Table of Contents
Advertisement
Quick Links
Advertisement
Table of Contents

Related Manuals for SUTO S505


Summary of Contents for SUTO S505
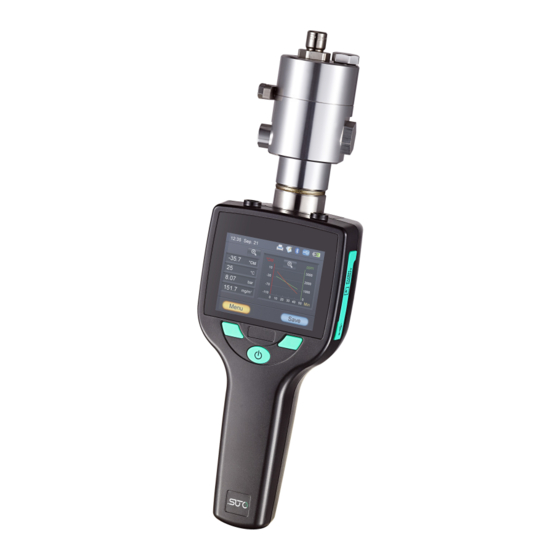
- Page 1 English Instruction and operation manual S505 Dew point meter (portable)
- Page 2 The device is designed exclusively for the described application. SUTO offers no guarantee for the suitability for any other purpose. SUTO is also not liable for consequential damage resulting from the delivery, capability or use of this device.
-
Page 3: Table Of Contents
9.2 S4C-Handheld..............19 10 Optional accessories..............20 10.1 Portable bluetooth printer CS2..........20 10.1.1 Paper loading..............20 10.1.2 Basic operations............21 10.2 Measuring chambers for the S505........22 10.2.1 Standard measuring chamber (A699 3500).....22 10.2.2 By-pass measuring chamber (A699 3501).......22 10.3 4G SD card...............23 11 Calibration................23 11.1 Dew point calibration............24... -
Page 4: Safety Instructions
• Consider all regulations for electrical installations. • The system must be disconnected from any power supply during maintenance work. • Any electrical work on the system is only allowed by authorized qualified personal. S505... - Page 5 • Please make sure that the storage temperature of the sensor is between -40 ... +65°C. • Avoid direct UV and solar radiation during storage. • For the storage the humidity must be <95% rH, no condensation. S505...
-
Page 6: Registered Trademarks
Registered trademark of the PROFIBUS User Organization, Karlsruhe, Germany 3 Application The S505 is a dew point meter which is designed to monitor the dew point in industrial application within the permissible operating parameters. These parameters can be found in the technical data section. -
Page 7: Features
Measuring medium Non-corrosive gases Measuring range Sensor Q: -100 ... -30°C Td Sensor P: -50 ... +50°C Td Pressure: -0.1 ... 1.5 MPa Temperature: -30 ... +50°C Operating temperature 0 ... 50°C Operating pressure -0.1 ... 1.6 MPa * S505... -
Page 8: Electrical Data
USB charger: 5 V, 2 A 5.3 Accuracy Accuracy Dew point: ± 2°C Td @ -50°C Temperature:± 0.3°C Pressure:± 0.005 MPa Repeatability ± 0.5°C Stated accuracy at Ambient/process temperature: 23°C ± 3°C Ambient humidity: 0 ... 80% rH, no condensation Accuracy: S505... - Page 9 Technical data Valid working range: S505...
-
Page 10: Dimensional Drawing
Dimensional drawing 6 Dimensional drawing S505... -
Page 11: Installation
• Use the sensor module Q for expected dew point below -50 °C Td. • Use the sensor module P for expected dew point above -50°C Td. 2. To change the sensor modules just open the 2 screws at the back of the instrument S505... - Page 12 The parking measuring chamber is mounted permanently on the sensor head to keep the sensor dry. To measure, the handle on the chamber must be turned into the “Measuring” position. After finishing the measurement, please return it to the “Park” position. Measuring position Parking position S505...
-
Page 13: Electrical Connection
• Please ensure that the teflon hose remains dry and clean. Wet and contaminated hoses can effect the measurement and should be exchanged. 7.2 Electrical connection Please recharge the dew point meter if the battery is empty. For this use the charger which is included in your delivered package. S505... -
Page 14: Operation
Operation 8 Operation 8.1 Buttons and connectors S505... -
Page 15: Symbols On Screen
General error indication. Please note down the error code and contact the manufacturer. Bluetooth is active and ready to connect. USB connection is established. A connection to the printer is established. The data logger is active. The SD card is inserted S505... -
Page 16: Main Screen
On the left side of the screen the menu is shown. It includes the follow menu items: • Settings • Logger • Files • Print • Bluetooth • Calibration • Service S505... -
Page 17: Data Logger
2 seconds. A window will pop-up where you can choose between edit, new, delete and chancel. The S505 has two different logger functions. One is the continuous logging with sampling rate and the other one is a single value logging, where you just store the current values on the screen in a file. -
Page 18: File Menu
1. Turn on the printer. 2. Select the S505 menu and tick "Connect to printer" 3. S505 will start to search for the printer. After a few seconds the spinning wheels on the screen should disappear and the printer symbol should be shown at the top of the screen. -
Page 19: Application Software
• To detect an S505 and view its online measurement data, click the Detect button. • To read the S505 data files to local folders, click the Read button. • To display the S505 measurement values recorded in the data files in an intuitive graphical or tabular view, click the Files button. -
Page 20: Optional Accessories
48mm print area 10.1.1 Paper loading 1. Remove the seal on the paper. 2. Press the "OPEN" button to open the cover. 3. Put the paper in the paper bin, and then the cover with small piece of paper exposed. S505... -
Page 21: Basic Operations
• When the printer is turned on, if there is no button operation or data transmission within 5 seconds, the printer will automatically enter the sleep state. Note: The printer wakes up when the power or "OPEN" button is pressed or the printer receives any data. S505... -
Page 22: Measuring Chambers For The S505
10.2 Measuring chambers for the S505 10.2.1 Standard measuring chamber (A699 3500) The S505 is supplied with a measuring chamber (Item no. A699 3500) with a pressure range of 0.3 ... 1.5 MPa. This measuring chamber is used to connect the compressed air to the sensor using a 6 mm hose. -
Page 23: Sd Card
The calibration is excluded from the instruments warranty. For this please contact the manufacturer. If the instrument has a slight drift due to ageing, temperature or other effects a dew point and pressure calibration can be performed. S505... -
Page 24: Dew Point Calibration
Please use the calibration function and select “dew point calibration”. Follow the steps on the screen. If there is any doubt about correct calibration process and result, the calibration can be removes at any time. Please follow the instruction on the screen. S505... -
Page 25: Pressure Calibration
“pressure calibration”. Follow the steps on the screen. 12 Maintenance To clean the sensor and its accessories it is recommended to use moist cloth only. ATTENTION! Do not use isopropyl alcohol to clean the sensor and its accessories ! S505... -
Page 26: Disposal Or Waste
The sensor, the accessories and its packings must be disposed according to your local statutory requirements. The dispose can also be carried by the manufacturer of the product, for this please contact the manufacturer. S505... - Page 27 S505...
- Page 28 SUTO iTEC GmbH SUTO iTEC (ASIA) Co., Ltd. Grißheimer Weg 21 Room 10, 6/F, Block B, Cambridge Plaza D-79423 Heitersheim 188 San Wan Road, Sheung Shui, N.T. Germany Hong Kong Tel: +49 (0) 7634 50488 00 Tel: +852 2328 9782...
Need help?
Do you have a question about the S505 and is the answer not in the manual?
Questions and answers