Table of Contents
Advertisement
Quick Links
Advertisement
Table of Contents

Related Manuals for SUTO S520


Summary of Contents for SUTO S520
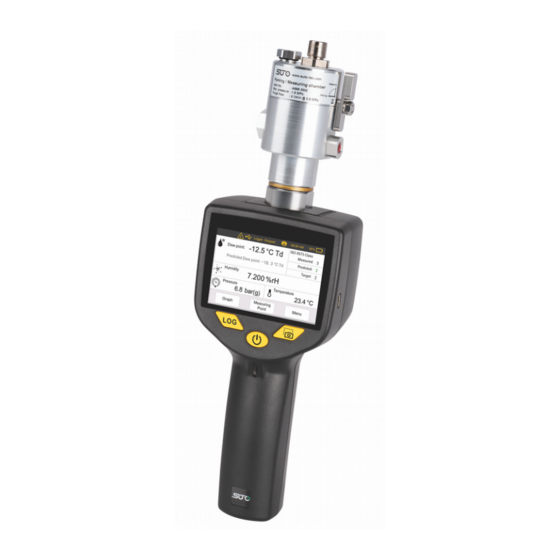
- Page 1 English Instruction and operation manual S520 Portable Dew Point Meter...
- Page 2 The device is designed exclusively for the described application. SUTO offers no guarantee for the suitability for any other purpose. SUTO is also not liable for consequential damage resulting from the delivery, capability or use of this device.
-
Page 3: Table Of Contents
8.9 Update the device Firmware..........30 9 Application software ..............32 9.1 S4A...................32 10 Optional accessories..............33 10.1 Wireless printer CS2 (A1372)..........33 10.1.1 Paper loading..............33 10.1.2 Basic operations............34 10.2 Measuring chambers for the S520........35 10.2.1 Standard measuring chamber (A699 3500).....35 10.2.2 By-pass measuring chamber (A699 3501).......35 S520... - Page 4 11 Calibration................36 11.1 Dew point calibration............36 11.2 Pressure calibration ............36 12 Maintenance................36 13 Disposal or waste..............37 S520...
-
Page 5: Safety Instructions
• Consider all regulations for electrical installations. • The system must be disconnected from any power supply during maintenance work. • Any electrical work on the system is only allowed by authorized qualified personal. S520... - Page 6 • Please make sure that the storage temperature of the sensor is between -20 ... +50°C. • Avoid direct UV and solar radiation during storage. • For the storage the humidity must be <80% rH with no condensation. S520...
-
Page 7: Registered Trademarks
2 Registered trademarks 2 Registered trademarks SUTO ® Registered trademark of SUTO iTEC MODBUS ® Registered trademark of the Modbus Organization, Hopkinton, USA HART ® Registered trademark of the HART Communication Foundation, Austin, PROFIBUS ® Registered trademark of the PROFIBUS User Organization, Karlsruhe,... -
Page 8: Application
3 Application 3 Application The S520 is a dew point meter that is designed to monitor the dew point in the industrial application within the permissible operating parameters. These parameters can be found in the Technical data chapter on page 9. -
Page 9: Technical Data
See dimensional drawing on page Display 3.5” color LCD touch screen Weight 2.7 kg complete set in transport case Camera 5.0 megapixels (only with smart features option) Data Logger Integrated mass storage, 100 Million values Process connection G1/2” for direct sensor connection, S520... -
Page 10: Electrical Data
± 2 °C Td (-60 … 0 / +20 … +50°C Td) ± 3 °C Td (-100 … -60°C Td) Temperature: ± 0.3 °C Pressure: 0.5 % FS Repeatability ± 0.5°C Stated accuracy at Ambient/process temperature: 23°C ± 3°C Ambient humidity: 0 … 80% rH, no condensation S520... -
Page 11: Dimensional Drawing
6 Dimensional drawing 6 Dimensional drawing S520... -
Page 12: Installation
Please make sure that all components listed below are included in your package. Qty Description Item No. S520 Handheld meter with data logger P600 0520 - Measuring chamber with parking function - USB-OTG memory stick - 1.5 m PTFE hose 6 mm with a quick coupling at... -
Page 13: Installation Procedure
2. Connect the teflon hose to the measuring chamber. 3. Connect the quick coupling at the other end of the teflon hose to the process. S520... -
Page 14: Electrical Connection
1. Connect the USB cable to the device and the charger. 2. Plug in the charger to your AC supply outlet. The device starts to indicate the charging progress. Always try to charge to 100%. S520... -
Page 15: Replacing The Sensor Unit
3. Screw the measuring chamber off the sensor unit. 4. Screw the measuring chamber onto the new sensor unit. 5. Insert the new sensor unit together with the measuring chamber back to the sensor unit. 6. Tighten the two screws. S520... -
Page 16: Operation
To access the Logger menu to set up the logging rate and mode. Power On/off To turn on or off, keep the button pressed for >3 sec. Measurement To quickly record a file of the current measurements for later printing. S520... -
Page 17: Symbols On Screen
Indicates that a wireless printer is connected to the device. Shows the current device time. Indicates the battery capacity of the device. It also indicates whether the battery is draining or is being charged. S520... -
Page 18: Home Screen
Shows the measured dew point value in the selected unit. The predicted dew point is available only if the S520 is ordered with smart features. To change the unit of the dew point, press this pane, and a pop-up window appears for you to change the unit. -
Page 19: Menu
8.4 Menu The device menu offers different operations, such as connecting a printer, reading device information, and many more. Below is the tree structure of the device menu. The following sections provide detailed description for each menu. S520... - Page 20 8 Operation S520...
- Page 21 Site information To enter the customer information where the audit is performed. For more information, see Section 8.4.7 on page 26. Wireless printer To connect and maintain the connection to a wireless printer. For more information, see Section 8.4.8 on page 26. S520...
-
Page 22: Device Settings
• To enable the screen to be automatically locked when not used Beeper Settings • To determine whether the device beeps every time the screen is touched. System Reset • To reset the system to factory defaults. Attention: This will delete all user-specified S520... -
Page 23: Sensor Settings
• To perform a user multi-point calibration of the calibration dew dew point measurement. point Measurement • Same settings with the ones in the Device Settings > Measurement menu. Remark: A new instrument is calibrated ex-work and ensures accurate S520... -
Page 24: Logger
8.4.4 Files Enables you to view logger files and perform file operations. Recorded Files • Shows the list of recorded files. • To view information of a file, select the file. S520... -
Page 25: Device Info
8.4.5 Device info Shows the basic information of the hand-held unit. • Model name • Serial number of the main unit • Firmware version of the main unit • Hardware version of the main unit S520... -
Page 26: Service Info
• To enter the name of your client where the measurement is carried out. For example Customer Co. Ltd. The Site information can also be imported from an XML file, scroll down and click Load Service info from XML file to select a file from the USB drive. S520... -
Page 27: Wireless Printer
8.5 Graph The S520 provides graphical analysis for the measurement directly on the device. The graph shows a separated curve for each measurement value. You can activate or deactivate the curves. The scaling of the Y-axis can be set automatically or adjusted manually. -
Page 28: Print Files
• Show the list of recorded files. • Show the file information by selecting a file. • Show the print preview and show the measurement results on the device by clicking Preview Print. • Print a file using the wireless printer by clicking Print. S520... -
Page 29: Smart Features
8 Operation 8.7 Smart features The S520 can be optionally ordered with Smart Features (A1373). Smart features include the following: • Measurement Snapshot • Dew point end value prediction • Camera Notes: • If the smart features are purchased in the initial order, they are activated by default. -
Page 30: Export Logger Files To A Pc
To export the data to Excel or CSV files and analyze them using S4A, do the following: 1. To export files, open the S520 device menu and enter the Files menu (For more details, see 8.4.4 Files on page 24.). - Page 31 8 Operation 2. Power on the S520 device. 3. Connect the USB drive to the S520 USB-C port. 4. On the touchscreen, navigate to Menu > Device Settings > Firmware update. 5. Enable the OTG function (to enable reading from USB drive).
-
Page 32: Application Software
• To detect an S520 and view its online measurement data, click the Detect button. • To read the S520 data files to local folders, click the Read button. • To display the S520 measurement values recorded in the data files in an intuitive graphical or tabular view, click the Files button. -
Page 33: Optional Accessories
48mm print area 10.1.1 Paper loading 1. Remove the seal on the paper. 2. Press the "OPEN" button to open the cover. 3. Put the paper in the paper bin, and then the cover with small piece of paper is exposed. S520... -
Page 34: Basic Operations
• When the printer is turned on, if there is no button operation or data transmission within 5 seconds, the printer will automatically enter the sleep state. The printer wakes up when the power or "OPEN" button is pressed or the printer receives any data. S520... -
Page 35: Measuring Chambers For The S520
10.2 Measuring chambers for the S520 10.2.1 Standard measuring chamber (A699 3500) The S520 is supplied with a measuring chamber (Item no. A699 3500) with a pressure range of 0.3… 1.5 MPa. This measuring chamber is used to connect the compressed air to the sensor using a 6 mm hose. - Page 36 See Section 8.4.2 Sensor Settings on Page 23 first before continuing with the calibration. 12 Maintenance To clean the sensor and its accessories it is recommended to use moist cloth only. ATTENTION! Do not use isopropyl alcohol to clean the sensor and its accessories! S520...
- Page 37 The sensor, the accessories and its packings must be disposed according to your local statutory requirements. The dispose can also be carried by the manufacturer of the product, for this please contact the manufacturer. S520...
- Page 38 S520...
- Page 39 S520...
- Page 40 SUTO iTEC GmbH SUTO iTEC (ASIA) Co., Ltd. Grißheimer Weg 21 Room 10, 6/F, Block B, Cambridge Plaza D-79423 Heitersheim 188 San Wan Road, Sheung Shui, N.T. Germany Hong Kong Tel: +49 (0) 7634 50488 00 Tel: +852 2328 9782...
Need help?
Do you have a question about the S520 and is the answer not in the manual?
Questions and answers