Table of Contents
Advertisement
Available languages
Available languages
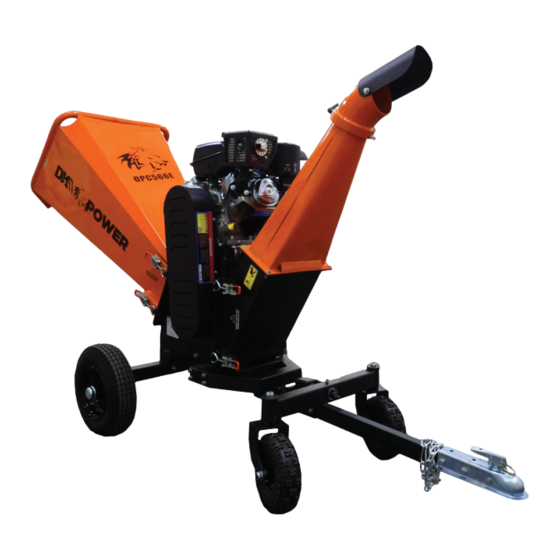
OPC566E
6 INCH KINETIC DRUM CHIPPER
D.O.T. TOWABLE • KINETIC DRUM • 14 HP KOHLER ENGINE
USER MANUAL
DK2 USA WEST
DK2 CORPORATE OFFICE
DK2 USA EAST
4301 S VALLEY VIEW BLVD.
5330 MAINWAY
3750 SOUTH AVENUE,
SUITE 10-11 LAS VEGAS, NEVADA
BURLINGTON, ONTARIO
NORTH UNIT, TOLEDO, OHIO
89103 USA
L7L6A4 CANADA
43615 USA
PARTS AND SERVICE 1 (888) 277-6960 | WWW.DETAILK2.COM
Advertisement
Chapters
Table of Contents

Related Manuals for DK2 Power OPC566E


Summary of Contents for DK2 Power OPC566E
- Page 1 OPC566E 6 INCH KINETIC DRUM CHIPPER D.O.T. TOWABLE • KINETIC DRUM • 14 HP KOHLER ENGINE USER MANUAL DK2 USA WEST DK2 CORPORATE OFFICE DK2 USA EAST 4301 S VALLEY VIEW BLVD. 5330 MAINWAY 3750 SOUTH AVENUE, SUITE 10-11 LAS VEGAS, NEVADA...
-
Page 2: Table Of Contents
WARRANTY ..............34 2 | OPC566E man. -
Page 3: Section I: Assembly
SECTION I ASSEMBLY... -
Page 4: Step 1: Inspect The Packaging
NOTE: Upon inspection of parts, if you find any damage or missing parts please call DK2 POWER at 1 (888) 277-6960 or contact us via our website at www.detailk2.com. We will replace any damaged or missing parts to you for free. Please do not return to the store. 4 | OPC566E man. -
Page 5: Step 2: Preparation
ASSEMBLY STEP BY STEP INSTRUCTIONS STEP 2: PREPARATION Slide the chipper body to hang off the side of the crate as shown below. Have a helper tip the unit forward while you complete the next step. EXTEND THE UNIT OFF THE CRATE. v.211123 | 5... -
Page 6: Step 3: Feed Chute
ASSEMBLY STEP-BY-STEP INSTRUCTIONS STEP 3: FEED CHUTE With a helper, slide the feed chute hinge pins into place, close and latch shut. 6 | OPC566E man. -
Page 7: Step 4: Wheels
ASSEMBLY STEP BY STEP INSTRUCTIONS STEP 4: WHEELS Install the wheel, washer, nut and pin to the axle. Wheels should spin freely. Install end cap. Repeat for the other wheel. v.211123 | 7... -
Page 8: Step 5: Axle
ASSEMBLY STEP-BY-STEP INSTRUCTIONS STEP 5: AXLE Tip the unit forward with a helper as shown below. Install the axle using the 2 bolts and hardware provided, and tighten. 2 BOLTS AND NUTS 8 | OPC566E man. -
Page 9: Step 6: Front Hitch
ASSEMBLY STEP BY STEP INSTRUCTIONS STEP 6: FRONT HITCH INSTALL THE FRONT HITCH ASSEMBLY USING THE 8 BOLTS AND HARDWARE PROVIDED, FASTEN TIGHTLY v.211123 | 9... -
Page 10: Step 7: Front Axle Swing Mount
ASSEMBLY STEP-BY-STEP INSTRUCTIONS STEP 7: FRONT AXLE SWING MOUNT BOLT USE THE BOLT AND PIN HARDWARE PROVIDED AND PARTIALLY TIGHTEN TO ALLOW THE ASSEMBLY TO RAISE AND LOWER. 10 | OPC566E man. -
Page 11: Step 8: Front Axle
ASSEMBLY STEP BY STEP INSTRUCTIONS STEP 8: FRONT AXLE INSTALL THE FRONT AXLE AS SHOWN USING WASHER, NUT, THEN PIN v.211123 | 11... -
Page 12: Step 9: Tow Bar
ASSEMBLY STEP-BY-STEP INSTRUCTIONS STEP 9: TOW BAR INSTALL THE TOW BAR USING THE 2 BOLTS PROVIDED 12 | OPC566E man. -
Page 13: Step 10: Expulsion Chute
ASSEMBLY STEP BY STEP INSTRUCTIONS STEP 10: EXPULSION CHUTE INSTALL THE EXPULSION CHUTE USING THE 4 BOLTS PROVIDED v.211123 | 13... -
Page 14: Step 11: Battery
UNIT USING 2 BOLTS AND WIRING AS SHOWN HARDWARE PROVIDED CAUTION: Be careful when connecting the battery wires. DO NOT make contact with your tools or any other conductive material to the metal frame when installing the positive (red) wire. 14 | OPC566E man. -
Page 15: Section Ii: Safety & Operation
SECTION II SAFETY & OPERATION... -
Page 16: Safety Conventions
The descriptions and specifications contained in this manual were in effect at printing. Equipment described within this manual may be optional. Some illustrations may not be applicable to your machine. 16 | OPC566E man. -
Page 17: Safety Labels
SAFETY & OPERATION SAFETY LABELS SAFETY LABELS FOUND ON YOUR UNIT v.211123 | 17... -
Page 18: Your Kohler Engine
Pull Starter - Pull Tight - Then Pull Start Oil - Fill to mark 10W30, will not start if oil is low, has low oil shutoff protection. Two yellow caps are oil fill caps, use either one to fill oil. 18 | OPC566E man. -
Page 19: Emergency Stop
SAFETY & OPERATION EMERGENCY STOP WARNING: Make sure the emergency stop wire is connected properly. If not, this may result in death or serious injury. WARNING: EMERGENCY STOP AVERTISSEMENT : ARRÊT D'URGENCE (EN) Make sure the emergency stop wire is connected properly. If not, this may result in death or serious injury. -
Page 20: Safe Practices & General Information
DO NOT put any part of your body into the in-feed chute while the machine is running. • DO NOT operate the machine while under the influence of alcohol or drugs. • DO NOT operate inside a building or confined space. • DO NOT climb on the machine. 20 | OPC566E man. - Page 21 SAFETY & OPERATION SAFE PRACTICES & GENERAL INFORMATION WARNING: PROTECTING YOURSELF AND THOSE AROUND YOU This is a powerful machine, with moving parts operating with high energy. You must operate the machine safely. Unsafe operation can create several hazards for you, as well as anyone else in the nearby area.
- Page 22 Removal of such parts could create a fire hazard. Do not use flammable solutions to clean the air filter. • The muffler and engine become very hot and can cause a sever burn; do not touch. 22 | OPC566E man.
- Page 23 SAFETY & OPERATION SAFE PRACTICES & GENERAL INFORMATION WARNING: GENERAL SAFETY Operating this Wood Chipper safely is necessary to prevent or minimize the risk of death or serious injury. Unsafe operation can create several hazards for you. Always take the following precautions when operating.
-
Page 24: Technical Specifications
DIMENSIONS 105” (L) x 47” (W) x 55” (H) 266.7 cm (L) x 119.4 cm (W) x 139.7 cm (H) ASSEMBLED WEIGHT 551 lb 250 kg SHIPPING WEIGHT 617 lb 280 kg ROLLER MAX RPM 2000 24 | OPC566E man. -
Page 25: Operation Guidelines
SAFETY & OPERATION OPERATION GUIDELINES WARNING Read and understand all instructions, safety precautions, and/or warnings listed in this manual before operating the Wood Chipper. If any doubt or question arises about the correct or safe method of performing anything found in this manual, please contact DK2 Customer Service at 1 (888) 277-6960. - Page 26 NOTE: If the drum jams with wood under the drum, remove the drum shaft side shield and turn the drum counter-clockwise. It may be necessary to remove the drive belts for severe jams to relieve resistance on the direct drive system to make the drum easier to turn and free up. 26 | OPC566E man.
-
Page 27: Maintenance
SAFETY & OPERATION MAINTENANCE Regular maintenance is the best way to ensure optimal performance and longevity of the machine. Please refer to this manual and the engine manufacturer’s user manual for maintenance procedures. WARNING: Before performing any maintenance procedure or inspection, stop the engine, wait five minutes to allow all parts to cool. -
Page 28: Troubleshooting
The belts may be too loose and slipping. Adjust or replace belts as needed. to have full chipping • The blades may be dull, reverse to the sharp edge or replace blades. power. • Check drum for blockage. 28 | OPC566E man. -
Page 29: Section Iii: Parts & Schematics
SECTION III PARTS & SCHEMATICS... -
Page 30: Schematics
Bearing 6204 M24 x 1.5 Slot Nut Tow Bar Tow Hitch Chain Deflector Scan here to access the DK2 POWER Parts Store or open your browser and go to Discharge (Top Part) www.detailk2.com/shop-power-equipment-parts Discharge (Middle Part) Your Wood Chipper model is:... - Page 31 PARTS & SCHEMATICS SCHEMATICS v.211123 | 31...
- Page 32 PARTS & SCHEMATICS SCHEMATICS 32 | OPC566E man.
- Page 33 PARTS & SCHEMATICS SCHEMATICS v.211123 | 33...
-
Page 34: Warranty
If within one (1) year from the original date of purchase this product fails due to defect in material or workmanship, Detail K2 will repair, replace, or supply any covered defective part at our option. DK2 POWER is 1-year parts only warranty no labor. Kohler 3 year warranty is PARTS and LABOR. - Page 35 OPC566E DÉCHIQUETEUSE À DISQUE CINÉTIQUE 6 POUCES REMORQUABLE • TAMBOUR CINÉTIQUE • MOTEUR KOHLER® 14 CV MANUEL DE L’UTILISATEUR DK2 USA OUEST DK2 CORPORATE OFFICE DK2 USA EST 4301 S VALLEY VIEW BOUL. 5330 MAINWAY 3750 AVENUE SUD, SUITE 10-11 LAS VEGAS, NEVADA BURLINGTON, ONTARIO UNITÉ...
- Page 36 GARANTIE ..............34 2 | OPC566E man.
- Page 37 SECTION I ASSEMBLAGE...
-
Page 38: Section I : Assemblage
REMARQUE : Lors de l’inspection des pièces, si vous constatez des dommages ou des pièces manquantes, veuillez appeler DK2 POWER au 1 (888) 277-6960 ou contactez-nous via notre site Web à www.detailk2.com. On remplacera gratuitement toute pièce endommagée ou manquante. -
Page 39: Étape 2 : Préparation
ASSEMBLAGE INSTRUCTIONS ÉTAPE PAR ÉTAPE ÉTAPE 2 : PRÉPARATION Faites glisser le boîtier de la déchiqueteuse pour le descendre du bord de la caisse sur le côté , tel qu’ illustré ci-dessous. Demandez à quelqu’un de vous assister pour faire basculer l’appareil vers l’avant pendant que vous effectuez l’étape suivante. -
Page 40: Étape 3 : Trémie D'alimentation
ASSEMBLAGE INSTRUCTIONS ÉTAPE PAR ÉTAPE ÉTAPE 3 : TRÉMIE D’ALIMENTATION Avec un assistant, faites glisser les axes de charnière de la trémie d’alimentation en place, fermez et verrouillez. 6 | OPC566E man. -
Page 41: Étape 4 : Roues
ASSEMBLAGE INSTRUCTIONS ÉTAPE PAR ÉTAPE ÉTAPE 4 : ROUES Installez la roue, la rondelle, l’écrou et la goupille sur l’essieu. Les roues doivent tourner librement. Installez le capuchon d’extrémité. Répétez l’opération pour l’autre roue. v.211123 | 7... -
Page 42: Étape 5 : Essieu
INSTRUCTIONS ÉTAPE PAR ÉTAPE ÉTAPE 5 : ESSIEU Inclinez l’unité vers l’avant avec un assistant comme indiqué ci-dessous. Installez l’essieu à l’aide des 2 boulons et du matériel fournis, et serrez. 2 X BOULONS ET ÉCROUS 8 | OPC566E man. -
Page 43: Étape 6 : Attelage Avant
ASSEMBLAGE INSTRUCTIONS ÉTAPE PAR ÉTAPE ÉTAPE 6 : ATTELAGE AVANT INSTALLER L’ENSEMBLE D’ATTELAGE AVANT UTILISATION DES 8 BOULONS ET DU MATÉRIEL FOURNI, FIXER, SERRER. v.211123 | 9... -
Page 44: Étape 7 : Montage Pivotant Sur L'essieu Avant
ASSEMBLAGE INSTRUCTIONS ÉTAPE PAR ÉTAPE ÉTAPE 7 : MONTAGE PIVOTANT SUR L’ESSIEU AVANT GOUPILLE BOULON UTILISER LE BOULON ET LA GOUPILLE QUINCAIERIE FOURNI ET SERRER PARTIELLEMENT POUR PERMETTRE LE MONTAGE POUR MONTER ET DESCENDRE. 10 | OPC566E man. -
Page 45: Étape 8 : Essieu Avant
ASSEMBLAGE INSTRUCTIONS ÉTAPE PAR ÉTAPE ÉTAPE 8 : ESSIEU AVANT INSTALLER L’ESSIEU AVANT COMME INDIQUÉ EN UTILISANT RONDELLE, ÉCROU, PUIS GOUPILLE v.211123 | 11... -
Page 46: Étape 9 : Barre De Remorquage
ASSEMBLAGE INSTRUCTIONS ÉTAPE PAR ÉTAPE ÉTAPE 9 : BARRE DE REMORQUAGE INSTALLER LA BARRE DE REMORQUAGE UTILISANT LES 2 BOULONS FOURNIS 12 | OPC566E man. -
Page 47: Étape 10 : Goulotte D'expulsion
ASSEMBLAGE INSTRUCTIONS ÉTAPE PAR ÉTAPE ÉTAPE 10 : GOULOTTE D’EXPULSION INSTALLER LA GOULOTTE D’EXPULSION EN UTILISANT LES 4 BOULONS FOURNIS v.211123 | 13... -
Page 48: Étape 11 : Batterie
MATÉRIEL FOURNI INDIQUÉ ATTENTION : Soyez prudent lorsque vous branchez les fils de la batterie. NE PAS prendre contact vos outils ou tout autre matériau conducteur au cadre métallique lors de l’installation du fil positif (rouge). 14 | OPC566E man. - Page 49 SECTION II SÉCURITÉ ET FONCTIONNEMENT...
-
Page 50: Section Ii : Sécurité Et Fonctionnement
Les descriptions et spécifications contenues dans ce manuel étaient en vigueur à l’impression. L’équipement décrit dans ce manuel peut être en option. Certaines illustrations peuvent ne pas s’appliquer à votre machine. 16 | OPC566E man. -
Page 51: Étiquettes De Sécurité
SÉCURITÉ ET FONCTIONNEMENT ÉTIQUETTES DE SÉCURITÉ ÉTIQUETTES DE SÉCURITÉ TROUVÉES SUR VOTRE APPAREIL v.211123 | 17... -
Page 52: Votre Moteur Kohler
Huile - Remplissez jusqu’à la marque repère d’huile 10W30, le moteur ne démarrera si le niveau d’huile est bas, il y a un système de protection contre le manque d’huile. Il y a deux bouchons jaunes pour remplissage d’huile, utilisez l’un ou l’autre pour remplir l’huile. 18 | OPC566E man. -
Page 53: Arrêt D'urgence
SÉCURITÉ ET FONCTIONNEMENT ARRÊT D’URGENCE AVERTISSEMENT : Assurez-vous que le câble d’arrêt d’urgence est correctement branché. Si non, ce peut entraîner la mort ou des blessures graves. WARNING: EMERGENCY STOP AVERTISSEMENT : ARRÊT D'URGENCE (EN) Make sure the emergency stop wire is connected properly. If not, this may result in death or serious injury. -
Page 54: Pratiques De Sécurité Et Informations Générales
• NE PAS utiliser la machine sous l’influence de l’alcool ou de drogues. • NE PAS faire fonctionner à l’intérieur d’un bâtiment ou d’un espace confiné. • NE PAS monter sur la machine. 20 | OPC566E man. - Page 55 SÉCURITÉ ET FONCTIONNEMENT PRATIQUES DE SÉCURITÉ ET INFORMATIONS GÉNÉRALES ATTENTION : PROTÉGER VOUS ET CEUX QUI VOUS ENTOURENT Il s’agit d’une machine puissante, avec des pièces mobiles fonctionnant à haute énergie. Vous devez exploiter la machine en toute sécurité.Une opération non sécurisée peut créer plusieurs dangers pour vous, ainsi que pour toute autre personne dans la zone avoisinante.
- Page 56 Le retrait de telles pièces pourrait créer un risque d’incendie. N’utilisez pas de solutions inflammables pour nettoyer • le filtre à air. • Le silencieux et le moteur deviennent très chauds et peuvent provoquer de graves brûlures ; Ne pas toucher. 22 | OPC566E man.
- Page 57 SÉCURITÉ ET FONCTIONNEMENT PRATIQUES DE SÉCURITÉ ET INFORMATIONS GÉNÉRALES AVERTISSEMENT : SÉCURITÉ GÉNÉRALE L’utilisation de cette déchiqueteuse en toute sécurité est nécessaire pour prévenir ou minimiser le risque de décès ou blessure grave. Un fonctionnement dangereux peut créer plusieurs dangers pour vous.
-
Page 58: Spécifications Techniques
105 po. (L) x 47 po. (L) x 55 po. (H) 266.7 cm (L) x 119.4 cm (L) x 139.7 cm (H) POIDS ASSEMBLÉ 551 lb 250 kg POIDS D’EXPÉDITION 617 lb 280 kg ROULEAU MAX RPM 2000 24 | OPC566E man. -
Page 59: Directives De Fonctionnement
SÉCURITÉ ET FONCTIONNEMENT DIRECTIVES DE FONCTIONNEMENT ATTENTION Lisez et comprenez toutes les instructions, précautions de sécurité et/ou avertissements répertoriés dans ce manuel avant d’utiliser la déchiqueteuse . En cas de doute ou de question concernant le bon fonctionnement ou une méthode sûre pour effectuer tout ce qui se trouve dans ce manuel, veuillez contacter le service à... - Page 60 Il peut être nécessaire de retirer les courroies d’entraînement en cas de blocage pour soulager la résistance sur le système d’entraînement direct pour rendre le tambour plus facile à tourner et libérer. 26 | OPC566E man.
- Page 61 SÉCURITÉ ET FONCTIONNEMENT MAINTENANCE Un entretien régulier est le meilleur moyen d’assurer des performances et une longévité optimales de la machine. Veuillez vous référer à ce manuel et au manuel d’utilisation du fabricant du moteur pour procédures de maintenance. AVERTISSEMENT : Avant d’effectuer toute procédure de maintenance ou d’inspection, arrêtez le moteur, attendez cinq minutes pour permettre à...
-
Page 62: Dépannage
• Les courroies peuvent être trop lâches et glissantes. Ajustez ou remplacez les courroies au besoin. pas avoir la puissance • • Les lames peuvent être émoussées, renversées jusqu’au bord tranchant ou remplacer les lames. de déchiquetage totale. • • Vérifiez que le tambour n’est pas obstrué. 28 | OPC566E man. -
Page 63: Section Iii : Pièces Et Schémas
SECTION III PIÈCES & SCHÉMAS... -
Page 64: Schémas
Écrou à fente M24 x 1,5 Barre de remorquage Attelage de remorquage Chaîne Déflecteur Scannez ici pour accéder au DK2 POWER Parts Store ou ouvrez votre navigateur et accédez à Décharge (partie supérieure) www.detailk2.com/shop-power-equipment-parts Décharge (partie médiane) Votre modèle de déchiqueteuse est : OPC566E Décharge (partie inférieure) - Page 65 PIÈCES & SCHÉMAS SCHÉMAS v.211123 | 31...
- Page 66 PIÈCES & SCHÉMAS SCHÉMAS 32 | OPC566E man.
- Page 67 PIÈCES & SCHÉMAS SCHÉMAS v.211123 | 33...
-
Page 68: Garantie
Detail K2 réparera, remplacera ou fournira toute pièce défectueuse couverte par la garantie à notre gré. La Garantie de DK2 POWER est de 1 an sur les pièces seulement Cette garantie ne s’applique pas à la main-d’oeuvre. La garantie Kohler de 3 ans est PIÈCES et MAIN-D’OEUVRE.
Need help?
Do you have a question about the OPC566E and is the answer not in the manual?
Questions and answers
Battery no longer holds a charge, what do I need to know to get a replacement battery?
The context does not provide specific steps to get a replacement battery for the DK2 Power OPC566E. However, it mentions that if you find any damaged or missing parts upon inspection, you should contact DK2 Power directly. They will replace damaged or missing parts for free and request not to return the product to the store.
So, the likely steps are:
1. Inspect the battery and confirm it is damaged or missing.
2. Contact DK2 Power at 1 (888) 277-6960 or through their website.
3. Request a replacement battery and provide necessary details.
This applies to damaged or missing parts found during inspection.
This answer is automatically generated
How do you sharpen the blades and what kind of battery is need to replacement? Can it be water, or jell?