Advertisement
Quick Links
DETAIL K2 INC.
DK2 POWER USA
4301 S Valley View Blvd STE 10-11
Las Vegas, NV 89103
1-702-331-5353
PARTS AND SERVICE 702-331-5353 OR
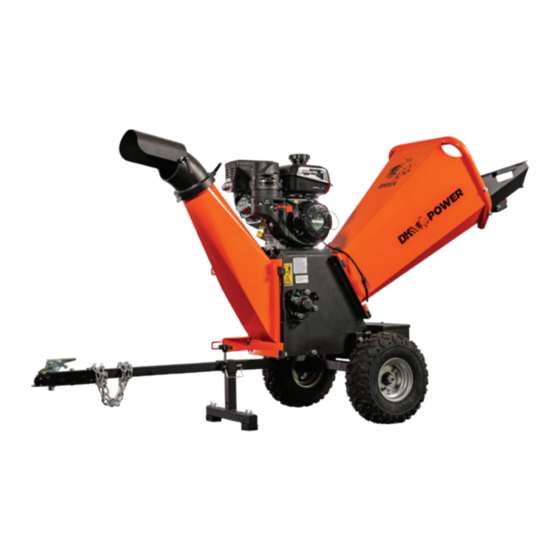
CHIPPER ASSEMBLY GUIDE
MODEL: OPC524
4 INCH KINETIC COMMERCIAL CHIPPER
DETAIL K2, INC.
1080 Clay Avenue Unit 2
Burlington, Ontario, Canada L7L0A1
WWW.DK2POWER.COM
COMMERCIAL CHIPPER
DK2 USA EAST
6245 Industrial Parkway
Whitehouse, OH 43571
CONTACT US
SWING CHUTES
TOWABLE
KOHLER ENGINE
REV 1 -12-12-20
Advertisement

Summary of Contents for DK2 Power OPC524
- Page 1 CHIPPER ASSEMBLY GUIDE MODEL: OPC524 4 INCH KINETIC COMMERCIAL CHIPPER DETAIL K2 INC. DK2 POWER USA DETAIL K2, INC. DK2 USA EAST 4301 S Valley View Blvd STE 10-11 1080 Clay Avenue Unit 2 6245 Industrial Parkway Las Vegas, NV 89103...
- Page 2 The Chipper is shipped in a crate. Leave the sides folded down and use as your work space. NOTE: UPON INSPECTION OF PARTS IF YOU FIND ANY DAMAGE OR MISSING PARTS PLEASE CALL DK2 POWER AT 702-331-5353 OR CONTACT US VIA OUR WEBSITE WWW.DK2POWER.COM...
-
Page 3: Assembly Steps
STEP 2: 1. Remove all hardware from axle. 2. Install wheel with stem facing out, then washer, then nut, ASSEMBLY STEPS 1. Install wheel with valve stem on the outside 2. Washer 3. Nut... - Page 4 STEP 3: 1. Tip the unit back and balance it with a helper. 2. Place chip chute on the chipper.
- Page 5 STEP 4: INSTALL FEED CHUTE 1. Install the feed chute on the 2 hinges. To seat the hinge pins for the first time a rubber mallet may be used to tap the pins into the hinges. These are tight fitting to reduce vibration noise.
- Page 6 STEP 5: INSTALL THE TOWBAR AND STAND ASSEMBLY 1. GRAB THE FEED CHUTE AND TIP THE UNIT BACK, RAISING THE FRONT END UP. 2. WITH THE FRONT END RAISED, INSTALL THE TOW BAR HITCH USING BOLTS. 3. ASSEMBLE TOW STAND AND INSERT THE HITCH PIN 4.
- Page 7 STEP 6: INSTALL CHIP CHUTE 1. INSTALL AXLE ASSEMBLY...
- Page 8 STEP 7: INSTALL CHIP CHUTE DEFLECTOR 1. Install the Chip Chute Directional Deflector and tighten the locking handles.
- Page 9 STEP 8: READ THE KOHLER ENGINE MANUAL SUPPLIED WITH YOUR UNIT FOR FULL ENGINE OPERATION, SAFETY, AND MAINTENANCE.
- Page 12 Ref Description Ref Description belt cover discharge damping pad belt discharge fastener drive pulley discharge regulator drum pulley discharge top part spacer discharge bottom part bearing tower bar seal plate foot rubber inner belt cover forefoot spacer flange spacer engine M6*15 blot switch 6 washer...
- Page 13 Ref Description Ref Description M4*15 bolt 4 spring washer 4 washer buckle M4 locknut M10*25 bolt M14 locknut 14 spring washer Ø 16* Ø 30*2 washer M10*65 bolt Ø 8*70 D pin M12*65 bolt M8*65 bolt M12*60 bolt 12 washer 12 spring washer M12 locknut buckle...
- Page 14 OPERATION – BEFORE TURNING KEY AND PULL STARTING ENGINE CLEAR AREA OF ALL PEOPLE AND PROPERTY THAT COULD BE DAMAGED. THINK SAFETY. CHIPS ARE FLYING PROJECTILES AND CAN CAUSE INJURY. CHECK BOTH CHUTES AND MAKE SURE THEY ARE CLOSED AND LOCKED. WEAR SAFETY GLASSES, HEARING PROTECTION, AND GLOVES IF YOUR UNIT WILL NOT START –...
- Page 15 DIESEL TRACTORS – Chassis component parts only, no labor, ENGINES – 1 YR KOHLER WARRANTY 3PT EQUIPMENT – 1-YEAR parts only, Gearbox drive unit 3-year warranty parts only. DK2 POWER OUTDOOR EQUIPMENT – 1-Year parts only, no labor. 3-year commercial Kohler warranty. THIS WARRANTY DOES NOT COVER OR APPLY TO:...


Need help?
Do you have a question about the OPC524 and is the answer not in the manual?
Questions and answers