Table of Contents
Advertisement
Advertisement
Table of Contents

Related Manuals for Carimali Optima Ultra


Summary of Contents for Carimali Optima Ultra
- Page 1 USER’S MANUAL Translation of original instructions Optima Ultra...
-
Page 2: Table Of Contents
INDEX GENERAL SAFETY WARNINGS ....3 3 TECHNICAL CHARACTERISTICS ..30 HANDLING AND STORAGE ....7 TECHNICAL DATA ....... 30 PACKAGING CONTENTS ....... 9 OVERALL DIMENSIONS..... 31 PRIOR CHECKING AFTER RECEIPT ..9 4 INSTRUCTIONS FOR USE ....32 POSITIONING ........10 CONNECTION TO THE GETTING STARTED .... -
Page 3: General Safety Warnings
After unpacking the machine, verify its integrity. In case of damage or doubts about the packaging contents, please contact the Carimali Service Centre. Handle the machine with care to pre- vent the risk of impacts or falls that may cause damage. - Page 4 Keep packaging parts (box, inner pro- For more detailed information about tections, etc.) out of reach of children recycling of this product, contact the since they are potentially dangerous. local authority or the local waste dis- Do not dump those parts into the en- posal service.
- Page 5 In case of fault or malfunctioning of in service, carry out the machine, switch it off and contact the necessary main- the Carimali Service Centre. tenance operations to allow it to return to Access to the service areas is re-...
- Page 6 Service Centre or served to customers the Manufacturer. of.the.official.Carimali. website. The Manufacturer reserves the right to carry out technical and aesthet- NOTE ic. modifications. to. the. machine. and/...
-
Page 7: Handling And Storage
HANDLING AND STORAGE WARNING COFFEE MACHINES COFFEE MACHINES Made in Italy Made in Italy COFFEE MACHINES Made in Italy COFFEE MACHINES COFFEE MACHINES Made in Italy Made in Italy NOTE Handle the packaging by means of the apposite carrying han- dles. - Page 8 WARNING Should you decide not to use the machine any longer, it is advisable to make it inoperative by unplugging it. Then, dis- connect the power cable. NOTE The disposal of the machine is not responsibility of the Manu- facturer and must be carry out in compliance with the applica- ble regulations.
-
Page 9: Packaging Contents
PACKAGING CONTENTS Machine User’s manual Brush 95.01806 Brush 95.00678 Front door key Adhesive hook for Power Clean- er drain 95.05046 L-shaped plastic joint 97.05012 C O F F E E M A C H IN Adhesive hook for M a d e in It a Power Cleaner 37.05067... -
Page 10: Positioning
POSITIONING WARNING Position the machine: Do not obstruct the ●. Indoor with temperature ranging openings or slots for from 5° and 30°C; ventilation heat ●. At a minimum distance of 150 dissipation and do mm from walls or other objects, to not insert water or facilitate ventilation;... -
Page 11: Water Mains Connection
WATER MAINS CONNECTION ATTENTION mains water pressure must nev- er exceed 6 bar (0.6 MPa); if this is not Liquid the. case,. a. qualified. discharge technician. must. fit. a. pressure reducer. External softener.filter. to be installed ATTENTION by the Cus- tomer For water mains con- nection, use only the... -
Page 12: Milk Circuit Connection
MILK CIRCUIT CONNECTION WARNING Milk temperature must be below 4 °C. Connect the milk container to the Hole for milk pipe inlet Milker outlet hose. NOTE The fridge was designed and built to work along with the machine, in or- der to ensure a correct conservation of milk at a suitable temperature. -
Page 13: Boiler Filling
●. Improper maintenance of the ma- manufacturer’s liabil- chine. ity for machine func- tioning will lapse im- mediately. IDENTIFICATION ATTENTION CARIMALI S.p.A. - www.carimali.com Via Industriale, 1 - 24040 Chignolo d’Isola - ITALY This operation must MADE IN ITALY XXNN-NNNNNNNN s/n XXXXXXXX TYPE: 10/2018... -
Page 14: Introduction
Skilled operator in charge erator that may cause of installation, adjustment, severe injury or death. advanced use, and routine maintenance. ATTENTION CARIMALI SERVICE EN- GINEER This indicates a po- Skilled operator authorized tentially dangerous by the Manufacturer, in situation for the oper-... -
Page 15: Intended Use
INTENDED USE REASONABLY FORESEEABLE This machine was designed and MISUSE manufactured for dispensing: ● Coffee; WARNING ● Milk (external circuit); ● Hot water; In order to ensure ● Steam. safety of the operator and the machine, it is The machine is intended for profes- strictly forbidden to sional use, such as: use the machine in a... -
Page 16: Description Of The Machine
2 DESCRIPTION OF THE MACHINE MACHINE CONFIGURATIONS Optional: Dispensable products: COFFEE, ● Barista steam wand; MILK ● Milk pump ● MaxSave Energy Saving; ● Cup holder; ● Lock with key for coffee containers; ● Direct solid grounds discharge; ● Premium Self-Cup Station; ● Card reader; ● Telemetry system; ● Coin slot +Box; ● Decaf door closure; ● Basin block. 2 Coffee grinders Additional units: Milk circuit ● Fridge Ultra;... -
Page 17: General Description Of The Machine
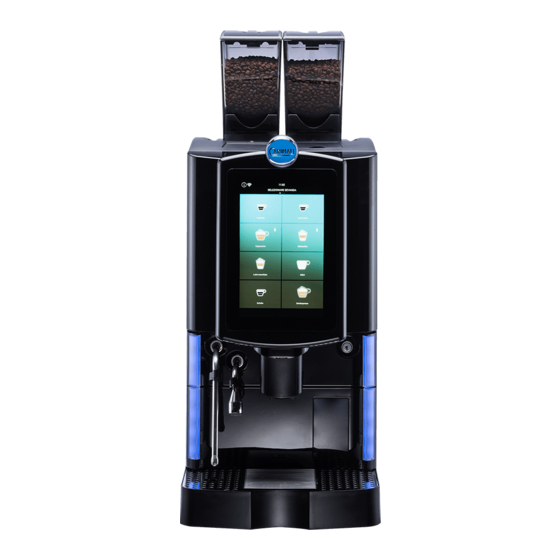
GENERAL DESCRIPTION OF THE MACHINE Coffee containers Card reader Decaf door Touch screen display Front door Door lock Steam wand rubber Operation LED Steam wand or Barista wand (opt) Adjustable delivery nozzles Grounds drawer Cup sensor Hot water spout Drip tray... -
Page 18: Coffee Container Details
2.2.1 Coffee container details 11 - Coffee container 1.3 kg NOTE If your machine is the “Premium Self” ver- sion, to fill the con- tainers it is neces- sary to unlock them with the apposite key. -
Page 19: Touch Screen Display
TOUCH SCREEN DISPLAY 2.3.1 Using the display 12 - Sample page Pressure Scrolling up / down Scrolling right / left... -
Page 20: Switching On
2.3.2 Switching on Info Light Light Language menu Modem Clock alarms selection Information button Setup menu Help menu NOTE If the coffee/steam boiler has not reached the correct working temperature, the heating page will be shown when the ma- chine is switched on. NOTE The info bar icons described refer to the machine with all op- tional extras. If your machine does not have all of the optional extras, some of the icons will not be shown on the display. -
Page 21: Boiler Heating
2.3.3 Boiler heating NOTE There are two types of boiler heating: The machine is config- ured at the factory with the contempo- rary heating. It is however possible Temperature to select the sequen- gauge tial heating by the skilled technician. 2.3.4 Introduction NOTE This page appears Intro screen when the machine is switched on. -
Page 22: Drink Selection (Free Vend Examples)
2.3.5 Drink selection 2.3.6 Drink delivery (free vend examples) in progress Delivery stop button Information progress Selected beverage icon Press the icon to dispense the re- NOTE quired drink. The dispensing stop button is enable at the factory. It can be NOTE disabled by a skilled During drinks dis-... -
Page 23: Dose Settings
Select a new or existing drink to ac- cess its settings. NOTE Enter the relevant password to access. Press and select the Dose Setting menu from the Drinks Selection page. Then select Set Doses. ATTENTION Dose setting is re- served to a qualified service engineer or the CARIMALI Ser- vice Centre. NOTE The symbol sig- nals the drink is dis- abled and can be re- set. -
Page 24: Alarm Signals
2.3.8 Alarm signals 2.3.9 Alarm history In case of alarm, the signal light will Press setup and enter the password begin to flash red and the alarm mes- from the first screen: 11111. sage will appear on the display. Select the Alarms history menu. Alarm message NOTE NOTE The menu will show Press on the light the last 10 alarms to open and view the that have occurred. alarm details. NOTE The new alarms to view are in red. -
Page 25: Display Adjustment
2.3.10 Display adjustment NUMBER OF Press setup and enter the password INTERFACE TYPE DRINKS from the first screen: 11111. Traditional 4, 6, 8, 10 Select the Display adjustment Self Service 4, 6, 8, 10 menu. Beverage format 6, 9, 12 Set the preferences for and the ap- pearance of the display to customize the drinks selection and the dispens- ing in progress pages. NOTE According to the in- terface setting, there will be a different number of drinks on each page. -
Page 26: Touch Screen Display Variation
TOUCH SCREEN DISPLAY VARIATION 2.4.1 Cup station NOTE If the “Cup Station” option is enabled, every time delivery of a drink is selected, the system checks the closing state of the front door. NOTE The version with “Cup Station” features one only front door. Open the door with the key for emptying the drawer of used grounds. After emptying, when closing the front door, confirm the draw- er emptying on the display. If the door is open, all dispensing is disabled and the display will show a screen asking for the cup to be inserted. After closing the front door, the dispensing will start automatically. NOTE During delivery, the door cannot be opened and will remain locked until the end of the process. The door can be opened and the beverage taken out at the end of dispensing. -
Page 27: Energy Save
2.4.2 Energy save NOTE When the energy saving option is enabled (reserved to a qual- ified service engineer only), it will be applied only with the ma- chine on. The software will activate the energy saving mode according to five conditions: • User’s presence, if no user is detected; • Cup presence, if no cup is detected; • Timeout timer based on a “time” setting; • No drink dispensing; • No button pressure. In all these conditions are present, the machine enters the “Energy Save” mode and a screensaver will appear on the display. When one of the above conditions is no longer valid, the system will deactivate the “Energy Saving” mode, restoring the working temperature for the boilers based on the machine settings. -
Page 28: Manual Delivery Stop
2.4.3 Manual delivery stop NOTE If the “Stop Dispensing” function is enabled, the user has the possibility to stop delivery manually. Press “Stop Dispensing” to stop beverage delivery manually. Manual delivery stop NOTE The manual delivery stop is not instant, but occurs when the system detects a safe situation for machine operation. WARNING If there is an MDB payment module, the necessary credit for delivery is subtracted in full, even if delivery is interrupted be- fore completion. -
Page 29: Mdb Payment System
2.4.4 MDB payment system NOTE If the MDB payment system is installed and enabled (device available only upon request), it is necessary to insert the re- quired money to delivery the beverage. WARNING The management of drinks prices and change is managed by software (reserved to the qualified service engineer) and is different according to the type of MDB installed. NOTE For further details on the MDB system, refer to the specific documentation. -
Page 30: Technical Characteristics
3 TECHNICAL CHARACTERISTICS TECHNICAL DATA FEATURES DATA Dispensing group adjustment 94 - 194 mm Coffee grounds capacity Coffee bean container capacity 1.3 kg Coffee boiler capacity 1.0 l Steam boiler capacity 1.8 l Drip tray 2.0 l capacity min 1 bar (0.1 Mpa) Water mains inlet pressure min 6 bar (0.6 Mpa) Net weight (empty) -
Page 31: Overall Dimensions
OVERALL DIMENSIONS Measurements expressed in mm... -
Page 32: Instructions For Use
4 INSTRUCTIONS Pour the coffee beans into the con- tainer, avoiding to pour it onto the ma- chine. GETTING STARTED Before using the machine, it is impor- tant to carry out the following: ● Dispenser group washing; ● Power Cleaner washing. For further details, refer to the main- tenance chapter. -
Page 33: Switching On
SWITCHING ON Allow the coffee/steam boilers to heat up before operating the machine. After carrying out the installation and the preliminary operations, switch on the machine. The following screen will appear when the machine switches on. Temperature gauge NOTE Based on the ma- chine settings, it is possible to heat the boilers in sequence... - Page 34 NOTE During the heating stage, when the cof- fee boiler reaches 50°C (122°F), machine will carry out an automatic dis- pensing group rinse. Once the machine reaches the work- ing temperature, it is possible to pro- ceed with drink dispensing.
-
Page 35: Dispensing Circuit Washing
4.2.1 Dispensing circuit washing DRINK DISPENSING 4.3.1 Coffee-based drinks. Press the key corresponding to re- WARNING quired coffee-based drink. When using for the NOTE first time, or after a During coffee-based long period of disuse, drink dispensing, it is wash the dispensing possible to dispense circuit to eliminate any hot water or steam. -
Page 36: Hot Water / Steam
NOTE Before using steam wand, condensation must be drained out for at least 2 seconds. Press the key corresponding to hot water or steam. NOTE Adjust the dispensing group height accord- ing to the height of the cup. At the end of the dispensing opera- tion, the display will show the drinks selection screen. -
Page 37: Deca Drinks
4.3.3 Deca drinks Adjust the dispensing group height according to the cup used and open the Deca door. NOTE NOTE The Deca drinks are When opening the highlighted by the “A” Deca door, the ma- icon. For their dis- chine disable pensing, the grinders drinks that are not pre-set for this dis-... -
Page 38: Switching Off
SWITCHING OFF Then press “Machine off” To switch off the machine, press The display will return to the initial screen. -
Page 39: Routine Maintenance
5 ROUTINE WARNING MAINTENANCE Each operation re- quiring disassembly of the machine parts must be performed by DANGER a skilled technician. The intervention of routine maintenance and cleaning must be ATTENTION performed by the op- When carrying out erator only after: maintenance, only ● having switched... - Page 40 TYPE OF OPERATION FREQUENCY PARAGRAPH OPERATION Touch screen 5.1.1 Manual Daily display cleaning 5.3.5 External cleaning of chrome-plated Manual Daily 5.1.2 surfaces External cleaning of Manual Daily 5.1.3 machine surfaces Emptying and clean- Daily or before if ing the liquid grounds Manual 5.1.4 necessary...
-
Page 41: External Cleaning
To clean the internal components, 5.1.2 Cleaning of chrome-plated open the front door of the machine surfaces using the keys supplied. WARNING cleaning chrome-plated sur- EXTERNAL CLEANING faces, use a damp cloth, an antistatic 5.1.1 Cleaning the display cloth or similar. Do abrasive agents to carry out this operation. -
Page 42: Cleaning The Solid/Liquid Grounds Container
5.1.4 Cleaning the solid/liquid 5.1.5 Cleaning of coffee contain- grounds container Slide out the drip tray and the grounds Open the upper front door. drawer and rinse them in water. Solid grounds container Liquid grounds container Loosen the Phillips screw situated on the front. -
Page 43: Power Cleaner Washing
POWER CLEANER WASHING NOTE Make sure there are ATTENTION no residues. Clean compo- The machine is set at nents manually with the factory with the a brush, if necessary. automatic rinsing. If it is disabled, carry out Lastly, insert the hopper into its seat the Power Cleaner and fit the lid. - Page 44 Insert the milk hose inside the sup- port on the drip tray. Insert the milk hose support in the drip tray for discharging washing. Wait for the end of the wash.
-
Page 45: Washing And Sanitisation Of Functional Groups
WASHING SANITI- WARNING SATION FUNCTIONAL GROUPS The following oper- ations are reserved This section is very important as the to the personnel in correct understanding of the instruc- charge of filling/main- tions and/or the proper execution of tenance of the ma- the operations are essential for food chine who has been safety and hygiene of food dispensed trained... - Page 46 The next screen shows an option at the end of washing: ● Press YES to go back to the Power On page at the end of the washing cycle. ● Press NO to go back to the bever- age selection page. Press START of the All-in-One wash- ing to start the washing cycle.
- Page 47 When removing the grounds draw- WARNING er, the machine shows the following message on the display: Do not interrupt the washing cycle after it has been started. If the washing cy- cle is interrupted by operation concerning the pro- cedure or by unfore- seen events, the ma- chine completes the cycle...
- Page 48 For sanitisation, use solution. only products author- ised by Carimali. NOTE Alarms could activate on the refrigerator signalling the lack of milk or of the tank it- self. This is normal...
- Page 49 The next step is washing of the coffee ATTENTION group. For this operation, strictly follow the in- dications of this man- ual. Use only the brushes supplied, do not use water or damp sponges for this operation. Even though the ma- chine is in a particu- lar safety mode con- cerning the cleaning...
- Page 50 When opening the door, the display The machine will immediately ask to shows the images of the areas to be position a tablet of Carimali descal- cleaned: ing agent (06.00133) into the infusion ● The area of the brewing unit rack;...
- Page 51 Closing the door, the cleaning cycle will start automatically until its com- pletion. If the machine is not connected to the direct discharge, put a 2 l container At the end of the All-in-One cycle, the underneath the spout during washing. machine will go back to the selected In this way, no errors of full tray will be status when the washing cycle All-in-...
-
Page 52: Disassembly, Washing And Sanitisation Of The
Anyway, the assessment must be NOTE carried out by OSA based on actu- versatility al daily productivity compared to the the machine allows one expected by the Manufacturer. also to carry out the cleaning cycles sin- ATTENTION gularly by selecting the menu entries de- At the end of the san- scribed below. -
Page 53: Disassembly And Manual Cleaning Of Evo Milker
EVO milk- er, so that it can be removed from its seat. Prepare a mix of 30 ml Carimali san- itiser (06.00136) with 500 ml of water in a container. Immerse the spout into the solution for 5 minutes. -
Page 54: Cleaning The Display
When the group is released, remove After having assembled all parts, car- it from its seat. ry out an All-in-One washing cycle. 5.3.4 Cleaning the display NOTE This procedure can be carried out follow- ing the instructions on the display. Press and select the manual wash menu from the Drinks Selection page. -
Page 55: Recommended Washes
The display shows the procedures of the recommended washing cycles. 5.3.5 Recommended washes NOTE Scroll through the pages of the docu- This procedure can ment with the < > keys. be carried out follow- ing the instructions on the display. Press and select the manual wash menu from the Drinks Selection page. -
Page 56: Troubleshooting
6 TROUBLESHOOTING FAULT POSSIBLE CAUSE POSSIBLE SOLUTION USER Plug the power cable into the wall socket and the ma- chine. Check there is voltage in Wrong electrical connection. the wall socket. Loss of voltage on the socket. Check the machine switch is on “I”. -
Page 57: How To Detect An Error
HOW TO DETECT AN ERROR Follow the instructions on the display. -
Page 58: Operating Alarms
MILK TANK OUT displayed if the extra unit dispense milk- rectly into the fridge. is present). based drinks. ATTENTION For any other type of message or in case of alarms that switch off the machine, please contact the CARIMALI Service Centre. -
Page 59: Disposal
7 DISPOSAL The Customer is held to deliver the material to the designated collection facilities. This machine is compliant with the Directive 2012/19/EU. WARNING WARNING Follow the aforesaid disposal procedures, Should you decide not subject to penalties to use the machine set forth in the applica- any longer, unplug it ble waste legislation. - Page 60 Carimali S.p.A. Via Industriale, 1 Chignolo d’Isola (BG) 24040 - ITALY +39 035 4949555 +39 035 905447 info@carimali.com carimali.com...
Need help?
Do you have a question about the Optima Ultra and is the answer not in the manual?
Questions and answers