Advertisement
Quick Links
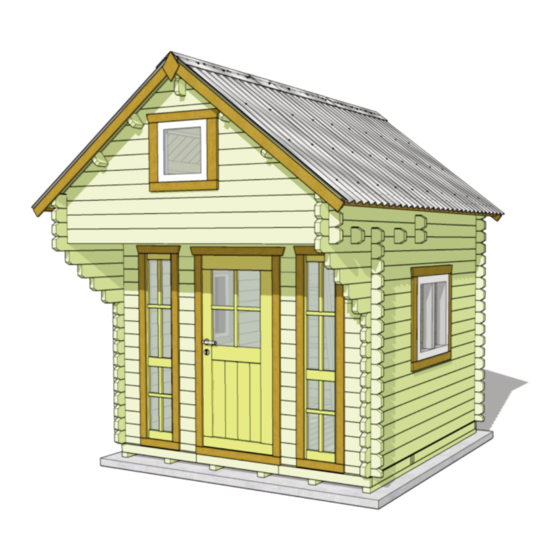
Thank you for purchasing a
9x9 Muskoka Cabin. Please take
the time to identify all the parts
prior to assembly.
Safety Points and Other Considerations
Our products are built for use based on
proper installation on level ground and
normal residential use. Please follow the
instruction manual when building your
shed and retain the manual for future
maintenance purposes.
Customers are responsible for ensuring
a solid, level, well-draining site for
construction.
Please check with your local municipal
or county by-laws before ordering this
product to confirm it complies with
building codes.
In the event of a missing or broken piece, call the Outdoor Living Today Customer Support Line @ 1-888-658-1658 with-
in 30 days of the delivery of your purchase. It is our commitment to you to courier replacement parts, free of charge,
within 10 business days of this notification. Replacement parts will not be provided free of charge after the 30 day
grace period.
All structures purchased from Outdoor Living Today are covered for a period of one year for defects in manufacturing
and workmanship. Costs incurred for customer installations are not included.
Failure to use supplied parts included in this kit could result in poor product performance and may void your warranty.
Please contact Outdoor Living Today's Customer Toll Free Line if you plan to deviate from our written instructions.
1-888-658-1658
9' x 9' Muskoka Cabin
Assembly Manual
- Snow load ratings vary by geographical location. If heavy or wet snowfall occurs, it
is advisable to sweep snow off roof frequently.
- If the product is elevated, any structural and building code requirements are solely
the customer's responsibility, and should be abided by.
- In areas with high or gusty wind conditions, it is advisable to install the structure
securely to the ground.
- Have a regular maintenance plan to ensure screws, doors, windows and parts are
tightly affixed.
Customer agrees to hold Outdoor Living Today and any Authorized
Dealers free of any liability for improper installation, maintenance and
repair.
www.outdoorlivingtoday.com
Page 1
Version #1.3
May 12, 2022
sales@outdoorlivingtoday.com
Advertisement

Related Manuals for OLT Muskoka Cabin 9x9


Summary of Contents for OLT Muskoka Cabin 9x9
- Page 1 9’ x 9’ Muskoka Cabin Assembly Manual Version #1.3 May 12, 2022 Thank you for purchasing a 9x9 Muskoka Cabin. Please take the time to identify all the parts prior to assembly. Safety Points and Other Considerations Our products are built for use based on proper installation on level ground and normal residential use.
- Page 2 What to do before my Shed arrives? • Become familiar with this assembly manual and determine if you can complete the project yourself or will require a professional contractor. • One helper is recommended to assist in constructing your shed. It generally takes two people about 3 days to assemble a shed.
- Page 3 Foundation Types for 10x10 Muskoka Cabin 110 1/4” 110 1/4” 110 1/4” 110 1/4” Front Side Front Side Front Side Completed Foundation Concrete Foundation Concrete Slab Foundation: - Slab must be at least the same size as assembled floor frame (110 1/4” x 110 1/4”) or larger. - 6”...
- Page 4 Thank you for purchasing our 10 x 10 Muskoka Cabin. Please take the time to identify all the parts prior to assembly. Details Length Quantity 118 1/8” 2 149 5/8” 2 149 5/8” 2 149 5/8” 2 149 5/8” 2 143 5/16”...
- Page 5 Details Length Quantity Front Wind Flap 5/8” x 3 3/8” 78 3/4” Top Wind Flap 5/8” x 3 3/8” 78 3/4” Side Wind Flap 5/8” x 1 3/4” 149 5/8” 2 Flashing Rhomb (Detail plate) Railing 3/4” x 4 3/8” 33 1/2”...
-
Page 6: Hardware Package
MUSKOKA 9x9 HARDWARE PACKAGE BR1 - Square Drive Bit 1/4”x 2” x 80 x 210 N1 - 1 1/2” Finishing Nails Metal Roof Screw x 175 S4 - 3” Screws 1/4” Nut Driver x 105 S1 - 2 1/2” Screws x 125 S3 - 2”... -
Page 7: Floor Section
1. Floor Section Exploded view of all parts necessary to complete Floor Section. Identify all parts prior to starting. Note: Floor Footprint is 110 1/4” wide x 110 1/4” deep. Part 40 (3pcs) Part 39 (3pcs) Part 38 (6pcs) Part 36 (3pcs) Part 37 (6pcs) Part 35 (3pcs) Lay out Part 36 - Floor Frame and two Part 38 - Floor Joists as illustrated above. - Page 8 Lay out Part 35 - Floor Frame and two Part 37 - Floor Joists as illustrated above and assem- ble as per Step 1. Complete each frame. Screw Frames 35 & 36 together with 6 - 2 1/2” screws. Complete 3 sets of floor frames 110 1/4”...
- Page 9 39” Runner 71” Runner Locate Parts 23 - Floor Runners (12 Total). Place two on each edge of floor frame and evenly space remaining 8. Run floor runners perpendicular to floor joists. Floor runners should be approximately 18 3/4” apart Fasten each runner with 10 - 3” screws. With floor runners attached to floor frame, carefully flip the floor over and place on to your foundation.
- Page 10 With Plywood in position on floor framing, attach with 1 1/4” screws every 16” (Approximately 75 Total). Hint: Use a chalk line to mark location of floor joists for easy screw placement. 2. Lower Wall Section Exploded view of all parts necessary to complete the Wall Section. Identify all parts prior to starting.
- Page 11 Part 1 (2pcs) Important: Front door will be positioned here Locate Parts 1 (2 Total). Place one on each edge of floor frame. Use 2 Part 8’s from Step 10 to ensure starter pieces are spaced correctly. Once positioned secure Part 1’s to floor using 1 - 3”...
- Page 12 Part 8 (2pcs) Locate 2 more Part 8’s, place and fasten as per Step 10. Part 8 (16pcs) Part 13 (12pcs) Continue adding Part 8’s and Part 13’s until your side walls are stacked 7 boards high. 16 1/2” 33” 16 1/2”...
- Page 13 Note: Attach both top and side trims to front window panels before installation. Part 28 (1pc) Part 30 (2pcs) Locate Part 28 (Door) and Parts 30 (Front Windows). Ensure Door and Windows fit between Part 14’s previously installed. Use a shim to keep the door off the ground. If you find it easier to assemble the Bunkie without the doors you can leave them uninstalled till Step 23.
- Page 14 3. Upper Wall Section Exploded view of all parts necessary to complete the Wall Section. Identify all parts prior to starting. Part 14 (14pcs) Part 13 (14pcs) Part 6 (2pcs) Part 7 (2pcs) Part 10 (2pcs) Part 11 (2pcs) Part 12 (20pcs) 1-888-658-1658 www.outdoorlivingtoday.com sales@outdoorlivingtoday.com...
- Page 15 Part 8 (1pc) Part 13 (2pcs) Part 14 (2pcs) Part 12 (4pcs) Locate Parts 12 (20 Total) and 1 Part 8 for the rear wall. Part 12’s will allow for a window opening while continue to build the walls. Part 8 (3pcs) Part 13 (4pcs) Part 14 (4pcs) Part 12 (12pcs)
- Page 16 Part 8 (1pc) Part 12 (2pcs) Part 13 (2pcs) Part 14 (2pcs) Part 10 (2pcs) Locate Parts 10 (2 Total). Continue adding to your walls as per Steps 17-18 but replace the front Part 12’s with Part 10’s. Place one on each side. Part 8 (1pc) Part 13 (2pcs) Part 14 (2pcs)
- Page 17 4. Loft Wall Section Exploded view of all parts necessary to complete the Wall Section. Identify all parts prior to starting. Part 5 (2pcs) Part 4 (2pcs) Part 3 (2pcs) Part 8 (11pcs) Part 2 (2pcs) Part 9 (1pc) Toll Free 1-888-658-1658 www.outdoorlivingtoday.com sales@outdoorlivingtoday.com Page 17...
- Page 18 Part 9 (1pc) Locate Part 9 (1 Total). Part 9 is notched out to fit over the front door and windows. If the front door and windows have not been installed yet, install them now. Part 2 (2pcs) Locate Parts 2 (2 Total). Position on side walls and fasten. Part b1 (2pcs) Part 8 (4pcs) Locate Parts 8 (4 Total) &...
- Page 19 Part 3 (2pcs) Locate Parts 3 (2 Total). Position on side walls and fasten. Part 8 (3pcs) Locate Parts 8 (3 Total). Position and fasten. Part 4 (2pcs) Locate Parts 4 (2 Total). Position on side walls and fasten Toll Free 1-888-658-1658 www.outdoorlivingtoday.com sales@outdoorlivingtoday.com Page 19...
- Page 20 Part 8 (2pcs) Part 5 (2pcs) Locate Parts 5 (2 Total). Position on side walls and fasten 5. Loft Section Exploded view of all parts necessary to complete the Wall Section. Identify all parts prior to starting. Part 25 (21pcs) Part 46 (4pcs) Part 46 flush with Part 8...
- Page 21 6. Gable & Rafter Section Exploded view of all parts necessary to complete the Wall Section. Identify all parts prior to starting. Part s2 (1pc) Part s1 (1pc) Part s3 (4pcs) Part g1 (2pcs) Toll Free 1-888-658-1658 www.outdoorlivingtoday.com sales@outdoorlivingtoday.com Page 21...
- Page 22 Part f1 (2pcs) Cleats on rear of g1 to asemble 3 pcs Part g1 (2pcs) Locate Parts f1 & g1 (4 Total). Place f1 on each edge of roof, resting on Part 8’s. Fasten with 2 - 2” screws per side at a 45°. Place g1 on f1 and attach the same way. Complete both gables. Part s1 (1pc) Part s2 (1pc) Locate Parts s2 &...
- Page 23 7. Roof Section Exploded view of all parts necessary to complete the Wall Section. Identify all parts prior to starting. Part 33 (3pcs) Part 34 (24pcs) Part 32 (10pcs) Part 26 (30pcs) Part 27 (30pcs) Toll Free 1-888-658-1658 www.outdoorlivingtoday.com sales@outdoorlivingtoday.com Page 23...
- Page 24 Part 27 (30pcs) Part 26 (30pcs) Locate Parts 26 & 27 (60 Total). Position roof boards onto rafters overhanging equally on front and rear of Bunkie. Be sure to position roof boards with the smooth face down as these will be seen from inside.
- Page 25 Part 34 (4pcs) Locate Parts 34 (8 Total, 4 per side). Position near peak of roof on top of Roof Panels. Part 33 (3pcs) Locate Parts 33 (3 Total). Position on peak of roof over top of Foam Enclosures. Overlap the 3 Ridge Caps and space apart to achieve desired overhang.
-
Page 26: Trim Section
8. Trim Section Exploded view of all parts necessary to complete the Wall Section. Identify all parts prior to starting. Part 18 (2pcs) Part 15 (4pcs) Part 47 (4pcs) Part 17 (2pcs) 1-888-658-1658 www.outdoorlivingtoday.com sales@outdoorlivingtoday.com Page 26... - Page 27 Part 47 (4pcs) Part 15 (4pcs) Locate Parts 47 (4 total) and Parts 15 (4 Total). Attach Part 47’s underneath roof boards with 4 - 1 1/4” screws per piece. .Position Front Wind Flap over Rafters and attach with 8 - 1 1/2” finishing nails per piece. Attach all 4 pieces. Part 18 (2pcs) Locate Parts 18 (2 Total).
-
Page 28: Miscellaneous Section
9. Miscellaneous Section Exploded view of all parts necessary to complete the Wall Section. Identify all parts prior to starting. Part 19 (2) Part 20 (4) Locate Parts 19 & 20 (6 Total) to assemble loft railing. Fasten Part 19 to 2 Part 20’s with 2 - 1 1/4”... - Page 29 Trim out outside of Windows with Parts 42 & 44 (bundled). Attach with 3 - 1 1/2” finishing nails per piece (48 total). Trim out inside of Windows with Parts 43 & 45 (bundled). Attach with 3 - 1 1/2” finishing nails per piece (48 total).
- Page 30 Plan of 1st floor in axis 1/2 - A/D 1-888-658-1658 www.outdoorlivingtoday.com sales@outdoorlivingtoday.com Page 30...
- Page 31 Plan of attic in axis 1/2 - A/D 1-888-658-1658 www.outdoorlivingtoday.com sales@outdoorlivingtoday.com Page 31...
- Page 32 Wall on axis A & B 1-888-658-1658 www.outdoorlivingtoday.com sales@outdoorlivingtoday.com Page 32...
- Page 33 Wall on axis C & D 1-888-658-1658 www.outdoorlivingtoday.com sales@outdoorlivingtoday.com Page 33...
- Page 34 Wall on axis 1 1-888-658-1658 www.outdoorlivingtoday.com sales@outdoorlivingtoday.com Page 34...
- Page 35 Pediment on axis A & D, & Details 1-888-658-1658 www.outdoorlivingtoday.com sales@outdoorlivingtoday.com Page 35...
- Page 36 Roof Trim, Rhomb, & Railing 1-888-658-1658 www.outdoorlivingtoday.com sales@outdoorlivingtoday.com Page 36...
- Page 37 Congratulations on assembling your 9x9 Muskoka Cabin Note: Our Sheds are shipped as unfinished products. If exposed to the elements, the western red cedar lumber will weather to a silvery-gray color. If you prefer to keep the cedar lumber looking closer to the original color, we suggest that you treat the wood with a good oil base wood stain.
Need help?
Do you have a question about the Muskoka Cabin 9x9 and is the answer not in the manual?
Questions and answers