Advertisement
Quick Links
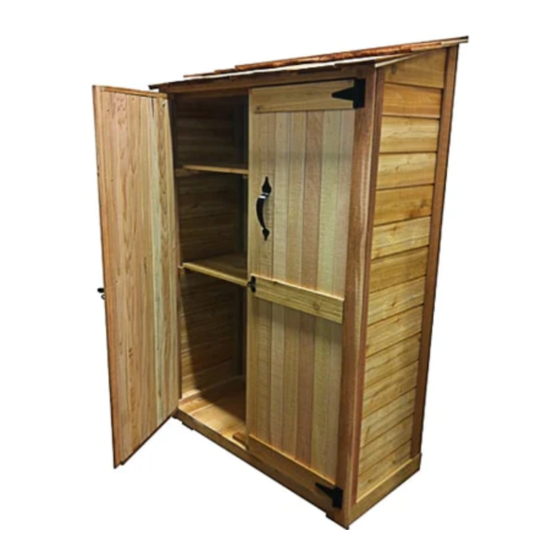
Thank you for purchasing a 4x2
Garden Chalet. Please take the time
to identify all the parts prior to
assembly.
Please use Safety Eyewear and Gloves
while Assembling. Be sure to read and
follow all operating instructions for any
tools used during assembly.
Remember- NO SAW CUTTING IS
REQUIRED!
Safety Points and Other Considerations
Our products are built for use based on
proper installation and normal residential
use, on level ground.
Please follow the instruction manual when
building your Grand Garden Chalet and
retain the manual for future maintenance
purposes.
Some of the safety and usage measures
you may wish to consider include:
-If the product is elevated, any structural
and building code requirements are solely
the customer's responsibility, and should
be abided by.
-In high or gusty wind conditions it is
advisable to keep the structure securely
grounded.
-Have a regular maintenance plan to ensure
screws, doors, roof and parts are tight.
In the event of a missing or broken piece, simply call the Outdoor Living Today
Customer Support Line @ 1-888-658-1658 within 30 days of the delivery of your
purchase. It is our commitment to you to courier replacement parts, free of charge,
within 10 business days of this notification. Replacement parts will not be
provided free of charge after the 30 day grace period.
Outdoor Living Today
Garden Chalet 4X2
Assembly Manual
sales@out doorlivingtoday.com
Page 1
Revision #9
Oct 21th, 2012
4x2 Garden Chalet Dimensions:
A: Outside Height (Rear) =73 3/4"
B: Outside Height (Front) = 67 3/4"
C: Outside Width =48"
D: Outside Depth =23 1/4"
E: Door Width = 40"
F: Door Height = 61 1/4"
G: Inside Height (Rear) =67"
H: Inside Height (Front) =61"
I: Inside Width =44"
J: Inside Depth =20"
Advertisement

Subscribe to Our Youtube Channel
Related Manuals for OLT Garden Chalet 4x2


Summary of Contents for OLT Garden Chalet 4x2
- Page 1 Revision #9 Oct 21th, 2012 Garden Chalet 4X2 Assembly Manual Thank you for purchasing a 4x2 Garden Chalet. Please take the time to identify all the parts prior to assembly. Please use Safety Eyewear and Gloves while Assembling. Be sure to read and follow all operating instructions for any tools used during assembly.
- Page 2 Exploded View and Parts List for 4’x2’ Garden Chalet Parts List Floor Section Trim Section 1 - Floor Section - 20 1/2” x 45” x 2 1/2” 2 - Front Corner Door Trims - 1/2” x 2 1/2” x 65 1/2” 4 - Floor Legs - 1 1/2”...
-
Page 3: Tools Required
4x2 GARDEN CHALET HARDWARE PACKAGE 3/4” Hardware Kit (Provided) Silver Note: screws and nails shown actual size. 3/4” Black 2 1/2” 1 1/4” Finishing 1 1/4” 7/8” Shingle 1” Square Drive Bit 2” Black 1 1/2” Bolt with Black Head, Silver Nut and W asher (I) Tee Hinge x4 (CC) Door Handle X 2 (DD) Barrel Bolt... - Page 4 You can find the Square Drive Bit for the screws in with the Hardware Kit Bag. Flip Floor (A) over on a level surface. Locate Legs (B) and position in each corner tight to floor and framing and attach with 2- 2 1/2” screws. Complete all Leg att achments. Flip Floor over and complete Leg attachments by screwing 1 - 2 1/2”...
- Page 5 Align Rear Wall flush to floor at the back and wall framing of Side and Rear Walls together. Wall Framing aligned together. approx. 1/2” gap Wall Frames aligned Rear Wall Siding Flush with Floor at back. With Side and Rear Wall correctly positioned, attach together at top, middle and bottom of vertical wall frames with 3 - 2 1/2”...
- Page 6 Position right Side Wall Panel on Floor as per Step 2-4. With Side Wall Panel correctly aligned, attach Rear and Side Wall together at top, middle and bottom of vertical wall frames with 3 - 2 1/2” screws. Optional - Caulking seams will help prevent moisture from entering at seam.
- Page 7 Aligned flush at front and top Door Header (E) Dado cut to front, facing down. Locate Door Header (E) and place between Side Wall framing with dado cut facing down and to the front. You will want Front Corner Trim (P) to cover screws in Step 24.
- Page 8 Secure with 3 - 7/8” Shingle Nails Flush with other Roof Shingles. Align U Shingle tight against Roof Shingle. Position and attach U Shingle (5” wide) on Roof Panel with 3 - 7/8” Shingle Nails. See above for details. Secure with 3 - 7/8” Shingle Nails Place and attach V Shingle (6”...
- Page 9 Shingled Roof Panel (F) Recessed 1/8” back from Header. Place Shingle Roof Panel (F) on Wall Framing and Door Header. At the front, recess the Plywood sheathing of the Roof slightly back 1/8”. Align plywood sheathing of the Roof evenly from side to side as illustrated above. Angle 2 1/2”...
- Page 10 Gable and Wall Siding evenly aligned at rear. Locate both Angle Cut Gable Siding Pieces - Left/Right Pieces (G) . Starting with the left side, place above Side Wall so lap sidings fit together. Roof and Angle Cut Gable Siding close together. Gable and Wall Siding evenly aligned at rear.
- Page 11 Front Corner Door Trims (H) Side Wall Frame. Trim Flush to Flush with bottom of Floor 2x2 Side Wall frame Locate Front Corner Door Trims (H). Position flush with Side Wall framing and flush with bottom of Floor . Attach with 8 - 1 1/4”...
- Page 12 1/8” 1 - 2” screws per Hinge initially. 1/8” gap Shim with Shingle Leave a gap on left side and bottom of Door approximately 1/8”. Use a shingle to Gap between Top of Door shim the door at bottom to help position door evenly.
- Page 13 Door Flange (K) Open Left Door and position Door Flange (K) flush against to be positioned Horizontal Door Trim making sure also to align evenly at top and on Left Door. bottom of Door Trim. From the inside screw Flange to door with 6 - 1” screws.
- Page 14 Side / Front Corner Trim Place Side / Front Corner Trim (P) tight to Corner Door Trim and flush to top of Skirting at bottom. Nail secure with 6 - 1 1/2” nails. Complete both sides. Side / Rear Corner Trim (Q &...
- Page 15 Front Door Header Trim (T) Locate Front Door Header Trim (T) and place between Corner Door Trim flush against Door Header and Plywood Roof. Make sure Door Header Trim is positioned so it does not impede the opening and closing of Doors. When correctly positioned, secure with 5 - 1 1/2” finishing nails. Roof Ridge Cap (X) Center Roof Ridge Cap (X) from side...
- Page 16 Shelf Support Locate 1 Shelf Support (Z) and position on Vertical Shelf Support and Rear Wall framing. Drill pilot hole in Shelf Support to Positioned 3/4” prevent splitting and attach with 1 - 1 1/4” screw on each end. on Side Wall Note - Make sure Shelf Support is level prior to att aching.
- Page 17 Attach Interior Door Stop (BB) to Floor with 2 - 1 1/4” screws. To align correctly, close Doors in best close Door position. Mark and att ach. Drill pilot holes to prevent splitting. Install 3/4” from top of Door. Install the Barrel Bolt Plywood Spacer 3/4” from top of the Right Door with 2 - 1” screws. Position the Interior Silver Barrel Bolt on the Plywood Spacer and use 3/4”...
- Page 18 Congratulations on assembling your 4x2 Garden Chalet! Note; Our Sheds are shipped as an unfinished product. If exposed to the elements, the western red cedar lumber will weather to a silvery-gray color. If you prefer to keep the cedar lumber looking closer to the original color, we suggest that you treat the wood with a good oil base wood st ain.
Need help?
Do you have a question about the Garden Chalet 4x2 and is the answer not in the manual?
Questions and answers