Table of Contents
Advertisement
Advertisement
Table of Contents

Related Manuals for POSIFLEX Aura PP7700 Series


Summary of Contents for POSIFLEX Aura PP7700 Series
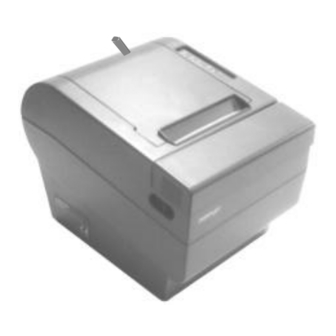
- Page 1 Aura PP7700 Series Wireless POS Thermal Printer User's Guide Rev.: Original IMPORTANT!!!! Please read carefully before using this printer Before opening the Top Hood, make sure there is no paper jam or cutter jam trouble. (Read page 3-4, 3-5 and Warranty Limit in the user’s Manual.)
-
Page 2: Federal Communications Commission Radio Frequency
POS thermal printers delicately designed to work with either serial or parallel interface connection. This manual covers both operational and technical aspects. This manual covers also the Epson emulation commands and some special features of the printer. The manufacturer of the Aura (PP7700) series heartily apologizes to the user for reserving the right to change or to modify this manual without notice due to the rapid and constant progress and improvement on science and technology. -
Page 3: Table Of Contents
Flexible wireless connection ... . . 2 -- 9 Signal Detection (to select a proper printer location) ........2 -- 10 Peripheral Connection . - Page 4 SPECIFICATIONS PRINTER ....... . 4 -- 1 PAPER ........4 -- 1 POWER ADAPTOR .
-
Page 5: Getting Started
You have made a very wise decision by purchasing the easy loading; low noise; high resolution; light weight; high reliability wireless thermal printer Aura PP7700 series of Posiflex products. This series of printers has been elegantly designed for a Point-Of- Sale, kitchen &... -
Page 6: Unpacking
UNPACKING Followings are items you may find when you carefully unpack the carton that delivers Aura series printer. If there is any discrepancy or problem, contact your dealer immediately. Be sure to save the packing materials in case the printer needs to be shipped at some point in the future. -
Page 7: Main Parts On The Exterior
Language to add to standard model: Japanese Kanji; Korean; Traditional Chinese or Simplified Chinese MAIN PARTS ON THE EXTERIOR Top Hood Top Cover Hood Release Front View Power Switch Power LED Rear View Antenna Frame Ground Power Connector Peripheral Connector 1 - 3 Error LED Paper Out LED... -
Page 8: Indicators
Place the printer on a sturdy, level surface. Choose a place that is well ventilated and free of excessive dust, smoke or fume. Do not put the printer under direct sunlight or near a heater. Avoid such environment with large number or size of... -
Page 9: Useful Tips
Try to prevent as much as possible any obstacle between printer and host PC such as metal plate, wire mesh or any other materials of metal. Ideal room temperature is from 5ºC to 40ºC. Ideal humidity is from 20% to 85% RH (no condensation). - Page 10 Store thermal paper away from high temperature and humidity. Avoid extended exposure to direct light. Do not set any liquid or drinks such as coffee on the printer case 1 - 6...
-
Page 11: Quick Start-Up
Tear off excessive paper. Slide the hood lock toward the front of the printer to release the hood. Drop the thermal paper roll inside the printer in the orientation as shown in the picture. -
Page 12: When To Replace Paper
When To Replace Paper Whenever the printer gives paper out signal or a red line appears on the thermal paper, it is the proper timing for replacing the paper. Do not wait till the print engine is dragging the paper roll at the very end. -
Page 13: Physical And Driver Installation
The driver can be found together in delivery of the wireless printer or the Posiflex Product Information CD of version 1.9 or above, or please visit our web http://www.posiflex.com or http://www.posiflex.com.tw... - Page 14 At the host system that the Dongle is connected, be sure to terminate any application program or to uninstall any driver occupying the COM port that the Dongle is connected. Select the proper COM port if requested by the installation program. If there are multiple Dongles installed on several COM ports in the host, you have to free all COM ports to be used for wireless connection before driver installation and select the...
- Page 15 In “Hardware Update Wizard” that appears after this, choose “Install from a list or specific location (Advanced)” --> “Don’t search, I will choose the driver to install” --> “Have Disk” --> “Browse” and find the subfolder where the drivers were stored. Select “ComBtDrv.inf”.
- Page 16 Ignore this message and click “Next”, a warning dialogue box will pop up. Select “Continue Anyway” to exit the “Hardware Installation.” warning dialogue box 2 - 6...
-
Page 17: Making Wireless Connection
Follow procedures below for first time connecting a wireless printer to the Dongle if the application program does not take care of this part. Please find under the bottom of the wireless printer PP7700 that you want to connect a BT ID printed on a label near the serial number. - Page 18 “HOST: BT Address”. Double check the installation if it still shows “NONE” here. Do a “Query Printer” and in the “PRINTER” field all BT ID of the wireless printers within communication range will be displayed.
-
Page 19: Automatic Re-Connection At Power On
Whenever you connected a POS printer to a COM port in the host system, you would expect the connection remains there if you power off and back on either the host or the printer before you make the “Disconnect” operation. This would be... -
Page 20: Signal Detection (To Select A Proper Printer Location)
Posiflex provided “Signal detect” feature to help users in determining the most suitable location setup for the wireless printer. Please first remove the paper roll out of PP7700 and connect power to it as described in coming section. Turning on... -
Page 21: Peripheral Connection
LED flash (up to a little bit faster than 1 flash / sec) indicates a better connection condition. If the signal detect signal flashes too slow or even steady on or off, it may need to shorten the printer -- host distance or to check the environment again and you may move the PP7700 around and adjust the antenna direction before final decision on location setup. -
Page 22: Power Connection
With the paper roll loaded in the printer press and hold down the feed button while push the on / off switch on. The printer will then perform a self test. A sample slip of self test result is printed below. -
Page 23: Special Adjustments
To exit the test printing, please turn the printer off and on again. SPECIAL ADJUSTMENTS Paper Near End Sensor The near end sensor for paper roll in the printer is now able to have the printer work with paper rolls of several bobbin sizes. -
Page 24: Paper Roll Placement
signal. -
Page 25: Paper Cutting
In wall mount application, the paper near end sensor will not have proper operation and it is suggested to set in the setup window to have the printer to send busy only when input buffer is full and not based on every off line signal. -
Page 27: Maintenance Guides
GENERAL CLEANING Please use soft hair brush or compressed air to clear away any dust or paper scraps accumulation inside the printer. Check also the area of the auto-cutter regularly. PRINT HEAD CLEANING The print head is located underneath the roll paper passage at the exit as in the picture below. -
Page 28: Trouble Shooting
If there is no paper jam and the printer has been printing for quite a period of time, the print head may be overheated. It will usually cool back in few minutes and the printing will resume. - Page 29 If there is no paper jam and the print head is not overheated, turn off the printer and wait for half a minute then turn it back on. If the problem still remains, contact a qualified service person. Nothing can be printed with ERROR LED OFF – Try to run self test according to previous chapter to check if the printer itself works properly.
-
Page 30: Paper Jam Problems
Paper Jam Problems Paper is jammed inside the printer – Turn off the printer and open the print hood by releasing the hood lock. Remove the jammed paper and reinstall the paper roll. Close the hood properly and firmly. Then turn on the printer for operation. -
Page 31: Graphic Printer Speed
Printer goes into error status with intact wireless connection: -- This may occur for example if the printer top hood is opened during normal operation (maybe for paper roll change or else) and all E-M field conditions remain unchanged. The Error LED on PP7700 will lit. - Page 32 Printer fails to respond such as being powered off: -- The wireless connection will resume when the printer comes back alive. However the data sent when the printer goes off if it happens at printing process will be lost. So it is quite advisable for...
-
Page 33: Advanced Analysis Tool
Advanced Analysis Tool This printer supports Hexadecimal Dump for experienced user to view exactly what data is received by the printer. This can be useful in finding software problems. To start the dump mode: Turn off printer; Open print hood;... -
Page 35: Specifications
IV. SPECIFICATIONS PRINTER ITEM Printing method Printing speed Maximum Printable Width Default Printing Width Print Segmentation Position Print Segmentation Vertical Shift Paper feed method Paper load method Auto-cutter capability Manual cutter Dot Pitch Input power type Input voltage Dimension (mm) -
Page 36: Power Adaptor
POWER ADAPTOR ITEM INPUT VOLTAGE INPUT FREQUENCY INPUT CURRENT OUTPUT VOLTAGE OUTPUT POWER STATIC LOAD OUTPUT REGULATION MTBF EMI STANDARDS REQUIREMENT 100 V AC ~ 250 V AC 50 ~ 60 HZ 1.5 A MAX. @ 115 V AC + 24 V DC 60 W 0 A ~ 2.5 A + / - 5 %... -
Page 37: Technical Information
19200 bps, none parity, 8 data bits, 1 stop bit (use 38400 bps for graphics) COM port of Posiflex POS systems FUNCTI ON Search for wireless printer in range of each Dongle (discover) and register a virtual COM port for each printer (connect) One Printer for each Dongle. -
Page 38: Peripheral Interface
On bottom cover of the Aura series thermal printer, there is screwed a metal plate for setup window. In this window, there is a 8 position DIP switch for printer setup. Please use proper tool to 6 pin plug Description... - Page 39 Paper End (completely no paper) till paper is replaced when S1-5 is ON. Yet when S1-5 is OFF, the printer will keep on beeping every 3 seconds at Paper Near End (still long paper in replace) till paper is replaced.
-
Page 40: Internal Switch
42.5 lines/sec. Switch position 2 is usually set to OFF for use with 80 mm paper width. When the printer is installed with the 58 mm paper ON ON OFF OFF OFF OFF OFF OFF Setting Effect... -
Page 41: Software Commands
Switch position 3 is usually set to OFF for ESC/POS command application that prints at 512 dots / line. Only technical users shall set this switch to ON and make the printer work in the 576 dots / line format. - Page 42 Then use this command with m set to 0 and both n 255. The printer will be able to drive the kitchen bell for about half a second on each such command. If this command is sent to...
-
Page 43: Character Code Pages
CHARACTER CODE PAGES Aura PP-7700 series supports all code pages and international character sets applicable to Epson printer TM-T88. Page 0 (PC437: USA) Page 1 (Katakana) Page 2 (PC850: Multilingual) - Page 44 The user may visit our web at http://www.posiflex.com.tw or http://www.posiflex.com for a view of the fonts in the code pages and character sets. 5 - 8...
Need help?
Do you have a question about the Aura PP7700 Series and is the answer not in the manual?
Questions and answers