Table of Contents
Advertisement
Quick Links
Advertisement
Table of Contents

Related Manuals for POSIFLEX AURASeries


Summary of Contents for POSIFLEX AURASeries
- Page 1 Aura Series (PP-7000-III / PP-7000U-III) Thermal Printer User’s Manual Rev.: A0 IMPORTANT!!!! Please read carefully before using this printer Before opening the Top Hood, make sure there is no paper jam or cutter jam trouble. (Read page 16 and Warranty Limit in the user’s Manual.)
-
Page 2: Federal Communications Commission Radio Frequency
Federal Communications Commission Radio Frequency Interference Statement This equipment has been tested and found to comply with the limits for a Class A digital device, pursuant to Part 15 of the FCC Rules. These limits are designed to provide reasonable protection against harmful interference when the equipment is operated in a commercial environment. -
Page 3: Getting Started
I. GETTING STARTED CONGRATULATION You have made a very wise decision by purchasing the easy loading; low noise; high resolution; light weight; high reliability thermal printer Aura (PP-7000-III & PP-7000U-III) series of Posiflex products. This series of printers has been elegantly designed for a Point-Of-Sale, kitchen &... - Page 4 The Aura PP-7000-III & PP-7000U-III supports a guillotine type auto cutter for paper partial cut and a manual cut mechanism. The Aura series also supports user’s company’s LOGO downloading for superior performance. It even supports some enhancement capability for reminder function to persons around. It can be used to drive a separately purchased kitchen bell for such reminder function in noisy environment.
- Page 5 d Powered USB cable (1.5 meter long) for Aura PP-7000U-III to use with 24V Powered USB port of POS system Length of the serial or parallel interface cable depends on whether the order includes the power adaptor. When power adaptor is included, the interface cable is 6 ft long for stand-alone application.
-
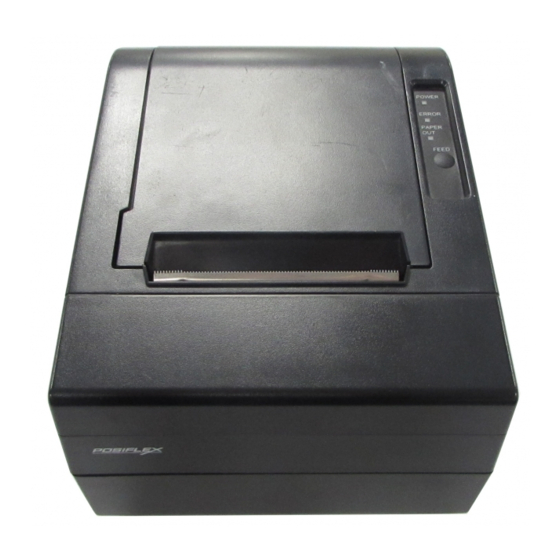
Page 6: Main Parts On The Exterior
MAIN PARTS ON THE EXTERIOR Power LED Top Hood Error LED Paper Out LED Top Cover FEED Switch Cutter Cover Bottom Cover Power Switch Hood Release Front View Bottom View Setup Window Screws Window Plate Screw Power Switch... - Page 7 Rear View of PP-7000U-III Rear View of PP-7000-III USB Connector Frame Ground Frame Ground Serial Connector Peripheral Connector Parallel Connector Power Connector INDICATORS • Power LED: green • Error LED: red • Paper Out LED: red...
-
Page 8: Quick Start-Up
II. QUICK START-UP LOADING PAPER Desk top application Slide the hood lock toward the front of the printer to release the hood. Raise the released hood wide open manually. Release Button Drop thermal paper roll inside the printer in orientation as shown in the left picture. -
Page 9: Connecting Cables
CONNECTING CABLES PP-7000-III PP-7000U-III Serial connection All the external connectors are in the recessed area at the rear bottom for PP-7000-III. The serial connector is a 9-PIN D sub Female connector at the right in the picture above. Apply the male connector of RS232 cable to this port for serial application. -
Page 10: Peripheral Connection
has a type A normal USB connector at one end that is a more or less flat shape 4-PIN connector and a type B normal USB connector at the other end that is a more or less square shape connector as in picture at right. -
Page 11: Power Connection
7000U-III. With use of Posiflex cash drawer cable 20863018001 (CCBLA-180-1) come with cash drawer, this port can control a Posiflex cash drawer CR3100 or CR3200 or CR4000 or CR4100. If a Posiflex special split cable 20867023800 (CCBLA-238) is used instead, this port can control two cash drawers of above models. -
Page 12: Special Adjustments
Self test Press and hold down the feed button while turning the on / off switch on. The printer will then perform a self-test. A sample slip of self-test result is printed as in below sample. Please note that both serial and parallel interfaces are indicated. -
Page 13: Paper Roll Placement
adjustment allows sensor activation on paper roll overall diameter between 21 and 23.6 mm unless for too light bobbins. Remember, for smaller roll diameter, the sensor head should go higher. Paper roll placement When the paper roll to put (back) in is Bobbin O.D. -
Page 14: Paper Cutting
Paper cutting The paper advance after a protective cut is set to 12 mm. In case the user uses direct cut instead of protective cut to have something like a logo printed on top of each slip, it is also highly suggested to print the logo and necessary paper feeding to make 12 mm paper advance right after each cut to prevent curling up and jamming of paper front edge inside the paper exit slot. -
Page 15: General Cleaning
III. MAINTENANCE GUIDES MAINTENANCE GUIDE LINES • Always turn off and disconnect power before opening the cover. • The areas around the print head and motor become very hot during and just after printing, DO NOT touch them. • When handling the interior of the thermal printer, please pay attention not to be hurt by any sharp edge of the metal parts. -
Page 16: Troubleshooting
Before putting back the paper roll for printing, alcohol solvent must be dried completely. TROUBLE SHOOTING This section gives solutions to some printer problems you may have. General Problems No LED lights up on control panel when switched on – Make sure that the power supply cables are correctly plugged into the printer, the power adaptor and to the power outlet. - Page 17 both situations are not the cause, please try pulling the hood lock forward. If the top hood won’t release automatically, check for paper jam described in next item. If there is no paper jam and the print head is not overheated, turn off the printer and wait for half a minute then turn it back on.
-
Page 18: Paper Jam Problems
from trembling and degraded performance. As a common practice, increasing the communication baud rate could be a smart decision to this situation. (No need to change baud rate if no trembling occurs to eliminate possible data error rate.) Paper Jam Problems Paper is jammed inside the printer –... -
Page 19: Advanced Analysis Tool
it back to position when finish. The lock up of the print hood can then be released after this problem solved. Please use manual cutter as temporary alternative measure once the auto cutter malfunctioned. Lift transparent protective foil Open Cutter Cover when hood locked Turn the wheel downward till a hole in the plastic gear appears in this window... -
Page 20: Specifications
IV. SPECIFICATIONS PRINTER ITEM SPECIFICATION Printing method Thermal sensitive line dot method Effective printing width 64 mm Thermal head configuration 512 dots / line Printing speed 180 mm /sec. Paper feed method Friction auto-feed Paper load method Drop and use Auto-cutter capability Partial cut (1 point at center left) Manual cutter... -
Page 21: Power Adaptor
POWER ADAPTOR ITEM REQUIREMENT INPUT VOLTAGE 100 V AC ~ 240 V AC INPUT FREQUENCY 50 ~ 60 HZ INPUT CURRENT 1.8 A MAX. @ 115 V AC OUTPUT VOLTAGE + 24 V DC OUTPUT POWER 60 W STATIC LOAD 0 A ~ 2.5 A OUTPUT REGULATION + / - 5 %... -
Page 22: Useful Tips
V. USEFUL TIPS • Please note that only those qualified technicians may adjust several jumpers for some technical settings. Please visit our web site http://www.posiflex.com or http://www.posiflex.com.tw for details of the technical information such as driver installation, DIP switch settings and command sets etc. if required. •... - Page 23 • Do not use a power outlet of a circuit shared with any equipment that uses a lot of power or causes great electrical noises, such as a copier, electric motors or a coffee maker. • Do not use thermal paper containing Sodium (Na+), Potassium (K+) and Chlorine (Cl-) ions that can harm the print head thermal elements.
Need help?
Do you have a question about the AURASeries and is the answer not in the manual?
Questions and answers