Table of Contents
Advertisement
Quick Links
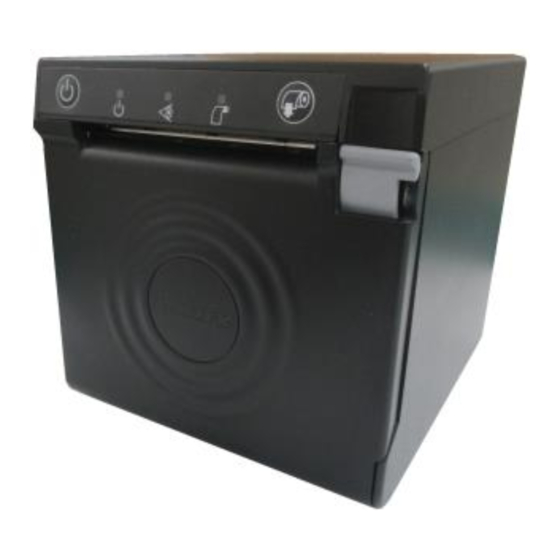
PP-7900W
POS Printer
User Manual
To avoid paper jam occurring, do NOT press the printer's cover
open lever or pull the printed paper during printing.
When a paper jam occurs, press the cover open lever to release the
paper cover. Then, remove the jammed paper and reinstall the
paper roll. Next, close the paper cover properly and firmly.
If the auto cutter is still jammed, the paper cover will be locked.
Should the cutter jam be so serious to interfere the paper cover
release operation, please push the paper cover back and press the
cover open lever several times. If the problem cannot be solved
none the less, please call your local service center for help right
away.
FCC NOTES
This equipment has been tested and found to comply with the limits for a Class A digital device,
pursuant to part 15 of the FCC Rules. These limits are designed to provide reasonable protection
against harmful interference when the equipment is operated in a commercial environment. This
equipment generates, uses, and can radiate radio frequency energy and, if not installed and used in
accordance with the instruction manual, may cause harmful interference to radio communications.
Operation of this equipment in a residential area is likely to cause harmful interference in which
case the user will be required to correct the interference at his own expense.
This device complies with part 15 of the FCC Rules. Operation is subject to the following two
conditions: (1) This device may not cause harmful interference, and (2) this device must accept
any interference received, including interference that may cause undesired operation.
PP-7900W Ver. A0
Package Contents
POS Printer..............................(x1)
80mm-wide Thermal Paper...........(x1)
(For operational testing)
58mm Paper Spacer Plate.............(x1)
24V/60W Power Adapter.............(x1)
Power Cord..............................(x1)
USB Cable..............................(x1)
1
Advertisement
Table of Contents

Related Manuals for POSIFLEX PP-7900W


Summary of Contents for POSIFLEX PP-7900W
- Page 1 This device complies with part 15 of the FCC Rules. Operation is subject to the following two conditions: (1) This device may not cause harmful interference, and (2) this device must accept any interference received, including interference that may cause undesired operation. PP-7900W Ver. A0...
- Page 2 CE CLASS A WARNING This equipment is compliant with Class A of CISPR 32. In a residential environment this equipment may cause radio interference. AVERTISSEMENT CE CLASSE A Cet équipement est conforme à la classe A de CISPR 32. Dans un environnement résidentiel, cet équipement peut provoquer des interférences radio.
- Page 3 Views of the PP-7900W Front View Power Button Power LED Indicator Error LED Indicator Paper-out LED Indicator Feed Button Paper Roll Exit Cover Open Lever Paper Cover Wedge Groove Paper Near End Sensor (Option)
-
Page 4: Bottom View
Part Names Description Power Button This button turns the printer on or off. Power LED Indicator This indicator turns on when the printer is on. Error LED Indicator This indicator works when the printer has something wrong. For more details, refer to the Status LED Indicators section given below. -
Page 5: Loading A Paper Roll
Status Indicator for Reset Button WiFi Connection Loading a Paper Roll Before loading a paper roll, make sure you use a specified paper type. Follow the steps below to load a paper roll. Press down the cover open lever to release the paper cover. - Page 6 Software Switch Utility for Windows. The software switch utility can be downloaded from the Posiflex’ global website: https://download.posiflex.com/en-global/Download/index/driver/POS- Printer/AURA_PP-7900W). To get more detailed information on the paper width jumper setting, contact directly the Posiflex’ technical service team. To avoid the paper cover not being locked completely, push the central portion of the paper cover to close.
- Page 7 Pull the cover in the direction indicated by the arrow in the right figure. Remove the cable cover. Remove Connect the power adapter and the other I/O cables to the I/O ports of the printer. Please follow the instruction given below to connect I/O cables before powering on the printer.
-
Page 8: Setting Up The Printer
Determine that the cable cover is completely closed. Firmly Closed Setting up the Printer The PP-7900W can be set through the specific software switch setting utility for setup of other functions. Please visit our web site https://download.posiflex.com/en-global/Download/index/driver/POS- Printer/AURA_PP-7900W to download the Thermal Printer Software Switch Utility for Windows. - Page 9 4. Press the feed button of the printer 2 times. 5. Close the paper roll cover manually. 6. The printer will emit one short beep sound and then print a page displaying software switch factory-default settings. 7. The printer will restart by itself. Doing WiFi/LAN Settings Reset Among multiple built-in functions, LAN Settings Reset mainly allows you to reset LAN settings to factory default.
- Page 10 Configuration of WiFi/LAN Printer Posiflex LAN WiFI Printer Manager through WiFi mode The default IP address of PP-7900W in WiFi mode is 192.168.192.168. Connect USB cable to the printer module and the POS terminal. Turn on the printer. Please visit our web site https://download.posiflex.com/en-...
- Page 11 SETTING”, and wait the bar running until it finished. 11. Select “Broadcast” to check whether the device can be detected or not. If not, please exit the Posiflex LAN Wi-Fi Printer Manager first, and then re-open the Posiflex LAN Wi-Fi Printer Manager to check again.
- Page 12 Web-based POS Printer Manager You can also set up the PP-7900W through Web-besed POS Printer Manager. Check your host POS terminal and the PP-7900W are in the same network segment. Connect LAN cable with PP-7900W and your host POS terminal.
- Page 13 In default condition, reading from the configuration page of the manager, your PP-7900W’s IP ADDRESS in LAN mode is 192.168.192.166; the PP-7900W’s IP ADDRESS in WiFi mode is 192.168.192.168. You can read WiFi & LAN information through the web manager.
- Page 14 LAN / WI-FI Reset As the setup for the PP-7900W can be set freely, if the changes are not well registered, some troubles could be made. In PP-7900W, there is a “RESET”...
- Page 15 Connect the power adapter and the other I/O cables to the I/O ports of the printer. Fix the wall mount bracket onto the rear side of the printer with two M2.5- 4.5L screws. Stick the four rubbers to the four corners of the printer.
-
Page 16: Status Led Indicators
For cement wall, you have to drill the hole on the wall, and apply the plastic cotter into the drilled hole first. Make the self-tapping Ø3.5-25L screw pass through plastic stopper. Fix the plastic stopper on top of the printer. Status LED Indicators After powering ON the printer, you can read the printer operation status from the power LED indicator on the printer. -
Page 17: Specifications
Error LED indicator is flashing Power off the printer; after 10 seconds, power it back on. If the error LED indicator turns on again even after turning the power back on, malfunction may occurs. Contact your dealer or Posiflex’ technical service team. Specifications General... - Page 18 Power Source AC adapter (24V DC) Power Saving Print quality assured: +5℃~ +40℃/ Operating: 0 Temperature ℃~ +40℃/ Non-operating: -20℃~ +60℃ Operating: 20 ~ 85%, non-condensing 35% above Relative Humidity for auto cutter / Non-operating: 5% ~ 90%, non- condensing (paper excluded) Acoustic Noise Level 55db Standards and Approvals...
-
Page 19: Outline Dimension
DC Jack 24V DC (3-pin) Operating System OS support Android / Windows / Linux Outline Dimension ※ The product information and specifications are subject to change without prior notice.
Need help?
Do you have a question about the PP-7900W and is the answer not in the manual?
Questions and answers