MikroTik LHG kit Series Manual
Hide thumbs
Also See for LHG kit Series:
- Manual (9 pages) ,
- User manual (4 pages) ,
- Quick setup manual (3 pages)
Table of Contents
Advertisement
Quick Links
LHG kit-series
This manual is for LHG kit series models:
LHG LTE6 kit
(RBLHGR&R11e-LTE6)
LHG LTE kit
(RBLHGR&R11e-LTE)
LHG LTE kit-US
(RBLHGR&R11e-LTE-US)
Safety Warnings
Before you work on any equipment, be aware of the hazards involved with electrical circuitry, and be familiar with standard practices for preventing
accidents.
Ultimate disposal of this product should be handled according to all national laws and regulations.
All installation methods for mounting an access point on any wall surface are subject to the acceptance of local jurisdiction.
The Installation of the equipment must comply with local and national electrical codes.
This product is intended to be mounted outdoors on a pole. Please read the mounting instructions carefully before beginning installation. Failure to use the
correct hardware and configuration or to follow the correct procedures could result in a hazardous situation for people and damage to the system.
Use only the power supply and accessories approved by the manufacturer, which can be found in the original packaging of this product.
Read the installation instructions before connecting the system to the power source.
We cannot guarantee that no accidents or damage will occur due to the improper use of the device. Please use this product with care and operate at your
own risk!
In the case of device failure, please disconnect it from power. The fastest way to do so is by unplugging the power plug from the power outlet.
It is the customer's responsibility to follow local country regulations, including operation within legal frequency channels, output power, cabling
requirements, and Dynamic Frequency Selection (DFS) requirements. All Mikrotik radio devices must be professionally installed.
This is a class A device. In a domestic environment, this product might cause radio interference in which case the user might be required to take adequate
measures.
Exposure to Radio Frequency Radiation: This MikroTik equipment complies with the FCC, IC, and European Union radiation exposure limits set forth for an
uncontrolled environment. This MikroTik device should be installed and operated no closer than 130 centimeters from your body, occupational user, or the
general public.
Quickstart
The default configuration CPE RouterMode:
*WAN port is protected by a firewall and enabled DHCP client.
Advertisement
Table of Contents

Subscribe to Our Youtube Channel
Related Manuals for MikroTik LHG kit Series


Summary of Contents for MikroTik LHG kit Series
- Page 1 Exposure to Radio Frequency Radiation: This MikroTik equipment complies with the FCC, IC, and European Union radiation exposure limits set forth for an uncontrolled environment. This MikroTik device should be installed and operated no closer than 130 centimeters from your body, occupational user, or the general public.
-
Page 2: Case Assembly
Must have a valid SIM card inserted. To manually update the device, please go to https://mikrotik.com/download Choose MIPSBE packages for this device and download them to your PC. Upload downloaded packages to the WebFig "Files" menu and reboot the device. ... - Page 3 Optional - to access the miniPCIe slot, the opening of the unit top cover is required. As an opening tool, you can use a large-size flat head screwdriver or a small coin. Be extremely cautious when opening, because the incorrect opening of the clip can break it off! The mounting and configuration of this device should be done by a qualified person.
- Page 4 Locate the miniPCIe slot on the PCB and remove two factory attached screws; Attach provided a thick thermal pad to the card, and install the card into miniPCIe slot so that the thermal pad is between PCB and card; Insert your desired card; The secure card is in place using previously removed two screws;...
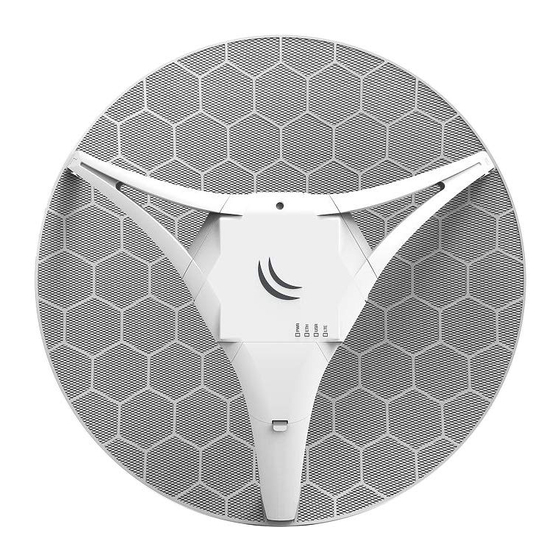
- Page 5 Slide the included metallic mounting rings into the two slots on the back of the antenna dish. Attach the unit to a pole, with the Ethernet port pointing downward. Use a PH2 screwdriver to tighten the rings. Fix the Ethernet cable to the pole using zip ties, less than one meter from the unit, to avoid the cable being pulled out of the port. Check mounting angle and positioning.
-
Page 6: Expansion Slots And Ports
The action of the mode buttons can be configured from RouterOS software to execute any user-supplied RouterOS script. You can also disable this button. The mode button can be configured in the RouterOS menu /system routerboard mode-button. Specifications For more information about this product, specifications, pictures, downloads, and test results please visit our web page: https://mikrotik.com/product /lhg_lte6_kit... -
Page 7: Operating System Support
Operating system support The device supports RouterOS software version 6. The specific factory-installed version number is indicated in the RouterOS menu /system resource. Other operating systems have not been tested. To avoid pollution of the environment, please separate the device from household waste and dispose of it in a safe manner, such as at designated waste disposal sites. - Page 8 Информация о дате изготовления устройства указана в конце серийного номера на его наклейке через дробь. Первая цифра означает номер года (последняя цифра года), две последующие означают номер недели. Изготовитель: Mikrotikls SIA, Aizkraukles iela 23, Riga, LV-1006, Латвия, support@mikrotik.com. Сделано в Китае, Латвии или Литве. Cм. на упаковке.
-
Page 9: Ce Declaration Of Conformity
WLAN et LTE conformément aux réglementations ETSI. Pour plus d'informations, voir la déclaration de conformité ci-dessus / Questo dispositivo MikroTik è conforme ai limiti massimi di potenza di trasmissione WLAN e LTE in conformità con le normative ETSI. Per ulteriori informazioni, consultare la dichiarazione di conformità...
Need help?
Do you have a question about the LHG kit Series and is the answer not in the manual?
Questions and answers