MikroTik LHG Series User Manual
Hide thumbs
Also See for LHG Series:
- Manual (9 pages) ,
- Quick setup manual (3 pages) ,
- Quick start manual (9 pages)
Table of Contents
Advertisement
Quick Links
LHG series
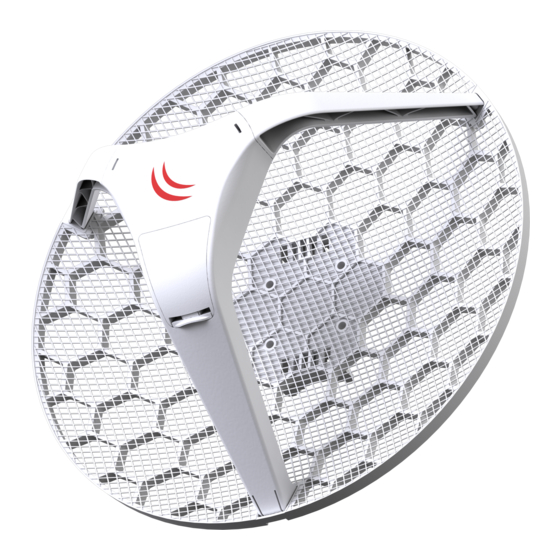
The LHG is an outdoor wireless router with a built-in directional antenna. It can be used as a CPE or for point to point links (use RouterOS
wireless mode "bridge" to work as a single-client AP for point to point scenarios).
Assembly
Attach the two legs to the LHG case, then snap the assembled LHG unit to the grid in the appropriate locations. Fix the legs in place with two
self thread screws (Included, use Phillips screw driver PH2). The package also contains a grounding cable connector, and a 5 degree angle
adapter. More detailed instructions available on the product page on https://mikrotik.com/products/.
Connecting
1.
Open the ethernet door to connect an ethernet cable to the ethernet port, connect the other end of the ethernet cable to the included
PoE injector.
2.
Plug the PoE injector into your network switch or ISP internet outlet.
3.
Plug the included power supply into the PoE injector to start up the device.
4.
Set LAN computer IP configuration to automatic (DHCP).
5.
Default IP address of the unit is 192.168.88.1, open this address in your web browser to start configuration. The username is admin
and there is no password.
The device is preconfigured as a wireless client and all you need to do is select the AP to connect to and set a device password. You can do
this in the QuickSet tab that is opened by default.
In case IP connection is not available, Winbox can be used to connect to the MAC address of the device.
In case you wish to boot the device from network, for example to use MikroTik Netinstall, hold the RESET button of the device when starting it,
until the LED light turns off, then the device will start to look for Netinstall servers.
More information about using RouterOS and connecting to this device in our documentation:
Powering
The device accepts powering only from Passive PoE injectors.
Extension slots and ports
One 10/100 Ethernet port, supporting automatic cross/straight cable correction (Auto MDI/X), so you can use either straight or cross-
over cables for connecting to other network devices.
One Integrated 2x2 MIMO wireless device with built-in grid antenna.
Buttons and jumpers
The reset button has three functions:
Hold this button during boot time until LED light starts flashing, release the button to reset RouterOS configuration (total 5 seconds).
•
Keep holding for 5 more seconds, LED turns solid, release now to turn on CAPs mode (total 10 seconds).
•
Or keep holding the button for 5 more seconds until until LED turns off, then release it to make the RouterBOARD look for Netinstall
•
servers (total 15 seconds).
Regardless of the above option used, the system will load the backup RouterBOOT loader if the button is pressed before power is applied to the
device. Useful for RouterBOOT debugging and recovery.
The device includes a grounding connection (marked
the device will be used. This is to substantially reduce risk of ESD and lightning damage.
Operating system support
The device supports RouterOS software with the version number at or above what is indicated in the RouterOS menu /system resource.
Other operating systems have not been tested.
See
https://www.mikrotik.com/
for more information or contact
) which you should connect to the grounding installation of the tower or building where
support@mikrotik.com
http://mt.lv/help
20-Oct-17
Advertisement
Table of Contents

Related Manuals for MikroTik LHG Series


Summary of Contents for MikroTik LHG Series
-
Page 1: Operating System Support
In case IP connection is not available, Winbox can be used to connect to the MAC address of the device. In case you wish to boot the device from network, for example to use MikroTik Netinstall, hold the RESET button of the device when starting it, until the LED light turns off, then the device will start to look for Netinstall servers. -
Page 2: Federal Communication Commission Interference Statement
The OEM is required to comply with all 47CFR labeling instructions and requirements for the finished products. Changes or modifications not expressly approved by MikroTik could void the OEM authority to install or operate the equipment. OEMs must test their final product to comply with unintentional radiators (FCC section 15.107 and 15.109) before declaring compliance of their final product to... -
Page 3: Industry Canada
(c.-à-d., qu'ils ont la priorité) des bandes de 5 250 à 5 350 MHz et de 5 650 à 5 850 MHz et, d’autre part, que ces radars pourraient causer du brouillage et/ou des dommages aux dispositifs de RL-EL https://www.mikrotik.com/ for more information or contact support@mikrotik.com... -
Page 4: Ce Declaration Of Conformity
Manufacturer: Mikrotikls SIA, Pernavas street 46, Riga, Latvia, LV1009. Full Declaration of Conformity (DoC) may be obtained by visiting our product page on https://mikrotik.com [EN] English Hereby, MIKROTĪKLS SIA declares that the radio equipment RBwAPG-60ad is in compliance with Directive 2014/53/EU [BG] Bulgarian С...
Need help?
Do you have a question about the LHG Series and is the answer not in the manual?
Questions and answers