MikroTik LHG Series Quick Setup Manual
Hide thumbs
Also See for LHG Series:
- Manual (9 pages) ,
- User manual (4 pages) ,
- Quick start manual (9 pages)
Table of Contents
Advertisement
Quick Links
LHG series
Quick Setup Guide and Warranty Information
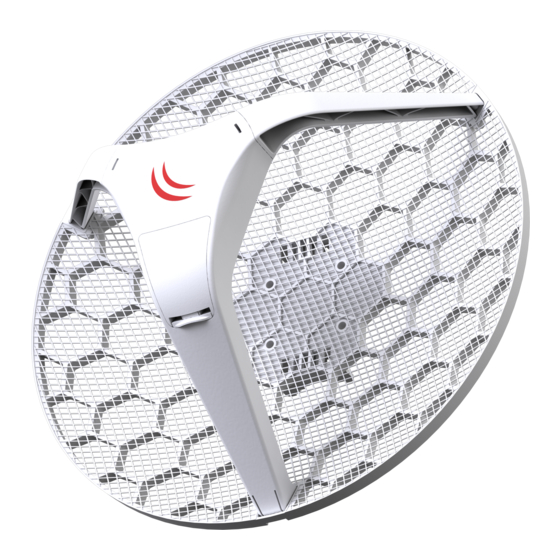
The LHG is an outdoor wireless router with a built in directional antenna. It can be used as a CPE or for point to point links (use RouterOS
wireless mode "bridge" to work as a single-client AP for point to point scenarios).
Assembly
Attach the two legs to the LHG case, then snap the assembed LHG unit to the grid in the appropriate locations. Fix the legs in place with two
self thread screws (Included, use philips screw driver PH2). The package also contains a grounding cable connector, and a 5 degree angle
adapter. More detailed instructions available on the product page on
Connecting
1.
Open the ethernet door to connect an ethernet cable to the ethernet port, connect the other end of the ethernet cable to the included
PoE injector
2.
Plug the PoE injector into your network switch or ISP internet outlet
3.
Plug the included power supply into the PoE injector to start up the device
4.
Set LAN computer IP configuration to automatic (DHCP)
5.
Default IP address of the unit is 192.168.88.1, open this address in your web browser to start configuration. The username is admin
and there is no password
The device is preconfigured as a wireless client, and all you need to do is select the AP to connect to and set a device password. You can do
this in the quickSET tab that is loaded by default.
In case IP connection is not available, Winbox can be used to connect to the MAC address of the device.
In case you wish to boot the device from network, for example to use MikroTik Netinstall, hold the RESET button of the device when starting it,
until the LED light turns off, then the device will start to look for Netinstall servers.
More information about using RouterOS and connecting to this device in our documentation: http://mt.lv/help
Powering
The device accepts powering only from Passive PoE injectors
Extension Slots and Ports
One 10/100 Ethernet port, supporting automatic cross/straight cable correction (Auto MDI/X), so you can use either straight or cross-
over cables for connecting to other network devices.
One Integrated 2x2 MIMO wireless device with built in grid antenna
Buttons and Jumpers
RouterBOOT reset button (RESET, front panel ) has three functions:
•
Hold this button during boot time until LED light starts flashing, release the button to reset RouterOS configuration (total 5 seconds)
•
Keep holding for 5 more seconds, LED turns solid, release now to turn on CAPs mode (total 10 seconds)
•
Or Keep holding the button for 5 more seconds until until LED turns off, then release it to make the RouterBOARD look for Netinstall
servers (total 15 seconds)
Power on device with pressed reset button and release it right away in order to boot backup RouterBOOT (useful for debugging situations where
RouterOS and Netinstall do not work).
The device includes a grounding connection (marked
the device will be used. This is to substantially reduce risk of ESD and lightning damage.
Operating System Support
Currently tested operating system is MikroTik RouterOS starting from version v6.38
See
www.routerboard.com
for more information. Contact
http://routerboard.com
) which you should connect to the grounding installation of the tower or building where
support@mikrotik.com
9-Jun-17
Advertisement
Table of Contents

Related Manuals for MikroTik LHG Series


Summary of Contents for MikroTik LHG Series
-
Page 1: Operating System Support
In case IP connection is not available, Winbox can be used to connect to the MAC address of the device. In case you wish to boot the device from network, for example to use MikroTik Netinstall, hold the RESET button of the device when starting it, until the LED light turns off, then the device will start to look for Netinstall servers. -
Page 2: Federal Communication Commission Interference Statement
: (1) l'appareil ne doit pas produire de brouillage, et (2) l'utilisateur de l'appareil doit accepter tout brouillage radioélectrique subi, même si le brouillage est susceptible d'en compromettre le fonctionnement. IC numbers: 7442A-LHG5ACD, 7442A-LHG5ND, 7442A-LHG5NDM, 7442A-LHG5HPND www.routerboard.com for more information. Contact support@mikrotik.com 9-Jun-17... -
Page 3: Ce Declaration Of Conformity
[NO] Norwegian MIKROTĪKLS SIA Erklærer herved at ROUTERBOARD er i samsvar med de grunnleggende krav og øvrige relevante krav i direktiv 1999/5/EF. EN. Instruction manual: Connect the power adapter to turn on the device. Open 192.168.88.1 in your web browser, to configure it. More information on http://wiki.mikrotik.com BG. Инструкция: Свържете адаптера на...
Need help?
Do you have a question about the LHG Series and is the answer not in the manual?
Questions and answers