Grundfos SCALA2 Instructions Manual
Hide thumbs
Also See for SCALA2:
- User manual ,
- Installation and operating instructions manual (52 pages) ,
- Service instructions manual (31 pages)
Table of Contents
Advertisement
Advertisement
Table of Contents

Related Manuals for Grundfos SCALA2


Summary of Contents for Grundfos SCALA2
- Page 1 GRUNDFOS INSTRUCTIONS SCALA2 Installation and operating instructions...
- Page 3 SCALA2 English (GB) Installation and operating instructions ............5 Български...
- Page 4 Instrucciones de instalación y operación ............814 SCALA2...
-
Page 5: Table Of Contents
A blue or grey circle with a white graphical symbol indi- 10.3 Expert settings, SCALA2 ..... 17 cates that an action must be taken. -
Page 6: Target Group
These installation and operating instructions are intended for This pump has been evaluated for use with water only. professional as well as non-professional users. Only use SCALA2 pumps according to the specifications stated in these installation and operating instructions. 2. Product introduction The pump is suitable for pressure boosting of fresh water in domestic water supply systems. -
Page 7: Identification
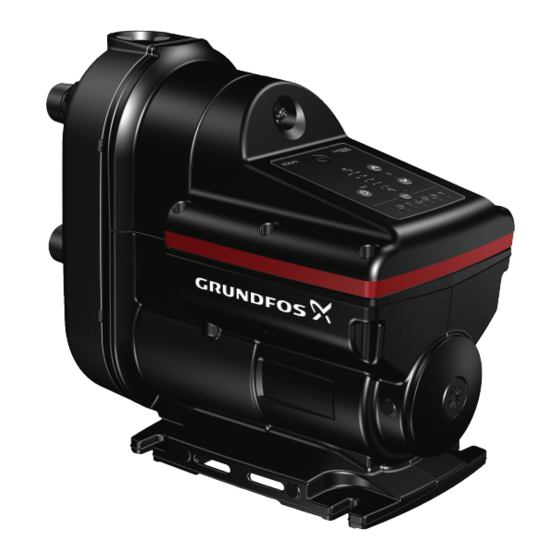
2.4 Identification 2.4.2 Type key Example: SCALA2.3-.45.A.1 x 200-240 V.50/60 Hz.C.H.D.E 2.4.1 Nameplate Code Explanation Designation SCALA2 Type range Rated flow rate Max. head [m] Standard Material code 200-240 V, 50/60 208-230 V, 60 Hz Supply voltage 1 x 115 V,... -
Page 8: Receiving The Product
The box contains the following items: 4.2.1 Maximum system pressure • 1 Grundfos SCALA2 pump • 1 quick guide Make sure that the system in which the pump is installed is designed for the maximum pump pressure. -
Page 9: Foundation
5.2 Foundation Fasten the pump to a solid horizontal foundation by means of screws through the holes in the base plate. See the figures below. Horizontal foundation How to fit the connections Pos. Description Inlet and outlet port Union nut Pipe fitting 5.4 How to reduce noise in the installation We recommend to use flexible hoses and mount the pump... -
Page 10: Locking Pin
5.5 Locking pin 5.6 Installation examples The pump may produce a clicking noise if there is positive pressure Fittings, hoses and valves are not supplied with the pump. at the inlet of the pump. In this case, you can mount a locking pin to We recommend to follow the installation examples in sections avoid this noise. - Page 11 5.6.1 Mains water pressure boosting 5.6.2 Suction from a well In some countries, boosting from the city water mains is prohibited. Please follow local regulations regarding this application. Mains water pressure boosting, SCALA2 Suction from a well Pos. Description Highest tapping point Pos. Description...
- Page 12 5.6.3 Suction from freshwater tank 5.6.4 Inlet pipe length The overview below shows the different possible inlet pipe lengths, depending on the vertical pipe length. The overview is only intended as a guide. Suction from freshwater tank Inlet pipe length Pos.
-
Page 13: Electrical Connection
6. Electrical connection 7. Starting up the product Carry out the electrical connection according to local regu- lations. Do not start the pump until it has been filled with liquid. Check that the supply voltage and frequency correspond to the values stated on the nameplate. 7.1 Priming the pump DANGER 1. -
Page 14: Pressure Setting
7.3 Pressure setting 7.3.2 Boosting from the mains The pressure settings 4.5, 5.0 and 5.5 bar (65, 73 and 80 psi) The pump can be set to provide a water pressure between 1.5 to require a positive inlet pressure and these settings must only be 5.5 bar (22 to 80 psi) at intervals of 0.5 bar (7 psi). -
Page 15: Handling And Storing The Product
8. Handling and storing the product 9. Control functions 8.1 Handling the product 9.1 Menu overview, SCALA2 Take care not to drop the pump as it may break. 8.2 Storing the product If the pump is to be stored for a period of time, for example during the winter, drain it and store it indoors in a dry location. - Page 16 9.1.1 Pressure indicator, SCALA2 9.1.2 Indicator lights for SCALA2 The pressure indicator shows the required outlet pressure from 1.5 to 5.5 bars (22 to 80 psi) in 0.5 bar (7.5 psi) intervals. Indications Description The illustration below shows a pump set to 3 bar (44 psi) indicated by two green lights, and a pump set to 3.5 bar (51 psi) indicated by...
-
Page 17: Setting The Product
How to unlock the operating panel 1. Hold down the buttons simultaneously for 3 seconds. 2. The operating panel is unlocked when symbol turns off. 10.3 Expert settings, SCALA2 Expert menu overview Expert settings are for installers only. Pos. Description... -
Page 18: Resetting To Factory Settings
All alarms must be reset manually by means of the button. back to 5 bar (72 psi). Related information 9.1.2 Indicator lights for SCALA2 10.3.4 Anti cycling The factory setting for this function is "off". This function monitors the starts and stops of the pump. -
Page 19: Servicing The Product
11.2 Customer service information For further information on service parts, see Grundfos Product Center on www.product-selection.grundfos.com. 11.3 Service kits For further information on service kits, see Grundfos Product Center at www.product-selection.grundfos.com. SCALA2 pump To remove the inlet non-return valve, follow the steps below: 1. -
Page 20: Starting Up The Product After Standstill
12. Starting up the product after standstill 1. Check that the pump is not blocked by following the instructions in section 12.1 Deblocking the pump. 2. If the pump has been drained, it must be filled with liquid before startup. See section 7.1 Priming the pump. -
Page 21: Fault Finding
14. Fault finding 14.1 Grundfos Eye operating indications Grundfos Eye Indication Description Power off No lights are on. The pump is not running. Power on Two opposite green indicator lights running in the direction of rotation of the pump. The pump is running. -
Page 22: Fault Finding Chart
See section Starting up the product after The pump is not standstill. running. The pump is blocked by impurities. Contact Grundfos Service if the problem persists. Check the water source, and prime the Dry running. pump. The maximum runtime has been ex- Check the installation for leakage and re- ceeded. - Page 23 Fault Cause Remedy Reduce the pressure to a new setpoint (maximum 3.5 bar (51 psi) + positive inlet The setpoint is set too high. The differ- pressure). ence between the outlet pressure and the inlet pressure must not exceed 3.5 Example: If the inlet pressure is 0.5 bar (7 bar (51 psi).
-
Page 24: Technical Data
15. Technical data Supply voltage Frequency Plug [Hz] 15.1 Operating conditions IEC, type E&F IEC, type I Temperature [°C (°F)] 1 x 200-240 50/60 IEC, type G Max. ambient temperature None 1 x 208-230 V, 60 Hz: 45 (113) 1 x 208-230 NEMA 6-15P 1 x 115 V, 60 Hz: 45 (113) -
Page 25: Dimensions And Weights
This product or parts of it must be disposed of in an environmentally sound way. 1. Use the public or private waste collection service. 2. If this is not possible, contact the nearest Grundfos company or service workshop. The crossed-out wheelie bin symbol on... - Page 26 Tel.: +387 33 592 480 Centre Turkey Fax: +387 33 590 465 29-33 Wing Hong Street & 68 King Lam GRUNDFOS Pumper A/S GRUNDFOS POMPA San. ve Tic. Ltd. Sti. www.ba.grundfos.com Street, Cheung Sha Wan Strømsveien 344 Gebze Organize Sanayi Bölgesi E-mail: grundfos@bih.net.ba...
- Page 27 98880508 05.2022 ECM: 1340778 www.grundfos.com...
Need help?
Do you have a question about the SCALA2 and is the answer not in the manual?
Questions and answers