Advertisement
Quick Links
Advertisement

Related Manuals for KTM 1290 SUPER DUKE R


Summary of Contents for KTM 1290 SUPER DUKE R
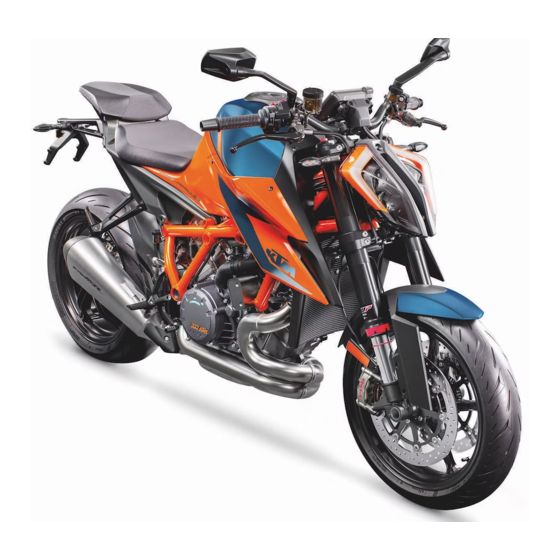
- Page 1 SETUP INSTRUCTIONS 2021 1290 SUPER DUKE R Art. no. 3214400en...
- Page 3 KTM accepts no liability for delivery options, deviations from fig- ures and descriptions, misprints, and other errors. The models portrayed partly contain special equipment that does not belong to the regular scope of supply.
-
Page 4: Means Of Representation
1 MEANS OF REPRESENTATION Symbols used The meaning of specific symbols is described below. Indicates an expected reaction (e.g. of a work step or a function). Indicates an unexpected reaction (e.g. of a work step or a function). Indicates a page reference (more information is provided on the specified page). Indicates information with more details or tips. - Page 5 To operate the vehicle, the vehicle electronics must be enabled. This process is conducted during initial setup in KTM Dealer.net. Enabling ensures that the initial setup in KTM Dealer.net is docu- mented. Enabling can be performed either temporarily, e.g. for a test ride, or permanently for vehicle handover.
- Page 6 2 SETUP – Remove cable tie(s) – Remove screws – Take off the controls from the transport holder. S04114-10 – Remove the handlebar clamp screws – Take off the handlebar clamp and transport holder. S04115-10 – Position the handlebar. The markings of the handlebar scale are located centrally between the handlebar clamp.
- Page 7 Plug in connector with sleeve. – Mount and tighten the rear mirror on both sides. S04120-01 (1290 SUPER DUKE R US) – Bond the reflectors on the right and left side of the reflec- tor holder. – Mount the reflector holder on license plate holder S04121-10 –...
- Page 8 Plug in the connector of starter relay – Mount the cover. – Charge the 12-V battery. ( p. 11) S04184-10 – Remove the protective film. – Refuel. ( p. 13) – Prepare the vehicle according to the specifications in KTM Dealer.net for handover to the customer.
- Page 9 WORK 3 Removing the passenger seat – Insert the RACE-ON key or the black ignition key into seat lock and turn clockwise. – Lift passenger seat at the front and pull it out of the bracket toward the front. – Remove the passenger seat.
- Page 10 3 WORK Mounting the front rider's seat Main work – Hook recess of the front rider's seat into guide , lower it at the rear and push it forward. – Position the locking pin in the lock housing and push the pas- senger seat down at the front.
- Page 11 WORK 3 Main work – Remove control unit and hang to the side. – Disconnect negative cable from the 12-V battery. – Remove positive terminal cover and disconnect the posi- tive cable from the 12-V battery. S03934-10 – Disconnect connector –...
- Page 12 3 WORK – Position the positive cable and mount and tighten the screw. Guideline Screw, battery termi- 4.5 Nm (3.32 lbf ft) – Mount positive terminal cover – Position negative cable and mount and tighten the screw. Guideline Screw, battery termi- 4.5 Nm S03937-10 (3.32 lbf ft)
- Page 13 WORK 3 Connecting the negative cable of the 12-V battery Warning Risk of injury Battery acid and battery gases cause serious chemical burns. – Keep 12 V batteries out of the reach of children. – Wear suitable protective clothing and safety glasses. –...
- Page 14 3 WORK Note Environmental hazard 12 V batteries contain environmentally hazardous materials. – Do not dispose of 12 V batteries as household waste. – Dispose of 12 V batteries at a collection point for used batteries. Note Environmental hazard Hazardous substances cause environmental damage. –...
- Page 15 WORK 3 – Set time and date. 3.10 Refueling Danger Fire hazard Fuel is highly flammable. The fuel in the fuel tank expands when warm and can escape if overfilled. – Do not fuel the vehicle in the vicinity of open flames or lit cigarettes. –...
- Page 16 3 WORK – Switch off the engine. – Open fuel tank filler cap. ( p. 14) – Fill the fuel tank with fuel up to the lower edge of the filler neck. Total fuel tank 16 l Super unleaded capacity, approx. (4.2 US gal) (ROZ 95) p.
- Page 17 WORK 3 – Fold up cover slowly. The fuel tank filler cap is unlocked. – Fold up fuel tank filler cap S03886-10 3.12 Closing the fuel tank filler cap Warning Fire hazard Fuel is highly flammable, toxic and a health hazard. –...
- Page 18 3 WORK Setting the date – Press the UP or DOWN button until the date is marked. – Press the SET button. The day next to Date flashes. – Press the UP or DOWN button until the current day is set. –...
-
Page 19: Technical Data
TECHNICAL DATA 4 Chassis tightening torques EJOT PT Remaining screws, chassis ® K50x12 1 Nm (0.7 lbf ft) EJOT PT Remaining screws, chassis ® K50x14 1 Nm (0.7 lbf ft) EJOT PT ® Remaining screws, chassis K50x16 2 Nm (1.5 lbf ft) Remaining screws, chassis EJOT PT ®... - Page 20 243™ Nut, shift rod 12 Nm (8.9 lbf ft) Nut, valve (1290 SUPER 4 Nm (3 lbf ft) DUKE R JP, 1290 SUPER DUKE R CN) Nut, valve (1290 SUPER 6 Nm (4.4 lbf ft) Loctite ® 243™ DUKE R EU, 1290 SUPER...
- Page 21 TECHNICAL DATA 4 Screw, rear brake disc 28 Nm (20.7 lbf ft) Loctite ® 243™ Screw, shift lever on footrest 20 Nm (14.8 lbf ft) Loctite ® 243™ bracket Screw, shift shaft deflector on 10 Nm (7.4 lbf ft) Loctite ®...
- Page 22 4 TECHNICAL DATA Nut, rear axle, shock absorber side M35x1.5 200 Nm (147.5 lbf ft) Loctite ® 262™/lock the locking wire with locking varnish Nut, rear axle M50x1.5 250 Nm (184.4 lbf ft) Thread greased/lock locking wire with locking varnish...
- Page 23 SUBSTANCES 5 Super unleaded (ROZ 95) Standard/classification – DIN EN 228 (ROZ 95) Guideline – Only use super unleaded fuel that matches or is equivalent to the specified standard. – Fuel with an ethanol content of up to 10% (E10 fuel) is safe to use. Info Do not use fuel containing methanol (e.g., M15, M85, M100) or more than 10% ethanol (e.g., E15, E25, E85, E100).
- Page 24 *3214400en* 3214400en 01/2021 KTM Sportmotorcycle GmbH 5230 Mattighofen/Austria Photo: Mitterbauer/KISKA/KTM http://www.ktm.com...
Need help?
Do you have a question about the 1290 SUPER DUKE R and is the answer not in the manual?
Questions and answers