Advertisement
Quick Links
Advertisement

Related Manuals for KTM 1290 Super Duke R 2019


Summary of Contents for KTM 1290 Super Duke R 2019
- Page 1 SETUP INSTRUCTIONS 2019 1290 Super Duke R Art. no. 3213974en...
- Page 3 KTM accepts no liability for delivery options, deviations from figures and descriptions, misprints, and other errors. The models portrayed partly contain special equipment that does not belong to the regular scope of supply.
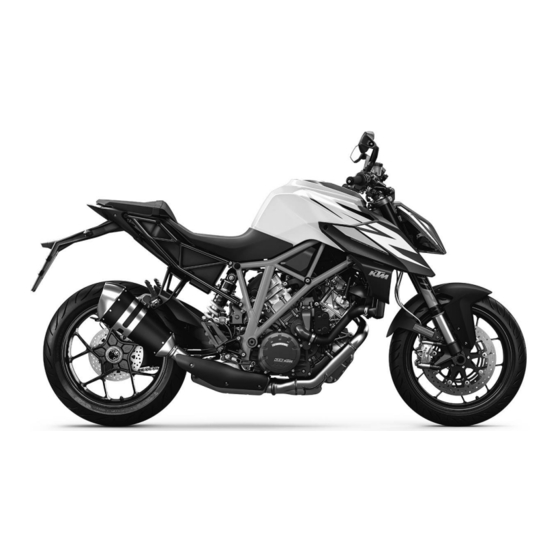
- Page 4 INTRODUCTION This document is valid for the following models: 1290 Super Duke R EU (F9903S9, F9903S2) 1290 Super Duke R JP (F9986S2) 1290 Super Duke R US (F9975S9, F9975S2)
-
Page 5: Means Of Representation
MEANS OF REPRESENTATION 1 Symbols used The meaning of specific symbols is described below. Indicates an expected reaction (e.g. of a work step or a function). Indicates an unexpected reaction (e.g. of a work step or a function). Indicates a page reference (more information is provided on the specified page). Indicates information with more details or tips. - Page 6 1 MEANS OF REPRESENTATION Indicates a current measurement. Indicates a resistance measurement. Indicates the end of an activity including potential rework. Formats used The typographical formats used in this document are explained below. Proprietary name Indicates a proprietary name. Name ®...
- Page 7 To operate the vehicle, the vehicle electronics must be enabled. This process is conducted during initial setup in KTM Dealer.net. Enabling ensures that the initial setup in KTM Dealer.net is docu- mented. Enabling can be performed either temporarily, e.g. for a test ride, or permanently for vehicle handover.
- Page 8 2 SETUP Main work – Remove the adhesive tape in the upper area of the motorcycle. S01841-10 – Roll down the film at the sides. Info To avoid damaging the motorcycle during unpacking, leave the other films on the vehicle until you have fin- ished work on the vehicle.
- Page 9 SETUP 2 Info The procedure in the event of transport damage is described in the customer service manual. – Remove cable tie(s) – Remove screws – Take off the controls from the transport holder. S01843-10 – Disconnect connector – Remove screw –...
- Page 10 2 SETUP – Remove the handlebar clamp screws – Take off the handlebar clamp and transport holder. – Remove packaging on the right turn signal. S01845-10 – Position the handlebar. The markings of the handlebar scale are located centrally between the handlebar clamp. –...
- Page 11 SETUP 2 – Position brake assembly on the handlebar. – Position brake assembly clamp on the handlebar. The holding lug of the clamp engages in the combination switch. – Mount and tighten screws Guideline Remaining screws, 10 Nm (7.4 lbf ft) chassis S01847-10 –...
- Page 12 2 SETUP – Position the combination instrument rack on the handlebar. – Mount screw but do not tighten yet. – Move the combination instrument into the desired position. – Tighten screw Guideline Screw, combination 2 Nm (1.5 lbf ft) instrument clamping –...
- Page 13 SETUP 2 – Mount splash protector with screws on license plate bracket Guideline Remaining screws, EJOT PT ® 1 Nm (0.7 lbf ft) chassis K50x12 S01851-10...
- Page 14 2 SETUP – Mount rear reflector with spring washers on holding plate – Mount retaining plate on license plate holder (All EU/JP models) – Mount license plate holder on license plate bracket (1290 Super Duke R US) – Bond the reflectors on the right and left side of the reflec- tor holder.
- Page 15 SETUP 2 – Carefully loosen and remove the tension belt from the frame. Info An assistant prevents the motorcycle from falling over. – Carefully loosen and remove the tension belts around the fork legs. The vehicle is released at the front. –...
- Page 16 Plug in the connector of starter relay – Charge the 12-V battery. ( p. 27) – Remove the protective film. – Refuel. ( p. 30) – Prepare the vehicle according to the specifications in the KTM Dealer.net for handover to the customer. S01856-10...
-
Page 17: Mounting The Passenger Seat
WORK 3 Removing the passenger seat – Insert the Race‑on key or the black ignition key into the seat lock and turn clockwise. – Lift the passenger seat at the front and pull it out of the bracket toward the front. –... - Page 18 3 WORK Removing the front rider's seat Preparatory work – Remove the passenger seat. ( p. 15) Main work – Lift the rear of the front rider's seat. – Detach the front of the front rider's seat and take it off. E00694-10...
- Page 19 WORK 3 Mounting the front rider's seat Main work – Attach recesses on the front rider's seat to the fuel tank and push the front rider's seat forward while lowering it. Holding lug is located in the recess. – Check that the front rider's seat is mounted correctly. 401921-10 Finishing work –...
-
Page 20: Removing The 12-V Battery
3 WORK Removing the 12-V battery Warning Risk of injury Battery acid and battery gases cause serious chemical burns. – Keep 12 V batteries out of the reach of children. – Wear suitable protective clothing and safety glasses. – Avoid contact with battery acid and battery gases. –... - Page 21 WORK 3 Main work – Remove screw – Lift cover at the rear and pull toward the rear. – Fold up the cover. T00488-10 – Disconnect negative cable from the 12-V battery. – Remove positive terminal cover and disconnect the posi- tive cable from the 12-V battery.
-
Page 22: Installing The 12-V Battery
3 WORK Installing the 12-V battery Warning Risk of injury Battery acid and battery gases cause serious chemical burns. – Keep 12 V batteries out of the reach of children. – Wear suitable protective clothing and safety glasses. – Avoid contact with battery acid and battery gases. –... - Page 23 WORK 3 Main work – Fold up cover – Insert 12-V battery into the battery compartment. 12-V battery (YTX14-BS) L01484-10 – Position the positive cable and mount and tighten the screw. Guideline Screw, battery termi- 4.5 Nm (3.32 lbf ft) –...
- Page 24 3 WORK – Position cover Screw heads engage in recesses – Mount and tighten screw V01154-10 Finishing work – Mount the front rider's seat. ( p. 17) – Mount the passenger seat. ( p. 15) – Adjust the time and date.
- Page 25 WORK 3 Disconnecting the negative cable of the 12-V battery Warning Risk of injury Battery acid and battery gases cause serious chemical burns. – Keep 12 V batteries out of the reach of children. – Wear suitable protective clothing and safety glasses. –...
- Page 26 3 WORK Main work – Remove screw – Lift cover at the rear and pull toward the rear. – Fold up the cover. T00488-10 – Disconnect negative cable from the 12-V battery. T00491-11...
- Page 27 WORK 3 Connecting the negative cable of the 12-V battery Warning Risk of injury Battery acid and battery gases cause serious chemical burns. – Keep 12 V batteries out of the reach of children. – Wear suitable protective clothing and safety glasses. –...
- Page 28 3 WORK Main work – Position negative cable ; mount and tighten the screw. Guideline Screw, battery termi- 4.5 Nm (3.32 lbf ft) T00491-10 – Fold down cover – Mount and tighten screw Guideline Remaining screws, 5 Nm (3.7 lbf ft) chassis T00489-11 Finishing work...
-
Page 29: Charging The 12-V Battery
WORK 3 Charging the 12-V battery Warning Risk of injury Battery acid and battery gases cause serious chemical burns. – Keep 12 V batteries out of the reach of children. – Wear suitable protective clothing and safety glasses. – Avoid contact with battery acid and battery gases. –... - Page 30 3 WORK Info Even when there is no load on the 12-V battery, it discharges steadily. The charging level and the method of charging are very important for the service life of the 12-V battery. Rapid recharging with a high charging current shortens the service life of the battery. If the charging current, charging voltage, and charging time are exceeded, the 12-V battery will be destroyed.
- Page 31 WORK 3 Main work – Connect the battery charger to the 12-V battery. Adjust the battery charger. EU battery charger XCharge‑professional (00029095050) Alternative 1 US battery charger XCharge‑professional (00029095051) Alternative 2 311910-10 UK battery charger XCharge‑professional (00029095052) Alternative 3 CH battery charger XCharge‑professional (00029095053) Info Follow the instructions of the charger and the manual.
- Page 32 3 WORK Guideline The charging current, charging voltage, and charging time must not be exceeded. Recharge the 12-V battery 3 months regularly when the motorcy- cle is not being used Finishing work – Connect the negative cable of the 12-V battery. ( p.
- Page 33 WORK 3 Warning Danger of poisoning Fuel is poisonous and a health hazard. – Avoid skin, eye and clothing contact with fuel. – Immediately consult a doctor if you swallow fuel. – Do not inhale fuel vapors. – In case of skin contact, rinse the affected area with plenty of water. –...
- Page 34 3 WORK – Switch off the engine. – Open fuel tank filler cap. ( p. 32) – Fill the fuel tank with fuel up to the lower edge of the filler neck. Total fuel tank 18 l Super unleaded capacity, approx. (4.8 US gal) (ROZ 95/RON 95/PON 91)
- Page 35 WORK 3 Warning Danger of poisoning Fuel is poisonous and a health hazard. – Avoid skin, eye and clothing contact with fuel. – Immediately consult a doctor if you swallow fuel. – Do not inhale fuel vapors. – In case of skin contact, rinse the affected area with plenty of water. –...
- Page 36 3 WORK – Fold up cover slowly. The fuel tank filler cap is unlocked. – Fold up fuel tank filler cap S01718-10 3.12 Closing the fuel tank filler cap Warning Fire hazard Fuel is highly flammable, toxic and a health hazard. –...
- Page 37 WORK 3 3.13 Clock/Date Condition • The motorcycle is stationary. – Press the SET button when the menu is closed. – Press the UP or DOWN button until the Settings menu is marked on the display. Press the SET button to open the menu. –...
-
Page 38: Technical Data
4 TECHNICAL DATA Chassis tightening torques EJOT PT Remaining screws, chassis ® K50x12 1 Nm (0.7 lbf ft) EJOT PT Remaining screws, chassis ® K50x14 1 Nm (0.7 lbf ft) EJOT PT ® Remaining screws, chassis K50x16 2 Nm (1.5 lbf ft) Remaining screws, chassis EJOT PT ®... - Page 39 TECHNICAL DATA 4 Screw, chain sliding guard 5 Nm (3.7 lbf ft) Screw, combination instrument 3.5 Nm (2.58 lbf ft) Screw, combination switch, right 5 Nm (3.7 lbf ft) Screw, front turn signal bracket 3 Nm (2.2 lbf ft) Screw, fuel level sensor 3 Nm (2.2 lbf ft) Screw, fuel tank filler cap 3 Nm (2.2 lbf ft)
- Page 40 4 TECHNICAL DATA Screw, clutch assembly 5 Nm (3.7 lbf ft) Loctite ® 243™ Screw, connecting piece, rear 10 Nm (7.4 lbf ft) Loctite ® 243™ brake line Screw, cooler retaining bracket 7 Nm (5.2 lbf ft) Screw, exhaust clamp on main 8 Nm (5.9 lbf ft) silencer Screw, exhaust clamp on manifold...
- Page 41 TECHNICAL DATA 4 Screw, side stand stub 6 Nm (4.4 lbf ft) Loctite ® 243™ Screw, steering damper bracket on 8 Nm (5.9 lbf ft) Loctite ® 243™ frame Screw, step plate for foot brake 10 Nm (7.4 lbf ft) Loctite ®...
- Page 42 4 TECHNICAL DATA Screw, front rider footrest bracket 25 Nm (18.4 lbf ft) Loctite ® 243™ Screw, handlebar clamp 20 Nm (14.8 lbf ft) Screw, ignition lock (tamper-proof 25 Nm (18.4 lbf ft) screw) Screw, rear brake caliper 25 Nm (18.4 lbf ft) Loctite ®...
- Page 43 TECHNICAL DATA 4 Remaining nuts, chassis 45 Nm (33.2 lbf ft) Remaining screws, chassis 45 Nm (33.2 lbf ft) Screw, engine bearer 45 Nm (33.2 lbf ft) Loctite ® 243™ Screw, front brake caliper 45 Nm (33.2 lbf ft) Loctite ®...
- Page 44 4 TECHNICAL DATA Screw, eccentric 70 Nm (51.6 lbf ft) Nut, fork pivot M19x1.5 130 Nm (95.9 lbf ft) Thread greased Nut, seat lock M22x1.5 6 Nm (4.4 lbf ft) Screw, front wheel spindle M25x1.5 45 Nm (33.2 lbf ft) Thread greased Screw, steering head, top M25x1.5...
- Page 45 SUBSTANCES 5 Super unleaded (ROZ 95/RON 95/PON 91) Standard/classification – DIN EN 228 (ROZ 95/RON 95/PON 91) Guideline – Only use unleaded super fuel that matches or is equivalent to the specified fuel grade. – Fuel with an ethanol content of up to 10 % (E10 fuel) is safe to use. Info Do not use fuel containing methanol (e.
- Page 46 *3213974en* 3213974en 07/2018 KTM Sportmotorcycle GmbH Photo: Mitterbauer/KTM 5230 Mattighofen/Austria http://www.ktm.com...
Need help?
Do you have a question about the 1290 Super Duke R 2019 and is the answer not in the manual?
Questions and answers