Table of Contents
Advertisement
Quick Links
Advertisement
Table of Contents

Related Manuals for Dyness POWERCUBE Series


Summary of Contents for Dyness POWERCUBE Series
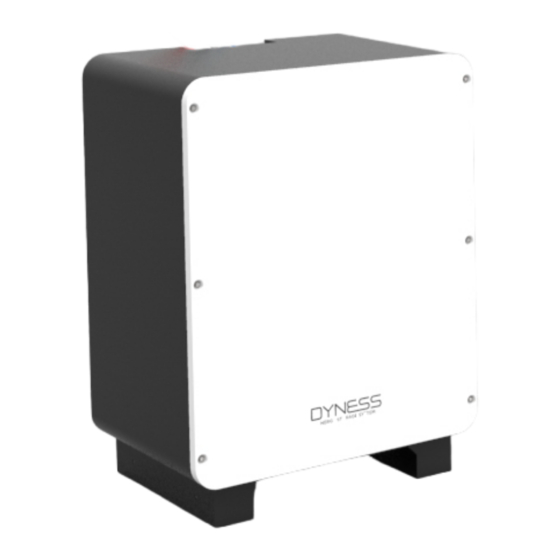
- Page 1 POWERCUBE User Manual...
-
Page 2: Table Of Contents
POWERCUBE User Manual Content Statement of Law ............................. 1 Safety Precautions ............................ 2 Preface ..............................3 1 Introduction ............................4 1.1 Brief Introduction .......................... 4 1.2 Product Properties ........................4 1.3 Product identity definition ......................4 2 Product Specification ..........................6 2.1 Size and Weight .......................... -
Page 3: Statement Of Law
Customer can check the related information on the website of Jiangsu Daqin New Energy Technology Co., Ltd when the product or technology is updated. Web URL:http://www.dyness.net/ Please note that the product can be modified without prior notice. Revision History Revision NO. -
Page 4: Safety Precautions
DIP mode, expand the capacity or other operations that won’t harm the product, customer needs to contact DYNESS and inform the product ID. DYNESS will record the case, confirm the operation can be operated and will authorize. After... -
Page 5: Preface
This user manual describes 4Box, 5Box, 6Box and 7Box in the Powercube series. It details the basic structure, parameters, installation, and operation and maintenance of the equipment. -
Page 6: Introduction
1.2 Product Properties Powercube series energy storage product’s anode materials are lithium iron phosphate, battery cells are managed effectively by BMS with better performance, the system feature as below: ... - Page 7 POWERCUBE User Manual Battery voltage is higher than safe voltage, direct contact with electric shock hazard. Be careful with your actions and be aware of the dangers. Read the user manual before using. The scrapped battery cannot be put into the garbage can and must be professionally recycled.
-
Page 8: Product Specification
POWERCUBE User Manual 2 Product Specification 2.1 Size and Weight Table 2-1 Powercube series Device Model Dimension Module Nominal Nominal Product Series Weight (mm) type Voltage Capacity Level B4850 DC48V 200Ah ≈151kg IP65 492×600×862 Powercube-4BOX ≈183 kg DC48V 300Ah IP65 ≈176 kg... - Page 9 POWERCUBE User Manual Table 2-3 Interface Definition Item Name Definition Power cable- negative Interface 1 Reserve waterproof connector Power cable- negative The battery DC output negative pole Interface waterproof connector RJ45 network cable Reserve Interface connector CAN/RS485 communication interface RJ45 network cable (Factory default CAN communication Interface connector...
-
Page 10: Dip Switch Definition And Description
Note: Before opening the cover to change the DIP mode, contact DYNESS to inform the ID, DYNESS will record the battery ID and authorizes the opening operation. Only authorized by Dyness to operate. Except for changing the DIP mode, any other operations cannot be done. - Page 11 Note: For more information of matching inverter brands, please subject to the latest document <The list of compatibility between Dyness ESS and Inverters >. Note: 1.After the whole system connection,set the master DIP mode according to the inverter model firstly,then start the battery.
- Page 12 POWERCUBE User Manual Host DIP Switch mode 1 module ADD: 0010 DIP Switch mode 2 ADD: 0100 DIP Switch mode 3 ADD: 0110 Slave modules DIP Switch mode 4 ADD: 0000...
-
Page 13: Battery Management System(Bms)
POWERCUBE User Manual 2.4 Battery Management System(BMS) 2.4.1 Voltage Protection Discharging Low Voltage Protection: When any battery cell voltage is lower than the protection value during discharging, the over- discharging protection starts, and the battery buzzer makes an alarm sound. Then battery system stops supplying power to the outside. -
Page 14: Installation And Configuration
POWERCUBE User Manual Self-Shutdown: When device connects no external loads for over 72hours, device will dormant standby automatically. Caution Battery’s maximum discharging current should be more than load’s maximum working current. 3 Installation and Configuration 3.1 Ready for installation Safety Requirement This system can only be installed by personnel who have been trained in the power supply system and have sufficient knowledge of the power system. -
Page 15: Technical Preparation
POWERCUBE User Manual Table 3-1 Tool instrument Name Screwdriver (word, cross) AVO meter Wrench Clamp meter Inclined pliers Insulating tape Needle nose pliers The thermometer Clip forceps Wrist strap Wire stripper AVO meter Electric drill Tape 3.1.3 Technical preparation Electrical interface check Devices that can be connected directly to the battery can be user equipment, power supplies, or other power supplies. - Page 16 POWERCUBE User Manual Open the package, the installation personnel should read the technical documents, verify the list, according to the configuration table and packing list, ensure objects are complete and intact, if the internal packing is damaged, should be examined and recorded in detail.
-
Page 17: Engineering Coordination
POWERCUBE User Manual Communication Black/L2000mm/ cable-to Double RJ45 plug inverter2 3.1.5 Engineering coordination Attention should be paid to the following items before construction: Power line specification. The power line specification shall meet the requirements of maximum discharge current for each product in table2-2. Mounting space and bearing capacity. -
Page 18: Mechanical Installation
POWERCUBE User Manual 3.2.2 Mechanical installation Case1: If the normal power of inverter is ≤ 5kW, Mechanical installation shown as follows: 1. Fix the Powercube cabinet to the mounting position and remove the front cover. Pass the total positive cable and the total negative cable ( Power cable- positive1/ Power cable-negative1 ) through the waterproof connector on the back of the cabinet, and... - Page 19 POWERCUBE User Manual Item Name Definition Power cable- positive Interface 5 The battery DC output positive pole waterproof connector Power cable- positive Interface 6 Reserve waterproof connector 2. Place the battery unit on the cabinet bracket as shown in the figure and push it into the cabinet to the installation position.
- Page 20 POWERCUBE User Manual Case 2: If the normal power of inverter is > 5kW, Mechanical installation shown as follows: 1. Fix the Powercube cabinet to the mounting position and remove the front cover. Pass the total positive cable and the total negative cable ( Power cable- positive1, Power cable- positive2 and Power cable-negative1, Power cable-negative2 ) through the...
-
Page 21: Electrical Installation
POWERCUBE User Manual 2. Place the battery unit on the cabinet bracket as shown in the figure and push it into the cabinet to the installation position. Figure3-5 4. Fix the battery unit in the cabinet with nuts through the mounting holes top on the hanging ears of the battery module front panel. - Page 22 POWERCUBE User Manual poles of the battery shall be connected respectively to the positive and negative poles of the opposite terminal. It is better to add a circuit breaker between the inverter and the battery system. The selection of the circuit breaker requires: Voltage: U>60V Inverter power Current: I =...
- Page 23 POWERCUBE User Manual PIN5 Blue/white CANL PIN6 Green NC/NULL PIN7 Brown/white PIN8 Brown NC/NULL 3. Connect to the inverter Connect the total positive cable( Power cable- positive1 ) and the total negative cable( Power cable- negative 1 ) that are pulled out from the outside of the cabinet to the circuit breaker(the other end of the circuit breaker is connected to the inverter), and the external CAN communication line 2( Communication cable-to inverter2 ) is connected to the inverter.
- Page 24 POWERCUBE User Manual Case 2: If the normal power of inverter is >5kW, power cable installation as follows: 1. Install the power cable Install the Parallel cable- negative and the Parallel cable- positive as shown in Figure 3-8, then connect the positive cable and the total negative cable (use Power cable- positive1, Power cable- positive2 and Power cable- negative1, Power cable- negative2 ).
- Page 25 POWERCUBE User Manual Inverter Circuit breaker Communication cable-to inverter2 Power cable- negative1 Power cable- Power cable- positive 2 negative2 Power cable- Communication positive 1 cable-to inverter1 Parallel cable- Parallel cable- negative positive Communication parallel cable...
- Page 26 POWERCUBE User Manual Figure 3-8 Wiring diagram Table 3-5 Battery& Inverter power matching table B4850 B4874 Inverter Min. System Min. System Output Powercube Powercube parallel Energy parallel Energy power /kw series series number (kWh) number (kWh) Powercube- Powercube- ≤4.8 kW 14.4 5Box 5Box...
-
Page 27: Use, Maintenance And Troubleshooting
POWERCUBE User Manual 4 Use, maintenance and troubleshooting 4.1 Battery system usage and operation instructions After completing the electrical installation, follow these steps to start the battery system. Press the ON/OFF button to the ON position, press and hold the SW button for 3 seconds. -
Page 28: Alarm Description And Processing
POWERCUBE User Manual 4.2 Alarm description and processing When the protection action or fault occurs in the system, the alarm signal will be given through the working status indicator on the front panel of the battery module. The network management can query the specific alarm categories. If the fault such as single cell overvoltage, charging over-current, under-voltage protection, high-temp protection and other abnormalities which affects the output, please deal with it according to Table 4-1. - Page 29 POWERCUBE User Manual The power cable sparks Power Turn off the battery, check once power on and connection short- the cause of the short circuit ALM light RED circuit The DIP setting of the host is wrong/ the battery type of the inverter is wrong/ Communication...
- Page 30 Jiangsu Daqin New Energy Tech Co., Ltd Address: 158# South Ji'an Road, Hi-Tech District, Yangzhou City, Jiangsu Province, China, 211400. Email: Sales@dyness.net Website: www.dyness.net...
Need help?
Do you have a question about the POWERCUBE Series and is the answer not in the manual?
Questions and answers