Table of Contents
Advertisement
Quick Links
Instruction Manual
Medical Weighing Equipment
<Usage Conditions>
Temperature Range
: 5 to 35°C/41 to 95°F
Relative Humidity Range
: 30 to 80%
(without condensation)
Maximum Altitude
: 2,000m ASL/6,500ft ASL
Atmospheric Pressure Range : 86 to106kPa
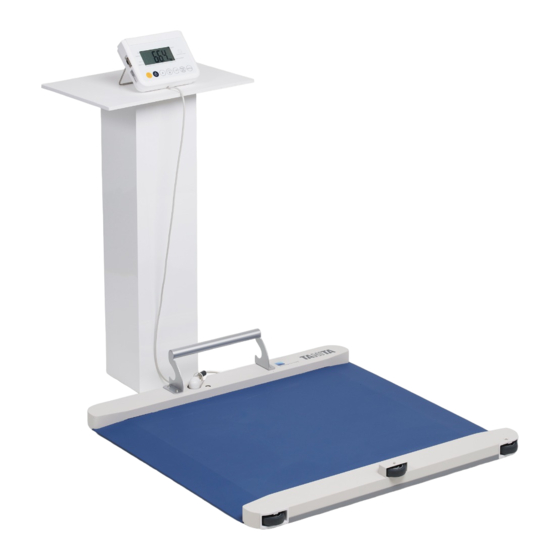
PW-650MA
*The pictured stand is not for sale.
*Images in this manual are for illustrative purposes only.
Read this Instruction Manual carefully and keep it for future reference.
<Storage/Transport Conditions>
Temperature Range
: -10 to 60°C/14 to 140°F
Relative Humidity Range
: 10 to 90% (without condensation)
Atmospheric Pressure Range
: 70 to 106kPa
To avoid malfunctions, avoid storing the equipment in a location that is
subject to direct sunlight, significant temperature changes, dampness, large
amounts of dust, the risk of vibration or impact, or near naked flames.
Advertisement
Table of Contents

Related Manuals for Tanita PW-650MA


Summary of Contents for Tanita PW-650MA
- Page 1 Instruction Manual Medical Weighing Equipment PW-650MA *The pictured stand is not for sale. *Images in this manual are for illustrative purposes only. <Usage Conditions> <Storage/Transport Conditions> Temperature Range : 5 to 35°C/41 to 95°F Temperature Range : -10 to 60°C/14 to 140°F...
- Page 2 Intended use ・This equipment has been calibrated as a precision weighing instrument and can be used to certify weights and/or business transactions. ・It can be used to obtain reference data during medical examinations, such as periodic checkups, and can help the prevention of obesity. Efficiency Measurements can be taken quickly and easily, causing minimal inconvenience to the patient during measurements.
-
Page 3: Table Of Contents
Contents Before use For Your Safety ……………………………… 4 Part Names/Accessories……………………… 9 Preparations Before Use……………………… 11 How to use How to Use …………………………………… 16 Measuring Weight ………………………………… 16 Weight Lock Mode ………………………………… 16 Using Tare …………………………………………… 17 Using a Preset Tare ………………………………… 17 Canceling the Preset Tare Temporarily …………... -
Page 4: For Your Safety
Please familiarise yourself with this information to ensure safe operation of this equipment. The PW-650MA is not diagnostic equipment. In order to make an accurate diagnosis, in addition to the result of PW-650MA, the doctor in charge should conduct appropriate examinations and consider the results. - Page 5 Caution Do not jump on the equipment. Do not lean against the equipment. Do not tilt the equipment. Do not use this equipment near other products that emit electromagnetic waves. Do not insert fingers into any of the gaps or holes. Do not apply force to the display.
- Page 6 For Your Safety (continued) For Accurate Measurements Do not take measurements while using transmitting devices such as mobile phones, as these may affect readings. Do not apply your full weight to the rail. Prohibited Doing so may cause incorrect measurement. Use the equipment under the same conditions and in the same position as much as possible for accurate tracking of changes.
- Page 7 Regular Maintenance TANITA recommends that each facility conduct periodic checks of each unit. 1. Check the following at least daily: • Check that the unit is on a stable and level surface, e.g. on firm flooring, not on a thick carpet •...
- Page 8 For Your Safety (continued) Usage Precautions *This product is designed as a stationary equipment. *This product is not intended to be moved by the operator. When lifting 1. When pulling the equipment to move it after use, first disconnect the AC adapter and connecting cable.
-
Page 9: Part Names/Accessories
Part Names/Accessories Control Unit Battery Compartment Connector DC Jack for AC Adapter Connecting Cable Platform Connector Attachment Rail Handle Level Gauge Measurement Area Caster x 3 Adjustable Feet x 4 Accessories □ □ Instruction Manual AC Adapter... - Page 10 Part Names/Accessories (continued) Control Panel Turn power ON / Input Preset Tare value Scale reset to zero Turn Weight Lock Turn power OFF function ON/OFF Increase numerical value Setup various functions Tare / Decrease numerical value STEP ON : Start measuring weight. Net / Net(PT) : Indicates that the tare value is input.
-
Page 11: Preparations Before Use
Preparations Before Use How to Install Correctly Use the product on a firm, level and stable surface. Do not install in a location with direct sunlight, near a heater or directly contacted by air conditioning. Avoid using in locations with extreme changes in temperature. Do not install in locations with high humidity or moisture. - Page 12 Insert the AC adapter plug into DC jack socket of the control unit, and plug the AC adapter into a wall socket. Note Use only genuine Tanita products. When using the AC adapter, please use it after removing the batteries.
- Page 13 Emergency Shutdown Loosen the screw to slide the Battery Compartment out Keep the area around the plug socket clear during operation of the equipment in case of an emergency. Pull out the AC Adapter in case of an emergency. Required...
- Page 14 Preparations Before Use (continued) Setting Automatic Power Off Time Automatic Power Off is a function that turns off the power automatically after the set time has passed if no operations are being performed. Press blinks, then is displayed. Press while nothing is on the platform. Enters the settings mode.
- Page 15 Press to set the desired time. Saves the set time and finishes. is not pressed after the time is changed, the changed time will not be saved. When is displayed, the setting is completed.
-
Page 16: How To Use
How to Use Measuring Weight Press blinks. Step onto the center of the platform once is displayed. After load is stabilized, "Stabilized" ◀ lights up. Step off the platform when measurement is finished. Display returns to Weight Lock Mode This product has weight lock function. In order to use this function, enable the “Weight Lock Mode” in advance. When this function is enabled, the display is locked after the weighing value is stabilized. -
Page 17: Using Tare
Using Tare Maximum 200k can be measured including the tare weight and measured weight. Press blinks, then is displayed. With nothing on the platform, first place the item for the tare weight (chair, etc.), then press *The maximum tare weight is 100k . The measured value is set as the tare weight and is displayed. - Page 18 How to Use (continued) Press while nothing is on the platform. ▶"Net(PT)", and blink. Set the preset tare weight using *Preset tare weight can be set in 0.1k increments. *The maximum preset tare weight is 100k . Press The preset tare weight is selected. Note is not pressed, the preset tare weight is automatically selected if it is not changed for 10 seconds.
-
Page 19: Canceling The Preset Tare Temporarily
Canceling the Preset Tare Temporarily The set preset tare can be canceled temporarily. Press while a preset tare weight is being subtracted and nothing is on the platform. The set preset tare weight is canceled and the display returns Note To completely cancel it, change the preset tare weight to (see "Changing the Preset Tare Weight"). -
Page 20: Various Settings
Various Settings Time Settings Time is set at the factory, but may need to be corrected, so please set it again (the internal clock backup batter may be depleted when using this product for the first time. Connect the AC adapter for at least two days, or charge by insert- ing AA batteries. - Page 21 Select the day using , then press The currently set day is displayed. *The flashing section can be changed from 1 to the number of the last day in the set month. Select the hour using , then press The currently set hour is displayed. *The flashing section can be changed from 0 to 23.
-
Page 22: External Output Settings
Various Settings (continued) External Output Settings Use external output settings to select an external device to connect to this product. Press blinks, then is displayed. Press while nothing is on the platform. Enters the settings mode. Select using or , then press Select the external output port using or , then press... -
Page 23: Confirmation Software Version Number
External output is available only in Weight Lock Mode. If you set printer as the output destination, you can select language. Change language using or , then press . (English is the factory setting.) Confirmation Software Version Number Press blinks, then is displayed. Press while nothing is on the platform. -
Page 24: Output Data Format
Output Data Format This explanation is for the interface to output the readings from PW-650MA to external equipment (e.g. PC) as a RS-232C-compliant signal. Specifications Communication standard EIA RS-232C Communication method Asynchronous Signal speed 9,600bps Data bit length 8bit Parity... - Page 25 Transmission Data Transmission data is output immediately after measurement regard-less of the status of the reception side (e.g. PC). Therefore, the reception side must always be ready to receive data before any measurements are taken. Item Header Output data (ASCII code) Details Control data Fixed at 16...
-
Page 26: Troubleshooting
Troubleshooting If you think your equipment is malfunctioning, check the following before ordering repairs. Reference Issue Items to check page When using the AC adapter Makes sure the AC adapter plug and DC jack are connected and the plug is connected to an outlet. Nothing is displayed When using batteries when... -
Page 27: Specifications
Specifications Model number PW-650MA Classification Class Im Accuracy class NAWI Class III Input: 100-240V AC 50-60Hz AC adapter Output: 9V DC (ATM012T-W090V Class II ) Power source Plug Type: Center minus Battery 9V DC LR6 (AA alkaline battery)×6 Electric current range 10.8VA... - Page 28 <Manufacturer> <EU Representative> TANITA Corporation TANITA Europe B.V. TANITA Corporation of America, Inc. 2625 South Clearbrook Drive, 1-14-2 Maeno-cho, Itabashi-ku, Tokyo Hoogoorddreef 56-E, 1101 BE Amsterdam, Arlington Heights, Illinois 60005 U.S.A 174-8630 Japan...
Need help?
Do you have a question about the PW-650MA and is the answer not in the manual?
Questions and answers