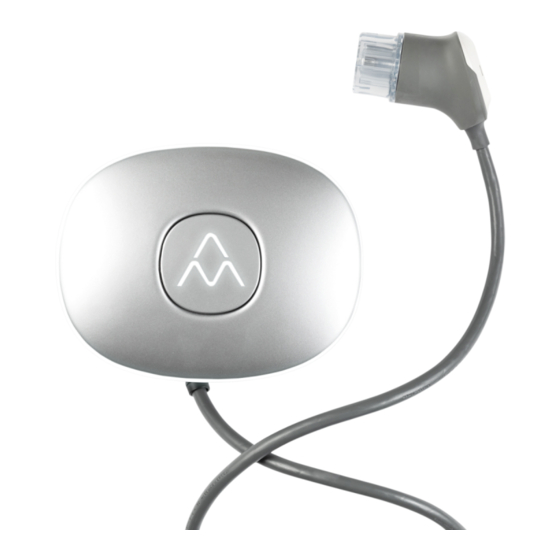
Charge Amps Halo Installation Manual
Hide thumbs
Also See for Halo:
- Quick manual (45 pages) ,
- Installation manual (41 pages) ,
- User manual (15 pages)
Table of Contents
Advertisement
Quick Links
Advertisement
Table of Contents

Subscribe to Our Youtube Channel
Summary of Contents for Charge Amps Halo
- Page 1 Charge Amps Halo Installation Manual 3.7 kW, 7.4 kW and 11 kW...
- Page 2 Charge Amps AB can reject any and all claims for compensation in connection with any injuries/damage or incidents – direct or indirect – that are a result of such negligence.
-
Page 3: Table Of Contents
6.2. Connect via LAN ..................15 6.3. Local management interface settings ........... 15 7. Cloud connectivity ..................17 7.1. Create a Charge Amps Partner account ..........18 8. Troubleshooting ..................18 8.1. Restart ....................... 18 8.2. Reset to factory default settings ............18 9. -
Page 4: Safety
Be careful not to touch the circuit board during installation to prevent risk of static • electricity. Heavy object! To avoid muscle strain or back injury, use lifting aids and proper • lifting techniques. © Copyright Charge Amps AB Charge Amps www.chargeamps.com Doc. Nr: 130741-EN Frösundaleden 2B Org. No. 556897-7192... -
Page 5: Technical Data
16/32 A* * Depending on variant Rated current of a circuit (Inc) 16/32 A* * Depending on variant Rated frequency (fn) 50 Hz © Copyright Charge Amps AB Charge Amps www.chargeamps.com Doc. Nr: 130741-EN Frösundaleden 2B Org. No. 556897-7192 Rev 01... - Page 6 Locations with restricted access or non- Non-restricted access restricted access Method of mounting Wall mounted ASSEMBLY* * Stationary floor mounted installation with accessory Pole mount © Copyright Charge Amps AB Charge Amps www.chargeamps.com Doc. Nr: 130741-EN Frösundaleden 2B Org. No. 556897-7192 Rev 01...
-
Page 7: Product Overview
3. Product overview 3.1. Parts A. Centre light / RFID reader B. Ring light C. Socket-outlet (some models only) D. EV connector © Copyright Charge Amps AB Charge Amps www.chargeamps.com Doc. Nr: 130741-EN Frösundaleden 2B Org. No. 556897-7192 Rev 01... -
Page 8: Package Contents
3 x 5 mm flat head stainless screws type A2 or A4 with associated plugs (if • required) for mounting of Charge Amps Halo 4 x 3.5 mm screws with recessed head for wall mounting of the EV connector •... -
Page 9: Mounting Requirements
Only insert the electrical cable through the specified cable entry. • The cable ethernet connector must be of short type. • N.B Ethernet connection is only available for Charge Amps Halo OCPP version. 4.4.1. Check the following before installation The power is switched off at the main switch. •... -
Page 10: Installation
2. Make sure that the feed cable is isolated. 3. Unpack Charge Amps Halo. 4. Mount a separate type A RCD on the feed line to the Charge Amps Halo. 5. Open the Charge Amps Halo with an Allen key H4. - Page 11 8. Install the ethernet cable via the LAN connection. Max diameter 4-8 mm. 9. Mark and drill mounting holes on the wall for the Charge Amps Halo. (mm) Not to scale. Marked area is the sealing area that puts pressure on the wall.
- Page 12 11 kW Connect all 5 cables. Connection of 1-phase in IT network • 17. Refit the terminals in the front cover. © Copyright Charge Amps AB Charge Amps www.chargeamps.com Doc. Nr: 130741-EN Frösundaleden 2B Org. No. 556897-7192 Rev 01...
- Page 13 20. Switch the power on at the main switch. A start-up sequence with self-test begins. • Once Charge Amps Halo is illuminated with a steady white light, it is ready • for use. 21. Continue the installation by configuring Charge Amps Halo.
-
Page 14: Configuration
Charge Amps Halo WiFi access point is not connected to a network. Charge Amps Halo WiFi access point is only accessible within 10 minutes after power on. Connect to Charge Amps Halo WiFi using a smartphone, tablet or a computer. -
Page 15: Connect Via Lan
2. Click on the arrow in the top right corner to navigate between tabs. Select the WiFi tab. 3. Enter the sign in details of the facility WiFi to connect Charge Amps Halo to internet. 4. Click Refresh to save. - Page 16 Select the “RFID” tab and follow the instructions. 2. Click Refresh to save. 6.3.3. Connect cloud provider N.B. Not applicable for Charge Amps Cloud users. Select the OCPP tab and enter the cloud provider url. 2. Click Refresh to save.
-
Page 17: Cloud Connectivity
7. Cloud connectivity Charge Amps Cloud and Charge Amps App are available for Charge Amps Halo connected to Charge Amps as cloud provider. For Charge Amps Halos connected to other cloud providers, please refer to the cloud provider for inquiries about portals and apps. -
Page 18: Create A Charge Amps Partner Account
Company postal address d. Company email e. Company phone number Company organization number g. Company representative 3. Charge Amps will notify you by email when your Partner account has been created. 8. Troubleshooting 8.1. Restart Restart by power cycle the charger. -
Page 19: Dismounting
9. Dismounting N.B. Dismounting shall only be performed by an authorized electrician. Perform a factory reset of Charge Amps Halo before powering it down. Contact the supplier before performing this action. The power supply to the charger must be isolated before dismounting starts.


Need help?
Do you have a question about the Halo and is the answer not in the manual?
Questions and answers