
Related Manuals for Wampat W09B5102B


Summary of Contents for Wampat W09B5102B
- Page 1 Assembly Instructions W09B5102B Please read this manual carefully before beginning assembly of this product.Keep this manual for future reference.
- Page 4 This illustration shows how the CAM fastening system works. Esta ilustración muestra como funciona el x 31 x 16 x 31 sistema de fijación de leva. Cette illustration montre comment le système de fixation de la CAME fonctionne. x 16 x 31 Tools Required (Not included)
- Page 5 ·Stick the skid pads (F) on the bottom of the legs (2). ·Install and fix the legs (2) on the four corners under the table by using parts (C, D, G). 3...
- Page 6 ·Screw parts (A) into panel (7).
- Page 7 ·Attach panels (5,6) to panel(7). ·Insert and secure cam locks (B) to panels (5,6) to lock it.
- Page 8 ·Attach panel (8) to panel (7). ·Insert and secure cam locks (B) to panel (8) to lock it.
- Page 9 ·Screw parts (A) into panels (9,11).
- Page 10 ·Attach panel (9) to panel(11). ·Attach panel (10) to panel(9). ·Insert and secure cam locks (B) to panels (9,10) to lock it.
- Page 11 ·Attach panel (9) to panel (7). ·Insert and secure cam lock (B) to panel (9) to lock it. ·Screw parts (E) into panels (8,11).
- Page 12 x 14 ·Screw parts (A) into panels (13,14).
- Page 13 x 14 ·Attach panels (13,14) to panels (5,7,8,10,11). ·Insert and secure cam locks (B) to panels (5,7,8,10,11) to lock it.
- Page 14 ·Screw parts (A) into panel (1).
- Page 15 ·Attach panels(5,6,13,14) to panel(1). ·Insert and secure cam locks (B) to panels (5,6,13,14) to lock it.
- Page 16 ·Insert the pulley on the back of the mirror (12) into the slide rail (7), keep the mirror vertical, then press and hold the top button as shown in the picture and push it up into the slot of the slide rail (11), now you can slide it.
- Page 17 ·Unscrew these two screws connected to the handles by the screwdriver, then exchange the position of the screws and the handles as shown in the picture and tighten the screws from the inside of the drawers.
- Page 18 x 31 ·Stick stickers (H) on cam locks (B).
- Page 19 ·Stick the skid pads (F) on the bottom of the legs (4). ·Install and fix the legs (4) on the four corners under the panel (15).
- Page 20 Attach panel (15) to cushion (3) with screws (J), and make sure the edges are evenly spaced. ·Screw parts (J) into panels (15,3).
- Page 21 WARNING We recommend it to be fixed to the wall to prevent the furniture from tipping over. Wall anchor and hardware are included in the package. Please make sure hardware is suitable for your walls before installation, as different wall materials may require different types of anchors. Ground...
-
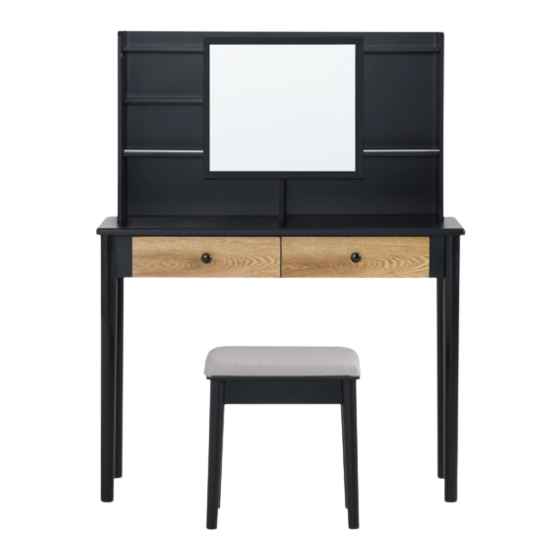
Page 22: Final Assembly
Final Assembly...
Need help?
Do you have a question about the W09B5102B and is the answer not in the manual?
Questions and answers