Advertisement
S
erver Express
Used with pouches up to
1½ gallons with 16mm fitments.
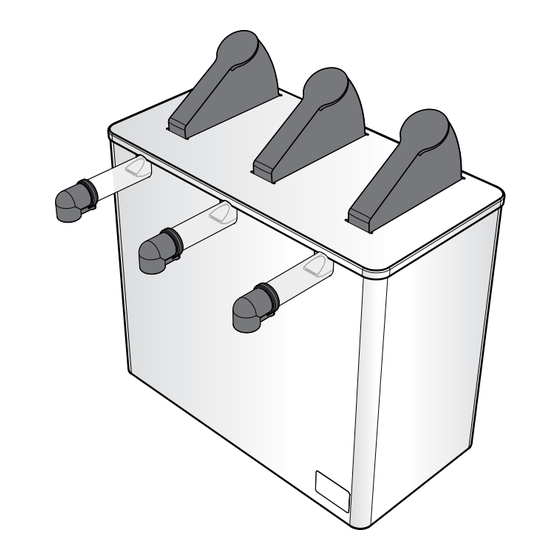
MODELS:
SE-3
SE-3DI
SE-4
SE-5
SE-5DI
Thank You
for purchasing our Server Express
Dispenser. This portion controlled unit is sealed and
sanitary, achieves excellent evacuation and has only a few
parts for easy clean-up.
SIMPLIFY CONDIMENT MANAGEMENT— GO POUCHED
®
Pouched Condiment
®
Advertisement
Table of Contents

Related Manuals for Server Express SE-3


Summary of Contents for Server Express SE-3
- Page 1 SE-3 SE-3DI SE-4 SE-5 SE-5DI Thank You for purchasing our Server Express Pouched Condiment ® Dispenser. This portion controlled unit is sealed and sanitary, achieves excellent evacuation and has only a few parts for easy clean-up. SIMPLIFY CONDIMENT MANAGEMENT— GO POUCHED...
- Page 2 SERVER EXPRESS MODELS ® SE-3 SE-4 SE-5 07124 07180 07122 Triple Quadruple Quintuple SE-3DI SE-5DI 07127 07123 Triple Drop-In Quintuple Drop-In PARTS LEVER 07014 HINGE PIN 07161 LID ASSEMBLY MODEL(S) (ROUNDED ASSEMBLY ROLLER CORNERS) 07056 07124, 07127 07865 07866 07180...
- Page 3 Check with local food and safety regulators for specific guidelines. Server Products, Inc. cannot be NSF International lists this pump as: responsible for the serving of potentially hazardous “Not acceptable for dispensing potentially product.
-
Page 4: Pump Assembly
PUMP ASSEMBLY WASH ALL PARTS PROPERLY BEFORE USE. See page 7. INSERT PINCH VALVE into pump housing. TIP: Squeeze the pinch valve open before installation to ensure it isn’t stuck shut. INSTALL DOME Press dome into Wrap loop housing fully. around lower opening to Ensure valve flap... - Page 5 SETUP ATTACH POUCHES TO PUMPS Firmly press piercing connector into center of pouch fitment. An audible click indicates a secure connection. CLICK INSTALL PUMPS Slide pouch and pump into pouch support within shroud. Align pump guides into slots in shroud. PLACE LID ON TOP PRIME PUMPS Press lever several times until you see...
-
Page 6: Portion Control
TAKE-DOWN & DISASSEMBLY REMOVE LID REMOVE PUMP & POUCH DETACH PUMP FROM POUCH FLUSH & RINSE PUMP Place lower end of pump into container of hot water. Pump until all remaining product is expelled and only water flows from discharge tube. -
Page 7: Care Of Stainless Steel
CLEANING CLEAN After disassembling, clean all washable parts with soap and hot water. YES! Use dishwashing RINSE soap and hot water fully with clear water. • External surfaces may be wiped clean with a clean damp cloth. • Glass and surface cleaners approved for use in food contact areas may be used. -
Page 8: Troubleshooting
GENERAL SERVICE, SERVER PRODUCTS REPAIR OR RETURNS LIMITED WARRANTY Before sending any item to Server Products for service, repair, or return, contact Server Products customer service to request a Return Authorization Number. Merchandise must be sent to Server Products with this number. Service is extremely prompt.
Need help?
Do you have a question about the Express SE-3 and is the answer not in the manual?
Questions and answers