Advertisement
Quick Links
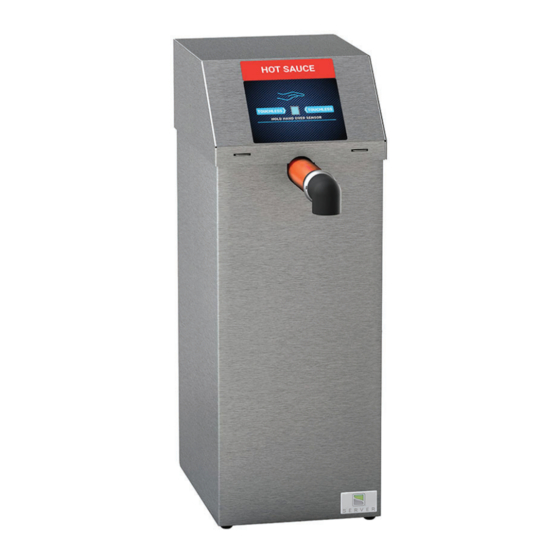
Server Touchless Express
™
Pour food product
directly into internal jar.
MODELS:
SE-SS-TDP1.3
Thank You
...for purchasing our Server Touchless Express™
Direct-Pour Condiment Dispenser. This portion
controlled unit allows for a touchless dispensing
experience and has only a few parts for easy clean-up.
SIMPLIFY CONDIMENT MANAGEMENT— GO TOUCHLESS
Advertisement

Subscribe to Our Youtube Channel
Related Manuals for Server Touchless Express SE-SS-TDP1.3


Summary of Contents for Server Touchless Express SE-SS-TDP1.3
- Page 1 MODELS: SE-SS-TDP1.3 Thank You ...for purchasing our Server Touchless Express™ Direct-Pour Condiment Dispenser. This portion controlled unit allows for a touchless dispensing experience and has only a few parts for easy clean-up. SIMPLIFY CONDIMENT MANAGEMENT— GO TOUCHLESS...
- Page 2 TOUCHLESS EXPRESS ™ MODEL SE-SS-TDP1.3 100259 - USA MARKET 100367 - EXPORT Single DOME 07399 MODEL 100265 PINCH VALVE 07798 PART DESCRIPTION PUMP HOUSING 07388 07399 PUMP DOME, BLUE 07798 LARGE PINCH VALVE DISCHARGE 07388 PUMP HOUSING FITTING 07669 9½" TUBE 07795, 07796 OR 07797 07795...
- Page 3 PARTS - TOUCHLESS SERVER EXPRESS™ LID FOR JAR LID ASSEMBLY 100315 100281 BACK SLIDE PANEL 100396 Flavor Decal Sheet 100246 100280 SHROUD KIT 100398 PUMP 100265 See page 2 for individual pump parts. Replacement Feet Available Power Supply/Cord 100273 92098 11"...
- Page 4 This unit must be earthed or grounded. temperature the product is required to maintain. This requires all three prongs (terminals) on cord Server Products, Inc. can not be responsible for plug to be plugged into power source. the serving of potentially hazardous product.
-
Page 5: Pump Assembly
WASH ALL PARTS PUMP ASSEMBLY PROPERLY BEFORE USE. See page 11. INSERT PINCH VALVE into pump housing. TIP: Squeeze the pinch valve open before installation to ensure it isn’t stuck shut. INSTALL DOME Press dome into Wrap loop housing fully. around lower opening to Ensure valve flap... - Page 6 SETUP PRACTICE SAFETY. WASH ALL PARTS PROPERLY BEFORE USE. See page 11. POUR Remove internal jar from the back of the shroud by removing the back slide panel and pull out through the back. Fill jar to 1-inch below the handles to allow for displacement of product when pump is inserted.
- Page 7 PLACE LID ON TOP Align slots on front of lid with tabs on front of shroud and pull locking spring pin out on back of lid and push down into locking position. Release locking spring pin to lock into position. Aligning lid slots Placing lid on Pulling locking spring...
-
Page 8: How To Operate
HOW TO OPERATE TOUCHLESS DISPENSE Place one hand over sensing window while holding portion cup or food item underneath dispensing point. HOW IT WORKS • The sensing window detects your hand 2 cm to 15 cm away from the surface of the window. •... - Page 9 SENSOR LIGHT WHAT DO THE DIFFERENT SENSOR LIGHT COLORS MEAN? • Sensor light color sequences at time of dispenser power up. First there will be a blue sensor light that will flash, then a green sensor light, then a red sensor light and finally a blue sensor light that will appear and stay lit, indicating the dispenser is in a ready state to begin dispensing.
- Page 10 TAKE-DOWN & DISASSEMBLY POWER DOWN Turn power switch to the "Off" position and unplug unit from the power source. REMOVE LID Pull locking spring pin(s) out on the back of the lid and pull lid up then slide the lid forward to disengage lid slots from the shroud tabs on front of the unit.
-
Page 11: Care Of Stainless Steel
CLEANING WARNING- ELECTRICAL SHOCK COULD OCCUR • Electrical components of unit could be damaged from water exposure or any liquid. • Never immerse lid into water or any liquid. • Never use a water jet or pressure sprayer on lid. •... -
Page 12: Troubleshooting
Server Products customer service to request a Return Authorization Number. Merchandise must be sent to Server Products with this number. Service is extremely prompt. Typically, units are repaired Touchless Express units are backed by a and ship out within 48 hours of receipt.
Need help?
Do you have a question about the Touchless Express SE-SS-TDP1.3 and is the answer not in the manual?
Questions and answers