Clearaudio Statement TT1 User Manual
Hide thumbs
Also See for Statement TT1:
- User manual (18 pages) ,
- User manual (16 pages) ,
- User manual (20 pages)

Subscribe to Our Youtube Channel
Related Manuals for Clearaudio Statement TT1


Summary of Contents for Clearaudio Statement TT1
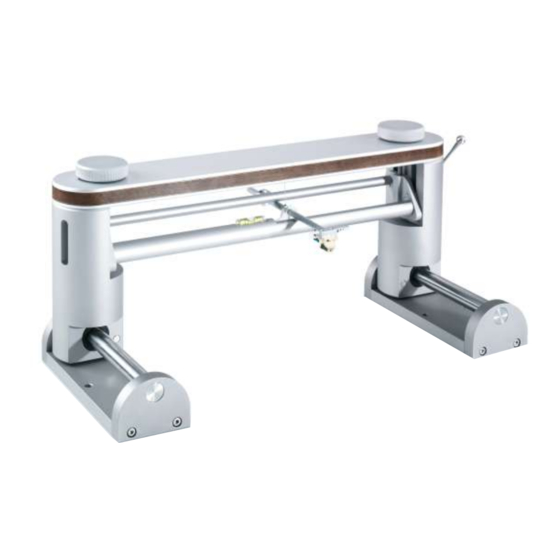
- Page 1 Statement TT1 User manual Pic. similar Pic. similar © clearaudio electronic GmbH, 2022-01 Made in Germany...
- Page 2 Statement TT1 We wish you much pleasure with your new Clearaudio tangential tonearm. Clearaudio electronic GmbH Page 2 © clearaudio electronic GmbH, 2022-01...
- Page 3 When repackaging the tonearm, please follow in reverse the steps indicated in this manual for installation and setup. 3. Service If any servicing or repair of a Clearaudio product is necessary, please first contact your dealer or distributor. Alternatively contact Clearaudio directly and we will advise you of your nearest service location.
-
Page 4: Table Of Contents
9. Fine adjustment of the tonearm 9.1 Adjustment of the tangential alignment ..............15 9.2 Adjustment of the VTA ..................16 9.3 Adjustment of the azimuth ...................17 10. Technical data ................18 Warranty ....................19 - 20 Page 4 © clearaudio electronic GmbH, 2022-01... -
Page 5: List Of Components
Please keep this packaging in case of any further transport. Important note: Please check the contents as shown in the picture below. Statement TT1 Please take special care of the tonearm cable while unpacking your Clearaudio tonearm! Note: All threads are metrical! Pic. 1: Package content... - Page 6 (to mount round base on turntable) White gloves 4x mounting screws M4 x 20 (to mount tonearm on round base) Clearaudio linear gauge User manual, Warranty card, Return delivery note (not shown) Set with cartridge mounting screws Page 6 © clearaudio electronic GmbH, 2022-01...
-
Page 7: Delivery Condition
User manual 2. Delivery condition Statement TT1 is packed in a special foam packaging and comes almost completely assembled. Pic. 2: Delivery condition tonearm body Please note: For the transport, the tonearm carriage is protected with an transport lock to avoid any damages. -
Page 8: Front And Rear View Of The Tt1 Tonearm
Magnet to lock in operating position Precision tube holder for glass tube Rear view Tonearm cable ground screw Tonearm cable holder Cueing lever Cueing lift mechanism Tonearm cable holder Pic. 4: Front and rear view Page 8 © clearaudio electronic GmbH, 2022-01... -
Page 9: Preparation Of The Statement Turntable
User manual 4. Preparation of the Statement turntable After checking the package contents as described on page 4, place the parts on a clean and flat surface in preparation for set-up. Assembly and set-up of the are quite straightforward, as most parts have been factory pre- assembled. - Page 10 (Pic. 7). Attention: Any misalignment at this stage will cause problems when positioning the tonearm Pic. 7: Tightening the mounting bolts After the round bases have been fixed, the alignment gauge can be removed. Page 10 © clearaudio electronic GmbH, 2022-01...
-
Page 11: Mounting The Tt1 Tonearm On The Statement Turntable
User manual Statement 5. Mounting the tonearm on the turntable To avoid any damage on the tonearm or turntable, we recommend that two people do the assembly. Place the tonearm chassis on top of the two round bases. Lift it carefully, making sure that the sliding tonearm bridge is positioned to the rear of both sliding bases as shown in picture 8. -
Page 12: Mounting The Armwand
Ground the tonearm using the screw as seen in picture 12. We recommend tightening the screws of the aluminum block only slightly, as the armwand needs to be movable for the subsequent adjustments. Pic. 13: Mounted armwand Pic. 12: Mounting of the armwand Page 12 © clearaudio electronic GmbH, 2022-01... -
Page 13: Mounting The Cartridge
This tonearm is suitable for all cartridges with a weight of 5.5g and above. If your cartridge is lighter, please use an additional weight (headshell plate). Available through your dealer/distributor or at Clearaudio: info@clearaudio.de Now you can connect the respective signal cable with the matching color pins of the cartridge. -
Page 14: Pre-Setting The Tracking Force
The correct setting will be made at the end of the tonearm settings. Use the #1.5 hex wrench to tighten the counterweight fixing screws. To check the tracking force, we recommend the Clearaudio “Weight Watcher touch” digital cartridge weight (Art. No. AC163, also available at www.analogshop.de). -
Page 15: Fine Adjustment Of The Tonearm
9. Fine adjustment of the tonearm 9.1 Adjustment of the tangential alignment Use the lift to lower the stylus at the left hand end of the Clearaudio linear gauge, moving the gauge so that the diamond sits exactly on the reference line (see Pic. 16a). -
Page 16: Adjustment Of The Vta
The included Clearaudio linear gauge is suitable for adjusting the tonearm height, as it corresponds to the thickness of a record. Place the Clearaudio linear gauge through the existing hole on the spindle of the turntable and align it parallel to the tonearm. -
Page 17: Adjustment Of The Azimuth
For the correct setting we recommend the digital cartridge weight „Weight Watcher touch“ from Clearaudio (item: AC163; also available from: www.analogshop.de). Pic. 20: Placing the Mini Level Gauge For perfect sound, we recommend checking the tracking force, azimuth and VTA settings again and correcting them if necessary. -
Page 18: Technical Data
Approx. 21.26 x 8.27 x 8.27 inches Manufacturer’s warranty: 10 years * Provided that the warranty card is correctly completed and returned to Clearaudio, or your product is registered online at https://clearaudio.de/en/service/registration.php, within 14 days of purchase. Page 18 © clearaudio electronic GmbH, 2022-01... -
Page 19: Warranty
The full, extended warranty period for the tonearm is 10 years. To receive this full Clearaudio warranty, you must either complete and return the relevant section of the warranty registration card to Clearaudio, or register your product online at: https://clearaudio.de/en/service/registration.php, within 14 days of purchase. - Page 20 ESPAÑOL GARANTIA Para obtener información acerca de la garantia póngase en contacto con su distribuidor Clearaudio. GUARDE SU RECIBO DE COMPRA Su recibo de compra es su prueba permanente de haber adquirido un aparato de valor, Este recibo deberá guardarlo en un lugar seguro y utilizarlo como referencia cuando tenga que hacer uso del seguro o se ponga en contacto con Clearaudio.
- Page 21 User manual Made in Germany Page 21...
- Page 22 User manual Page 22 © clearaudio electronic GmbH, 2022-01...
- Page 23 User manual Made in Germany Page 23...
- Page 24 Handmade in Germany Clearaudio Electronic accepts no liability for any misprints. Technical specifications are subject to change or improvement without prior notice. Product availability is as long as stock lasts. Copies and reprints of this document, including extracts, require written consent from Clearaudio Electronic GmbH, Germany.
Need help?
Do you have a question about the Statement TT1 and is the answer not in the manual?
Questions and answers