Table of Contents

Related Manuals for LulzBot Mini 2


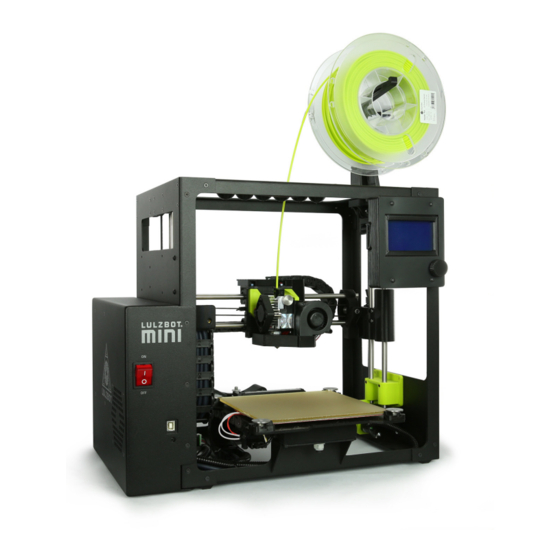
Summary of Contents for LulzBot Mini 2
- Page 1 LulzBot Mini 2 User Manual Congratulations on joining the ranks of our amazing LulzBot 3D Printer useres! Refer to the LulzBot Mini Quick Start Guide for detailed unpacking instructions and step-bystep guides wthrough your first 3D print.
-
Page 2: Table Of Contents
Table of Contents Warnings & Safety Information Regulatory Statements Recommended Software Cura LulzBot Edition Filament Guide Graphical LCD Controller Maintenance Advanced Usage Source Support Warranty & Return Policies Contact Glossary... -
Page 3: Warnings & Safety Information
WARNING! READ THIS COMPLETELY BEFORE UNPACKING AND POWERING UP YOUR PRINTER. Hazards and Warnings Your LulzBot 3D printer has motorized and heated parts. Always be aware of possible hazards when the printer is operational. Electric Shock Hazard Never open the electronics case when the printer is powered on. Before removing the electron- ics case cover, always power down the printer and completely turn off and unplug the printer. -
Page 4: Regulatory Statements
Regulatory Statements Regulatory Compliance Statemetn Class B Federal Communications Commision Statement This device complies with part 15 class B of the FCC Rules. Operation is subject to the following two conditions: 1. This device may not cause harmful interference and 2. -
Page 5: Recommended Software
GNU/Linux and OS X users will not need to install drivers to communicate with the LulzBot Mini 2 3D printer. If your school or workplace requires a manual driver installation process, the drivers can be downloaded from LulzBot.com/downloads. - Page 6 Cad and 3D Modeling Software A Free/Libre slicer like Cura LulzBot Edition will support many of the 3D model file types generated by Free/Libre Software design applications. Other Common non-free CAD and 3D modeling software options may be capable of exporting the required 3D model file types.
- Page 7 Your LulzBot Mini 2 was designed in FreeCAD! Find the design files in the Source files included with your 3D printer. OpenSCAD From OpenSCAD.org: “OpenSCAD is software for creating solid 3D CAD models. It is free software and available for Linux/UNIX, Windows and Mac OS X.
-
Page 8: Cura Lulzbot Edition
Cura LulzBot Edition will automatically install the required drivers for Windows users during the installation process. GNU/Linux and OS X users will not need to install drivers to communicate with the LulzBot Mini 2 3D printer. If your school or workplace requires a manual driver installation process, the drivers can be downloaded from LulzBot.com/downloads. - Page 9 File > Open Recent and selecting Rock2pus . Load the Rock2pus model now. Supported File Types Cura LulzBot Edition supports many of the file types used by many popular 3D modeling and design applications. Currently, Cura LE supports the following 3D model file types: 3MF, G, G-code, STL, OBJ, X3D Cura LE can also convert the following image types into a height map, for 3D printed lithographs.
- Page 10 Navigating Within Cura LE 1. Virtual Print Surface 9. Rotate 2. Axis Indicator 10. Mirror 3. Print Area 11. Per-model Settings 4. Prepare Tab 12. Multiply Object 5. Monitor Print Tab 13. G-code File Name Text Box 6. Open File 14.
- Page 11 Controlling the Cura LE Viewpoint Use your mouse or trackpad to move the camera view. Hold down the right mouse button on GNU/Linux and Windows, or Control on Mac OSX, and move your mouse to rotate the virtual print bed. Hold the middle button, or shift while clicking to pan up, down, left, and right.
- Page 12 Scale Adjust the size of the model using values entered in millimeters or percentages. Snap Scaling uses increments of 10% when using the red/blue/green axis boxes to drag and scale. Uniform scaling is selected by default, to keep the 3D model aspect ratio the same.
- Page 13 Per-model Settings Change or assign model-specific slicing settings when printing more than one model at a time. NOTE: This button will only be enabled when in Custom Mode, and when the Special Mode of Print Sequence: One at time is active. This setting is only recommended for expert users.
- Page 14 View Type Change your view type by selecting an option from the top dropdown menu: Solid view: The default viewing mode X-Ray view: View any interior structures of the model Layer view: Also known as G-code Preview, scroll through each layer of your print by changing to this view.
- Page 15 Line Type Use Line Type to show the movements in different colors. Feedrate This option will use a color gradient to display the movement speed throughout each layer. Layer Thickness The Layer Thickness option uses a color gradient to show the different layer heights used throughout the model.
- Page 16 Print Setup The right-hand side of the Cura LE window contains the Print Setup interface. The options here allow for switching between 3D printers, materials sorted by ease of use and by name, and preset slicing profiles of varying qualities and options. 1.
- Page 17 Choose your filament here. While some materials may be similar, each brand may require different speed and temperature settings. Click on the informational link to view filament details and specifications at LulzBot.com. Some materials can benefit from treating the print surface with PVA-based glue stick. Any...
- Page 18 Choosing a Print Profile Choose your desired print quality or characteristics with the Profile dropdown. Some specializd filaments may only have a single profile. The value listed after the profile name is the average layer height used for the print. Standard: A balance of speed, surface finish, and detail, this setting is recommended for most 3D prints.
- Page 19 LulzBot 3D Printer is built with ABS parts 3D printed with a 60% or higher infill. Generate Support The LulzBot Mini 2 3D printer is able to print models that have angles and overhangs, even without support material. Turn this option on if sections of the model extend out away from the model.
- Page 20 SD card. If the LulzBot Mini 2 is connected through the USB cable to a computer this button will display Print via USB. Click on the drop down arrow to access the file save options.
- Page 21 Print Monitor The Print Monitor is used to monitor progress and control the LulzBot Mini 2 when connected to your computer using the supplied USB cable. 1. Monitor Tab 11. Estimated Total Printing Time 2. Connect Button 12. Estimated Time Remaining 3.
- Page 22 Access the Print Monitor by clicking the Monitor tab (1) in the portion of Cura LE window. 3D Printing Directly Through Cura LE 3D printing through Cura LE is easy! Follow the steps below to 3D print your Rock2pus. For this print we will be using Polylite PLA filament.
- Page 23 Once the material has been selected, under profile, select “Standard. ” In the top-right corner of the screen, click the “Print Monitor” (1) button to open the printer control menu. Next, click “Connect”(2) to establish a connection between your computer and printer.
- Page 24 Using a different material? Set the hot end to the extrusion temperature of your material to remove the filament from the LulzBot Aerostruder Tool Head. Refer to the Filament Guide for the proper extrusion temperature. Once the printer has reached at least 200°C, you can remove any...
- Page 25 Use the included blue-handled knife to remove your Rock2pus after the print surface has moved forward. Explore More Advanced Features Once you’ve mastered your first print, you can explore the interface to unlock more advanced features. Cura LE includes profiles for over 30 different filament types, including a number of ornamental and industrial strength copolymers.
-
Page 26: Filament Guide
Filament Guide... - Page 27 PLA: Polylactic Acid PLA is one of the most commonly used 3D printing materials. It’s affordable and easy to use, and comes in a huge assortment of colors! It’s a unique thermoplastic polymer in that it’s derived from renewable resources such as corn starch. As such, it is biodegradeable and not suited for long-term outdoor use or in wet environments.
- Page 28 How strong and durable is ABS? Strong enough to use in your LulzBot 3D Printer! Almost all of the 3D printed parts are ABS, and were 3D printed in our in-house LulzBot 3D Printer cluster.
- Page 29 Alloy 910 Nylon If you’re looking for a highly durable filament, this nylon blend is one of the toughest filaments available! Developed by Taulman to provide a material with a high tensile strength and durability, this material is ideal for industrial applications. Its minimal shrink nature and excellent surface bonding properties make this an easy filament to use, and at an affordable price, easily obtainable too! Use Alloy 910 for frames or enclosures subject to stress and high impact, and items subject to repeated flexing such as buckles and clasps.
- Page 30 Due to the blended nature of this filament, we strongly recommend using a LulzBot Tool Head with a 0.5mm nozzle for optimal 3D printing performance.
- Page 31 bioFila Silk Also produced in Germany by twoBEars, bioFila Silk is similar to bioFila Linen in its biodegradable, lignin-based nature. It adheres well to the print surface without additional measures, and is generally easy to use. Objects printed with bioFila Silk demonstrate a durability on par with prints made with traditional PLA, and bear a striking aesthetic.
- Page 32 Non-processed bronzeFill prints have a similar appearance to terra cotta. Due to the blended nature of this filament, we strongly recommend using a LulzBot Tool Head with a 0.5mm nozzle for optimal 3D printing performance.
- Page 33 This premium 3D printing filament can also interact with some touch sensors and even touch screens. Due to the carbon powder blended into this filament, we strongly recommend using a LulzBot Tool Head with a 0.5mm nozzle for optimal 3D printing performance.
- Page 34 Non-processed copperFill prints have a similar appearance to terra cotta. Due to the blended nature of this filament, we strongly recommend using a LulzBot Tool Head with a 0.5mm nozzle for optimal 3D printing performance.
- Page 35 HIPS HIPS is a lightweight, affordable material that is favored for its versatility. This filament is a synthetic copolymer, combining polystyrene and polybutadiene rubber for a tough filament with a fair amount of give. Because of its dimensional stability, it’s frequently used for pre-production prototyping. It can also be used as support material in dual extrusion 3D printing, as it is soluble in Limonene, a lemon-based solvent that is easily available.
- Page 36 LayWood is primarily favored for its aesthetic properties; it is not recommended for printed objects requiring a high degree of durability. Due to the blended nature of this filament, we strongly recommend using a LulzBot Tool Head with a 0.5mm nozzle for optimal 3D printing performance.
- Page 37 Suggested uses for Magnetic Iron PLA range from sculptures and busts to architectural details and models. Due to the blended metal powder found in this magnetic 3D printer filament, we strongly recommend using a LulzBot Tool Head with a 0.5mm nozzle for optimal 3D printing performance.
- Page 38 n-Gen ColorFabb nGen filament is engineered for prototyping and production. This co-polyester filament by colorFabb brings together the strength and precision found in Eastman Amphora™ 3300 3D polymer, optimized for desktop 3D printing. Create durable, sturdy prints with this easy-to use filament! nGen handles complex models well, including bridging gaps, holes, and overhangs.
- Page 39 PC+PBT filament is a polycarbonate-based material, therefore applying a glue stick (such as Elmer’s® brand) directly to the print surface before starting your LulzBot 3D printer is strongly recommended for increased printed object adhesion. Extrusion Temperature: 240°C PEI Print Surface Temperature: 110°C...
- Page 40 PC-Max is designed to perform in hot, demanding environments. PC-Max is a polycarbonate-based material, therefore applying a glue stick (such as Elmer’s® brand) directly to the print surface before starting your LulzBot 3D printer is strongly recommended for increased printed object adhesion.
- Page 41 Taulman PCTPE filament is also available in our custom LulzBot Green color! Taulman PCTPE is a nylon filament material, therefore applying a glue stick (such as Elmer’s® brand) directly to the print surface before starting your LulzBot is strongly recommended for better print adhesion.
- Page 42 PolyFlex Composed of 90% thermoplastic urethane (TPU) and 10% polylactic acid or polylactide, commonly known as PLA, this blend exhibits more stiffness and hardness while still retaining flexibility. PolyFlex is perfect for strong printed objects that need to flex while still holding their shape.
- Page 43 Stainless Steel PLA works well for models and figurines, costumes, jewelry, and props. Due to the blended metal powder found in this filament, we strongly recommend using a LulzBot Tool Head with a .5mm nozzle for optimal 3D printing performance. Extrusion Temperature: 230°C PEI Print Surface Temperature: 60°C Part Removal: 50°C...
- Page 44 Due to the blended nature of this filament, we strongly recommend using a LulzBot Tool Head with a 0.5mm nozzle for optimal 3D printing performance.
-
Page 45: Graphical Lcd Controller
Graphical LCD Controller The Graphical LCD Controller, or GLCD, allows you to print with the LulzBot Mini 2 3D printer without needing to have a computer connected or using host software such as Cura LulzBot Edition. This will allow for more efficient use of the workspace and free up a computer for other tasks. - Page 46 LulzBot Mini 2. Graphical LCD Controller Status Screen The GLCD screen will turn on when the LulzBot Mini 2 3D printer is powered on. The start-up screen will display the Status screen, the default home screen for the GLCD. This home screen displays the current status of the printer, such as the current temperatures, tool head coordinates, print status, and more.
- Page 47 Graphical LCD Controller Navigation and Selection Navigate through the GLCD menu options by rotating to scroll through selections. From the main status screen, press the knob to move into the menu screen. To move backwards in the menu tree, select the top most menu selection on the current screen. Selections that will move you backwards through the menu tree are noted by an upwards-facing arrow.
- Page 48 Configuration Options Your LulzBot Mini 2 3D printer has been factory calibrated for printing. However, the GLCD does allow tuning of the more advanced configuration settings. We highly suggest you do not modify the configuration settings unless you are certain it is necessary. The configuration section contains settings that control how your printer operates.
- Page 49 Z-Offset Your LulzBot Mini 2 3D printer has the ability to change the first layer height (Z-offset) directly through the GLCD, even while printing the first layer. Using the GLCD, navigate to Configuration >...
- Page 50 Steps/mm Your LulzBot Mini 2 3D printer is factory calibrated on all axis for accurate movement. These settings control that movement, and if adjusted, your objects will not be properly sized. We only recommend adjusting your Esteps/mm (Extruder Steps Per Unit) as this can be fine tuned for individual tool heads and filaments.
-
Page 51: Maintenance
Monthly Nozzle Wiping Pads The LulzBot Mini 2 completes a very low-voltage electrical circuit during the bed probing process. If the nozzle or nozzle wiping pads are excessively dirty the bed probing process may fail. This typically occurs when the nozzle wiping pads may be pilled, gouged, or filled with plastic residue. - Page 52 M3 screw. This clamp can be loosened with the 2.5mm hex driver included with your LulzBot Mini 2. Use the included needle nose pliers to gently pull the belt tight. Hold the belt tight with one hand and tighten down the M3 screw to secure the belt.
- Page 53 Cooling Fans Dust may be evident on the two tool head fan blades when the LulzBot Mini 2 is powered off. Clean this dust by: • Power off your 3D printer. • Gently press your finger against the center of the fan to prevent the fan from moving.
-
Page 54: Advanced Usage
Cura LE • Open Cura LE • Power on your LulzBot 3D Printer and connect it to your computer using the supplied USB cable • Record or verify possession of the Extruder steps per unit, by following the steps above •... - Page 55 Z-axis Offset Adjustment Your LulzBot Mini 2 3D printer has the ability to change the first layer height (Z-offset) directly through the Graphical LCD Controller and through Cura LE. Z-axis Offset Adjustment: GLCD From the main GLCD screen, select Configuration.
- Page 56 You will hear a beep, indicating that the settings have been successfully saved. Z-axis Offset Adjustment: Cura LE Connect to your LulzBot 3D Printer using the supplied USB cable and open the console found in the monitor tab.
- Page 57 OHAI (Open Hardware Assembly Instructions). Print Adhesion Your LulzBot Mini 2 is equipped with a PEI print surface. This revolutionary print surface has been tested by the advanced members of the LulzBot community and has proved to be an eas- ier and more reliable 3D printing surface.
- Page 58 Replacement beds and PEI sheets are available through LulzBot.com/store/parts. Using 1.75mm filament Your LulzBot Mini 3D printer is set up to use 3mm plastic filament by default and may be capa- ble of printing 1.75mm filament with no hardware modification. While many of our advanced users are able to do so, your results may vary.
-
Page 59: Source
• LulzBot Development Server (files may change without notice): Devel.LulzBot.com • Aleph Objects Code Repository https:/ /gitlab.com/lulzbot3d The LulzBot Mini 2 3D Printer is a Free Software and Open Source Hardware design. All of the source files are available at http:/ /download.lulzbot.com/Mini/2.0.0/ including: •... -
Page 60: Support
3D printing experts is available by phone and email seven days a week from our Colorado headquarters. For common technical support questions for your LulzBot Mini 2 3D printer please visit LulzBot.com/Support. Find advice and tips from the LulzBot 3D Printer community in our Forum.LulzBot.com. -
Page 61: Warranty & Return Policies
For less than the cost of a reel of filament a month you can print with confidence knowing that your LulzBot Mini 2 3D Printer will be able to keep up with your 3D printing needs. Extend your standard 1 year warranty and support period by purchasing an additional 1, 2, or 3 year warranty and support period. -
Page 62: Contact
Phone: +1-970-377-1111, option 3 Sales Email: Sales@LulzBot.com Phone: +1-970-377-1111 or +1-701-809-0800 Regional Phone Numbers A complete list of regional phone numbers is available at LulzBot.com/contact. • Australia (Sydney):+61-280730598 • Canada (Toronto):+1-647-560-0006 • China (Shenzhen):+86-75586243890 • Great Britain (London) +44-2036033166 • Mexico (Mexico City) +52-5541708259 •... - Page 63 .GCODE The file extension for G-Code files Cura Cura LulzBot Edition is a cross-platform software package that combines a slicing engine with a printer host interface. 3D Printer Also referred to as additive manufacturing, is the process of fabricating objects from 3D model data, through the deposition of a material in accumulative layers.
- Page 64 Polytetrafluoroethylene is a synthetic fluoropolymer used in the Budaschnozzle for it’s low coefficient of friction. This limits the TAZ 1-4 Budaschnozzle top extrusion temperature to 250°C. The LulzBot Mini does not use a hot end with a PTFE insert and can reach a 300°C extrusion temperature.
- Page 65 UltiMachine. Resolution In general terms, the resolution you print at can be determined by the layer height you use. The LulzBot Mini can print at layer heights of 0.05mm through 0.50mm with the standard tool head. Slic3r Slic3r is a cross-platform 3D model slicing engine used to process a 3 dimensional model into the GCODE (tool path) needed to physically generate the print.
- Page 66 Permission is granted to copy, distribute and/or modify this document under the terms of the Creative Commons Attribution 4.0 International Public License (CC BY-SA 4.0). Published by FAME3D, 1001 25th ST N, Fargo ND, 58102 USA. For more information, call +1-970-377-1111 (+1-701-809-0800) or go to LulzBot.com.
Need help?
Do you have a question about the Mini 2 and is the answer not in the manual?
Questions and answers