Table of Contents
Advertisement
Quick Links
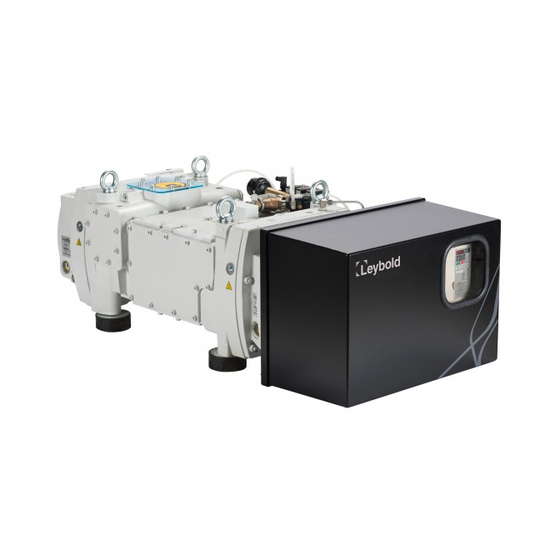
DRYVAC
DV 450, DV 650, DV 800
Dry Compressing Vacuum Pumps
Operating Instructions 300314330_002_C7
Part Numbers
112045V07-1 /09-1 /15-1 /19-1
/20-1 /29-1 /30-1
112065V05-1 /07-1 /09-1 /14-1
/14-2 /14-3 /15-1 /16-1 /17-1
/18-1 /19-1 /20-1 /23-1 /30-1
/32-1 /35-1 /36-1 /37-1
112065FP08-1 /18-1 /28-1
112080V05-1 /07-1 /14-1 /15-1
/17-1
Advertisement
Table of Contents

Related Manuals for LEYBOLD DRYVAC DV 450


Summary of Contents for LEYBOLD DRYVAC DV 450
- Page 1 DRYVAC DV 450, DV 650, DV 800 Dry Compressing Vacuum Pumps Operating Instructions 300314330_002_C7 Part Numbers 112045V07-1 /09-1 /15-1 /19-1 /20-1 /29-1 /30-1 112065V05-1 /07-1 /09-1 /14-1 /14-2 /14-3 /15-1 /16-1 /17-1 /18-1 /19-1 /20-1 /23-1 /30-1 /32-1 /35-1 /36-1 /37-1 112065FP08-1 /18-1 /28-1 112080V05-1 /07-1 /14-1 /15-1 /17-1...
-
Page 2: Table Of Contents
3.5.1 Gas Ballast Valve 3.5.2 Guidelines for Purge Gas Operation, Settings and Monitoring Electrical Connection 3.6.1 Electrical Connection DRYVAC DV 450/650 and 450/650-r 3.6.2 Electrical Connection DRYVAC DV 450/650 3.6.3 Electrical Connection DRYVAC DV 450/650-r 3.6.4 Electrical Connection DRYVAC DV 800 3.6.5... - Page 3 Replacing the Filter Cartridge in the Purge Gas Pressure Reducer 87 Troubleshooting Pump Malfunctions Fault and Alarms Displayed at the Frequency Converter Wearing Parts Waste Disposal EU Declaration of Conformity Certificates Original operating instructions. 300314330_002_C7 - 05/2021 - © Leybold...
- Page 4 Operating Instructions and follow the information so as to ensure optimum and safe working right from the start. The Leybold DRYVAC has been designed for safe and efficient operation when used properly and in accordance with these Operating Instructions. It is...
-
Page 5: Important Safety Information
Connect and disconnect the mains plug only in deenergized condition Hot Surface Do not touch. Allow this area to cool before servicing Burn hazard Hot Surface inside. Do not touch, wear protective equipment. 300314330_002_C7 - 05/2021 - © Leybold... - Page 6 Connect the pump so that it not will restart automatically after a mains power failure, once the power returns. Overhead load Transport the pump only at the four crane eyes or secured with a forklift. 300314330_002_C7 - 05/2021 - © Leybold...
-
Page 7: Mechanical Hazards
When transporting the pump with a forklift or similar, ensure that the pump has been secured on the forks or on a suitable pallet. The lifting eye of the screw pump must never be used to lift any pump combinations (Roots pump + backing pump). 300314330_002_C7 - 05/2021 - © Leybold... - Page 8 Before doing installation work on the pump system make sure that no vacuum is present in the pump and that all media connections have been depressurised. Before disassembling any cooling water lines, leave the pump to cool down, shut off the feed line. 300314330_002_C7 - 05/2021 - © Leybold...
-
Page 9: Electrical Hazards
The pump must only be operated at the frequency specified for the motor. Use only the Leybold frequency converter. For pumps with external frequency converter: after having connected the motor and each time after having made changes to the wiring, check the motor’s direction of rotation. -
Page 10: Thermal Hazards
DRYVACs without cooling water unit: (Industrial versions) For these DRYVAC pumps do not connect the cooling water using self-sealing quick locks or shut off the feed and discharge lines with valves. 300314330_002_C7 - 05/2021 - © Leybold... -
Page 11: Hazards Caused By Materials And Substances
Since not all application related hazards for vacuum systems can be described in detail in these Operating Instructions, Leybold has avail- able a separate document (Safety Booklet) in which the hazards and general safety concepts for design, operation and maintenance of vac- uum systems are explained. - Page 12 For this see Section 5.1 Service at Leybold. Leybold is not in a position to perform servicing (repairs) and waste disposal of radioactively contaminated pumps. Both needs to be ensured from the side of the user.
-
Page 13: Ignition Risk
Take note of the warning information on the casing surface. If this warning information was removed, covered or obstructed, then pro- vide corresponding additional warning information. 300314330_002_C7 - 05/2021 - © Leybold... -
Page 14: Danger Of Pump Damage
We recommend to fit a non return dis- charge valve. The discharge line should be laid so that it slopes down and away from the pump so as to prevent condensed vapours from backstream- ing into the pump. 300314330_002_C7 - 05/2021 - © Leybold... - Page 15 Maximum cooling water pressure: 7 bar. When exceeded, there is the risk of leaks. Pressures given in bar or mbar are absolute values. If exceptionally a gauge pressure is meant, a “g” is added (bar(g)). 300314330_002_C7 - 05/2021 - © Leybold...
-
Page 16: Description
(-r models). All DRYVAC pumps have been prepared for direct fitting of a RUVAC Roots pump. The pumps are water cooled. They are lubricated either with synthetic oil or PFPE. 300314330_002_C7 - 05/2021 - © Leybold... -
Page 17: Supplied Equipment
4x crane eyes M16 ■ Intake screen with O-ring ■ 3x plugs for purge gas valve (only with installed purge gas module) ■ Plug for purge gas pressure switch (only with installed purge gas module) ■ 300314330_002_C7 - 05/2021 - © Leybold... - Page 18 Fig. 1.2 Dimensional drawing, dimensions in mm For CAD installation drawings in the STEP format, please contact Leybold or log in to the Leybold e-shop. You can download STEP files there. 300314330_002_C7 - 05/2021 - © Leybold...
- Page 19 Description 1213 DRYVAC DV 450-r, DV 650-r, DV 800-r with cooling water unit (option) and with purge gas und gas ballast module Fig. 1.3 Dimensional drawing, dimensions in mm 300314330_002_C7 - 05/2021 - © Leybold...
-
Page 20: Technical Data
Short-circuit interrupting capacity < 30 kA Connectable cable cross-section, max. 10 mm 10 mm 10 mm 10 mm Switching frequency of the frequency conv. 8 kHz automatic switchover at low pump loads 15 kHz 300314330_002_C7 - 05/2021 - © Leybold... - Page 21 Purge gas flow shaft seal / rotor 22 to 107 slm ± 10 % see Section 3.5 Max. Gas ballast flow 180 slm 180 slm 220 slm 220 slm ± 10 % < 10 mbar) Inlet 300314330_002_C7 - 05/2021 - © Leybold...
- Page 22 Power consumption at ultimate pressure 7.5 kW Electrical power rating 23 kVA Mains fusing/characteristic 50 A/C Short-circuit interrupting capacity < 30 kA Connectable cable cross-section, max. 10 mm Switching frequency of the frequency conv. 8 kHz 300314330_002_C7 - 05/2021 - © Leybold...
- Page 23 4.0 to 10.0 bar(g)** ± 5 % Purge gas flow shaft seal / rotor 22 to 107 slm ± 10 % see Section 3.5 Max. Gas ballast flow on request ± 10 % < 10 mbar) Inlet 300314330_002_C7 - 05/2021 - © Leybold...
- Page 24 ) + 572.8 in °C = -190 · lg(p ) + 572,8 in °C > 500 1000 Gaseinlassdruck p in mbar Gas inlet pressure p (mbar) Fig. 1.4 Permissible gas inlet temperature as function of the inlet pressure 300314330_002_C7 - 05/2021 - © Leybold...
-
Page 25: Ordering Information
DV 650, 400 V on board triple none none Rubber feet LVO 210 112065V18-1 with Energy Saver DV 650 FP, 400 V on board triple none none Rubber feet, LVO 210 112065FP18-1 epoxy-lacquer, washable 300314330_002_C7 - 05/2021 - © Leybold... - Page 26 Rubber feet LVO 410 112065V36-1 with relay option board DV 650 C-r, 200 V extern (Rack) triple none none Rubber feet, LVO 410 112065V37-1 also outside free of non-fer- rous metal 300314330_002_C7 - 05/2021 - © Leybold...
-
Page 27: Accessories
LEYASSIST Windows software (control, configuration and analysis software for the 230439V01 DRYVAC and other Leybold products) (RS232 adapter for FC DRYVAC RUVAC WH 155224V and adapter USB - RS232 800110V0103 are required for connecting a PC to the DRYVAC and the use of the LEYASSIST software) - Page 28 Upgrade DRYVAC with Energy Saver, contains the DRYVAC Energy Saver AS1406F − and installation by Leybold Service GSD file, manual for the Profibus interface and Ethernet IP driver see: www.leybold.com -> Downloads -> Download Software 300314330_002_C7 - 05/2021 - © Leybold...
-
Page 29: Transport And Storage
The pump must only be transported using a fork lifter or a crane. At the installation site, use all four adjustable feet for aligning thereby securing the unit from rolling away and thus taking away the load from the castors. 300314330_002_C7 - 05/2021 - © Leybold... - Page 30 Connect the pump to oper- ate it briefly and then decommission it as described in the following sections. (The intake flange can stay sealed during this brief operation, the exhaust flange must be opened.) 300314330_002_C7 - 05/2021 - © Leybold...
- Page 31 AC power supply could be used to supply the variable DC voltage. Resistor 10 ohm Inverter Voltage : 360V (for 200V class) 720V (for 400V class) Time 3 min. or more 40 min. or more Fig. 2.2 Capacitor forming 300314330_002_C7 - 05/2021 - © Leybold...
-
Page 32: Installation
Optional intake Cooling water OUT* flange (blanked off) Cooling water IN* Fig. 3.1 Connections for the DRYVAC DV 450/650/800 Installation Placement Place the pump system on a flat and level surface. The pump is designed for operation in buildings. - Page 33 The pumps are supplied filled with synthetic oil or PFPE. Nothing will have to be refilled. Check the oil levels through all oil level glasses (2 per pumping stage). If one of the oil levels is found to be incorrect, please contact us. 300314330_002_C7 - 05/2021 - © Leybold...
-
Page 34: Conforming Use
Pumping of gases and vapours for which the materials of the pump are not ■ suited, consult Leybold. For a list of materials in contact with the process gases, see Section 1.3 Technical Data. Pumping of substances and mixtures (gases, liquids and solids) which are ■... - Page 35 Conversions, manipulations and maintenance work by persons not author- ■ ised by Leybold. Accessories which have not been specified by Leybold may only be used ■ after approval by Leybold. The non-conforming use of pump and accessories may result in severe WARNING injury or damage to the components.
-
Page 36: Connecting The Intake And Exhaust Lines
Connect the intake flange: Either with intake screen and O-ring or with a cen- tering ring without outer ring. Upon delivery, the optional intake flanges at the side are only provided with an O-ring seal. This will be inadequate for the purpose of connecting an intake line. 300314330_002_C7 - 05/2021 - © Leybold... -
Page 37: Exhaust Lines
In the case of wet processes avoid the ingress of any liquid into the pump. NOTICE Observe Safety Information 0.8.9 and 0.8.10. Check leak tightness of the exhaust lines on a regular basis! DANGER Observe Safety Information 0.4. 300314330_002_C7 - 05/2021 - © Leybold... -
Page 38: Connecting Cooling Water
The valve opens at 8 bar(g) and releases small amounts of water or vapour into the base pan. 300314330_002_C7 - 05/2021 - © Leybold... - Page 39 DRYVACs without cooling water unit (Industrial versions) For these DRYVAC pumps do not connect the cooling water using self-sealing quick locks or shut off the feed and discharge lines with valves. Notice Safety Information 0.3.7. CAUTION 300314330_002_C7 - 05/2021 - © Leybold...
-
Page 40: Water Quality
If there is the danger of frost, you may use a water glycol mixture of up to 30 %. DS water can be used for cooling the pump, if the pH value corresponds to the range indicated above. 300314330_002_C7 - 05/2021 - © Leybold... -
Page 41: Connecting Purge Gas
From 2020, new purge gas modules will be used in some DRYVAC models. The function is the same for new and old modules, they just look different. Connect nitrogen or air as purge gas. If in doubt, please contact Leybold. 300314330_002_C7 - 05/2021 - © Leybold... - Page 42 Installation Solenoid valves Gas ballast SV40 SV41 SV42 (Rotor purge) Purge gas supply Seal purge exhaust side Pressure switch Pressure gauge Seal purge inlet side Fig. 3.6 Double purge gas module 300314330_002_C7 - 05/2021 - © Leybold...
- Page 43 Wetted materials:, Brass, aluminium, zinc, polycarbonate, polybutenetere- phthalate (PBT), NBR, polyamide tube, copper, stainless steel, PTFE, Loctite. The pressure reducer is set to 2.8 bar at nominal flow (valves open) on deliv- ery. 300314330_002_C7 - 05/2021 - © Leybold...
-
Page 44: Gas Ballast Valve
(compressed air or nitrogen) from the valve block is used to actuate the electropneumatic gas ballast valve. The valve needs a pressure of 3.0 bar. The actual ballast gas will generally be ambient air. 300314330_002_C7 - 05/2021 - © Leybold... -
Page 45: Guidelines For Purge Gas Operation, Settings And Monitoring
NOTICE The safety always has to be considered (please be careful with air purges and read the safety booklet of Leybold). Exhaust shaft seal purge is running in most of all applications all the time. 300314330_002_C7 - 05/2021 - © Leybold... - Page 46 The gas ballast flow is not constant under all conditions! ■ The gas ballast flow of the DV pumps is strongly depending on the inlet ■ pressure! Applying max gas ballast flow results in: p ≥ 1x10 mbar for air. ■ 300314330_002_C7 - 05/2021 - © Leybold...
- Page 47 This switch is always installed, but the signal is not controlled by the pump itself (frequency converter). An LED indicates the status on the device itself. A to be connected PLC or junction box is needed to monitor this sig- nal. 300314330_002_C7 - 05/2021 - © Leybold...
-
Page 48: Electrical Connection
The frequency converter may, when deployed in residential areas, cause NOTICE high-frequency interference. In such a case the operator of the unit will have to introduce additional measures for the purpose of suppressing high-frequency interferences. 300314330_002_C7 - 05/2021 - © Leybold... - Page 49 To disconnect them, grasp the wire end with a pair of pliers, release the terminal using a straight-edge screw driver, turn the wire for about 45°, and pull it gently out of the terminal. 300314330_002_C7 - 05/2021 - © Leybold...
-
Page 50: Electrical Connection Dryvac Dv 450/650 And 450/650-R
Installation DV 450/650 and 450/650-r 3.6.1 Electrical Connection DRYVAC DV 450/650 and 450/650-r Main Circuit Terminals Terminal Type Function R/L1, S/L2, T/L3 Main circuit power Connects line power to the frequency con- supply input verter via line filter U/T1, V/T2, W/T3 Drive output Connects to the motor. - Page 51 Pt 1000 Temperature sensor Fig. 3.10 Main and control circuit wiring DRYVAC DV 450/650 (-r) < 1 > Connected using sequence input signal (S1 to S6) from NPN transistor. 300314330_002_C7 - 05/2021 - © Leybold Default: sink mode (0V com).
- Page 52 I/Os and the pump sensors on the I/O board of the frequency converter, see Fig. 3.18. You will find the 5-conductor connector in the PE bag of the operating instructions. 300314330_002_C7 - 05/2021 - © Leybold...
- Page 53 Forward Run / Stop Exhaust pressure switch* Temperature limiter* Fault reset* Digital Input* Baseblock DIP switch S3 SOURCE Switch to source (Control via external source) + 24 VDC Fig. 3.13 Option: Wiring with external power supply 300314330_002_C7 - 05/2021 - © Leybold...
-
Page 54: Electrical Connection Dryvac Dv
Profibus plugs can be guided. Fig. 3.14 Frequency converter without covers 3.6.2 Electrical Connection DRYVAC DV 450/650 Remove the cover from the frequency converter. The cover is connected to the PE terminals with a PE cable. Do not interrupt this cable. - Page 55 The exhaust pressure switch (setpoint 1.25 bar = 0.25 bar(g)) is connected to S2 and SC. The pump’s temperature sensor is connected to T1 and TC. The temperature limiter is connected to S3 and SC. Remount the cover on the frequency converter. 300314330_002_C7 - 05/2021 - © Leybold...
-
Page 56: Electrical Connection Dryvac Dv 450/650-R
S1 S2 S3 S4 S5 S6 HC SC H1 RP AC P1 P2 PC Fig. 3.16 Control circuit terminals 3.6.3 Electrical Connection DRYVAC DV 450/650-r The external frequency converters comply with EMC guidelines when the cable between pump and frequency converter does not exceed a length of 25 meters maximum. - Page 57 Temperaturbegrenzer temperature limiter Motorklemmenkasten Motor terminal box Fig. 3.17 DRYVAC DV 450/650/800-r sensors Sensors Connect the exhaust pressure switch (setpoint 1.25 bar = 0.25 bar(g)) to S2 and SC. A mating connector is delivered for the exhaust pressure switch. The Pt 1000 cable (30 m) is delivered seperately, so that it does not get dam- aged during transport.
- Page 58 Pt 1000 Pumpen- pump temperature temperatur Temperatur- Temperature begrenzer limiter U1 V1 W1 Motor terminal Motor- klemmenkasten Klemmleiste Leistungskreis Main circuit terminal block Fig. 3.18 Main and control circuit wiring for the DRYVAC DV 450/650-r 300314330_002_C7 - 05/2021 - © Leybold...
-
Page 59: Electrical Connection Dryvac Dv
The exhaust pressure switch (setpoint 1.25 bar = 0.25 bar(g)) is connected to S2 and SN. The pump’s temperature sensor is connected to A1 and AC. The temperature limiter is connected to S3 and SN. Remount the cover on the frequency converter. 300314330_002_C7 - 05/2021 - © Leybold... - Page 60 0 - 10 V/4 - 20 mA (250 Ω) [Default setting: Output frequency] Safety Inputs (STO SIL3) indicates shielded cable indicates shielded twisted-pair cable indicates main circuit terminal indicates control circuit terminal Fig. 3.19 Main and control circuit wiring DRYVAC DV 800 300314330_002_C7 - 05/2021 - © Leybold...
- Page 61 DV 800 Installation TB1-3 TB1-2 TB1-1 TB = Terminal Block 9k09 Pt 1000 Resistor Use the 5-conductor connector at the SN clamp. Fig. 3.20 Terminal connections for DV 800 300314330_002_C7 - 05/2021 - © Leybold...
-
Page 62: Electrical Connection Dryvac Dv 800-R
(120 Hz) amounts to 200 seconds. Open SN and S1 to stop the DRYVAC. Sensors See Figs. 3.17 and 3.22. Connect the exhaust pressure switch (setpoint 1.25 bar = 0.25 bar(g)) to S2 and SN. A mating connector is delivered for the exhaust pressure switch. 300314330_002_C7 - 05/2021 - © Leybold... - Page 63 Connect the pump’s temperature sensor (Pt 1000) to A1 and AC. Lay the cable so that it does not touch any hot surfaces. Connect the temperature limiter to S3 and SN. Connect the external resistor 9k09 to A1 and V. 300314330_002_C7 - 05/2021 - © Leybold...
-
Page 64: Leak Search After Installation
Installation Leak Search after Installation DANGER Observe Safety Information 0.4. On delivery, the pump is leak tight to 10 mbar·l/s (integral, leak-checked). Leak-check all relevant connections after having installed the pump. 300314330_002_C7 - 05/2021 - © Leybold... -
Page 65: Mounting Accessories
When transporting, the DRVAC and the RUVAC need to be separated for safety reasons and reassembled at the new destination. Exception: The WH 2500 can be lifted at its 4 eye-bolts together with the DRYVAC if no other accessories are fitted. 300314330_002_C7 - 05/2021 - © Leybold... -
Page 66: Non-Return Valve
Make sure that the O-ring sits in its groove. Bolt the non-return valve to the exhaust of the DRYVAC using the four M8 mounting bolts, tightening torque 25 +/- 2.5 Nm. 300314330_002_C7 - 05/2021 - © Leybold... - Page 67 Exhaust line Fig. 3.25 Side view/sectional view of the non-return valve with swivel joint Fig. 3.26 Non-return valve 112005A14 for DRYVAC DV 450/650/800 Only for non-return valve 112005A14 for DRYVAC DV 450/650/800 Supplied equipment: Non-return valve complete with mounting equipment, e.g.
-
Page 68: Operation
For installation and operation of the optional bus interfaces, please refer to the instructions of YASKAWA enclosed with the module, and to Operating Instructions 300802431 regarding bus interfaces for DRYVAC DV and RUVAC WH. For the DRYVAC DV 800 please contact Leybold. Start-up Checks before every Start-up Check if the pump system is leak tight. -
Page 69: Operation
For troubleshooting and testing the frequency converter is equipped with LEDs and keys. Please also note the recommendations relating to running up of the pumps provided at the beginning of Section 4.2. Some parameters are only taken over after a restart. 300314330_002_C7 - 05/2021 - © Leybold... -
Page 70: Led Operator And Keys
U1-02 (output frequency) and U7-03 (Pt 1000 tem- perature). The units of measurement are not displayed. When the output fre- Fig. 4.1 LED operator at DRYVAC DV 450/650 quency is indicated, then simultaneously the LED FOUT will come on and two digits after the decimal point are displayed. - Page 71 • The drive is energized with an active Run command and b1-17 = 0 [Run Command at Power Up = Disregard Existing RUN Command]. ESC Key Returns to the previous menu. Push and hold to go back to the frequency reference screen (the initial screen). 300314330_002_C7 - 05/2021 - © Leybold...
- Page 72 On: The motor rotation direction is reverse. Off: The motor rotation direction is forward DWEZ LED On: The drive is In DriveWorksEZ operation. * The pump is not intended for LOCAL mode. Default is REMOTE 300314330_002_C7 - 05/2021 - © Leybold...
-
Page 73: Frequency Converter Outputs
Contact closed Multifunction opto-coupler during Error (general message) 48 V DC max. 50 mA max. AM-AC Analog output Analog monitor output 0 to +10 V DC (2 mA) 10 V when the pump is running 300314330_002_C7 - 05/2021 - © Leybold... - Page 74 1: During alarm detection 1: During speed agree 1: Drive ready 1: During fault detection 1: Drive ready 1: During alarm detection 1: During alarm detection 1: During fault detection 1: During fault detection 300314330_002_C7 - 05/2021 - © Leybold...
-
Page 75: Relay Option Board
K3 Output, Normally Open (NO) contact K3 Output, Normally Closed (NC) contact K3 Output, Common K1 control signal K2 control signal K3 control signal Common for K1,K2 and K3 Fig. 4.3 Relay option board: Connections 300314330_002_C7 - 05/2021 - © Leybold... -
Page 76: Option: Changing The Speed Of The Pump
Hz, allowed input range 0 Hz to 120 Hz). Closing of the switch between the digital input S5 and SC will enable the second frequency. The input signal at S5 can be controlled through a timer relay or through the PLC. 300314330_002_C7 - 05/2021 - © Leybold... - Page 77 VDC with lower limit”. Make sure that parameter H3-10 has been set to the default value 0. Connect the control voltage to terminals A2 and AC. 0 to 10 V, 0 V corre- sponds to 0 Hz, 10 V corresponds to 120 Hz, linear increase. 300314330_002_C7 - 05/2021 - © Leybold...
- Page 78 Make sure that parameter H3-10 has been set to the default value 0. Connect the control current to terminals A2 and AC. 4 to 20 mA, 4 mA cor- responds to 0 Hz, 20 mA corresponds to 120 Hz, linear increase. 300314330_002_C7 - 05/2021 - © Leybold...
-
Page 79: Warning And Shut-Off Thresholds
60 °C (LVO 210) frequency converter 100 FT (DV 450/650) side (Pt 1000) 45 °C (LVO 410) 50 °C (LVO 410) dWFL (DV 800) Frequency converter tem- TSH 281 105 °C 110 °C frequency converter perature 300314330_002_C7 - 05/2021 - © Leybold... -
Page 80: Gas Ballast Operation
CAUTION Type of gas and purge gas quantity must be selected so that even under the most unfavourable circumstances no explosive mixture can occur within the gas chamber during decompression process. 300314330_002_C7 - 05/2021 - © Leybold... -
Page 81: Pumping Of 100% Argon
If the pump has previously pumped hazard ous gases observe Safety DANGER Information in Section 0.4 and in the Safety Booklet. 300314330_002_C7 - 05/2021 - © Leybold... -
Page 82: Removing From Service
Blow out the cooling water coils with compressed air or Nitrogen (max. 4 bar). Blow into the cooling water inlet port only. Also when storing the pump for longer periods of time the lubricant remains in the pump. 300314330_002_C7 - 05/2021 - © Leybold... -
Page 83: Maintenance
This form is available from Form www.leybold.com -> Downloads -> Download Documents. Attach the form to each pump. This statement detailing the type of contamination is required to satisfy legal requirements and for the protection of our employees. -
Page 84: Exchanging The Oil
Fill in new oil at a pump temperature of 15 ºC to 25 ºC. For this use a clean funnel. Make sure to use the right kind of oil. Only use Leybold oil. Observe the correct oil fill levels for the shutdown (standing still) pump. - Page 85 Oil level with the pump at standstill Oil level glass Oil drain plug Purge gas or gas ballast valves and cooling water Oil drain plug unit are not shown. Oil level glass Fig. 5.1 Oil change 300314330_002_C7 - 05/2021 - © Leybold...
-
Page 86: Checking And Cleaning The Gas Ballast Filter
The air filter should be subjected to maintenance within regular intervals. Open the locking clips at the air filter and remove the dust cap from the air fil- ter. Use dry compressed air to blow out the filter. 300314330_002_C7 - 05/2021 - © Leybold... -
Page 87: Replacing The Filter Cartridge In The Purge Gas Pressure Reducer
Fig. 3.5. For replacing, unscrew the metal protection basket with cup from the pres- sure reducer. Unscrew the mounting component and detach the used filter cartridge. Fit the parts using a new filter cartridge again. 300314330_002_C7 - 05/2021 - © Leybold... -
Page 88: Troubleshooting
Rotor is running untrue. Leybold Service, shutdown pump immediately. Oil slinger disc makes contact with the gear housing Leybold Service. or the oil pipe. Oil pump is blocked or defective. Leybold Service, shutdown pump immediately. 300314330_002_C7 - 05/2021 - © Leybold... -
Page 89: Fault And Alarms Displayed At The Frequency Converter
To remove an alarm or reset a fault, trace the cause, remove it and reset the frequency converter by pushing the Reset key on the operator or cycling the power supply. This lists up the most important alarms and faults only. 300314330_002_C7 - 05/2021 - © Leybold... - Page 90 50% of the frequency converters rated short circuits or broken insulation. Replace any output current. broken parts. Cable or motor insulation is broken. Reduce the carrier frequency. Excessive stray capacitance at frequen- cy converter output. 300314330_002_C7 - 05/2021 - © Leybold...
- Page 91 Drive The load is too heavy. Check the load. Overload Too much torque at low speed. The overload capability is reduced at low speeds. Reduce the load or increase the fre- quency converter size. 300314330_002_C7 - 05/2021 - © Leybold...
- Page 92 DC Charge The charge circuit for the DC bus is Cycle power to the frequency converter. Circuit Fault broken. Check if the fault reoccurs. Replace the frequency converter if the fault reoccurs. 300314330_002_C7 - 05/2021 - © Leybold...
- Page 93 The output frequency is below the fre- Detected quency set in P3-01 for the time set in P3-02. C-LiM C-Lim Alarm Drive was running at or above the Final Current Limit for the time P5-04 – P5-03 300314330_002_C7 - 05/2021 - © Leybold...
- Page 94 This ensures that only the faults “Pt 1000 open” and “Pt 1000 fault” can be seen or traced. As soon “Wait” is occurring the fre- quency converter stops with RUN to coast. 300314330_002_C7 - 05/2021 - © Leybold...
- Page 95 Check the V/f pattern settings. oPE12 Occurs if b1-01 (Frequency Reference) = 3 or b1-02 (Sequence Reference) =3 and Leybold Parameters Lower Level is set and option card is connected. Occurs if following condition is not given: P2-02 < P2-04 < P2-06 < P2-08 < P2-10 < P2-12 <...
-
Page 96: Wearing Parts
Waste oil from vacuum pumps must not be mixed with other substances or materials. Waste oil from vacuum pumps (Leybold oils which are based on mineral oils) which are subject to normal wear and which are contaminated due to the influence of oxygen in the air, high temperatures or mechanical wear must be disposed of through the locally available waste oil disposal system. -
Page 97: Eu Declaration Of Conformity
EU Declaration of Conformity 300314330_002_C7 - 05/2021 - © Leybold... - Page 98 This declaration becomes invalid if modifications are made to the product without prior agreement. Andries De Bock Axel Guddas VP Engineering General Manager Industrial Vacuum Division Product Company Cologne This product has been manufactured under a quality management system certified to ISO 9001:2015 300314330_002_C7 - 05/2021 - © Leybold...
- Page 99 2021-04-29 You must retain the signed legal declaration for future reference This declaration becomes invalid if modifications are made to the product without prior agreement. Signed for and on behalf of Leybold GmbH Andries De Bock Axel Guddas...
- Page 100 X: Indicates that the hazardous substance contained in at least one of the homogeneous materials used for this part is above the limit requirement of GB/T26572. This product has been manufactured under a quality management system certified to ISO 9001:2015 300314330_002_C7 - 05/2021 - © Leybold...
-
Page 101: Certificates
Certificates The DRYVAC DV 450 and DV 650 pumps have been certified by the TÜV Rheinland of North America according to the requirements of UL 61010-1: 2012 ■ Certificates CAN/CSA-C22.2 No.61010-1-12 ■ The components are in compliance to the tested standards. - Page 102 Leybold GmbH Bonner Strasse 498 50968 Cologne GERMANY T: +49-(0)221-347-0 info@leybold.com www.leybold.com...
Need help?
Do you have a question about the DRYVAC DV 450 and is the answer not in the manual?
Questions and answers