Table of Contents
Advertisement
Quick Links
Advertisement
Table of Contents

Related Manuals for Advantech EPD-210


Summary of Contents for Advantech EPD-210
- Page 1 User Manual EPD Device EPD-210 System Solution Wireless ePaper Display Solution...
- Page 2 No part of this manual may be reproduced, copied, translated, or transmitted in any form or by any means without the prior written permission of Advantech Co., Ltd. The information provided in this manual is intended to be accurate and reliable.
- Page 3 Technical Support and Assistance Visit the Advantech website at www.advantech.com/support to obtain the latest product information. Contact your distributor, sales representative, or Advantech's customer service center for technical support if you need additional assistance. Please have the following information ready before calling: –...
- Page 4 A battery subjected to extremely low air pressure that may result in an explo- sion or the leakage of flammable liquid or gas. DISCLAIMER: These instructions are provided according to IEC 704-1 standards. Advantech disclaims all responsibility for the accuracy of any statements contained herein. EPD-210 User Manual...
- Page 5 sion or the leakage of flammable liquid or gas. AVERTISSEMENT: Cet ensemble d'instructions est donné conformément à la norme CEI 704-1. Advantech décline toute responsabilité quant à l'exactitude des déclara- tions contenues dans le EPD-210 User Manual...
- Page 6 EPD-210 User Manual...
-
Page 7: Table Of Contents
System Architecture..............2 1.2.2 Hardware Specification ..............2 1.2.3 ID Dimension ................3 System Implementation................4 1.3.1 Advantech EPD-210 device, NFC APP tool, NFC agent, NFC reader.................... 4 Chapter NFC Writer & Reader ......5 Introduction ....................6 Specification....................6 Figure 2.1 EPR-210 ..............6... - Page 8 EPD-210 User Manual viii...
-
Page 9: Chapter 1 Product Overview
Chapter Product Overview... -
Page 10: Introduction
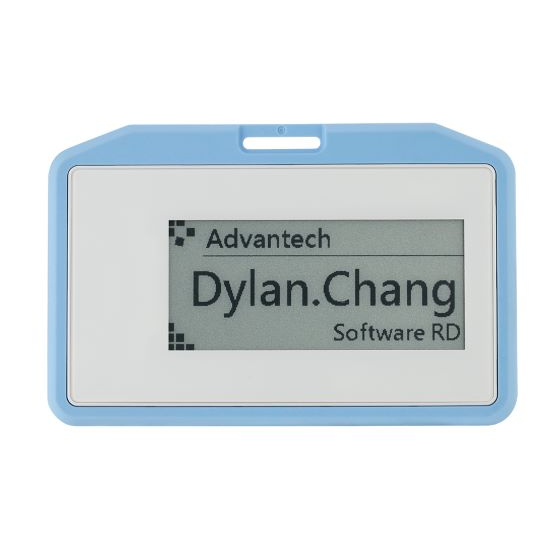
Introduction Advantech EPD-210 is an ePaper device that doesn’t require batteries. This ePaper device is relatively thin and equipped with a solid cover. The flexible fastener can be customized based on user scenarios. Advantech EPD-210 is widely utilized in badges, name card, logistic labels, manufacturing tracking cards, exhibitions, educa- tion, and IOT applications. -
Page 11: Id Dimension
Black and white Resolution 296 x 128 pixels Dimension 101x58x4.0mm(3.97x2.28x0.15 inch) without fastener Weight 36g(0.079lb) ISO/IEC 15693(ePaper image/User data read and write) Protocols ISO/IEC 14443(read only) Frequency 13.56MHz Power Supply 0-40°C(32-104°F) Operating Temperature IP54 1.2.3 ID Dimension EPD-210-001 EPD-210-101 EPD-210 User Manual... -
Page 12: System Implementation
Advantech provides a total solution for development of different architectures accord ing to the end customer's system requirements. NFC agent: users can utilize Advantech C+ sample code and dll to compile API and user’ data. Advantech NFC APP: download Advantech NFC APP on Android smart phones which reads ISO15693 type. -
Page 13: Chapter 2 Nfc Writer & Reader
Chapter NFC Writer & Reader... -
Page 14: Introduction
Introduction EPR-210 is Advantech NFC writer and reader. Users can apply Advantech C# dll to develop API and data binding.NFC APP is an Android APP which allow users to gen- erate various types of images using pre-defined templates and push them to Advant- ech EPD-210 through Near Field Communication (NFC). -
Page 15: Chapter 3 Epd-210 In Nfc App And Agent
Chapter EPD-210 in NFC APP and Agent Integration requirements of 3rd party readers... -
Page 16: Nfc App
NFC APP 3.1.1 Introduction Advantech APP provides some local templates and users can also create their images by downloading templates on DeviceOn/ePaper. This Advantech NFC APP includes five sections which contain all major functions in the APP. Section A. Sign in with Google account or anonymously ... - Page 17 Confirm your Google account to sign-in. Sign-in successfully. EPD-210 User Manual...
- Page 18 APP provides various kinds of sample templates for various domain usage, so you can choose a preferred template to prepare an image for EPD display. Take the price tag template for instance. Key in product information and click “push image”. EPD-210 User Manual...
- Page 19 Save image successfully. Click “Click to publish”. Place with overlapping the EPD-210 card under your Android phone. To place your smart phone at exactly NFC chip location to make sure connection. Please be patient and wait until all progress has finished. If NFC type detection is error (e.g IsoDep), please remove EPD-210 card from you’re android phone and try...
- Page 20 Section C. Image Management Images generated by local templates can be found in the Home section. In this section, you can browse all images, and delete unnecessary images. Click an image to delete it. EPD-210 User Manual...
- Page 21 Confirm to delete these images. Delete successfully. EPD-210 User Manual...
- Page 22 Section D. User Data Encoding Go to the NFC Encoding Page, and this section will teach you how to encode user data into EPD-210 card through NFC encoding. Choose an encode type. Here we support multiple encode types including Web Site, Telephone, SMS, Email, Business Card, LINE, and WiFi setting.
- Page 23 You can enter telephone number or find it from your contact list in your Android phone. Here, we find one from my contact list. Choose a contact with a phone number. EPD-210 User Manual...
- Page 24 You can see the telephone number is filled in. Click the CLICK TO PUBLISH button to start. Touch the EPD-210 card on the back of your Android phone, to your NFC chip location. Please be patient and wait until all progress is finished. If NFC type detection is error (e.g IsoDep), please remove EPD-210 card from your Android...
- Page 25 Section E. Online Templates In this section, you can download online templates from DeviceOn/ePaper server. Go to Online Templates page. You must register a connection to Device/ePaper for the first time. Click the Set- ting button. EPD-210 User Manual...
- Page 26 And use the following information to sign in. Server: DeviceOn/ePaper (Azure VM) URL: http://40.65.188.196:8080 Username: root Password: P@ssw0rd Confirm to register and sign in successfully. EPD-210 User Manual...
- Page 27 Go back to Online Template page, please wait for a while to access all online templates in DeviceOn/ePaper server. EPD-210 User Manual...
- Page 28 Select templates you want to download, and then click the DOWNLOAD button. After download is done, go to the Template Management page to use them. EPD-210 User Manual...
- Page 29 All online templates be included in the Custom group. Swift left on the templates, and you will find the new templates which just down- loaded from DeviceOn/ePaper. Key in any necessary info and then click the COMPLETE button. EPD-210 User Manual...
- Page 30 Image is saved. Click the CLICK TO PUBLISH button.Touch the EPD-210 card on the back of your Android phone, to be exactly, your NFC chip location. Please be patient and wait until all progress is finished. If NFC type detection is error (e.g IsoDep), please remove EPD-210 card from your Android phone and...
-
Page 31: Nfc Agent
USB port of computer which EPD- NFC agent installed, so that this command will send to its local agent and wait for EPD-210 card to approach it. This action will build an automatic process to transmit images one after one. -
Page 32: Installation
3.2.3 Installation Double click the Setup.msi file to run the installation wizard. Click Next to continue. Select an installation directory to install this program, and then click Next. EPD-210 User Manual... - Page 33 Click Next to start the installation. You will see the installation process. Please give it administrator authorization to complete this installation. EPD-210 User Manual...
- Page 34 Login in the ePaper Manager. Upload the item data. Navigate to the Item Data page, and click the plus icon to open a new item group named Warehouse, and then upload the sample data file Warehouse.csv from the data directory. EPD-210 User Manual...
- Page 35 Navigate to Template page, and click the plus icon to import the template from file directory, as the following picture, you can import two sample template files (RMA-P2L Off.json and RMA-P2L-On.json) under the template folder, sepa- rately. Please remember to save it before you upload the second one. EPD-210 User Manual...
- Page 36 After the upload is done, you will see the results like the following pictures. Program Execution Start the program Go to the start menu in Windows, and find the program called EPD NFC Agent and click it to execute the program. EPD-210 User Manual...
- Page 37 Chrome and directly sign in with the same URL path, user- name, and password. Note 2. Typo error. First view of EPD NFC Agent After you sign in successfully, you will see a program widget as in the following picture. EPD-210 User Manual...
- Page 38 Step 4. Click the Refresh button to get the newest USB port. You should get a newly connected USB port, COM4 in this example, which is the right port for the LEO-D30 Reader. See the following picture. Check it is properly connected. EPD-210 User Manual...
- Page 39 Put the EPD-210 card on the LEO-D30 NFC reader. If you select the right USB port and the EPD NFC Agent works properly, you should see a green light on both labels of ePaper Manager and the USB Port. Note: Because the number of USB port will be kept on this machine, you can remem- ber it for next time.
- Page 40 Select an item and preview by click the row in the table. You can also edit the data by double clicking it and keying in what you want to change. Click the row again to preview the results. EPD-210 User Manual...
- Page 41 Draw the image by clicking the Draw button, and you will see the progress of sending the image to the EPD-210 card. When it finished, you will see the image generated on the EPD-210 card. Queue Mode Usage Go to the Queue Mode panel by clicking the Queue Mode tab.
- Page 42 For example, I want to skip both the first and secondary jobs and change the position of the cursor to the row number 3, and next time the agent will send the third job to the EPD-210 card, as shown in the following image.
- Page 43 Headers: – Content-Type: application/json – Accept: application/json – Authorization: Basic [BASE64-ENCODED STRING username:password] Body: – raw: JSON (application/json) – Content as described below (You also can access it from request.json file under the api_sample directory) EPD-210 User Manual...
- Page 44 "name": "Warehouse", "location": "A_L12-15", "content": "{\"Part_Number\":\"1410023671\",\"Storage_Bin\":\"A_L12- 15\",\"Description\":\"FLASH ROM-5420 V1.10 CS:0043140B LPC11U1\",\"Status\":\"A\",\"Indicator\":\"T\",\"Cost\":\"50\",\"Storage\":\"R010\",\"Req uest_Qty\":\"1\",\"Storage_Qty\":\"2\",\"QR_Code_Deliver\":\"Advant- ech\",\"QR_Code_No_Stock\":\"Wise-PaaS\",\"LANE_ID\":\"A\",\"Appli- cant\":\"Yan.Chen\",\"Updated_Time\":\"03/30/20\"}" "mac_addr": "b06ebfcb47bc", "reader_id": "COM4", "job_id": "CUSTOM_JOB_ID_3", "template_name": "RMA-P2L-Off", "data": { "code": "1410023672", "name": "Warehouse", "location": "A_L12-15", "content": "{\"Part_Number\":\"1410023672\",\"Storage_Bin\":\"A_L12- 15\",\"Description\":\"uCTRL ADAM-3600-C-IO 01010188 CS:D1ED STM32F373C\",\"Status\":\"A\",\"Indicator\":\"\",\"Cost\":\"66\",\"Storage\":\"R010\",\"R EPD-210 User Manual...
- Page 45 Send button. You should see the response result: { "result": true }. Back to the EPD NFC Agent, you can see three jobs queued in the table and a send- ing progress of the first content job (Job ID: CUSTOM_JOB_ID_1) will begin auto- matically. EPD-210 User Manual...
- Page 46 You can put another EPD-210 card and the second job (Job ID: CUSTOM_- JOB_ID_2) will start automatically. EPD-210 User Manual...
-
Page 47: Integration Requirement Of 3Rd Reader
3.3.1 Integration of NFC software Figure 3.1 is the architecture of EPD-210 and a reader for the system and software. If users want to use a 3rd reader to control EPD-210, first you must integrate the FTM application software for NFC. Because EPD-210 data exchanges with the reader by FTM, which is based on ISO 15693, it is necessary for the reader to support FTM mailbox NFC protocol. - Page 48 EPD-210 User Manual...
- Page 49 No part of this publication may be reproduced in any form or by any means, such as electronically, by photocopying, recording, or otherwise, without prior written permission from the publisher. All brand and product names are trademarks or registered trademarks of their respective companies. © Advantech Co., Ltd. 2022...
Need help?
Do you have a question about the EPD-210 and is the answer not in the manual?
Questions and answers