Advertisement
Available languages
Available languages
Quick Links
Advertisement

Related Manuals for BorMann Pro BAP7000


Summary of Contents for BorMann Pro BAP7000
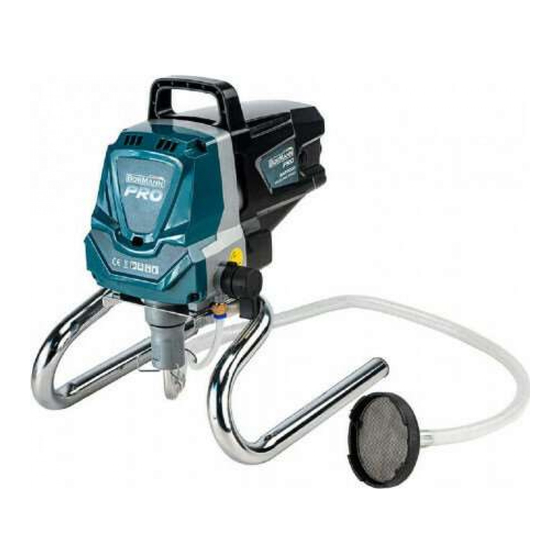
- Page 1 BAP7000 035947 v2.1 Art Nr: WWW.BORMANNTOOLS.COM...
-
Page 2: Safety Instructions
Safety instructions WARNING! Read this material before using this product. Failure to do so can result in serious injury. SAVE THIS MANUAL. RETURNS NOT ACCEPTED & WARRANTY VOID if Sprayer is not properly cleaned immediately after use. Clean Sprayer immediately to prevent permanent damage. Save This Manual Keep this manual for the safety warnings and precautions, assembly, operating, inspection, maintenance and cleaning procedures. - Page 3 3. Personal safety a. Stay alert. Watch what you are doing and use common sense when operating the sprayer. Do not use the sprayer while tired or under the influence of drugs, alcohol, or medication. A moment of inattention while operating the sprayer increases the risk of injury to persons. b.
-
Page 4: Description Of Main Parts
er interference or pacemaker failure. 31. WARNING: Some dust created by power sanding, sawing, grinding, drilling, and other construction activities, contains chemicals known [to the State of California] to cause cancer, birth defects or other reproductive harm. Some examples of these chemicals are: •... - Page 5 Controls and Functions ON/OFF Switch: The ON/OFF switch turns the power to the sprayer on and off (O=OFF, l=ON). Suction tube: Fluid is drawn through the suction tube into the pump. Fluid Section: A piston in the fluid section moves up and down to create the suction that draws fluid through the suction tube. Spray Gun: The spray gun controls the delivery of the fluid being pumped.
- Page 6 Operating instructions This section contains instructions that will be repeated throughout this manual. Locking the Spray Gun: Always lock the trigger off when attaching the spray tip or when the spray gun is not in use. Spray Gun The gun is locked when the trigger lock is at a 90º angle. (perpendicular to the trigger in either direction).
- Page 7 Purging and Priming the Sprayer All new units are performance-tested at the factory and are shipped with test fluid in the fluid section to prevent corrosion during shipment and storage. If you have already used your pump, some water or solvent used in cleaning may remain in the fluid section. Whether your sprayer is new or if you have already used it, this fluid must be purged and thoroughly cleaned out of the system prior to use.
- Page 8 4. Release trigger. Turn the PRIME/SPRAY knob to PRIME. 5. Lock the spray gun off. Make sure the saddle and black seal are in Turn the pump OFF (O). Trigger the gun into the waste con- place inside the tip guard nut. Thread the spray tip guard assembly tainer to be sure that no pressure is left in the hose.
- Page 9 The key to a good job is an even coating over the entire surface. This is done by using even strokes. Follow the TIPS, below. Light coat Heavy coat Light coat Tip: Keep the spray gun at right angles to the surface. This means moving your entire arm back and forth rather than just flexing your wrist.
- Page 10 Spraying Troubleshooting - Unclogging the Spray Tip If the spray pattern becomes distorted or stops completely while the gun is triggered, follow these steps. Warning! Do not attempt to unclog or clean the tip with your finger. NOTE - Do not use a needle or other sharp pointed instrument to clean the tip. The hard tungsten carbide can chip.
- Page 11 Spray gun - 1 Spray gun - 2 Tapered end (filter Tapered top) Filter end (filter top) Hole Hole Spring Fitting Spraying Troubleshooting - Cleaning the Inlet Filter The filter at the bottom of the suction tube may also need cleaning. Check it every time you change spray containers.
- Page 12 6. Unclip the return tube from the suction tube and place it into 7. Turn water supply on. Turn pump ON (l). Water will go the waste container. Turn the PRIME/SPRAY knob to PRIME. into the suction tube and out through the return tube. Let pump run for a few minutes to allow the return tube to be flushed.
- Page 13 Cleanup - Oil-based materials 1. Lock the gun and remove spray tip assembly. Submerge 2. Place a waste container next to the original material container. suction set into a bucket with appropriate cleaning solution. Aim the spray gun into the side of the original material container and hold the trigger.
- Page 14 Cleanup - Cleaning the Suction Set 1. Lock the gun and turn the pump OFF (O). 2. Remove the suction hose and return tube and clean it using the appropriate cleaning solution. You should also wipe the threads of the inlet nut (a) and remove and clean the solution set inlet filter.
- Page 15 Cleanup - Cleaning the Spray Gun Components 1. Make sure the pump is switched OFF (O). Make 2. Remove spray gun from the paint hose using adjustable sure the PRIME/SPRAY knob is turned to PRIME. wrenches Unplug the sprayer. 3. Remove filter from spray gun (refer to Cleaning the 4.
- Page 16 Short-Term Storage (up to 16 hours) Follow these steps when using latex materials only. If using materials that are oil-based, follow the Cleanup and Long- Term Storage steps. Shutdown 1. Lock the spray gun off 2. Turn the PRIME/SPRAY knob to PRIME. Switch 3.
- Page 17 Long-Term Storage Follow these instructions only after all cleanup steps have been performed. 1. Fill a cup or other container with separating oil (approximately 2 ounces) supplied with the unit and submerge the inlet valve into the oil. Separating oil 2.
- Page 18 Cleaning the Inlet Valve Cleaning or servicing the inlet valve may be required if the unit has priming problems. Priming problems may be prevented by properly cleaning the sprayer and following the Long-Term Storage steps. 1. Remove the suction set. 2.
- Page 19 Fluid Section Seal Replacement Instructions WARNING! Always wear protective eye wear while servicing the pump. Be sure to follow the Pressure Relief Procedure when shutting the unit down for any purpose, including servicing or adjusting. After performing the Pressure Relief Procedure, be sure to unplug the unit before servicing or adjusting. Area must be free of solvents and paint fumes.
-
Page 20: Troubleshooting & Maintenance
Troubleshooting / Maintenance Problem Cause Solution The sprayer does not start. The sprayer is not plugged in. Plug the sprayer in. The ON/OFF switch is set to OFF. Turn the ON/OFF switch to ON. The sprayer was turned off while Turn the pressure control knob to still under pressure. - Page 21 The spray gun will not spray. The spray tip or the gun filter is Clean the spray tip or gun filter. plugged. Put the tip in the SPRAY position. The spray tip is not fully in the SPRAY position. The paint pattern is tailing. The pressure is set too low.
-
Page 22: Οδηγίες Ασφαλείας
Οδηγίες ασφαλείας Προσοχή! Διαβάστε τις παρακάτω οδηγίες πριν χρησιμοποιήσετε αυτό το προϊόν. Εάν δεν το κάνετε, μπορεί να προκληθεί σοβαρός τραυματισμός. ΦΥΛΑΞΤΕ ΤΟ ΕΓΧΕΙΡΙΔΙΟ ΣΕ ΕΝΑ ΑΣΦΑΛΕΣ ΣΗΜΕΙΟ ΓΙΑ ΜΕΛΛΟΝΤΙΚΗ ΑΝΑΦΟΡΑ. Οι επιστροφές δεν θα γίνονται δεκτές και η εγγύηση ενδέχεται να ακυρωθεί αν το μηχάνημα δεν καθαρίζεται σωστά αμέσως μετά τη χρήση. Καθαρίστε... - Page 23 Ε. Κατά τη λειτουργία του μηχανήματος σε εξωτερικούς χώρους, χρησιμοποιήστε ένα καλώδιο προέκτασης κατάλληλο για εξωτερική χρήση. Η χρήση καλω- δίου κατάλληλου για εξωτερική χρήση μειώνει τον κίνδυνο ηλεκτροπληξίας. Στ. Εάν η λειτουργία του μηχανήματος σε χώρο όπου υπάρχει υγρασία είναι αναπόφευκτη, χρησιμοποιήστε μια συσκευή (GFCI). Η...
- Page 24 18. Για τον καθαρισμό του συστήματος βαφής, χρησιμοποιήστε τη χαμηλότερη δυνατή ρύθμιση πίεσης. 19. Όλοι οι εύκαμπτοι σωλήνες και τα εξαρτήματα ψεκασμού που χρησιμοποιούνται με το μηχάνημα πρέπει να έχουν πίεση μέχρι και 3000 PSI. 20. Το μηχάνημα πρέπει να είναι συνδεδεμένο σε μια πρίζα που είναι γειωμένη σύμφωνα με όλους τους τοπικούς κανονισμούς και νόμους. 21.
-
Page 25: Οδηγίες Συναρμολόγησης
7. Βεβαιωθείτε ότι το καλώδιο προέκτασης είναι καλώς συνδεδεμένο και βρίσκεται σε καλή λειτουργική κατάσταση. Να αντικαθιστάτε πάντα ένα κατε- στραμμένο καλώδιο προέκτασης ή να το επισκευάσετε παραδίδοντάς το σε έναν ειδικευμένο ηλεκτρολόγο πριν το χρησιμοποιήσετε. 8. Προστατέψτε τα καλώδια προέκτασης από αιχμηρά αντικείμενα, υπερβολική θερμότητα και την υγρασία. Περιγραφή... - Page 26 4. Συνδέστε τον εύκαμπτο σωλήνα υψηλής πίεσης στην 5. Συνδέστε το άλλο άκρο του σωλήνα στο πιστόλι ψεκα- υποδοχή σύνδεσης. Σφίξτε με ένα ρυθμιζόμενο κλειδί. σμού. Κρατήστε το πιστόλι με το ένα ρυθμιζόμενο κλειδί και σφίξτε το παξιμάδι του σωλήνα με το άλλο. Το...
-
Page 27: Οδηγίες Λειτουργίας
Οδηγίες λειτουργίας Αυτή η ενότητα περιέχει οδηγίες που θα επαναλαμβάνονται σε όλο το παρόν εγχειρίδιο. Ασφάλιση/Κλείδωμα του πιστολιού ψεκασμού: Κλειδώνετε πάντα τη σκανδάλη όταν τοποθετείτε το ακροφύσιο ψεκασμού ή όταν το πιστόλι ψεκασμού δεν χρησιμοποιείται. Πιστόλι ψεκασμού (βαφής) Το πιστόλι είναι κλειδωμένο όταν η ασφάλεια της σκανδάλης βρίσκεται σε γωνία 90º. (κάθετα... - Page 28 Καθαρισμός και προετοιμασία του μηχανήματος Όλες τα καινούργια μηχανήματα ελέγχονται ως προς τις επιδόσεις τους στο εργοστάσιο και αποστέλλονται γεμισμένα με δοκιμαστικό υγρό για να αποφευ- χθεί η διάβρωση κατά τη μεταφορά και την αποθήκευση. Εάν έχετε ήδη χρησιμοποιήσει το μηχάνημά σας, ενδέχεται να παραμείνει εντός του, λίγο νερό ή...
- Page 29 4. Αφήστε τη σκανδάλη. Γυρίστε τον διακόπτη PRIME/ 5. Κλειδώστε το πιστόλι ψεκασμού. Βεβαιωθείτε ότι το έδρανο SPRAY στη θέση PRIME. Κλείστε την αντλία OFF (Ο). Πα- και το μαύρο εξάρτημα στεγανοποίησης βρίσκονται στη θέση τήστε την σκανδάλη κατευθύνοντας το πιστόλι μέσα στο τους...
- Page 30 Για καλύτερα αποτελέσματα, συστήνεται η ομοιόμορφη επίστρωση σε ολόκληρη την επιφάνεια. Αυτό επιτυγχάνεται με ομοιόμορφες κινήσεις. Ακολουθήστε τις παρακάτω συμβουλές. "Βαριά" "Ελαφριά" "Ελαφριά" επίστρωση επίστρωση επίστρωση Συμβουλή: Κρατήστε το πιστόλι ψεκασμού σε ορθή γωνία ως προς την επιφάνεια. Αυτό σημαίνει ότι πρέπει να κινείτε ολόκληρο το χέρι σας μπρος-πίσω και...
- Page 31 Αντιμετώπιση προβλημάτων ψεκασμού - Απόφραξη του ακροφυσίου ψεκασμού Εάν το μοτίβο ψεκασμού παραμορφώνεται ή σταματά εντελώς ενώ το πιστόλι ενεργοποιείται, ακο- λουθήστε τα παρακάτω βήματα. Προειδοποίηση! Μην επιχειρήσετε να ξεβουλώσετε ή να καθαρίσετε το ακροφύσιο με το δά- χτυλό σας. ΣΗΜΕΙΩΣΗ...
- Page 32 Πιστόλι ψεκασμού - 1 Πιστόλι ψεκασμού - 2 Κωνικό Κωνικό άκρο (άνω άκρο (άνω μέρος μέρος Φίλτρο φίλτρου) φίλτρου) Οπή Ελατήριο Οπή Σύνδεσμος Αντιμετώπιση προβλημάτων ψεκασμού - Καθαρισμός του φίλτρου εισόδου Το φίλτρο στο κάτω μέρος του σωλήνα αναρρόφησης μπορεί επίσης να χρειάζεται καθαρισμό. Ελέγξτε το κάθε φορά που αλλάζετε...
- Page 33 6. Αποσυνδέστε το σωλήνα επιστροφής από το σωλήνα αναρρό- 7. Ανοίξτε την παροχή νερού. Ενεργοποιήστε την αντλία φησης και τοποθετήστε τον στο δοχείο αποβλήτων. Γυρίστε τον (l). Το νερό θα εισέλθει στο σωλήνα αναρρόφησης και θα διακόπτη PRIME/SPRAY στη θέση PRIME. εξέλθει...
- Page 34 Καθαρισμός - Υλικά με βάση το λάδι 1. Κλειδώστε το πιστόλι και αφαιρέστε το σύστημα του ακρο- 2. Τοποθετήστε ένα δοχείο συλλογής αποβλήτων δίπλα στο φυσίου. Βυθίστε το σύστημα αναρρόφησης σε ένα δοχείο με δοχείο του αρχικού υλικού. Στοχεύστε το πιστόλι ψεκασμού στο το...
- Page 35 Καθαρισμός του συστήματος αναρρόφησης 1. Κλειδώστε το πιστόλι και απενεργοποιήστε την 2. Αφαιρέστε τους σωλήνες αναρρόφησης και επι- αντλία (O). στροφής και καθαρίστε τους με το κατάλληλο καθα- ριστικό διάλυμα. Θα πρέπει επίσης να σκουπίσετε τα σπειρώματα του παξιμαδιού εισόδου (a) και να αφαιρέσετε...
- Page 36 Καθαρισμός των εξαρτημάτων του πιστολιού ψεκασμού 1. Βεβαιωθείτε ότι η αντλία είναι απενεργοποιημέ- 2. Αφαιρέστε το πιστόλι ψεκασμού από το σωλήνα ψεκα- νη (Ο). Βεβαιωθείτε ότι ο διακόπτης PRIME/SPRAY σμού χρησιμοποιώντας ρυθμιζόμενα κλειδιά. είναι γυρισμένος στη θέση PRIME. Αποσυνδέστε το μηχάνημα...
- Page 37 Αποθήκευση σύντομης χρονικής διάρκειας (έως 16 ώρες) Ακολουθήστε αυτά τα βήματα όταν χρησιμοποιείτε μόνο υλικά από λατέξ. Εάν χρησιμοποιείτε υλικά με βάση το λάδι, ακολουθήστε τα βήματα Καθαρισμός και μακροχρόνια αποθήκευση. Ολοκλήρωση διαδικασίας 1. Κλειδώστε το πιστόλι 2. Γυρίστε τον διακόπτη PRIME/SPRAY στη θέση 3.
- Page 38 Μακρόχρονη αποθήκευση Ακολουθήστε αυτές τις οδηγίες μόνο μετά την εκτέλεση όλων των βημάτων της διαδικασίας καθαρισμού. 1. Γεμίστε ένα κύπελλο ή άλλο δοχείο με ειδικό διάλυμα συντήρησης και βυθίστε τη βαλβίδα ει- σόδου στο δοχείο. Ειδικό διάλυμα συντήρησης. 2. Τοποθετήστε ένα πανί πάνω από την υποδοχή σύν- δεσης...
- Page 39 Καθαρισμός της βαλβίδας εισόδου Καθαρισμός ή συντήρηση της βαλβίδας εισόδου μπορεί να απαιτηθεί εάν η μονάδα παρουσιάζει προβλήματα εκκίνησης. Τα προβλήματα εκκίνησης μπορούν να αποφευχθούν με τον κατάλληλο καθαρισμό του μηχανήματος και την τήρηση των βημάτων μακροχρόνιας αποθήκευσης. 1. Αφαιρέστε το σύστημα αναρρόφησης. 2.
- Page 40 Αποσυναρμολόγηση της αντλίας 1. Αφαιρέστε το σύστημα αναρρόφησης. 2. Αφαιρέστε το μπροστινό κάλυμμα και τις τέσσερις βίδες που το στερεώνουν χρησιμοποιώντας Torx T20. 3. Χρησιμοποιήστε ένα T20 Torx. 4. Αφαιρέστε τον κοχλία και τη ροδέλα που ασφαλίζει τον πείρο. Ο πείρος συνδέει τον κοχλία με το έμβολο. 5.
- Page 41 Αντιμετώπιση προβλημάτων / Συντήρηση Περιγραφή προβληματος Πιθανή αιτία Ενέργεια αντιμετώπισης Το μηχάνημα δεν ενεργοποιείται. Το μηχάνημα είναι αποσυνδεδε- Συνδέστε το μηχάνημα με την παροχή. μένο από την παροχή. Γυρίστε τον διακόπτη ON/OFF στην Ο διακόπτης On/Off είναι στην θέση ON. θέση...
- Page 42 Η βαλβίδα PRIME/SPRAY είναι στη Η βαλβίδα PRIME/SPRAY είναι Παραδώστε το μηχάνημα σε εξουσιο- θέση SPRAY και υπάρχει ροή μέσω ακάθαρτη ή φθαρμένη. δοτημένο κέντρο σέρβις. του σωλήνα επιστροφής. Το πιστόλι ψεκασμού έχει διαρροή 1. 1. Τα εσωτερικά μέρη του πιστολιού 1.
Need help?
Do you have a question about the Pro BAP7000 and is the answer not in the manual?
Questions and answers