Sign In
Upload
Download
Table of Contents
Contents
Add to my manuals
Delete from my manuals
Share
URL of this page:
HTML Link:
Bookmark this page
Add
Manual will be automatically added to "My Manuals"
Print this page
×
Bookmark added
×
Added to my manuals
Manuals
Brands
Rapid Shape Manuals
3D Printers
D50+
Translation of the original operating instructions
Rapid Shape D50+ Translation Of The Original Operating Instructions
Hide thumbs
1
2
Table Of Contents
3
4
5
6
7
8
9
10
11
12
13
14
15
16
17
18
19
20
21
22
23
24
25
26
27
28
29
30
31
32
33
34
35
36
37
38
39
40
41
42
43
44
45
46
47
48
49
50
51
52
53
54
55
56
57
58
59
60
61
62
63
64
65
66
67
68
69
70
71
72
73
74
75
76
77
78
79
80
81
82
83
84
85
86
87
88
89
90
91
92
93
94
95
96
page
of
96
Go
/
96
Contents
Table of Contents
Troubleshooting
Bookmarks
Table of Contents
Table of Contents
Safety
Symbols in this Manual
Intended Use
Digital Workflow
Safety Devices
Protective Hoods
Hood Switch
Knife Protection Device
Attached Safety Markings
Residual Risks
Electrical Current
Mechanical Dangers
UV Radiation
Chemical Dangers
Danger Due to Hot Surfaces
Danger of Material Damage
Personnel Requirements
Personal Protective Equipment
Environmental Protection
Overview
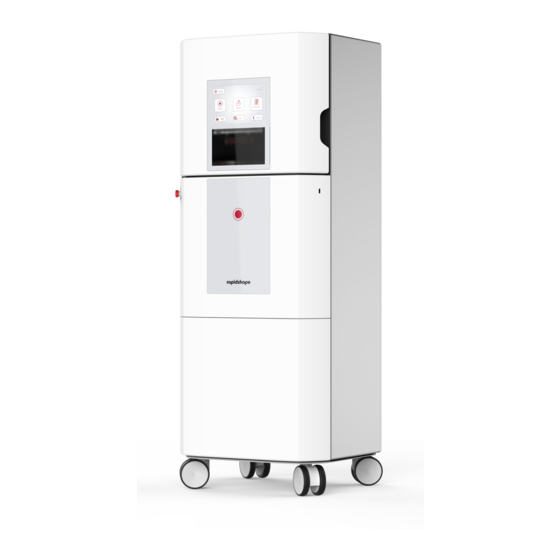
Machine Assembly & Operating Elements
Serial Plate
Transport & Storage
Transporting the Machine
Unpacking the Machine
Scope of Delivery
Storing the Machine
Installation
Setting up
Requirements for the Installation Location
Setting up the Machine
Aligning the Machine
Connecting the Machine
Setting up the Wi-Fi Connection
Connecting the Machine to Other Devices (Intelligent Connectivity)
Emergency Shutdown
Preparations
Required Accessories
Print Accessories
IT Requirements
Netfabb
Operation
Switching on the Machine
Switching on the Machine for the First Time
Switching on the Machine in Daytime Mode
Menu Overview
Verifying the Machine Status
Opening & Closing the Machine
Opening & Closing the Machine with the Foot Sensor
Opening & Closing the Machine Manually
Automatic Hood Closing
Making General Settings in the Customer Menu
Hide Warnings (Reservoir Inserted)
Disable Automatic Updates
Enable Automatic Part Separation
Show Detailed Printing Screen
Intelligent Connectivity
Disable Mixing
Disable Automatic Hood
Disable Hood Assistant
Enable Automatic Refill
Move Jobs in Queue on Complete
Maximum Jobs in Basket
Offset Part Detection
Preparing the Machine for Printing (Start of the Day)
Checking the Individual Components for Cleanliness
Inserting the Build Platform
Inserting the Knife Drip Guard & the Knife
Inserting the Material Reservoir
Inserting the Collection Basket
Connecting the Hose (Automatic Refill)
Setting up & Administrating the Automatic Separation Function
Operation with Automatic Separation Function
Operation Without Automatic Separation Function
Printing Jobs
Starting the Print Job
Switching the Print View
Pausing Jobs & Ending Them Prematurely
Side Note: Integrated Heating Function
Refilling Printing Material
Refilling Printing Material Manually
Automatic Refill: Refilling the Printing Material Automatically
Automatic Refill: Replacing the Material Bottle (Empty > Full)
Automatic Refill: Re-Pumping Printing Material Manually
Removing Jobs
Removing Jobs with the Automatic Separation Function
Removing Jobs Without Automatic Separation Function (Manually)
Post-Processing Jobs
Cleaning Jobs
Post-Curing Jobs
Checking Your Jobs
Changing Printing Material
Machine Follow-Up (End of Day)
Decommissioning
Switching off the Machine
Switching off the Machine in Daytime Mode
Switching off the Machine for a Prolonged Period of Time (> 1 Week)
Shutting down the Machine for a Long Period of Time (> 1 Month)
Troubleshooting
Cleaning & Maintenance
Overview of the Cleaning & Maintenance Work
Cleaning the Protective Glass
Cleaning the Build Platform
Cleaning the Knife
Cleaning the Knife Drip Guard
Cleaning the Material Reservoir
Cleaning the Collection Basket
Calibrating the Exposure Unit (One-Point Calibration)
Checking the Separation Unit
Checking the Refill Unit
10.1.10 Checking & Adjusting the Parallelism of the Build Platform
Performing Automatic Reservoir Cleaning (Clean Reservoir)
10.1.12 Cleaning the Hose
10.1.13 Changing the Knife
10.1.14 Changing the Hose
Disassembly & Disposal
Disassemble the Machine
Dispose of the Machine
Technical Details
Advertisement
Quick Links
Download this manual
D50+ 3D Printing System
P50+ | SHERAprint 50
Translation of the Original Operating Instructions
Rapid Shape GmbH │ Römerstraße 21 │ 71296 Heimsheim │ Germany
Phone +49 (0)7033 309 878 0 │ info@rapidshape.de │ www.rapidshape.de
Revision: 1 (15.02.2022) │ DOCR000438
EN
Table of
Contents
Previous
Page
Next
Page
1
2
3
4
5
Advertisement
Table of Contents
Need help?
Do you have a question about the D50+ and is the answer not in the manual?
Ask a question
Questions and answers
Related Manuals for Rapid Shape D50+
3D Printers Rapid Shape D30+ Original Operating Instructions
(44 pages)
3D Printers Rapid Shape D20+ Operating Instructions Manual
(37 pages)
3D Printers Rapid Shape RS cure Quick Start Manual
Post curing unit (10 pages)
3D Printers Rapid Shape P50+ Translation Of The Original Operating Instructions
(96 pages)
3D Printers Rapid Shape 3Demax Operating Instructions Manual
(37 pages)
3D Printers Rapid Shape P30+ Original Operating Instructions
(44 pages)
3D Printers Rapid Shape P20+ Operating Instructions Manual
(37 pages)
This manual is also suitable for:
P50+
Sheraprint 50
Table of Contents
Print
Rename the bookmark
Delete bookmark?
Delete from my manuals?
Login
Sign In
OR
Sign in with Facebook
Sign in with Google
Upload manual
Upload from disk
Upload from URL


Need help?
Do you have a question about the D50+ and is the answer not in the manual?
Questions and answers