PRESONUS R Series Owner's Manual
Active amt studio monitors
Hide thumbs
Also See for R Series:
- Owner's manual (17 pages) ,
- Quick start manual (2 pages) ,
- User manual

Subscribe to Our Youtube Channel
Related Manuals for PRESONUS R Series


Summary of Contents for PRESONUS R Series
- Page 1 R-Series R65 V2 and R80 V2 Active AMT Studio Monitors Owner’s Manual 用户手册 ® English www.presonus.com...
-
Page 2: Table Of Contents
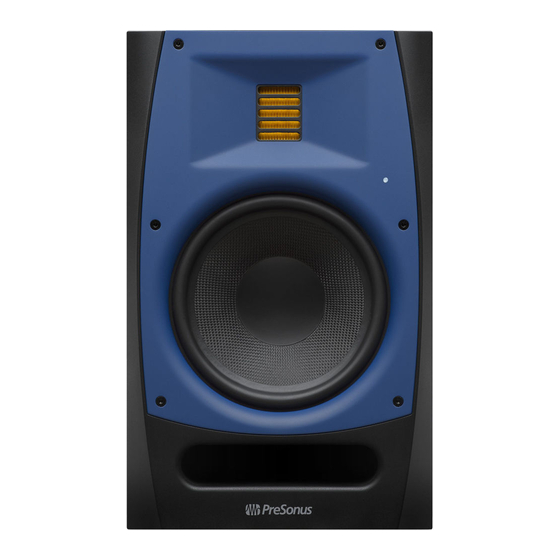
TableofContents 目录内容 Overview 概述 — 1 Introduction 介绍 — 1 Product Registration 产品注册 — 2 What’s in the Box 都有什么 — 2 Hookup 连接 — 3 Rear Panel Connections and Controls 后面板连接和控制 — 3 Inputs 输入— 3 2.1.1 Power 电源— 3 2.1.2 Acoustic Tuning Controls 声学调音控制... - Page 3 最大声压级方面有所不同;所有其他规格都是相同的。两个型号都采用了定制的AMT 高音单元。这种设计提供了一个超快的瞬态响应和一致的高频响应。6.8英寸的AMT高 音扬声器再现了微妙的超高谐波,增加了空气和空间感,这是传统球顶型高音扬声器无 法做到的。其结果是你可以听到你的混音的每一个细微差别,具有惊人的清晰度和一致性。 PreSonus Audio Electronics is committed to constant product improvement, and wevalueyour suggestionshighly.Webelieve thebestwaytoachieve our goal of constantproduct improvementis by listening to the real experts: our valued customers.Weappreciatethesupportyouhaveshownusthroughthepurchase of this product and are confident that you will enjoy your R65 V2/R80 V2!
- Page 4 R-SeriesR65V2andR80V2 Overview PreSonus Audio Electronics致力于不断改进产品,我们高度重视您的建议。我们相信,实现我 们不断改进产品的目标的最佳方式是听取真正的专家:我们尊贵的客户。我们感谢您通过购买 本产品对我们的支持,并相信您会喜欢您的R65 V2/R80 V2! 关于本手册。我们建议您在尝试将R系列录音室监听设备与其他录音室设备连接之前,使用本手 册熟悉其功能、应用和工作流程。这将有助于你获得更好的性能和效果。 在这本手册中,你会发现一些强大的用户提示,可以使你迅速成为演播室监听专家,从而使你 的投资得到最大的回报。 如果这是你的第一对录音室监听器,请看第3节,了解在混音环境中正确设置它们的细节。更多 www.presonus.com/learn/technical-articles。 信息可在...
-
Page 5: Product Registration 产品注册
PreSonus is committed to delivering the best experience for our customers. MyPreSonusis aone-stopportal forall our registeredcustomers’needs. From your my PreSonus account, you can view all your PreSonus hardware and software registrations;contact support; track orders and more. Toregister your R-Series studio monitor, go to My.PreSonus.com... -
Page 6: Hookup 连接
R-SeriesR65V2andR80V2 Hookup Owner’s Manual Rear Panel Connections and Controls Hookup 连接 Rear Panel Connections and Controls 后面板的连接和控制 2.1.1 Inputs 输入 Line-level Inputs. The R-Series studio monitors provide a choice of three line- level input types: balanced XLR, balanced ¼”TRS, and unbalanced RCA. Do not connect more than one source to your R-Series studio monitors simultaneously. -
Page 7: Acoustic Tuning Controls 声学调音控制
R-SeriesR65V2andR80V2 Hookup Owner’s Manual Rear Panel Connections and Controls PowerSwitch.This istheOn/Offswitchforyour R-Seriesstudiomonitor.When your R-Series studio monitor is powered On, the blue LED on the front panel will illuminate. 电源开关:这是R系列演播室监听器的开/关开关。当你的R系列演播室 监听器通电后,前面板上的蓝色LED将亮起。 AC Select Switch. The input-power voltage is set at the factory to correspond with the country to which the R-Series studio monitor was shipped. - Page 8 Power User Tip: If you are using a subwoofer that doesn’t feature a variable low pass filter, like the PreSonus Temblor T10 provides, you will use this control to set the crossover point for your 2.1 system. Forinformation on configuring a 2.1 system in the studio, please visitwww.PreSonus.com/Learn/Technical-Articles.
-
Page 9: Hookup Diagrams 连接图
R-SeriesR65V2andR80V2 Hookup Owner’s Manual Hookup Diagrams AcousticSpace. Cuts the level of all frequencies below 800 Hz by either -4 dB or -2 dBtocompensateforthebassboostthatnaturallyoccurswhenaspeakerisplaced near a wall or a corner. If your R-Series monitors can be placed away from the walls in your mix space, leave this control set to 0 dB. - Page 10 R-SeriesR65V2andR80V2 Hookup Owner’s Manual Hookup Diagrams 2.2.2 Advanced Setup with Monitor Controller and Speaker Switching 使用显示器控制器和扬 声器开关的高级设置 Quantum Temblor T10 R80 V2 R80 V2...
-
Page 11: Application Guide 应用指南
To compensate for this phenomenon, every PreSonus studio monitor is equipped with an Acoustic Space control that cuts all frequencies below 800 Hz by a specified amount: 在将录音室监听音箱放置在混音环境中之前,请将您的桌... - Page 12 R-SeriesR65V2andR80V2 Application Guide Owner’s Manual Monitor Placement and Acoustic Space Settings • IfyourR-Seriesstudiomonitorsareclosetothecorners oftheroom,startbysettingtheAcousticSpaceswitchto -4 dB. This will provide the most bass attenuation. • When R-Series studio monitors are placed closer to the back wall, set the Acoustic space switch to -2 dB. •...
- Page 13 R-SeriesR65V2andR80V2 Application Guide Owner’s Manual Calibrating Using 85 dB SPL “Standard” Reference If possible, your mix position should be placed on the center of a wall as this will provide a more balanced listening position. Place your speakers so that they arethe same distance from the sides of the room.Thatis,if your left speaker is six feet from the wall to the left and two feet from the wall behind, your right speaker should be six feet from the wall to the right and two feetfrom the wall behind.
- Page 14 R-SeriesR65V2andR80V2 Application Guide Owner’s Manual Calibrating Using 85 dB SPL “Standard” Reference 如果可能的话,你的混音位置应该放在墙的中央,因为这将提供一个更平衡的聆听位置。放置你的扬声 器,使它们与房间的两侧保持相同的距离。也就是说,如果你的左扬声器离左边的墙六英尺,离后面的墙 两英尺,你的右扬声器应该离右边的墙六英尺,离后面的墙两英尺。通过将你的混音位置居中,你的监听 系统 系统将提供更可靠的低频清晰度。在一个长方形的房间里,最好是沿着其中一面长墙设置,尤其是在 一个较小的房间里。这将最大限度地减少由侧墙反射引起的问题。 这就像把混音位置设置在角落里不是一个好主意一样,用混音位置制造一个角落也不是一个好主意。确保 扬声器到后面墙壁的距离与离它最近的侧墙的距离不同。例如,如果你的左边扬声器离它左边的墙有一英 尺,那么它离它后面的墙也不应该有一英尺。 R系列的波导设计确保了更广泛的水平覆盖,同时具有紧密的垂直弥散,有助于限制来自你的桌子或控制台 的早期反射。与其他可以水平或垂直放置的显示器不同,这种设计要求R系列显示器始终以其垂直方向放 置。 每当人们谈及聆听扬声器系统时,他们都会谈论 "甜蜜点"。如前所述,这是一个立体声系统的两边之间的 中间位置 如前所述,这是一个立体声系统两边的中间位置,扬声器重叠的地方,也是立体声图像最好的地 方。...
- Page 15 R-SeriesR65V2andR80V2 Application Guide Owner’s Manual Calibrating Using 85 dB SPL “Standard” Reference Creating the sweet spot is relatively easy. Simply angle, or“toe-in,”each speaker so that the tweeters form an equilateral triangle with your head—that is, the speakers are the same distance from each other as they arefrom you.Themonitors should be angled, or“toed in,”so that they areeach directed to an ear,rather than pointedstraight ahead.
- Page 16 R-SeriesR65V2andR80V2 Application Guide Owner’s Manual Calibrating Using 85 dB SPL “Standard” Reference Calibrating Using 85 dB SPL “Standard” Reference 使用85dB SPL "标准 "参考值进行校 准 After you have properly positioned your studio monitors and listening position, it is helpful to set all the levels in your studio so that you are optimizing every component.Takingthe time to properly calibrate your speakers can be very valuable in this respect and will also give you a great starting point to troubleshoot or fine-tune your mixing environment.
- Page 17 R-SeriesR65V2andR80V2 Application Guide Owner’s Manual Calibrating Using 85 dB SPL “Standard” Reference Youshould calibratethe right and left monitors independently to ensure that both monitors are set to the same acoustic level. This will ensure that your stereo mixesarebalanced and will translatewell acrossdifferentspeaker systems. ThegoalofthisStandardReferenceCalibrationistoensurethatwhentheoutput metersin your DAWor mixerregister0dB,the SPL at yourmix position is 85 dB.
- Page 18 R-SeriesR65V2andR80V2 Application Guide Owner’s Manual Calibrating Using 85 dB SPL “Standard” Reference Note: If 85 dB is too loud for your room, either because of noise constraints or because the room is too small, you can redo the above calibration steps and dial in each speaker to 79 dB instead.
-
Page 19: Settings 监听器的放置和声学空 间的设置
R-SeriesR65V2andR80V2 Resources Owner’s Manual Technical Specifications Resources 相关资源 Technical Specifications 技术规格 IINPUTS (R65 V2 and R80 V2) 输入 1 - Balanced XLR 1 - Balanced ¼”TRS 1 - Unbalanced RCA PERFORMANCE 性能 Frequency Response (-3 dB) 频率响应 R65V2 45Hz–22kHz R80V2 40Hz–22kHz Crossover Frequency 分频频率... - Page 20 R-SeriesR65V2andR80V2 Resources Owner’s Manual Technical Specifications Mid-frequency Control 中频控制 Settings 设置 +/- 6dB @ 1kHz Low Cut 低频切除 Settings Flat, 80Hz, or 100Hz Acoustic Space 声学空间 Settings Flat, -2dB or -4dB PROTECTION (R65 V2 and R80 V2) 防护 RF interference 射频干扰 Output-current limiting 输出电流限制...
-
Page 21: Troubleshooting 故障排除
R-SeriesR65V2andR80V2 Resources Owner’sManual Troubleshooting Troubleshooting 故障排除 NoPower.Firstensurethatyour R-Series studiomonitor is plugged in.If it’s connected to a power conditioner, verify that the power conditioner is turned onand functioning.Ifproblemstill exists,disconnectthe power cable from your studio monitor and check the fuse on the back panel. The fuse housing is located directly beneath the IEC power cable connection. - Page 22 Dinner is Served Addedbonus: PreSonus’previouslyTopSecretrecipefor… Red Beans andRice 额外的奖励:PreSonus的绝密配方为... 红豆和大米 Ingredients: • 1 lb dried Red Kidney Beans • 1 large onion (diced) • 3 celery stalks (diced) • 1 large green bell pepper (diced) • 6-8 C vegetable stock •...
- Page 23 10.在米饭上加辣酱和烤安杜尔香肠(可选)。 ©2021 PreSonus Audio Electronics, Inc. All Rights Reserved. AudioBox USB, Capture,CoActual, EarMix, Eris, FaderPort,FireStudio,MixVerb,Notion, PreSonus, PreSonusAudioBox, QMix, RedLightDist, SampleOne, Sceptre,StudioLive,Temblor,Tricomp,and WorxAudio are registered trademarks of PreSonus Audio Electronics, Inc. Studio One is a registered trademark of PreSonus Software Ltd.
- Page 24 R-Series R65 V2 and R80 V2 Active AMT Studio Monitors Owner’s Manual ® BatonRouge• USA Part# 70-52000166-A www.presonus.com...
Need help?
Do you have a question about the R Series and is the answer not in the manual?
Questions and answers