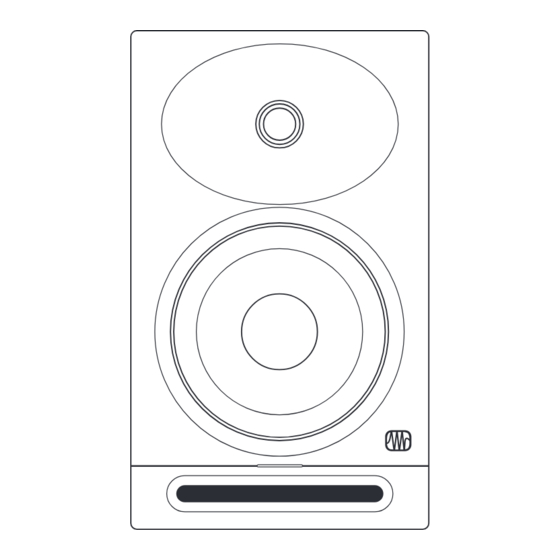
PRESONUS Eris Studio Series Owner's Manual
High-definition near field studio monitors
Hide thumbs
Also See for Eris Studio Series:
- User manual ,
- Owner's manual (28 pages) ,
- Quick start manual (4 pages)
Summary of Contents for PRESONUS Eris Studio Series
- Page 1 Eris Studio-Series ® High-Denition Near Field Studio Monitors Owner’s Manual ® English www.presonus.com...
-
Page 2: Table Of Contents
Table of Contents Overview — 1 Introduction — 1 Product Registration — 2 What’s in the Box — 2 Hookup — 4 Rear Panel Connections and Controls — 4 Inputs — 4 2.1.1 Power — 4 2.1.2 User Controls — 5 2.1.3 Hookup Diagrams —... -
Page 3: Overview
Eris expert so you can get the most out of your investment. If this is your rst pair of studio monitors, please take a look at Section 3 for details on setting them up properly in your mix environment. More information is available at My.PreSonus.com. -
Page 4: Product Registration
Owner’s Manual Product Registration Product Registration PreSonus is committed to delivering the best experience for our customers. MyPreSonus is a one-stop portal for all our registered customers’ needs. From your MyPreSonus account, you can view all your PreSonus hardware and software registrations; contact support; track orders and more. -
Page 6: Hookup
Eris Studio-Series Hookup Owner’s Manual Rear Panel Connections and Controls Hookup Rear Panel Connections and Controls Inputs 2.1.1 Line-level Inputs. The Eris Studio-Series monitors provide a choice of three line- level input types: balanced XLR, balanced ¼” TRS, and unbalanced RCA. Do not connect more than one source to your Eris studio monitors simultaneously. -
Page 7: User Controls
Power User Tip: If you are using a subwoofer that doesn’t feature a variable low pass lter, like the PreSonus Eris Pro Sub 10 provides, you will use this control to set the crossover point for your 2.1 system. For information on conguring a 2.1 system in the... -
Page 8: Hookup Diagrams
Eris Studio-Series Hookup Owner’s Manual Hookup Diagrams Acoustic Space. Cuts the level of all frequencies below 800 Hz by either -4 dB or -2 dB to compensate for the bass boost that naturally occurs when a speaker is placed near a wall or a corner. If your Eris Studio-Series monitors can be placed away from the walls in your mix space, leave this control set to 0 dB. -
Page 9: Advanced Setup With Monitor Controller And Speaker Switching
Eris Studio-Series Hookup Owner’s Manual Hookup Diagrams 2.2.2 Advanced Setup with Monitor Controller and Speaker Switching Audio Interface (Studio 68c) Monitor Controller (Monitor Station V2) Eris Pro 8 Eris Pro 8 Eris Studio 5 Eris Studio 5... -
Page 10: Tutorials
Eris Studio-Series Tutorials Owner’s Manual Monitor Placement and Acoustic Space Settings Tutorials Monitor Placement and Acoustic Space Settings Speakers 8” to 12” from wall Before placing your studio monitors in your mixing environment, position your desk or monitor stands so that your speakers will be at least 8 to 12 inches away from walls and corners. - Page 11 Eris Studio-Series Tutorials Owner’s Manual Monitor Placement and Acoustic Space Settings If possible, your mix position should be placed on the center of a wall as this will provide a more balanced listening position. Place your speakers so that they are the same distance from the sides of the room. That is, if your left speaker is six feet from the wall to the left and two feet from the wall behind, your right speaker should be six feet from the wall to the right and two feet from the wall behind.
-
Page 12: Calibrating Using 85 Db Spl "Standard" Reference
Eris Studio-Series Tutorials Owner’s Manual Calibrating Using 85 dB SPL “Standard” Reference Creating the sweet spot is relatively easy. Simply angle, or “toe-in, ” each speaker so that the tweeters form an equilateral triangle with your head—that is, the speakers are the same distance from each other as they are from you. - Page 13 Eris Studio-Series Tutorials Owner’s Manual Calibrating Using 85 dB SPL “Standard” Reference You should calibrate the right and left monitors independently to ensure that both monitors are set to the same acoustic level. This will ensure that your stereo mixes are balanced and will translate well across dierent speaker systems. The goal of this Standard Reference Calibration is to ensure that when the output meters in your DAW or mixer register 0 dB, the SPL at your mix position is 85 dB.
-
Page 14: Resources
Eris Studio-Series Resources Owner’s Manual Technical Specications Resources Technical Specications Studio 4 Studio 5 Studio 8 Frequency Response 55 Hz to 20 kHz 48 Hz to 20 kHz 35 Hz to 20 kHz Peak SPL 99 dB (@ 1M) 102 dB (@ 1M) 106 dB (@ 1M) LF Amplifer Power 25W, Class AB... -
Page 15: Troubleshooting
Be sure to use the correct fuse for the set input-power voltage. If the fuse blows again, you will need to contact PreSonus for a repair. No audio. If your Eris Studio monitor appears to power on but you hear no sound when playing audio from your audio source (the lights are on but nobody’s home), rst make sure that the cable connecting your... - Page 16 10. Serve over rice with hot sauce and grilled Andouille sausage (optional). © 2023 PreSonus Audio Electronics, Inc. All Rights Reserved. PreSonus and Eris are trademarks or registered trademarks of PreSonus Audio Electronics, Inc. All other trademarks are the property of their respective holders. All specications subject to change without notice...except the recipe, which is a classic.
- Page 17 Eris Studio-Series ® High-Denition Near Field Studio Monitors Owner’s Manual Baton Rouge • USA www.presonus.com Part# 70-52000198-A...


Need help?
Do you have a question about the Eris Studio Series and is the answer not in the manual?
Questions and answers