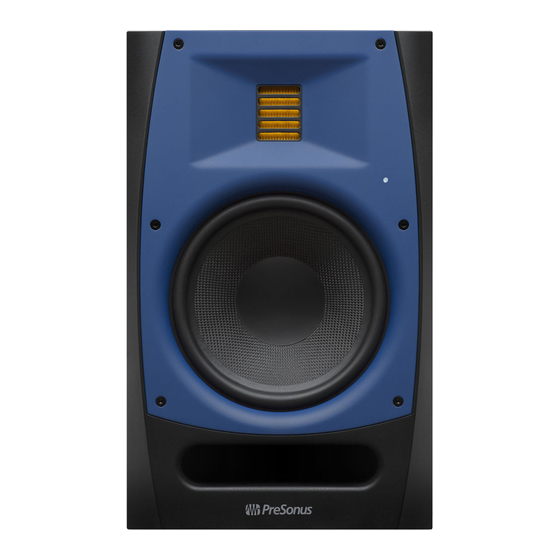
PRESONUS R Series Owner's Manual
Hide thumbs
Also See for R Series:
- Owner's manual (24 pages) ,
- Quick start manual (2 pages) ,
- User manual
Summary of Contents for PRESONUS R Series
- Page 1 R-Series R65 V2 and R80 V2 Active AMT Studio Monitors Owner’s Manual ® English www.presonus.com...
-
Page 2: Table Of Contents
Table of Contents Overview — 1 Introduction — 1 Product Registration — 2 What’s in the Box — 2 Hookup — 3 Rear Panel Connections and Controls — 3 Inputs — 3 2.1.1 Power — 3 2.1.2 Acoustic Tuning Controls — 4 2.1.3 Hookup Diagrams —... -
Page 3: Overview
Overview Introduction Thank you for purchasing the PreSonus® R65 V2 or R80 V2 active AMT studio monitor. PreSonus Audio Electronics has designed the R65 V2 and R80 V2 utilizing high-grade components to ensure optimum performance that will last a lifetime. -
Page 4: Product Registration
PreSonus is committed to delivering the best experience for our customers. MyPreSonus is a one-stop portal for all our registered customers’ needs. From your my PreSonus account, you can view all your PreSonus hardware and software registrations; contact support; track orders and more. -
Page 5: Hookup
R-Series R65 V2 and R80 V2 Hookup Owner’s Manual Rear Panel Connections and Controls Hookup Rear Panel Connections and Controls 2.1.1 Inputs Line-level Inputs. The R-Series studio monitors provide a choice of three line- level input types: balanced XLR, balanced ¼” TRS, and unbalanced RCA. Do not connect more than one source to your R-Series studio monitors simultaneously. -
Page 6: Acoustic Tuning Controls
Power User Tip: If you are using a subwoofer that doesn’t feature a variable low pass filter, like the PreSonus Temblor T10 provides, you will use this control to set the crossover point for your 2.1 system. For information on configuring a 2.1 system in the studio,... -
Page 7: Hookup Diagrams
R-Series R65 V2 and R80 V2 Hookup Owner’s Manual Hookup Diagrams Acoustic Space. Cuts the level of all frequencies below 800 Hz by either -4 dB or -2 dB to compensate for the bass boost that naturally occurs when a speaker is placed near a wall or a corner. -
Page 8: Advanced Setup With Monitor Controller And Speaker Switching
R-Series R65 V2 and R80 V2 Hookup Owner’s Manual Hookup Diagrams 2.2.2 Advanced Setup with Monitor Controller and Speaker Switching Quantum Temblor T10 R80 V2 R80 V2... -
Page 9: Application Guide
To compensate for this phenomenon, every PreSonus studio monitor is equipped with an Acoustic Space control that cuts all frequencies below 800 Hz by a specified amount:... -
Page 10: Monitor Placement And Acoustic Space
R-Series R65 V2 and R80 V2 Application Guide Owner’s Manual Monitor Placement and Acoustic Space Settings If possible, your mix position should be placed on the center of a wall as this will provide a more balanced listening position. Place your speakers so that they are the same distance from the sides of the room. - Page 11 R-Series R65 V2 and R80 V2 Application Guide Owner’s Manual Calibrating Using 85 dB SPL “Standard” Reference Creating the sweet spot is relatively easy. Simply angle, or “toe-in, ” each speaker so that the tweeters form an equilateral triangle with your head—that is, the speakers are the same distance from each other as they are from you.
- Page 12 R-Series R65 V2 and R80 V2 Application Guide Owner’s Manual Calibrating Using 85 dB SPL “Standard” Reference You should calibrate the right and left monitors independently to ensure that both monitors are set to the same acoustic level. This will ensure that your stereo mixes are balanced and will translate well across different speaker systems.
-
Page 13: Settings
R-Series R65 V2 and R80 V2 Resources Owner’s Manual Technical Specifications Resources Technical Specifications IINPUTS (R65 V2 and R80 V2) 1 - Balanced XLR 1 - Balanced ¼” TRS 1 - Unbalanced RCA PERFORMANCE Frequency Response (-3 dB) 45 Hz – 22 kHz R65 V2 40 Hz –... - Page 14 R-Series R65 V2 and R80 V2 Resources Owner’s Manual Technical Specifications Mid-frequency Control +/- 6dB @ 1kHz Settings Low Cut Flat, 80Hz, or 100Hz Settings Acoustic Space Flat, -2dB or -4dB Settings PROTECTION (R65 V2 and R80 V2) RF interference Output-current limiting Over-temperature Turn-on/off t ansient...
-
Page 15: Troubleshooting
R-Series R65 V2 and R80 V2 Resources Owner’s Manual Troubleshooting Troubleshooting No Power. First ensure that your R-Series studio monitor is plugged in. If it’s connected to a power conditioner, verify that the power conditioner is turned on and functioning. If problem still exists, disconnect the power cable from your studio monitor and check the fuse on the back panel. - Page 16 ©2021 PreSonus Audio Electronics, Inc. All Rights Reserved. AudioBox USB, Capture, CoActual, EarMix, Eris, FaderPort, FireStudio, MixVerb, Notion, PreSonus, PreSonus AudioBox, QMix, RedLightDist, SampleOne, Sceptre, StudioLive, Temblor, Tricomp, and WorxAudio are registered trademarks of PreSonus Audio Electronics, Inc. Studio One is a registered trademark of PreSonus Software Ltd.
- Page 17 R-Series R65 V2 and R80 V2 Active AMT Studio Monitors Owner’s Manual ® Baton Rouge • USA www.presonus.com Part# 70-52000166-A...


Need help?
Do you have a question about the R Series and is the answer not in the manual?
Questions and answers