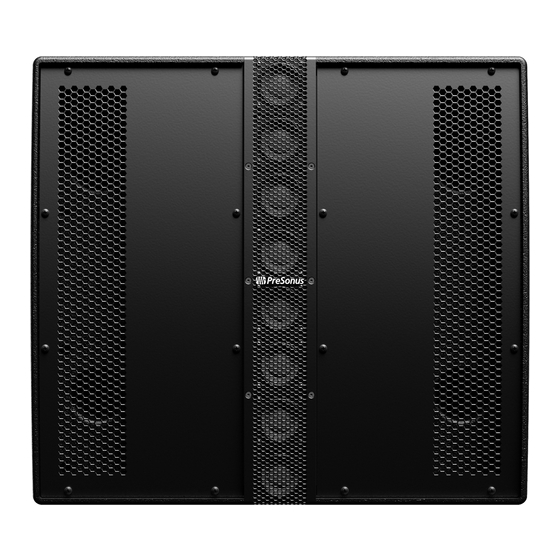
Summary of Contents for PRESONUS CDL10P
- Page 1 CDL12P / CDL10P Constant Directivity Loudspeakers Owner’s Manual ® English www.presonus.com...
-
Page 2: Table Of Contents
Table of Contents Technical Information — 12 Specifications — 12 Overview — 1 Mechanical Drawings — 12 Introduction — 1 4.2.1 CDL 12P — 12 What is in the Box — 2 4.2.2 CDL 10P — 13 Rigging Accessories (Sold Separately) — 2 Hookup —... -
Page 3: Overview
The result is a true hybrid of point-source and line-array technology that combines the benefits of each into the best listening experience possible. We encourage you to register your CDL loudspeaker(s) at My.PreSonus.com and to contact us through the MyPreSonus support portal with any questions or comments regarding this product. - Page 4 (1) CDL 12P or CDL 10P Loudspeaker • • (1) AC locking 3 conductor14AWG cord • PreSonus Health and Safety Guide Rigging Accessories (Sold Separately) CDL12P or CDL10P Rigging Grid • • CDL Rigging Extension Bar CDL12P or CDL10P Rigging Sling •...
-
Page 5: Hookup
HPF. Engages/disengages the onboard 90 Hz High Pass Filter. Sub Mode. Adjusts the crossover frequency and the delay for the companion PreSonus subwoofer being used (CDL Sub18, CDL18s, ULT18, or AIR18s). When using the CDL loudspeaker without a subwoofers, select “Off. ”... -
Page 6: Power
CDL12P / CDL 10P Hookup Power Owner’s Manual Brightness. Adjusts the brightness of the display. Contrast. Adjusts the contrast of the display. System Reset. Resets the system settings to factory default. System Info. Opens the System Information screen. Exit. Select to return to the Level screen. You will be given the option to save any changes you’ve made to the DSP settings before exiting. -
Page 7: Application And Deployment
The top of each loudspeaker should be parallel to the bottom of the unit above it. For suspension, the topmost unit must be securely attached to the CDL12P or CDL10P Rigging Grid. Getting Started Before you begin, here are a few general rules of thumb: •... -
Page 8: Important Safety Instructions
No one should be allowed to pass beneath the loudspeakers during installation. • Do not suspend any other components or loudspeakers from PreSonus CDL loudspeakers other than the supported configurations described in this manual. •... -
Page 9: Rigging Instructions
CDL12P / CDL 10P Application and Deployment Rigging Instructions Owner’s Manual Rigging Instructions CDL loudspeakers feature integrated rigging pins. The integrated rigging pins function the same whether you are attaching CDL or the CDL Rigging Grid. Rotate the pin to the forward 90˚. Press the release button to unlock the pin. -
Page 10: Cdl Rigging Extension Bar Installation Instructions
IIMPORTANT: Use only the rigging grid labeled for your model of CDL loudspeakers (CDL12P or CDL10P). Align the CDL Rigging Extension Bar with the center support of the CDL Rigging Grid. For downward tilt, the bar should be mounted at the rear of the loudspeaker array. -
Page 11: Suspending The Cdl Array
The table below shows the maximum suspended loudspeaker load configurations. Deploying loudspeakers that exceed the supported configurations below can lead to serious damage, injury, or death. PreSonus has tested the configurations below for safety. Please note that the structure from which you are suspending any CDL loudspeaker array must be able to support that total weight. -
Page 12: Rigging A Cdl Loudspeaker To A Cdl Rigging Grid
Using the CDL Rigging Sling with the CDL Rigging Grid WARNING: Use only the rigging sling labeled for your model of CDL loudspeakers (CDL12P or CDL10P). The CDL Rigging Sling is required on all installations that include 4 or more CDL loudspeakers in a vertical array. Additionally, in installations using the CDL Rigging Extension Bar deployed with an upward or downward tilt of 12˚... -
Page 13: Important Pole Mounting Safety Instructions
(2) CDL loudspeakers atop (1) CDL Sub18 or CDL18s WARNING PreSonus only supported pole mounting (2) rigged CDL loudspeakers atop a PreSonus CDL Sub18 or CDL18s subwoofer. No other subwoofers are supported for this application. The maximum pole height from the top of the CDL subwoofer to the bottom of the CDL loudspeaker cannot exceed 33.5”. - Page 14 Direct Line Out (XLR) Mains Connection Locking 3 conductor AC connector In and Out Locking 3 conductor AC connector In and Out DSP Functions HPF On/Off, No. arrayed boxes, PreSonus HPF On/Off, No. arrayed boxes, PreSonus subwoofer configuration preset subwoofer configuration preset Indicators...
- Page 15 CDL12P / CDL 10P Technical Information Mechanical Drawings Owner’s Manual 82.50° 525 mm [20.7 in] 4.2.2 CDL 10P 445 mm [17.5 in] CDL 10P 82.50° 365 mm 264 mm [14.4 in] [10.4 in] 82.50° 500 mm [19.7 in] 395 mm [15.6 in]...
- Page 16 CDL12P / CDL 10P Technical Information Mechanical Drawings Owner’s Manual...
- Page 17 Gulf fish. Also known as Reds or Red Drum, Redfish is not only fun to catch, it’s also delicious! © 2023 PreSonus Audio Electronics, Inc. All Rights Reserved. PreSonus and WorxAudio are trademarks or registered trademarks of PreSonus Audio Electronics, Inc. Other product...
- Page 18 Registra tu CDL Altavoz. Visita my.presonus.com y crea o entra en tu cuenta de usuario MyPreSonus para gestionar todos tus registros de hardware y software de PreSonus, conectar con el servicio de asistencia técnica y mucho más. También puedes registrarte con la aplicación MyPreSonus en tu dispositivo móvil.


Need help?
Do you have a question about the CDL10P and is the answer not in the manual?
Questions and answers