SEW-Eurodrive MOVITRAC LTP-B Compact Operating Instructions
Hide thumbs
Also See for MOVITRAC LTP-B:
- Operating instructions manual (232 pages) ,
- Compact operating instructions (44 pages) ,
- Manual (48 pages)

Related Manuals for SEW-Eurodrive MOVITRAC LTP-B


Summary of Contents for SEW-Eurodrive MOVITRAC LTP-B
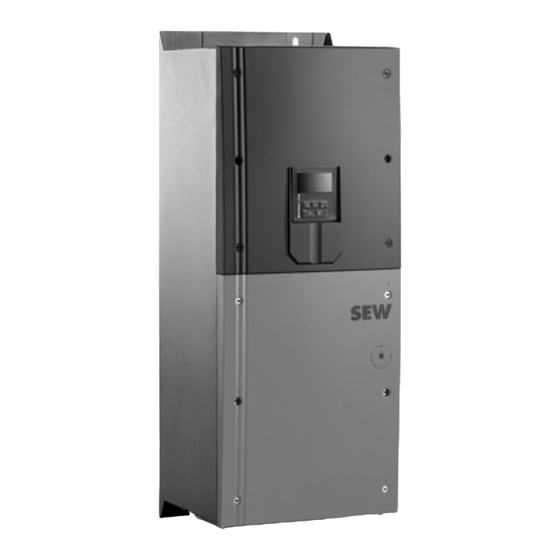
- Page 1 *26879778_0321* Drive Technology \ Drive Automation \ System Integration \ Services Compact Operating Instructions ® MOVITRAC LTP-B Edition 03/2021 26879778/EN...
- Page 2 SEW-EURODRIVE—Driving the world...
-
Page 3: Table Of Contents
Table of contents Table of contents General information........................ 4 About this documentation .................... 4 Structure of the safety notes ................... 4 Decimal separator in numerical values ................ 5 Rights to claim under limited warranty ................ 5 Content of the documentation.................. 5 Other applicable documentation .................. 5 Product names and trademarks.................. 5 Copyright notice ...................... 6 Safety notes .......................... -
Page 4: General Information
General information About this documentation General information About this documentation The documentation at hand is the original. This documentation is an integral part of the product. The documentation is intended for all employees who perform work on the product. Make sure this documentation is accessible and legible. Ensure that persons respon- sible for the systems and their operation as well as persons who work on the product independently have read through the documentation carefully and understood it. -
Page 5: Decimal Separator In Numerical Values
General information Decimal separator in numerical values Hazard symbol Meaning Warning of dangerous electrical voltage Warning of hot surfaces Warning of automatic restart 1.2.3 Structure of embedded safety notes Embedded safety notes are directly integrated into the instructions just before the de- scription of the dangerous action. -
Page 6: Copyright Notice
General information Copyright notice Copyright notice © 2021 SEW‑EURODRIVE. All rights reserved. Unauthorized reproduction, modifica- tion, distribution or any other use of the whole or any part of this documentation is strictly prohibited. ® Compact Operating Instructions – MOVITRAC LTP-B... -
Page 7: Safety Notes
Safety notes Preliminary information Safety notes Preliminary information The following general safety notes serve the purpose of preventing injury to persons and damage to property. They primarily apply to the use of products described in this documentation. If you use additional components, also observe the relevant warning and safety notes. -
Page 8: Network Security And Access Protection
Safety notes Network security and access protection Specialist for elec- Any electrotechnical work may be performed only by electrically skilled persons with a trotechnical work suitable education. Electrically skilled persons in the context of this documentation are persons who are familiar with electrical installation, startup, troubleshooting, and main- tenance of the product who possess the following qualifications: •... -
Page 9: Functional Safety Technology
Perform a hoist startup. 2.5.2 Restrictions under the European WEEE Directive 2012/19/EU You may use options and accessories from SEW-EURODRIVE exclusively in connec- tion with products from SEW-EURODRIVE. Functional safety technology The product must not perform any safety functions without a higher-level safety sys- tem unless explicitly allowed by the documentation. -
Page 10: Installation/Assembly
Safety notes Installation/assembly Installation/assembly Ensure that the product is installed and cooled according to the regulations in this doc- umentation. Protect the product from strong mechanical strain. Ensure that components are not deformed and insulation spaces are not changed, particularly during transportation and handling. -
Page 11: Electrical Installation
Safety notes Electrical installation Electrical installation Ensure that all of the required covers are correctly attached after carrying out the elec- trical installation. Make sure that preventive measures and protection devices comply with the applica- ble regulations (e.g. EN 60204-1 or EN 61800-5-1). 2.9.1 Required preventive measure Make sure that the product is correctly attached to the ground connection. -
Page 12: Startup/Operation
Safety notes Startup/operation 2.11 Startup/operation Observe the safety notes in chapters Startup and Operation in this documentation. Make sure the connection boxes are closed and screwed before connecting the sup- ply voltage. Depending on the degree of protection, products may have live, uninsulated, and sometimes moving or rotating parts as well as hot surfaces during operation. -
Page 13: Device Structure
Device structure Nameplate Device structure Nameplate The following figure shows an example of a nameplate. 34353237643 Type designation Example: MCLTP-B 0015-2B1-4-00 (60 Hz) ® Product name MCLTP MOVITRAC LTP-B Version Version status of the device series Recommended motor 0015 0015 = 1.5 kW power Connection voltage 2 = 200 –... - Page 14 Device structure Type designation Design 00 = Standard IP20 housing 10 = IP55/NEMA-12K housing 15 = IP55/NEMA‑12K housing for operation on IT systems 30 = IP66/NEMA‑4X housing without switch 40 = IP66/NEMA-4X housing with switch xH = High-frequency version Country-specific design (60 Hz) 60 Hz design ®...
-
Page 15: Installation
Installation Electrical installation Installation Electrical installation WARNING Electric shock due to charged capacitors. Dangerous voltage levels may still be present inside the device and at the terminals up to 10 minutes after disconnection from the power supply. Severe or fatal injuries. •... - Page 16 Installation Electrical installation ® To operate a MOVITRAC LTE‑B+ on the IT system, the integrated EMC filter must be deactivated. IP20 devices: • On sizes 2 and 3, unscrew the EMC screw and the VAR screw on the side of the device.
- Page 17 Installation Electrical installation 34106443147 SEW‑EURODRIVE recommends using earth-leakage monitors with pulse code mea- surement in voltage supply systems with a non-grounded star point (IT systems). Us- ing such devices prevents false tripping of the insulation monitor due to the earth ca- pacitance of the inverter.
- Page 18 Installation Electrical installation • Use 2 tightly twisted leads or a 2-core shielded power cable. The cable cross sec- tion must be dimensioned according to the tripping current I of F16, the cable's nominal voltage according to DIN VDE 0298. • Protect the braking resistor with a bimetallic relay and set the tripping current I the respective braking resistor.
- Page 19 Installation Electrical installation 4.1.3 Motor temperature protection TF, TH, KTY84, PT1000 Motors with internal temperature sensor (TF, TH, KTY84, PT1000 or similar) can be directly connected to the inverter. If the thermal protection is triggered, the inverter displays the error "F-PTC". For motor protection monitoring, the following types can be selected: •...
- Page 20 Installation Electrical installation 4.1.5 Signal terminals Main terminals NOTICE Applying impermissible voltages. Possible damage to property. • Do not connect any voltages to the output terminal. • The voltage applied to the signal terminals must not exceed 30 V. IP20, IP55 and IP66 IP66 with switch option 8 9 10 11 12 13 8 9 10 11 12 13...
- Page 21 Installation Electrical installation Termi- Signal Connection for Description nal no. +10 V Output +10 V: Reference 10 V: Reference voltage for analog input voltage (Potential supply +, 10 mA max., 1 – 10 kΩ) AI 1 / DI 4 Analog input 1 (12 bit) Analog: 0 – 10 V, 10 – 0 V, -10 – 10 V, 0 – 20 mA, 4 – 20 mA, 20 – 4 mA Digital input 4 Digital: 0/24 V...
- Page 22 Installation Electrical installation Relay terminals NOTICE Possible damage to property Do not connect any inductive loads to the relay contact. Termi- Signal Relay function selec- Description nal no. tion Relay output 1 reference P2-15 Relay contact (AC 250 V / DC 30 V, max.
- Page 23 Installation Electrical installation 4.1.7 Wiring diagram WARNING Danger of electric shock. Incorrect wiring can lead to dangerously high voltages. Severe or fatal injuries. • Adhere to the following points. In the following applications, always deactivate the brake in the AC and DC circuits: •...
- Page 24 Installation Electrical installation L2/N F11/F12/F13 (AC-3) L1 L2 ND LT.. L1' L2' L3' L1 L2 L3 MOVITRAC LT.. 9007217635508875 Line contactor between supply system and inverter. Brake Main switch (only for device design IP66/NEMA 4X housing with switch (MC LTP-B..-40)) Connection of braking resistor BW../BW..T Bimetallic relay for the protection of the braking resistor * not with 1-phase 230 V ®...
- Page 25 Installation Electrical installation Brake control V DC (BMV) V AC V AC (BMK) V AC F14/F15 F14/F15 F14/F15 (A C-3) (A C-3) C-3) (A C-3) (AC-3) white white BM K BG E BG E blue BM V white DR/DT/DV: DR/DT/DV: blue Cut-off in the DC Cut-off in the AC circuit...
-
Page 26: Startup
Startup User interface Startup User interface 5.1.1 Keypads The inverters in IP20 design are equipped with a standard keypad. The inverters in IP55/IP66 design are equipped with a full text display with language switching function. Both keypads allow for operation and setup of the inverter without additional devices. Standard keypad 18014401443146379 [1] 6-digit 7-segment display... - Page 27 Startup User interface Operation Both keypads have 5 keys with the following functions: Start [2] • Enable the drive • Change the direction of rotation • Stop the drive Stop [3] • Acknowledge the fault Navigate [4] • Switch the menu •...
- Page 28 Startup User interface Standby display brightness for keypads with TFT display (IP66 devices) If the inverter is not operated or parameterized via the keys on the keypad, the display automatically switches to standby brightness after 320 seconds. The default setting is 50%.
- Page 29 Startup User interface 5.1.2 Resetting parameters to default settings The following preconditions must be satisfied for the parameters to be reset to the fac- tory setting: • The inverter must not be enabled. • The inverter must not be in fire mode/emergency mode. •...
- Page 30 Startup User interface The inverter can be connected to the software together with the engineering package (cable set C) and the USB11A or USM21A interface adapter. A maximum of 63 inverters can be connected to LT Shell in a network. The software can be used to carry out the following tasks: •...
- Page 31 Startup User interface Connection to LT Shell via Bluetooth® parameter module LTP-B L1/L L2/N L3 1 2 3 4 5 6 7 8 9 10 11 12 13 14 15 16 17 18 9007216440559755 Parameter module ® Compact Operating Instructions – MOVITRAC LTP-B...
- Page 32 Startup User interface ® 5.1.5 MOVITOOLS MotionStudio engineering software The software can be connected to the inverter as follows: • Via an SBus connection between PC and inverter. The PC can be connected with the inverter via USM21A, for example. ®...
- Page 33 Startup User interface ® Connection to MOVITOOLS MotionStudio via SEW controller LTP-B L1/L L2/N L3 DHP 11B 1 2 3 4 5 6 7 8 9 10 11 12 13 14 15 16 17 18 9007216441033995 USB A‑B cable Terminating connector (120 Ω) USB11A or USM21A Cable splitter RJ10 to RJ10 cable...
-
Page 34: Automatic Measuring Procedure "Auto Tune
Startup Auto tune Auto tune Automatic measuring procedure "Auto tune" With the automatic measuring procedure, the inverter can measure almost any motor to determine the motor data. • After a reset to the factory settings, the measuring procedure starts automatically after the first enable and takes up to 2 minutes depending on the control type. - Page 35 Startup Startup for motors 5.3.2 Startup with asynchronous motors with VFC speed control 1. Connect the motor to the inverter. During the connection, adhere to the nominal motor voltage. 2. Enter the motor data indicated on the motor nameplate: • P1-07 = Nominal voltage of the motor •...
- Page 36 Startup Startup for motors 5.3.4 Starting with synchronous motors without encoder feedback (PMVC control) The synchronous motors are permanent magnet motors. INFORMATION The operation of synchronous motors without encoder must be checked in a test ap- plication. Stable operation in this operating mode cannot be ensured for all applica- tion cases.
- Page 37 Startup Startup for motors 5.3.5 Startup with LSPM motors from SEW‑EURODRIVE DR..J type motors are motors with LSPM technology (Line Start Permanent Magnet motors). 1. Connect the motor to the inverter. During the connection, adhere to the nominal motor voltage. 2.
- Page 38 Startup Startup for motors 5.3.7 Startup with brushless DC motors (BLDC control) 1. Connect the motor to the inverter. Adhere to the nominal motor voltage when con- necting. 2. Enter the motor data indicated on the motor nameplate: • P1-07 = Internal voltage at nominal motor speed •...
-
Page 39: Operation
Operation Inverter status Operation Inverter status 6.1.1 Static inverter status The following list shows the status messages for a non-enabled inverter. Message Description StoP Power stage of inverter deactivated. This message is displayed when the motor is at an idle state and no error is present. - Page 40 Operation Inverter status Message Message Description 7-segment dis- Full text dis- play play Auto-t Auto-tuning An automatic measurement of the motor parameters is being per- formed. This process can take up to 2 minutes..OL (= Over- The output current of the inverter exceeds the current value entered in (flashing dots) Load)
-
Page 41: Error List
Operation Error list Error list Code (in- Code Error code CANopen Meaning Measure verter dis- (MotionStudio status emergency play) in P0-13) word code if Bit5 = 1 4-20 F 0x71 0x1012 Signal loss 4 – • Check whether the input current lies within the range 20 mA (> 500 ms) defined in P2-30 and P2-33. - Page 42 Operation Error list Code (in- Code Error code CANopen Meaning Measure verter dis- (MotionStudio status emergency play) in P0-13) word code if Bit5 = 1 ® Enc-09 0x0E 0x1026 HIPERFACE type During the use of Smart Servo Package, a wrong motor/ is not supported.
- Page 43 Operation Error list Code (in- Code Error code CANopen Meaning Measure verter dis- (MotionStudio status emergency play) in P0-13) word code if Bit5 = 1 0x01 0x2303 Short-term over- Error during stop procedure: current at the in- Check for premature brake application. verter output.
- Page 44 Operation Error list Code (in- Code Error code CANopen Meaning Measure verter dis- (MotionStudio status emergency play) in P0-13) word code if Bit5 = 1 O-Volt 0x07 0x3206 DC link over- The error occurs if a high flywheel load or overhauling voltage load is connected, and the excess regenerative energy is transferred back to the inverter.
- Page 45 Operation Error list Code (in- Code Error code CANopen Meaning Measure verter dis- (MotionStudio status emergency play) in P0-13) word code if Bit5 = 1 SC-0b5 Connection Check if there is a connection between the inverter and between inverter keypad. and keypad inter- rupted.
- Page 46 Operation Error list Code (in- Code Error code CANopen Meaning Measure verter dis- (MotionStudio status emergency play) in P0-13) word code if Bit5 = 1 USr-PS Parameter backup The parameter set was successfully saved using P6-26. successfully com- pleted. ® Compact Operating Instructions –...
- Page 48 SEW-EURODRIVE—Driving the world SEW-EURODRIVE GmbH & Co KG Ernst-Blickle-Str. 42 76646 BRUCHSAL GERMANY Tel. +49 7251 75-0 Fax +49 7251 75-1970 sew@sew-eurodrive.com www.sew-eurodrive.com...
Need help?
Do you have a question about the MOVITRAC LTP-B and is the answer not in the manual?
Questions and answers