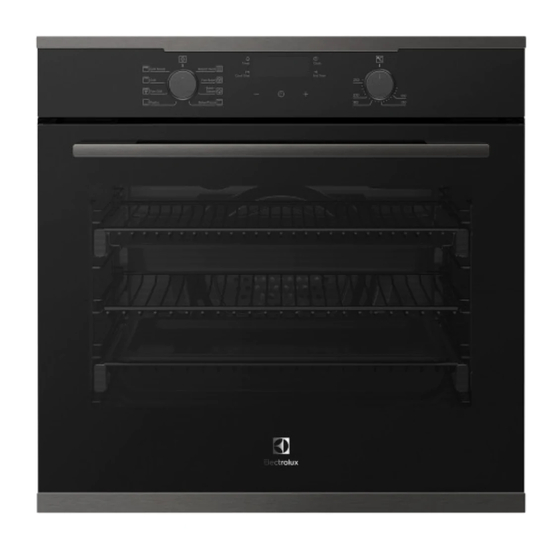
Electrolux EVE602 User Manual

Electrolux EVE602 User Manual

Hide thumbs Also See for EVE602:

Advertisement

EVE602, EVE614, EVE615, EVE636,
EVEP614, EVEP615, EVEP616,
EVEP618, EVEP619, EVEP626,
Cooking
Enjoy peace of mind.
Register your appliance today.
Stay updated on better living services, safety notices and shop
for accessories.
1. Open the camera app on your smartphone and
point at the QR code to scan
Product Registration QR code is located on the
front of your appliance or inside the door rim*.
2. Tap the notification or link to open the registration form
3. Complete your details and enjoy peace of mind
*Exact location of QR code may vary depending on oven model
User manual

Advertisement

Table of Contents
loading

Summary of Contents for Electrolux EVE602

  • Page 1 EVE602, EVE614, EVE615, EVE636, EVEP614, EVEP615, EVEP616, EVEP618, EVEP619, EVEP626, Cooking User manual Enjoy peace of mind. Register your appliance today. Stay updated on better living services, safety notices and shop for accessories. 1. Open the camera app on your smartphone and...
  • Page 2: Table Of Contents

    Important instructions ______________________________ 3 Dear customer, Before using your appliance _____________________ 3 Thank you for purchasing an Electrolux oven. Information on disposal for users ________________ 3 You’ve chosen a product that brings with it decades Important safety instructions ____________________ 3 of professional experience and innovation.
  • Page 3: Important Instructions

    For model EVEP618, check the water drawer interior may result in personal injury, property damage and for dust or contaminates. Wipe clean with a damp affect your ability to make a claim under the Electrolux cloth if necessary. manufacturer’s warranty provided with your product.
  • Page 4: General Cautions

    IMPORTANT INSTRUCTIONS (CONTINUED) • Only authorised personnel should carry out GENERAL CAUTIONS servicing. (Certificate of Compliance to be retained) • Always ensure the appliance is switched off before Read the following carefully to avoid damage or injury. cleaning or replacing parts.
  • Page 5: Installation Of The Appliance

    INSTALLATION OF THE APPLIANCE • Electrolux Home Products cannot accept responsibility for damage caused by installation into low temperature tolerant cabinets. WARNING • After installation, test and ensure that the appliance The appliance must not be installed behind a operates correctly before handing it over to the customer.
  • Page 6 IMPORTANT INSTRUCTIONS (CONTINUED) Levelling oven Double oven Cut-out dimensions Place a level in the oven as below making sure the level sits type of fit A (width) B (height) C (depth) on the front and rear forms. The level needs to be correct...
  • Page 7: Installing The Oven Accessories

    INSTALLING THE OVEN ACCESSORIES Pyro proof slides Obtain left hand side rack and left hand slide – see Slides (Telescopic runners) image to identify. Obtain left hand side rack and left hand slide – see image to identify. L = left hand side R = right hand side The shaded wires indicate the wire the slide can be mounted on.
  • Page 8 IMPORTANT INSTRUCTIONS (CONTINUED) Side racks of the side rack - see diagram. Ensure the same rail positions on both sides of the oven are being engaged. Insert the rear peg into the rear access hole provided, ensuring peg is fully inserted.
  • Page 9: Using The Appliance

    USING THE APPLIANCE Trays The appliance is supplied with Baking tray, Roasting tray IMPORTANT and on selected models Cast roasting dish/AirFry Plus tray. Pre-heating The baking tray and roasting dish can be placed on top of the shelves or can be suspended under the grill shelf. For best cooking results pre-heat the oven.
  • Page 10 IMPORTANT INSTRUCTIONS (CONTINUED) GETTING TO KNOW THE OVEN Get to know your new oven with this ‘Simple Test Cake’ Although we strive for a perfect performing oven, it’s possible that there will be some variation in colour when baking. Therefore, we suggest to make this simple, easy and delicious Simple Test Cake to help you understand your new oven.
  • Page 11: Technical Specifications

    (h x w x d) mm connection power rating current rating 561mm EVE602 597 x 596 x 568 230-240V / 50Hz 3.1kW 12.9A min. 650mm EVE614 597 x 596 x 568 230-240V / 50Hz 3.1kW...
  • Page 12: Eve602, Eve614

    EVE602 / EVE614 COMPONENTS Timer indicator Cook time Display Timer Clock button Function selector Warm air exhaust Temperature selector Double glazed door (EVE602) Triple glazed door (EVE614)
  • Page 13: Before Using The Appliance

    Make sure dishes will fit into the oven before it is switched on. • Keep edges of non Electrolux baking dishes at least 40mm from the side of the oven. This allows free circulation of heat and ensures even cooking.
  • Page 14: Cooking Functions

    EVE602 / EVE614 (CONTINUED) COOKING FUNCTIONS Symbol Function description Heat comes from the element surrounding the fan as well as the smaller element above the food. This Rapid Heat allows you to preheat your oven 30% quicker than on standard ‘Bake/Pizza’. ‘Rapid Heat’ is ideal for cooking frozen pre-cooked foods such as savoury pastries, pizzas, mini meals (TV dinners), meat pies and fruit pies.
  • Page 15: Operating Sequence

    OPERATING SEQUENCE USING THE APPLIANCE Select the cooking function Cooking with the timer Turn the function selector in any direction to the desired The appliance is equipped with a timer that has the cooking function. The oven cavity light will come on. following features: •...
  • Page 16 EVE602 / EVE614 (CONTINUED) Turn the function and temperature controls to the off position. Touch any button to stop the timer beeping. Adjusting the clock Touch the icon until the clock icon begins flashing. – Touch the symbols to change the time of day.
  • Page 17: Evep614

    EVEP614 COMPONENTS Display Rapid heat button Light button Child lock button Timer button OK button Function selector Warm air exhaust Temperature/timer adjustment Quadruple glazed door...
  • Page 18: Cooking Functions

    EVEP614 (CONTINUED) COOKING FUNCTIONS Symbol Function description Heat comes from the element surrounding the fan. This fan circulates the hot air around the oven cavity so that you can put Fan Bake your food in different places in the oven and still cook them at the same time. You can use ‘Fan Bake’ function for multi-shelf cooking, reheating cooked foods, pastries and complete oven meals.
  • Page 19: Operating Sequence

    OPERATING SEQUENCE USING THE APPLIANCE Control panel Select the oven function Turn the oven function selector clockwise to select the Control panel sensor fields desired oven function. NOTE: each oven function has a default temperature which Timer can then be adjusted as outlined below. Fast heat up This knob cannot be turned anticlockwise...
  • Page 20: Before First Use

    EVEP614 (CONTINUED) BEFORE FIRST USE WARNING Refer to safety chapters. Initial cleaning Before the first use, clean the empty oven and set the time: The display with the maximum number of functions set. Display indicators Remove all accessories and removable shelf supports from the oven.
  • Page 21: Daily Use

    DAILY USE 2. Select Assisted Cooking. Press OK. Start cooking Set a heating function. 3. Select the dish. Press OK. Refer to "Menu structure" chapter. 2. Set the temperature. P1 - P41 4. Insert the dish into the oven. Confirm setting. How to set: Assisted Cooking Every dish in this submenu has a recommended function and temperature.
  • Page 22: Clock Functions

    EVEP614 (CONTINUED) CLOCK FUNCTIONS 3. Press OK again. Clock function Application Minute minder. When the timer ends, the signal sounds. Cooking time. When the timer ends, the signal sounds and the heating function stops. 4. Rotate Temperature Selector until the current time is reached.
  • Page 23 How to set: Minute minder How to set: Cooking time Press Choose a heating function and set the temperature. Press repeatedly: The display shows: 2. Set the Minute minder The display shows: h:min STOP 3. Press OK. Set the cooking time. Timer starts counting down immediately.
  • Page 24 EVEP614 (CONTINUED) How to set: Time Delay Select the heating function. START STOP Set the end time. 2. Press repeatedly: Press OK. The display shows: the time of day h:min Timer starts counting down immediately. START STOP How to set: Child lock 3.
  • Page 25: Menu

    How to change: Settings Press OK to confirm selection. Select Adjust the value and press OK. Menu structure Assisted cooking Cleaning Settings Select Settings. Settings Time of Day Change 2. Press OK. Display Brightness Change 1 - Beep Key Tones 2 - Click 3 - Sound off Buzzer Volume...
  • Page 26 EVEP614 (CONTINUED) Christmas Stollen Assisted cooking settings Sponge Cake Jacket Potato Wedges Sugar Cake Hash Browns Swiss Roll Lasagne Swiss Tarte, sweet Potato Gratin Yeast Cake Pasta Bake Brownies Vegetable Gratin Cakes, small Pizza Cream Puffs Pizza frozen Eclairs...
  • Page 27: Pyrolytic Cleaning The Oven

    PYROLYTIC CLEANING THE OVEN Heavy clean When the oven is very dirty it may need a longer cycle to Pyrolytic cleaning of the oven cavity clean it thoroughly. This cycle will clean the dirtiest of ovens. The oven has the Pyrolytic self-cleaning function. It Pyrolytic Cleaning Operation cleans by burning off the spatters and accumulated dirt The pyrolytic cleaning function can be selected by turning...
  • Page 28: Eve636, Evep626

    EVE636 / EVEP626 DESCRIPTION On / Off button Touch screen display Oven cavity selection Menu Light button Favourite button Fast Heat Up button Control panel Lower (half sized) oven Lower (full sized) oven with triple/quadruple with triple glazed door...
  • Page 29: Evep618, Evep619

    EVEP618 / EVEP619 DESCRIPTION Menu button On / Off button Touch screen display Favourite button Light button Fast Heat Up button Water drawer Warm air exhaust Control panel Quadruple glazed door...
  • Page 30: Eve615, Evep615, Evep616

    EVE615 / EVEP615 / EVEP616 DESCRIPTION On / Off Warm air exhaust Favourites Triple / Quadruple glazed door Fast Heat Up button Menu Touch screen display Light switch Control panel...
  • Page 31: Eve615/636, Evep615/616/618/619/626

    EVE615 / 636, EVEP615/ 616 / 618 / 619 / 626 USING THE APPLIANCE 170°C On / Off Press and hold to turn the oven on and off Menu Lists the oven functions Favourites Lists the favourite settings Touch display Shows the current settings of the oven Light switch To turn the lamp on and off...
  • Page 32: Display

    EVE615 / 636, EVEP615/ 616 / 618 / 619 / 626 (CONTINUED) DISPLAY Display indicators Basic indicators – to navigate on the display To confirm the selection / setting To go one level back in the menu To undo the last action...
  • Page 33: Condition The Oven

    CONDITION THE OVEN Take a shortcut! (TO BURN OFF ANY RESIDUE) Run in the empty oven before the first use. 1. Remove all accessories and removable shelf How to set Assisted Cooking supports from the oven. 2. Set the temperature to 180°C for the function: Fan Every dish in this submenu has a recommended cooking .
  • Page 34: Additional Functions

    EVE615 / 636, EVEP615/ 616 / 618 / 619 / 626 (CONTINUED) Take a shortcut! – press to reset the setting. – press to cancel the setting. Function lock How to choose end option This function prevents an accidental change of the heating function.
  • Page 35 How to manage error codes When the software error occurs, the display shows error message. In this section, you will find the list of the problems that you can handle on your own. Code and description Remedy C2 – the Food sensor/probe is in the oven cavity Take out the Food sensor/probe.
  • Page 36: Cooking Functions

    EVE615 / 636, EVEP615/ 616 / 618 / 619 / 626 COOKING FUNCTIONS - STANDARD (Functions listed may not apply to all models.) Symbol Function description Heat comes from the element surrounding the fan. This fan circulates the hot air around the oven cavity so that you can put your food in different places in the oven and still cook them at the same time.
  • Page 37 COOKING FUNCTIONS (CONTINUED) Symbol Function description The ‘Cook from Frozen’ function is ideal for cooking frozen precooked foods such as savoury pastries, pizzas, Cook from frozen mini meals (TV dinners), meat pies and fruit pies. Heat comes from the element surrounding the fan as well as a smaller element above the food.
  • Page 38 EVE615 / 636, EVEP615/ 616 / 618 / 619 / 626 (CONTINUED) COOKING FUNCTIONS – SPECIAL (Functions listed may not apply to all models.) Symbol Function description The ‘Keep Warm’ function is a low temperature oven function designed to keep your food at a perfect eating temperature without cooking it further.
  • Page 39: Menu

    MENU Main menu Press: to open Menu Menu item Application Assisted cooking Lists automatic programmes. Cleaning Lists cleaning programmes. Favourites Lists the favourite settings. Options To set the oven configuration. Settings Setup To set the oven configuration Service Shows the software version and configuration Submenu for Pyrolytic Cleaning –...
  • Page 40 EVE615 / 636, EVEP615/ 616 / 618 / 619 / 626 (CONTINUED) Submenu for Setup Submenu Application Language Sets the oven language. Display brightness Sets the display brightness. Key tones Turns the tone of the touch fields on and off. It is not possible to mute the tone for Buzzer volume Sets the volume of key tones and signals.
  • Page 41 Make sure dishes will fit into the oven before it is switched on. • Keep edges of non Electrolux baking dishes at least 40mm from the side of the oven. This allows free circulation of heat and ensures even cooking.
  • Page 42: Pyrolytic Cleaning

    PYROLYTIC CLEANING Pyrolytic cleaning of the oven cavity localized temperature changes in the vicinity of all pyrolytic ovens when the pyrolytic self cleaning The oven has the Pyrolytic self-cleaning function, it program is in operation. cleans by burning off the spatters and accumulated dirt and grease from the oven liner, at high temperature.
  • Page 43: Evep626

    IMPORTANT At the beginning of Pyrolytic cleaning, the door will automatically lock and the lock symbol will appear on the display. During the Pyrolytic cleaning cycle there may be some burn off odours. It is advised to keep the room well ventilated during this cycle. EVEP626 For this model with two ovens, both doors will lock automatically at the beginning of the pyrolytic cleaning.
  • Page 44: Assisted Cooking Recipes

    ASSISTED COOKING RECIPES Food category Type of food Type Side / Oven Dishes Side Dishes Jacket Potato Wedges Hash Browns Oven Dishes Lasagne Potato Gratin Pasta Bake Vegetable Gratin Savoury Baking Pizza Pizza Quiche Quiche Bread Ciabatta Rolls Baguette...
  • Page 45: Steam Assisted Cooking

    STEAM ASSISTED COOKING EVEP614 MODEL ONLY All Electrolux range of ovens have the ability to add steam while baking. Steam cooking Cooking with steam is a great addition to ‘hot air’ cooking. Steam brings out all the natural flavours and goodness in Make sure that the oven is cold.
  • Page 46: Eve615, Eve636, Evep615, Evep616, Evep626

    STEAM ASSISTED COOKING (CONTINUED) EVE615, EVE636, EVEP615, EVEP616, EVEP626 Open the oven door. 2. Add 150ml of tap water to the cavity well. Only add water when the oven is cold. 3. Select any of the STEAM ASSIST functions.
  • Page 47: Evep618, Evep619

    COOKING FUNCTION – EVEP618 / EVEP619 STEAM ASSIST Steam product description Steam comes from the outlet pipe and heat comes from the element surrounding the fan. This fan circulates the hot air and steam around the oven cavity so that you can put your food in different places in the oven.
  • Page 48: Steam Cooking Operation

    STEAM ASSISTED COOKING (CONTINUED) STEAM COOKING OPERATION STEAM MAINTENANCE The water drawer cover is in the control panel. Refer to the cleaning function: Tank emptying. WARNING CAUTION Use only cold tap water. Do not use filtered (de- The appliance is hot. There is a risk of burns.
  • Page 49: Steam Service Functions

    STEAM SERVICE FUNCTIONS if the procedure is not completed correctly, the display prompts to repeat the procedure. Menu > Cleaning > Steam maintenance Descaling reminder Submenu Application There are two reminders which prompt you to descale the oven. You cannot disable the descaling reminder. Procedure for cleaning the Type Description...
  • Page 50: Water Hardness

    STEAM ASSISTED COOKING (CONTINUED) WATER HARDNESS Tank Emptying Use this function after cooking with a steam heating How to set water hardness: function to remove the residual water from the water drawer. When the oven is first turned ON, the water hardness level needs to be set.
  • Page 51: Steam Cooking Guide

    COOKING GUIDE Cooking time Shelf Recipe Function Temp (C) Preheat (min excluding Size/portion Accessory position preheat) Chicken AirFry Plus 15-25 600g AirFry Plus Tray nuggets Croquettes AirFry Plus 15-25 450g AirFry Plus Tray Crumbed AirFry Plus 15-25 6pcs AirFry Plus Tray fish Chicken AirFry Plus...
  • Page 52: Using The Food Sensor/Probe

    USING THE FOOD SENSOR/PROBE The Food Sensor/Probe measures the core temperature • Sound alarm – when the food reaches the core of the food. When the food reaches the desired set core temperature, the signal sounds. temperature, the oven turns off. The Food Sensor/Probe •...
  • Page 53 Poultry Place the whole poultry on the wire rack breast side up. Core temperatures of different foods Insert the Food Sensor/probe with at least 75% of the The temperatures in the table are given as a guide and Sensor/probe into the breast of the poultry. Place the may vary depending on the composition of the food.
  • Page 54 USING FOOD SENSOR/PROBE (CONTINUED) approximately 30 minutes. 12:30 12:30 Heating up 81°C 81°C 81°C 95°C STOP STOP 12:30 12:30 76°C 80°C 80°C STOP STOP NOTE: The Food Sensor/probe temperature will not be displayed until the oven is at the desired temperature.
  • Page 55: Cooking Guide

    COOKING GUIDE Roasting meat (use roasting tray & insert) • Food may need to be removed early and should be checked at minimum recommended bake time. • Place the meat in the oven and set the temperature between 180°C and 200°C. (It is recommended to •...
  • Page 56 COOKING GUIDE (CONTINUED) Cooking guide recommended meat minutes per kg temperature °C rare: 35-40 beef medium: 45-50 well done 55-60 medium: 40 lamb well done 60 veal well done 60 pork well done 60 poultry recommended minutes per kg &...
  • Page 57 TRADITIONAL BAKING food temperature °c oven shelf position* time in minutes scones – plain or fruit 2 or 3 biscuits – rolled 2 or 3 10-15 – spooned 2 or 3 12-15 – shortbread biscuits 2 or 3 30-35 meringues –...
  • Page 58 (CONTINUED) STEAM COOKING IMPORTANT For best results, preheat oven for 10 minutes. Refer to steam assisted cooking section for details. SteamBake function (EVE602, EVE614, EVE615, EVEP614, EVEP615, EVEP616, EVEP626, EVE636) food Water on cavity Temperature °C Oven shelf Time in minutes...
  • Page 59 STEAMBAKE food temperature °c oven shelf position* time in minutes bread – rolls 20-25 – loaves 35-45 – focaccia 200-210 15-25 GRILLING Grilling hints • Remove oven/grill dish and grill shelf and preheat grill As a method of cooking, grilling can be used to: for about 5 minutes.
  • Page 60: Dealing With Cooking Problems

    DEALING WITH COOKING PROBLEMS problem possible causes remedies Uneven cooking Incorrect shelf position • Select shelf suitable for cooking function. See cooking function tables in cooking guide Oven tray too large • Experiment with other trays or dishes Trays not centralised •...
  • Page 61: Cleaning The Appliance

    Care must be taken when wiping exposed stainless The cleaning procedure removes limestone residue from steel edges, they can be sharp! the cavity well after cooking with steam. A suitable cleaner can be purchased from Electrolux WARNING Customer Care Centres. Perform the cleaning procedure after every CAUTION Steam cooking cycle.
  • Page 62 Removing the trays and shelves from the appliance • A special high temperature resistant globe should be used. This can be purchased from Electrolux Slide the tray and shelves towards you until they Customer Care Centres. reach the front stop.
  • Page 63 CLEANING THE DOUBLE/TRIPLE GLAZED DOOR (NON PYROLYTIC MODELS) WARNING Do not lift the door by the handle. Rough handling will cause glass to break. Removing the oven door The oven is equipped with a door that can be disassembled in order to clean all the panes of glass. Remove the door before cleaning.
  • Page 64 CLEANING THE APPLIANCE (CONTINUED) Cleaning the door glass panels CAUTION • Do not to use harsh abrasives on the glass panes as the reflective surface plays a role in Push the middle of the trim down to ensure it is the function of the oven to keep the door cool.
  • Page 65 Stirrup in locked position Door column Hold the oven door with a hand each side and remove it from the oven by pulling it towards you. CLEANING THE QUAD GLAZED DOOR (PYROLYTIC MODELS) WARNING Lay the oven door with the outer side facing downwards on something soft and flat (for example Do not lift the door by the handle.
  • Page 66 CLEANING THE APPLIANCE (CONTINUED) Do not misplace them! Chamfer to be located in this corner Insert the black bordered glass panel into the upper position, ensuring the painted surface is facing the downside as per the image below. CAUTION •...
  • Page 67 Fitting the oven door Take hold of the oven door with a hand on each side and with the door at an angle of 30˚, position the recesses at the bottom of the door onto the hinge arms of the oven. Let the door slide down the hinge arms as far as it will go.
  • Page 68: Tips And Troubleshooting

    TIPS AND TROUBLESHOOTING Before the first use, have you to set: NOTE: If the oven is still hot from cooking, the cooling fan will keep running to cool the oven down and will switch off • Language by itself once cool.
  • Page 69 Faults If there is a problem with the oven or grill, please check the points listed below before calling for service. It may be possible to avoid a call by fixing the problem yourself - and so continue cooking. Data plate When you need information, service or spare parts please be prepared to tell us the: Model number:...
  • Page 70: Shortcuts

    SHORTCUTS Here you can see all the useful shortcuts. You can also find them in the dedicated chapters in the user manual. How to set: heating functions How to set: cooking with a steam heating function How to set: assisted cooking...
  • Page 71: Troubleshooting

    TROUBLESHOOTING NOTE: We may charge for service even in the warranty period if your problem is due to the causes listed below. problem possible cause Oven or grill not working • Time of day is not set. • Power is not turned on. •...
  • Page 72 TROUBLESHOOTING (CONTINUED) When using the Food Sensor/probe, • Ensure the Food Sensor/probe is inserted at least 75% into the food. centre of the food is undercooked • Ensure that food has been adequately rested after cooking. Shelf or telescopic runner slides out •...
  • Page 73: Notes

    NOTES...
  • Page 74 NOTES...
  • Page 75: Warranty

    Guarantee Act does not apply. warranty. 11. C onfidentiality: You accept that if you make a warranty claim, Electrolux 7. Exclusions: You may not make a claim under this warranty unless and its agents including ASC may exchange information in relation to you the defect claimed is due to faulty or defective parts or workmanship.
  • Page 76 To add a touch of professional inspiration to your home, visit electrolux.com.au or electrolux.co.nz electrolux.com.au or electrolux.co.nz ANC A13110601 Rev D ECN 127657 © 2022 Electrolux Home Products Pty Ltd. ABN 51 004 762 341 E_MAN_Ovens_A4_Feb22...

Table of Contents