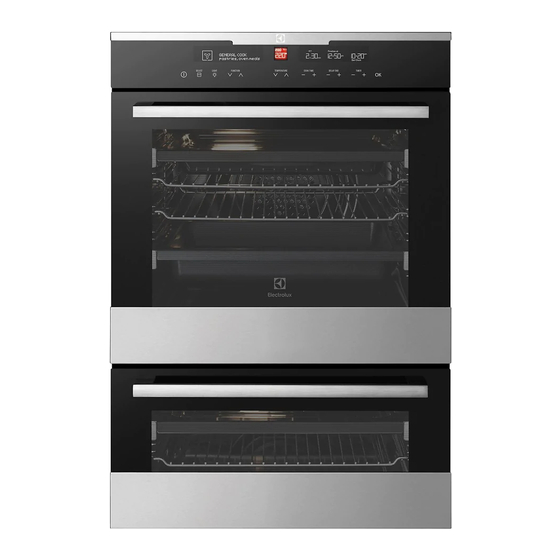
Electrolux EVE626 User Manual

Electrolux EVE626 User Manual

Hide thumbs Also See for EVE626:

Advertisement

EVE614, EVE616,
EVE626, EVE636,
EVEP614, EVEP616, EVEP618, EVEP626
Cooking
User manual

Advertisement

Table of Contents
loading

Summary of Contents for Electrolux EVE626

  • Page 1 EVE614, EVE616, EVE626, EVE636, EVEP614, EVEP616, EVEP618, EVEP626 Cooking User manual...
  • Page 2: Table Of Contents

    Important instructions ______________________________ 3 Dear customer, Before using your appliance _____________________ 3 Thank you for purchasing an Electrolux oven. Information on disposal for users ________________ 3 You’ve chosen a product that brings with it decades Important safety instructions ____________________ 3 of professional experience and innovation.
  • Page 3: Important Instructions

    30 minutes. may result in personal injury, property damage and affect your ability to make a claim under the Electrolux Please ensure the room is well ventilated manufacturer’s warranty provided with your product.
  • Page 4: General Cautions

    IMPORTANT INSTRUCTIONS (CONTINUED) • Allow the oven to cool down for 30 minutes before GENERAL CAUTIONS you drain the water tank in a steam oven. Scalding water may be released. Read the following carefully to avoid damage or injury.
  • Page 5: Installation Of The Appliance

    IMPORTANT INSTRUCTIONS (CONTINUED) INSTALLATION OF THE APPLIANCE • Electrolux Home Products cannot accept responsibility for damage caused by installation into low temperature tolerant cabinets. WARNING • After installation, test and ensure that the appliance The appliance must not be installed behind a operates correctly before handing it over to the customer.
  • Page 6 IMPORTANT INSTRUCTIONS (CONTINUED) Levelling oven Double oven Cut-out dimensions Place a level in the oven as below making sure the level sits type of fit A (width) B (height) C (depth) on the front and rear forms. The level needs to be correct...
  • Page 7: Installing The Oven Accessories

    NOTE: If you have purchased a two cavity appliance you INSTALLING THE OVEN will have additional side racks for the lower oven/grill. These ACCESSORIES are fitted in a similar manner. Shelves Slides (Telescopic runners) The shelves are designed so that they have maximum Obtain left hand side rack and left hand slide –...
  • Page 8: Using The Appliance

    IMPORTANT INSTRUCTIONS (CONTINUED) USING THE APPLIANCE The appliance is supplied with two types of shelves Standard shelf IMPORTANT Grill shelf -The tray can be suspended under the grill Pre-heating shelf to catch dripping fat. Rest the tray on two side rails of the grill shelf and push all the way in.
  • Page 9: Eve614

    EVE614 COMPONENTS Oven ‘ON’ light Function selector knob Timer display Touch pad ‘Heating’ light Temperature selector knob EVE614 Control panel Triple glazed door Warm air exhaust...
  • Page 10: Before Using The Appliance

    EVE614 (CONTINUED) BEFORE USING THE APPLIANCE Setting the time Before the appliance can be used, the time must be set. After the appliance has been electrically connected ‘12:00’ will be displayed and the clock icon will flash. To set the time of day in hours and minutes touch the –...
  • Page 11: Cooking Functions

    COOKING FUNCTIONS Symbol Function description Heat comes from the element surrounding the fan as well as the smaller element above the food. This Rapid Heat allows you to preheat your oven 30% quicker than on standard ‘Bake/Pizza’. ‘Rapid Heat’ is ideal for cooking frozen pre-cooked foods such as savoury pastries, pizzas, mini meals (TV dinners), meat pies and fruit pies.
  • Page 12: Operating Sequence

    EVE614 (CONTINUED) OPERATING SEQUENCE USING THE APPLIANCE Select the cooking function Cooking with the timer Turn the function selector in any direction to the desired The appliance is equipped with a timer that has the cooking function. The oven cavity light will come on.
  • Page 13 day will be displayed. The oven will automatically shut Setting the delayed start cooking time off once the set duration is reached. To check how • Set the cook time and end time as described in the much time remains, press MODE until the cook time previous sections.
  • Page 14: Evep614

    EVEP614 COMPONENTS Function selector knob Temperature selector knob Timer display Touch pad EVEP614 Control panel Quad glazed door Warm air exhaust...
  • Page 15: Before Using The Appliance

    BEFORE USING THE APPLIANCE Setting the time Before the appliance, can be used, the time must be set. When power is supplied to the oven the clock icon will be displayed. Along with the clock symbol the ‘12’ will be flashing.
  • Page 16: Cooking Functions

    EVEP614 (CONTINUED) COOKING FUNCTIONS Symbol Function description Heat comes from the element surrounding the fan as well as the smaller element above the food. This allows you to preheat Rapid Heat your oven 30% quicker than on standard ‘Bake’. ‘Rapid Heat’ is ideal for cooking frozen pre-cooked foods such as savoury pastries, pizzas, mini meals (TV dinners), meat pies and fruit pies.
  • Page 17: Operating Sequence

    OPERATING SEQUENCE USING THE APPLIANCE Cooking with the timer Select the oven function Turn the oven function selector clockwise to select the desired oven function. NOTE: each oven function has a default temperature which can then be adjusted as outlined below. This knob cannot be turned anticlockwise from off position...
  • Page 18 EVEP614 (CONTINUED) Adjusting the clock Setting the delayed start cooking time The ‘cook time’ and ‘end time’ functions can be To change the time, touch and hold the button until combined to switch the oven on and off at a specific the clock symbol begins to flash.
  • Page 19 Additional Functionality Releasing the child-proof lock Setting the countdown timer Touch and hold the buttons at the same time until a double beep is sounded. This will commence to Use this for timing any activity. For example boiling eggs. unlock the door and after 5 seconds the oven is ready Touch the button, the display will flash.
  • Page 20: Pyrolytic Cleaning Of The Oven

    EVEP614 (CONTINUED) PYROLYTIC CLEANING THE OVEN Normal clean Use this as the regular cycle about once every Pyrolytic cleaning of the oven cavity 2-3 months. The oven has the Pyrolytic self-cleaning function. It Pyrolytic Cleaning Operation cleans by burning off the spatters and accumulated dirt The pyrolytic cleaning function can be selected by turning and grease from the oven liner, at high temperature.
  • Page 21: Eve616

    EVE616 COMPONENTS ON/OFF Cook time control Cooking function display Light on/off Delay end control Temperature display Cooking function selector Set clock and timer control Cook time display Steam on/off Instant confirm Delay end display Temperature control Cooking function icon Clock/Timer display EVE616 Control panel Warm air exhaust...
  • Page 22: Eve626, Eve636

    EVE626, EVE636 COMPONENTS ON/OFF Cook time control Cooking function display Upper/Lower level selector Delay end control Temperature display Light on/off Set clock and timer control Cook time display Cooking function selector Instant confirm Delay end display Steam on/off Cooking function icon...
  • Page 23: Before Using The Appliance

    EVE616, EVE626, EVE636 (CONTINUED) BEFORE USING THE APPLIANCE Setting the time The time of day must be set before the appliance can operate. After the appliance has been electrically connected the display will cycle through the welcome screen, then ‘Set Clock’...
  • Page 24: Cooking Functions

    EVE616, EVE626, EVE636 (CONTINUED) COOKING FUNCTIONS Functions listed may not apply to all models. Symbol Function description Heat comes from the element surrounding the fan. This fan circulates the hot air around the oven cavity Fan Cooking so that you can put your food in different places in the oven and still cook them at the same time. You can use the ‘Fan Cooking’...
  • Page 25 The ‘Cook from Frozen’ function is ideal for cooking frozen precooked foods such as savoury pastries, Cook from frozen pizzas, mini meals (TV dinners), meat pies and fruit pies. Heat comes from the element surrounding the fan as well as a smaller element above the food. Simply place the food in the oven straight from the freezer and heat.
  • Page 26: Operating Sequence

    EVE616, EVE626, EVE636 (CONTINUED) OPERATING SEQUENCE Cooking suggestions will appear under the function name and suggested cooking temperatures will appear above the temperature selector. Turning the oven on If no other symbol is touched within 8 seconds the oven •...
  • Page 27: Using The Appliance

    USING THE APPLIANCE Setting the cook time Select the desired oven function and cooking Turning the oven off temperature. Single cavity models: Touch the ‘cook time’ symbol as often as necessary (or hold), until the desired cook time has Touch the ON/OFF symbol to switch off the oven.
  • Page 28 EVE616, EVE626, EVE636 (CONTINUED) Setting the delay end time Timers The delay end function can be used to switch the oven on The appliance has two timers which can be used one at a and off at a specific time during the day.
  • Page 29: Additional Functionality

    ADDITIONAL FUNCTIONALITY Adjusting the clock Switch on the oven by touching ‘ON/OFF’ symbol. Light on/off Select ‘SETTINGS’ from the function list and touch OK. Turn the oven light off and on in any cooking mode by Select ‘SET CLOCK’ from the list and touch OK. simply touching the ‘Set Clock’...
  • Page 30 EVE616, EVE626, EVE636 (CONTINUED) Other settings. The ‘Settings’ function gives the opportunity to change oven functionality. Scroll through the list by using function or function down Switch on the oven by touching the ‘ON/OFF’ symbol. Select ‘SETTINGS’ from the function list and touch OK.
  • Page 31: Evep616, Evep618

    EVEP616, EVEP618 COMPONENTS EVEP616 EVEP618 ON/OFF Set clock and timer control Water Drawer (EVEP618 only) Light on/off Instant confirm Control panel Cooking function selector Cooking function display Warm air exhaust Steam on/off Temperature display Quad glazed door Temperature control Cook time display Cook time control Delay end display Delay end control...
  • Page 32: Evep626

    EVEP626 COMPONENTS EVEP626 double cavity (duo) ON/OFF Cook time control Cook time display Upper/Lower oven selector Delay end control Delay end display Light on/off Set clock and timer control Clock/timer display Cooking function selector Instant confirm Control panel Steam function...
  • Page 33: Before Using The Appliance

    EVEP616, EVEP618, EVEP626 BEFORE USING THE APPLIANCE Setting the time The time of day must be set before the appliance can operate. After the appliance has been electrically connected the display will cycle through the welcome screen, then ‘Set Clock’ will illuminate under the clock display and the Hour digits will flash.
  • Page 34: Cooking Functions

    EVEP616, EVEP618, EVEP626 (CONTINUED) COOKING FUNCTIONS (Functions listed may not apply to all models.) Symbol Function description Heat comes from the element surrounding the fan. This fan circulates the hot air around the oven cavity so that you Fan cooking can put your food in different places in the oven and still cook them at the same time.
  • Page 35 COOKING FUNCTIONS (Functions listed may not apply to all models.) Symbol Function description The ‘Cook from Frozen’ function is ideal for cooking frozen precooked foods such as savoury pastries, pizzas, mini Cook from frozen meals (TV dinners), meat pies and fruit pies. Heat comes from the element surrounding the fan as well as a smaller element above the food.
  • Page 36: Operating Sequence

    EVEP616, EVEP618, EVEP626 (CONTINUED) OPERATING SEQUENCE Selecting a temperature The temperature is electronically controlled. Turning the oven on The temperature can be selected within the range of 30°C • Switch on the oven by touching the ON/OFF to 250°C and can be adjusted at any time. To set the symbol.
  • Page 37: Using The Appliance

    USING THE APPLIANCE • If you wish to cook a bit longer, press the ‘cook time’ symbol for each additional minute you require. The oven automatically Cooking with the timer reverts to the function and temperature The oven is equipped with a programmable controller that previously programmed.
  • Page 38 EVEP616, EVEP618, EVEP626 (CONTINUED) Setting the count down timer IMPORTANT The timer can be used independently of the oven for • 30 seconds after a cooking function has setting a count down period. When the period of time has started, it is no longer possible to delay the elapsed, an audible signal sounds.
  • Page 39: Additional Functionality

    ADDITIONAL FUNCTIONALITY Other settings. The ‘Settings’ function gives the opportunity to change Light on/off oven functionality. Scroll through the list by using function Turn the oven light off and on in any cooking mode by or function down simply touching the light symbol.
  • Page 40: Cleaning The Oven

    EVEP616, EVEP618, EVEP626 (CONTINUED) CLEANING THE OVEN WARNING During the pyrolytic cleaning process the oven CAUTION becomes extremely hot. A steam cleaner is not to be used to clean the product. • Please keep small children at a safe distance.
  • Page 41 Select the pyrolytic clean function. • Choose your Pyrolytic cleaning cycle from the following: Use cooking function selector to slect the ‘pyro clean’ function. soiling duration light clean 1hr 30mins medium clean 2hrs heavy clean 2hr 30mins NOTE: Duration includes heat-up time, excluding cool-down time.
  • Page 42: Getting To Know The Oven

    EVEP616, EVEP618, EVEP626 (CONTINUED) GETTING TO KNOW THE OVEN (EVEP626) For these models with two ovens, both doors will lock automatically at the beginning of the pyrolytic cleaning. Get to know your new oven with this ‘Simple Cooking is not permitted in either oven during the pyrolytic Test Cake’...
  • Page 43 Make sure dishes will fit into the oven before it is switched on. • Keep edges of non Electrolux baking dishes at least 40mm from the side of the oven. This allows free circulation of heat and ensures even cooking.
  • Page 44: Steam Assisted Cooking

    STEAM ASSISTED COOKING All Electrolux range of ovens have the ability to add steam CAUTION while baking, additionally EVEP618 has dedicated steam drawer and functions. Do not refill the cavity well with water during cooking or when the oven is hot.
  • Page 45 Steam operating sequence EVEP618 Open the water drawer in the control panel by pressing it. Steam product description Pour approximately 850mL of water into the drawer. The water level indicator on the display will show one to two bars. Close the water drawer. WARNING Take care when filling the water drawer.
  • Page 46 STEAM ASSISTED COOKING (CONTINUED) Emptying the water tank Steam on demand The water tank must be emptied after every steam During the cooking process some functions will allow assisted cooking cycle. This is done by: the user to switch between standard cooking and steam assisted cooking.
  • Page 47: Using The Food Probe

    USING THE FOOD PROBE The Food Probe measures the core temperature of Select the oven temperature by pressing the the food. When the food reaches the desired set core temperature or temperature to reach the temperature, the oven turns off. The Food Probe has a desired setting.
  • Page 48 USING FOOD PROBE (CONTINUED) Poultry Set the desired food core temperature by pressing the temperature or temperature to reach the Place the whole poultry on the wire rack breast side up. desired setting. Insert the Food Probe with at least 75% of the probe into the breast of the poultry.
  • Page 49 The appliance will calculate the approximate end To change the desired food core temperature during time. The end time is different for different quantities cooking, press and hold the at the same time. of food, set oven temperatures and function modes. To cancel the Food Probe operation, simply unplug the NOTE: The estimated end time will be displayed after probe from the socket.
  • Page 50: Cooking Guide

    COOKING GUIDE Cooking guide ENVIRONMENT! recommended To save energy and to help protect the meat minutes per kg temperature °C environment, we recommend these hints: rare: 35-40 Use the oven efficiently by cooking many trays of food at beef medium: 45-50 the same time.
  • Page 51 TRADITIONAL BAKING food temperature °c oven shelf position* time in minutes scones – plain or fruit biscuits – rolled 10-15 – spooned 12-15 – shortbread biscuits 30-35 meringues – hard – individual – soft – individual 15-20 – pavlova – 4 egg whites cakes –...
  • Page 52 (CONTINUED) STEAM COOKING IMPORTANT For best results, preheat oven for 10 minutes. Refer to steam assisted cooking section for details. Bake + Steam function (EVE614, EVE616, EVEP614, EVEP616, EVE626, EVEP626, EVE636) food Water on cavity Temperature °C Oven shelf Time in minutes...
  • Page 53 BREAD BAKING food temperature °c oven shelf position* time in minutes bread – rolls 20-25 – loaves 35-45 – foccacia 200-210 15-25 GRILLING Grilling hints • Remove oven/grill dish and grill shelf and preheat grill As a method of cooking, grilling can be used to: for about 5 minutes.
  • Page 54: Dealing With Cooking Problems

    DEALING WITH COOKING PROBLEMS problem possible causes remedies Uneven cooking Incorrect shelf position • Select shelf suitable for cooking function. See cooking function tables in cooking guide Oven tray too large • Experiment with other trays or dishes Trays not centralised •...
  • Page 55: Cleaning The Appliance

    • Always keep grill dish clean, as any fat deposits may steel edges, they can be sharp! catch fire. A suitable cleaner can be purchased from Electrolux Customer Care Centres. Food Probe (selected models only) • Clean the Food Probe after each use and let it dry.
  • Page 56: Cleaning The Accessories

    Removing the trays and shelves from the appliance • A special high temperature resistant globe should be used. This can be purchased from Electrolux Slide the tray and shelves towards you until they Customer Care Centres. reach the front stop.
  • Page 57: Cleaning The Triple Glazed Oven Door

    CLEANING THE TRIPLE GLAZED Lay the oven door with the outer side facing downwards on something soft and flat (for example DOOR (NON PYROLYTIC MODELS) a cloth/towel on a kitchen bench/table) to prevent scratches. WARNING Removing the oven door top trim Do not lift the door by the handle.
  • Page 58 CLEANING THE APPLIANCE (CONTINUED) Replacing the door glass panels Fitting the oven door Insert the smaller clear glass panel first from above Take hold of the oven door with a hand on each side and at an angle to the profile of the door.
  • Page 59: Cleaning The Quad Glazed Oven Door

    CLEANING THE QUAD GLAZED Lay the oven door with the outer side facing downwards on something soft and flat (for example DOOR (PYROLYTIC MODELS) a cloth/towel on a kitchen bench/table) to prevent scratches. WARNING Removing the oven door top trim Do not lift the door by the handle.
  • Page 60 CLEANING THE APPLIANCE (CONTINUED) Replacing door glass panels Push the trim down with its top edge over the glass panel until the clip snap in on each side of the trim. Assemble the silicone spacers to the upper corners of one of the clear glass panels.
  • Page 61: Tips And Troubleshooting

    TIPS AND TROUBLESHOOTING The effects of dishes on cooking results IMPORTANT Dishes and tins vary in their thickness, heat conductivity, Cooling/ventilation fan colour etc. which affects the way they transfer heat to the food inside them. This appliance is fitted with a cooling fan. This prevents your kitchen cabinet from overheating •...
  • Page 62 TROUBLESHOOTING NOTE: We may charge for service even in the warranty period if your problem is due to the causes listed below. problem possible cause Oven or grill not working • Time of day is not set. • Power is not turned on.
  • Page 63: Technical Specifications

    12.9A EVEP616 597 x 596 x 572 230-240V/50Hz 3.1kW 12.9A EVEP618 597 x 596 x 572 230-240V/50Hz 3.1kW 12.9A EVE626 890 x 596 x 568 230-240V/50Hz 5.3kW 22.1A EVEP626 890 x 596 x 572 230-240V/50Hz 5.3kW 22.1A EVE636 1083 x 596 x 568 230-240V/50Hz 6.2kW...
  • Page 64 NOTES...
  • Page 65 NOTES...
  • Page 66 NOTES...
  • Page 67: Warranty

    Guarantee Act does not apply. warranty. 11. C onfidentiality: You accept that if you make a warranty claim, Electrolux 7. Exclusions: You may not make a claim under this warranty unless and its agents including ASC may exchange information in relation to you the defect claimed is due to faulty or defective parts or workmanship.
  • Page 68 To add a touch of professional inspiration to your home, visit electrolux.com.au or electrolux.co.nz electrolux.com.au or electrolux.co.nz ANC A13110601 Rev B ECN 115001 © 2019 Electrolux Home Products Pty Ltd. ABN 51 004 762 341 EMAN_Ovens_Jul19...

Table of Contents