
Related Manuals for Electrolux EVEP627


Summary of Contents for Electrolux EVEP627
- Page 1 EVEP604, EVEP614, EVEP606, EVEP616, EVEP618, EVEP626, EVEP627, EVE614, EVE607, EVE616, EVE626, EVE636 Cooking User manual...
-
Page 2: Table Of Contents
CONTENTS Before using your appliance ____________________ 3 Dear customer, Important safety instructions __________________ 3 Thank you for purchasing an Electrolux oven. General cautions _____________________________ 4 You’ve chosen a product that brings with it decades of professional experience and innovation. Ingenious Identifying the appliance _______________________ 5 and stylish, it has been designed with you in mind. -
Page 3: Before Using Your Appliance
IMPORTANT SAFETY INSTRUCTIONS BEFORE USING YOUR APPLIANCE adjacent to vinyl-wrapped surfaces, use installation kit from vinyl wrap supplier. Before you use the appliance, we recommend that • Only authorised personnel should carry out servicing. you read through the relevant sections of this manual, (Certificate of Compliance to be retained) which provides the description of your appliance and •... -
Page 4: General Cautions
IMPORTANT SAFETY INSTRUCTIONS GENERAL CAUTIONS Read the following carefully to avoid damage or injury. It is important to use the appliance safely. Check these safety points before using the appliance. • This appliance must not be used as a space heater. -
Page 5: Identifying The Appliance
EVE614 Control panel used on: See page 14 PIZZA TIME TEMP EVEP604/EVEP614 Control panel used on: Select See pages 23, 24 Select EVE616 EVE626 EVE636 Control panel used on: See pages 33, 34 EVE607 EVEP606/EVEP616 EVEP618 Select EVEP626 / EVEP627... -
Page 6: Eve614
EVE614 COMPONENTS Oven ‘ON’ light Function selector knob Timer display Touch pad ‘Heating’ light Temperature selector knob MODE EVE614 Control panel Triple glazed door Warm air exhaust... -
Page 7: Before Using The Appliance
BEFORE USING THE APPLIANCE INSTALLING THE OVEN ACCESSORIES Preparing the oven Please remove all stickers and protective film from Side racks doors, and remove all leaflets and boxes from the Insert the twin pegged side into the rear access holes floor of the oven before operation. - Page 8 EVE614 (CONTINUED) To fit a shelf or tray to telescopic slides: With the slides fully pushed in, push the shelf or tray along the top of the slide until it hits the back post. Drop the front of the shelf or tray onto the slide ensuring it sits behind the front post of the slide.
-
Page 9: Cooking Functions
COOKING FUNCTIONS Functions listed may not apply to all models. Symbol Function description Heat comes from the element surrounding the fan as well as the smaller element above the food. This Rapid heat allows you to preheat your oven 30% quicker than on standard ‘Bake/Pizza’. ‘Rapid Heat’ is ideal for cooking frozen pre-cooked foods such as savoury pastries, pizzas, mini meals (TV dinners), meat pies and fruit pies. -
Page 10: Operating Sequence
EVE614 (CONTINUED) OPERATING SEQUENCE IMPORTANT Pre-heating Select the cooking function For best cooking results pre-heat the oven. Turn the function selector in any direction to the desired Pre-heating allows the oven to reach the required cooking function. The oven cavity light will come on. -
Page 11: Using The Appliance
USING THE APPLIANCE Selecting the timer • Touch the MODE symbol until the timer icon begins flashing. IMPORTANT • Set the countdown time you want by using the Cooling / Vent fan – symbols. 5 seconds after the last change The built-in appliance is fitted with a cooling fan. - Page 12 EVE614 (CONTINUED) USING THE APPLIANCE On completion of cooking The heat source will turn off, the timer will beep and the Setting the cooking end time end time and/or cook time icons will flash. Check that the clock displays the correct time of day.
-
Page 13: Getting To Know The Oven
GETTING TO KNOW THE OVEN Get to know your new oven with this ‘Simple Test Cake’ Although we strive for a perfect performing oven, it’s possible that there will be some variation in colour when baking. Therefore, we suggest to make this simple, easy and delicious Simple Test Cake to help you understand your new oven. -
Page 14: Evep604, Evep614
EVEP604, EVEP614 COMPONENTS Function selector knob Temperature selector knob Timer display 5 Button controller PIZZA TIME TEMP EVEP614 Control panel Quad glazed door Warm air exhaust... -
Page 15: Before Using The Appliance
BEFORE USING THE APPLIANCE Installing your oven accessories Side racks (EVEP614 only) Preparing your oven Insert the twin pegged end into the rear access holes Please remove all stickers and protective film from provided, ensuring pegs are fully inserted. doors, and remove all leaflets and boxes from the floor of the oven before operation. - Page 16 EVEP604, EVEP614 (CONTINUED) To fit a shelf or tray to telescopic slides (EVEP614 only): With the slides fully pushed in, push the shelf or tray along the top of the slide until it hits the back post. Drop the front of the shelf or tray onto the slide ensuring it sits behind the front post of the slide.
-
Page 17: Cooking Functions
COOKING FUNCTIONS Functions listed may not apply to all models. Symbol Function description Heat comes from the element surrounding the fan as well as the smaller element above the food. This allows Rapid heat you to preheat your oven 30% quicker than on standard ‘Bake’. ‘Rapid Heat’ is ideal for cooking frozen pre- cooked foods such as savoury pastries, pizzas, mini meals (TV dinners), meat pies and fruit pies. -
Page 18: Operating Sequence
EVEP604, EVEP614 (CONTINUED) OPERATING SEQUENCE IMPORTANT Pre-heating Select the oven function Turn the oven function selector clockwise to select the For best cooking results, pre-heat the oven. desired oven function. Pre-heating allows the oven to reach the required temperature quickly and efficiently as well as cook... - Page 19 USING THE APPLIANCE Setting the cook time Use the knobs to select the desired oven function Cooking with the timer and cooking temperature. Press the ‘TIME’ button as often as necessary, until the ‘cook time’ symbol appears. Set the desired cooking time commencing with –...
-
Page 20: Using The Appliance
EVEP604, EVEP614 (CONTINUED) 5 seconds after the last change the ‘cook time’ and Light operation ‘end time’ arrows are lit to confirm that the oven has During operation of the oven the light can be switched off been programmed. -
Page 21: Getting To Know The Oven
GETTING TO KNOW THE OVEN DEMO Mode The oven can be set to operate in a demo mode (e.g. in a Get to know your new oven with this retail store). In this mode the display works and functions ‘Simple Test Cake’ can be set but the oven does not actually heat. -
Page 22: Cleaning The Oven
EVEP604, EVEP614 (CONTINUED) CLEANING THE OVEN Pyrolytic Cleaning Operation The pyrolytic cleaning function can be selected by turning Pyrolytic cleaning of the oven cavity the function selector switch clockwise to the pyrolytic – position. Use the buttons on the electronic clock The oven has the Pyrolytic self-cleaning function. -
Page 23: Eve616
EVE616, EVE626, EVE636 COMPONENTS ON/OFF Cook time control Cooking function display Upper/Lower oven selector Delay end control Temperature display (EVE626, EVE636 only) Set clock and timer control Cook time display Light on/off Instant confirm Delay end display Cooking function selector Oven cavity icon Clock/timer display Temperature control... -
Page 24: Eve626, Eve636
EVE616, EVE626, EVE636 COMPONENTS Select Select EVE626 Double cavity model (duo) EVE636 Double cavity model (double wall oven) Control panel Warm air exhaust Upper main oven with triple glazed door Lower (half sized) oven with triple glazed door Lower (full sized) oven with triple glazed door... -
Page 25: Before Using The Appliance
EVE616, EVE626, EVE636 BEFORE USING THE APPLIANCE Installing your oven accessories Side racks Preparing the appliance Insert the twin pegged end into the rear access holes Please remove all stickers and protective film from provided, ensuring pegs are fully inserted. doors, and remove all leaflets and boxes from the Then locate the front peg into the front access hole and floor of the oven before operation. - Page 26 EVE616, EVE626, EVE636 (CONTINUED) When fully inserted the shelf/tray should not interfere with the closed oven door. To fit a shelf or tray to telescopic slides: With the slides fully pushed in, push the shelf or tray along the top of the slide until it hits the back post.
-
Page 27: Cooking Functions
COOKING FUNCTIONS Functions listed may not apply to all models. Symbol Function description Heat comes from the element surrounding the fan. This fan circulates the hot air around the oven cavity so that you can put your food in Fan cooking different places in the oven and still cook them at the same time. -
Page 28: Operating Sequence
EVE616, EVE626, EVE636 (CONTINUED) Select a cooking function OPERATING SEQUENCE The oven will have a selection of functions. Press the Turning the oven on function or function symbols as many times as necessary until the desired function appears. •... -
Page 29: Using The Appliance
USING THE APPLIANCE Condensation Excess condensation may fog the oven door. This may Turning the oven off happen when cooking large quantities of food from a cold start. Minimise condensation by: Single cavity models: • Keeping the amount of water used whilst cooking to Touch the ON/OFF symbol to switch off the oven. - Page 30 EVE616, EVE626, EVE636 (CONTINUED) • When the cook time has elapsed, an audible IMPORTANT signal will sound for 2 minutes, the oven will switch off and COOKING FINISHED will be 30 seconds after a cooking function has started, it displayed.
- Page 31 To begin the count down timer press OK or wait 8 Touch and hold the ON/OFF symbol until the display seconds. When the timer starts, the bell will stop turns ON then OFF. Immediately after, touch both the flashing and the timer will begin to count down. cooktime symbols simultaneously.
-
Page 32: Getting To Know The Oven
EVE616, EVE626, EVE636 (CONTINUED) GETTING TO KNOW THE OVEN Other settings. The ‘Settings’ function gives the opportunity to change oven functionality. Scroll through the list by using function Get to know your new oven with this or function down ‘Simple Test Cake’... -
Page 33: Eve607, Evep606, Evep616, Evep618
EVE607, EVEP606, EVEP616, EVEP618 COMPONENTS EVEP606, single cavity EVEP616, single cavity EVEP618 single cavity (with steam cooking) EVE607 single cavity (with steam cooking) ON/OFF Delay end control Clock/timer display Light on/off Set clock and timer control Water Drawer (EVE607 and EVEP618 only) Cooking function selector Instant confirm Control panel... -
Page 34: Evep626, Evep627
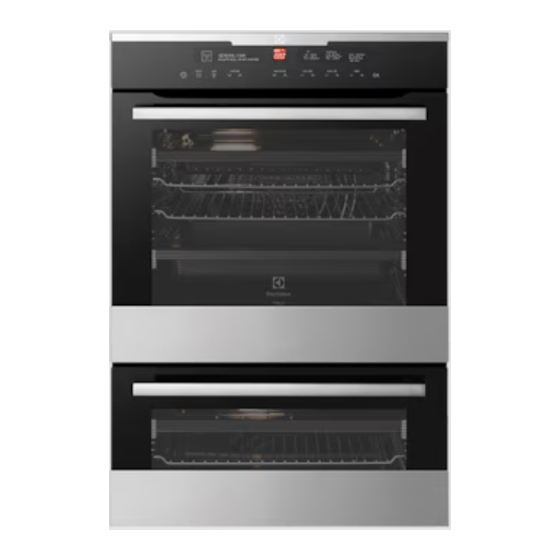
EVEP626, EVEP627 COMPONENTS Select EVEP626 / EVEP627 double cavity (duo) ON/OFF Delay end control Delay end display Upper/Lower oven selector Set clock and timer control Clock/timer display Light on/off Instant confirm Control panel Cooking function selector Cooking function display... -
Page 35: Before Using The Appliance
EVE607, EVEP606, EVEP616, EVEP618, EVEP626, EVEP627 BEFORE USING THE APPLIANCE IMPORTANT New appliances can have a smell during first use. Preparing the appliance It is recommended to ‘run in’ the oven before Please remove all stickers and protective film from cooking for the first time. -
Page 36: Installing Your Oven Accessories
NOTE: EVE607 & EVEP618 only have one telescopic slide in the bottom location. Back post NOTE: If you have purchased an EVEP626 or EVEP627 you will have additional side racks for the lower oven/grill. These are fitted in a similar manner, however the left hand side rack must be fitted to the lower two holes of the half cavity. - Page 37 To fit a shelf or tray to a formed cavity (EVEP606 only) Grill in oven (EVEP606 only) Your oven comes with formed “easy clean” shelf supports. The grill dish with wire insert can be used in any of the two The shelves are designed to travel freely on shelf supports upper height positions (shelf positions 4 and 5) between without being pulled out accidentally.
-
Page 38: Cooking Functions
EVE607, EVEP606, EVEP616, EVEP618, EVEP626, EVEP627 (CONTINUED) COOKING FUNCTIONS Functions listed may not apply to all models. Symbol Function description Heat comes from the element surrounding the fan. This fan circulates the hot air around the oven cavity so that Fan cooking you can put your food in different places in the oven and still cook them at the same time. - Page 39 COOKING FUNCTIONS Functions listed may not apply to all models. Symbol Function description The ‘Cook from Frozen’ function is ideal for cooking frozen precooked foods such as savoury pastries, pizzas, Cook from frozen mini meals (TV dinners), meat pies and fruit pies. Heat comes from the element surrounding the fan as well as a smaller element above the food.
-
Page 40: Operating Sequence
EVE607, EVEP606, EVEP616, EVEP618, EVEP626, EVEP627 (CONTINUED) OPERATING SEQUENCE Selecting a temperature The temperature is electronically controlled. Turning the oven on The temperature can be selected within the range of 30°C • Switch on the oven by touching the ON/OFF to 250°C and can be adjusted at any time. -
Page 41: Using The Appliance
USING THE APPLIANCE Setting the cook time Select the desired oven function and cooking temperature. IMPORTANT Touch the ‘cook time’ symbol as often as Pre-heating necessary (or hold), until the desired cook time has Pre-heating the oven is recommended in several cooking been set. - Page 42 EVE607, EVEP606, EVEP616, EVEP618, EVEP626, EVEP627 (CONTINUED) USING THE APPLIANCE (CONTINUED) Timers The appliance has two timers which can be used one at a time. The count up timer can be used to measure a period Setting the delay end time of time.
- Page 43 Adjusting the clock Bread baking Switch on the oven by touching ‘ON/OFF’ symbol. Specially programmed for buns and loaves of bread. This function gives perfect, fluffy insides with crisp golden Select ‘SETTINGS’ from the function list and crusts. See ‘getting to know your oven’ on touch OK.
- Page 44 EVE607, EVEP606, EVEP616, EVEP618, EVEP626, EVEP627 (CONTINUED) USING THE APPLIANCE (CONTINUED) WARNING Take care when filling the water drawer. Spillage Steam product description could create a slipping hazard. Immediately clean up any spills on the product, cabinet or floor. If the overfill alarm sounds immediately stop pouring water into the water drawer.
-
Page 45: Additional Functionality
the water outlet valve. Ensure the other end is in a Activating the child-proof lock container that can take up to 1 litre. When the child lock is engaged, the oven cannot be Remove the drain pipe only when the water switched on. -
Page 46: Using The Food Probe
EVE607, EVEP606, EVEP616, EVEP618, EVEP626, EVEP627 (CONTINUED) 15. Touch ‘OK’ to go into each selection to change Select a cooking function by pressing the function its settings by using function up and function or function as many times as necessary until down the desired function appears. - Page 47 Fish Put the plug of the Food Probe into the socket on the top right hand corner of the front frame. Ensure plug For best results, place the whole fish onto the wire rack is fully inserted into the socket. and prop it up in the swimming position (i.e.
- Page 48 EVE607, EVEP606, EVEP616, EVEP618, EVEP626, EVEP627 (CONTINUED) USING THE FOOD PROBE NOTE: The Food Probe temperature will not be displayed until the oven is at the desired temperature. Once the oven (CONTINUED) is at the desired temperature, the Food Probe temperature...
-
Page 49: Cleaning The Oven
CLEANING THE OVEN WARNING During the pyrolytic cleaning process the oven CAUTION becomes extremely hot. A steam cleaner is not to be used to clean the product. • Please keep small children at a safe distance. • Never clean non-stick baking trays and tins in the Cleaning steam parts oven during the pyrolytic cycle. - Page 50 EVE607, EVEP606, EVEP616, EVEP618, EVEP626, EVEP627 (CONTINUED) Turning the oven on Start Pyrolytic Switch on the oven by touching the ON/OFF symbol. Unlike other cooking functions, you MUST touch ‘OK’ for The control panel will come on and inform you that you the pyrolytic cycle to start.
-
Page 51: Getting To Know The Oven
Cleaning Reminder cakes have come away slightly from the sides of the cake pans. After a recommended period of time the oven will remind you to clean the oven. Once this period of time 10. Remove from oven to wire cake rack and rest for has elapsed, when turning the oven off you will get a 5 minutes before removing from cake pans. -
Page 52: Cooking Guide
When cooking with 1 shelf, position at 1 or 2. • Keep edges of non Electrolux baking dishes at least When cooking with 2 shelves, position them at 2 and 6. 40mm from the side of the oven. This allows free For more detailed shelf locations. - Page 53 poultry recommended minutes per kg ENVIRONMENT! & fish temperature °C chicken 45-50 To save energy and to help protect the duck 60-70 environment, we recommend these hints: 40-45 (<10kg) turkey Use the oven efficiently by cooking many trays of food at 35-40 (>10kg) the same time.
- Page 54 COOKING GUIDE TRADITIONAL BAKING food temperature °c oven shelf position* time in minutes scones – plain or fruit biscuits – rolled 10-15 – spooned 12-15 – shortbread biscuits 1 or 2 30-35 meringues – hard – individual – soft – individual 15-20 –...
- Page 55 STEAM COOKING (EVE607 and EVEP618 models only) food temperature °C oven shelf position* time in minutes cakes and pastries – apple cakes in a 20cm cake tin 60-80 – biscuits on a baking tray 3 (2 and 4) 20-40 – sweet buns on a baking tray 180-200 10-20 flan...
- Page 56 COOKING GUIDE (CONTINUED) GRILLING WARNING Do not place aluminium foil under food as this Grilling hints prevents fats and oils from draining away, which As a method of cooking, grilling can be used to: could result in a fire.
-
Page 57: Dealing With Cooking Problems
DEALING WITH COOKING PROBLEMS problem possible causes remedies Uneven cooking Incorrect shelf position • Select shelf suitable for cooking function. See cooking function tables in cooking guide Oven tray too large • Experiment with other trays or dishes Trays not centralised •... -
Page 58: Cleaning The Appliance
• Always keep grill dish and grill dish insert clean, as steel edges, they can be sharp! any fat deposits may catch fire. A suitable cleaner can be purchased from Electrolux Customer Care Centres. Food Probe (selected models only) •... -
Page 59: Cleaning The Accessories
• A special high temperature resistant globe should Ensure that they are placed between two be used. This can be purchased from Electrolux support wires. Customer Care Centres. To remove a tray from slides: - Pull tray towards you until it stops. -
Page 60: Cleaning The Oven Door
CLEANING THE APPLIANCE (CONTINUED) CLEANING THE TRIPLE GLAZED Lay the oven door with the outer side facing downwards on something soft and flat (for example DOOR (NON PYROLYTIC MODELS) a cloth/towel on a kitchen bench/table) to prevent scratches. WARNING Removing the oven door top trim Do not lift the door by the handle. - Page 61 Replacing the door glass panels Fitting the oven door Insert the smaller clear glass panel first from above Take hold of the oven door with a hand on each side and at an angle to the profile of the door. and with the door at an angle of 45º, position the recesses at the bottom of the door onto the hinge arms of the oven.
- Page 62 CLEANING THE APPLIANCE (CONTINUED) CLEANING THE QUAD GLAZED Lay the oven door with the outer side facing downwards on something soft and flat (for example DOOR (PYROLYTIC MODELS) a cloth/towel on a kitchen bench/table) to prevent scratches. WARNING Removing the oven door top trim Do not lift the door by the handle.
- Page 63 Replacing door glass panels Push the trim down with its top edge over the glass panel until the clip snap in on each side of the trim. Assemble the silicone spacers to the upper corners of one of the clear glass panels. Position the panel Push the middle of the trim down to ensure it is into the lower position of the door, ensuring the straight and firm against the glass panel.
-
Page 64: Tips And Troubleshooting
TIPS AND TROUBLESHOOTING • Aluminium, earthenware, oven glassware and bright IMPORTANT shiny utensils reduce cooking and base browning. Cooling/vent fan • Enamelled cast iron, anodized aluminium, aluminium with non-stick interior and coloured exterior and dark, This appliance is fitted with a cooling fan. This heavy utensils increase cooking and base browning. - Page 65 TROUBLESHOOTING NOTE: We may charge for service even in the warranty period if your problem is due to the causes listed below. problem possible cause Oven or grill not working • Time of day is not set. • Power is not turned on. •...
-
Page 66: Installation Of The Appliance
INSTALLATION OF THE APPLIANCE • Electrolux Home Products cannot accept WARNING responsibility for damage caused by installation into low temperature tolerant cabinets. The appliance must not be installed behind a decorative door in order to avoid overheating. • After installation, test and ensure that the appliance operates correctly before handing it over to the customer. - Page 67 Underbench oven Pyrolytic underbench Cut-out dimensions Your underbench oven looks best when the control panel type of fit A (width) B (height) C (depth) is directly under the benchtop. An upper infill panel may Flush fit (mm) 600 581 min. be added if the cooktop placed above the benchtop is too deep.
-
Page 68: Technical Specifications
12.9A EVE626 890 x 596 x 573 230-240V/50Hz 5.3kW 22.1A EVEP626 890 x 596 x 573 230-240V/50Hz 5.3kW 22.1A EVEP627 890 x 596 x 573 230-240V/50Hz 5.3kW 22.1A EVE636 1083 x 596 x 573 230-240V/50Hz 6.2kW 25.8A Hard wiring details... -
Page 69: Notes
NOTES... - Page 70 NOTES...
-
Page 71: Warranty
Guarantee Act does not apply. warranty. 11. C onfidentiality: You accept that if you make a warranty claim, Electrolux 7. Exclusions: You may not make a claim under this warranty unless the and its agents including ASC may exchange information in relation to you defect claimed is due to faulty or defective parts or workmanship. - Page 72 0800 225 088 email: customercare@electrolux.co.nz web: electrolux.co.nz To add a touch of professional inspiration to your home, visit electrolux.com.au or electrolux.co.nz electrolux.com.au or electrolux.co.nz ANC A15093701 Rev A © 2018 Electrolux Home Products Pty Ltd. ABN 51 004 762 341 EMAN_Ovens_FPupdate_Jun18...
Need help?
Do you have a question about the EVEP627 and is the answer not in the manual?
Questions and answers