Table of Contents
Advertisement
Quick Links
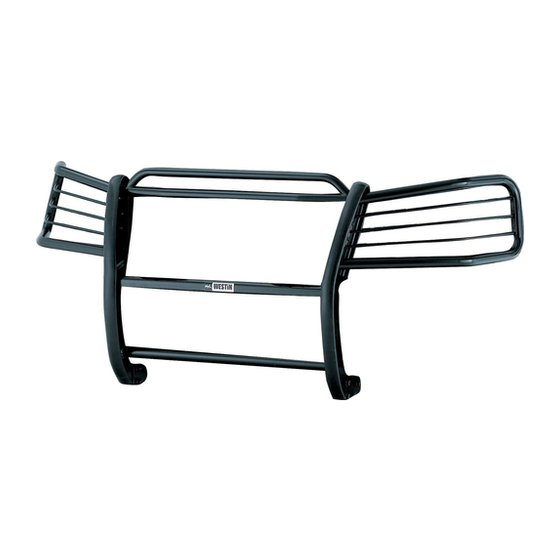
AUTOMOTIVE PRODUCTS, INC.
SPORTSMAN
ASSEMBLY
40-1125
ITEM QTY
DESCRIPTION
1
1
SPORTSMAN ASSEMBLY
2,3
2
LIGHT GUARD ASSEMBLY, PASSENGER (2) AND DRIVER (3)
4
2
TOP BRACE
, INNER
5
2
TOP BRACE, OUTER
6
1
MOUNT TOP STIFFENER
7,8
2
BOTTOM STIFFENER, PASSENGER (7) AND DRIVER (8)
9,10
2
TOP BRACKET, PASSENGER (9) AND DRIVER (10)
11,12
2
BOTTOM BRACKET, PASSENGER (11) AND DRIVER (12)
13
4
SPACER PLATE
14
6
1/2-13 X 1.25" HEX HEAD BOLT, STAINLESS STEEL BLACK ZINC
15
12
1/2" FLAT WASHER, STAINLESS STEEL BLACK ZINC
16
8
1/2" LOCK WASHER, STAINLESS STEEL BLACK ZINC (2 NOT USED)
17
6
1/2-13 HEX NUT, STAINLESS STEEL BLACK ZINC
18
2
3/8-16 X 1.25" HEX HEAD BOLT, STAINLESS STEEL BLACK ZINC
19
4
3/8" FLAT WASHER
20
2
3/8" LOCK WASHER
21
2
3/8-16 HEX NUT
2
22
1/4-20 X 1.00" HEX HEAD BOLT, STAINLESS STEEL BLACK ZINC
23
4
1/4" FLAT WASHER, STAINLESS STEEL BLACK ZINC
24
2
1/4" LOCK WASHER, STAINLESS STEEL BLACK ZINC
25
2
1/4-20 HEX NUT, STAINLESS STEEL BLACK ZINC
7/16" SOCKET
3/4" SOCKET
7/16" WRENCH
STEP 1.
Remove the contents from box and check for damage. Verify all parts are present. Read instructions completely before
beginning.
Attach light guard assemblies as shown.
STEP 2.
STEP 3.
From underneath the vehicle on the drivers side, locate two bumper attaching bolts on the inside of the frame rail. Remove nuts
and install top bracket with existing fasteners. Leave loose. Place one spacer plate between bracket and frame rail. Line up hole
in spacer plate with hole in bracket. Place another spacer plate on outside of frame rail over existing hole. Insert 5.50" bolt with
flat and lock washer through frame and bracket. Leave loose.
Attach driver bottom bracket to top bracket with 1/2" yellow fasteners.
STEP 4.
necessary to loosen and move tow hook to gain proper adjustment on brackets. Repeat steps 3 and 4 for passenger side.
Determine passenger and driver bottom stiffeners. From the front of the vehicle, insert bottom driver side stiffener through the
STEP 5.
top outside slot of lower grille.
to top bracket using the 3/8" yellow zinc fasteners.
STEP 6.
Remove factory cover plate by removing eight plastic screws and the eight plastic push pins. Bolt top inner braces to radiator
support using an extruded u-nut, M8-1.25 x 30mm hex head bolt, 5/16" lock washer and 5/16" flat washer as shown.
URE 2. NOTE:
I N S TA L L AT I O N I N S T R U C T I O N S
APPLICATION: 2003-UP FORD EXPEDITION 2/4 WHEEL DRIVE
1
2
PARTS KIT CONTENTS
, STAINLESS STEEL BLACK ZINC
, STAINLESS STEEL BLACK ZINC
, STAINLESS STEEL BLACK ZINC
TOOLS REQUIRED
13MM WRENCH
15MM SOCKET
3/4" WRENCH
9/16" SOCKET
5/32" HEX WRENCH
21MM SOCKET
SEE FIGURE 1.
SEE FIGURE 5.
Some vehicles come factory equipped with a bolted down bracket in the location. If this is the case, remove
13
4
6
5
3
ITEM QTY
26
2
27
4
28
12
29
6
30
6
31
2
32
4
33
2
34
2
35
3
36
3
37
3
38
3
39
3
40
1
41
8
42
4
43
4
44
2
FLAT SCREWDRIVER
9/16" WRENCH
RATCHET
SEE FIGURE 6.
SEE FIGURE 6.
Repeat for passenger side. From underneath vehicle, fasten bottom stiffener
SEE FIGURE 6.
WO:
7
9
8
10
DESCRIPTION
1/2-13 X 5.50" HEX HEAD BOLT, YELLOW ZINC
1/2-13 X 1.25" HEX HEAD BOLT, YELLOW ZINC
1/2" FLAT WASHER, YELLOW ZINC
1/2" LOCK WASHER, YELLOW ZINC
1/2-13 HEX NUT, YELLOW ZINC
3/8-16 X 1.25" HEX HEAD BOLT, YELLOW ZINC
3/8" FLAT WASHER, YELLOW ZINC
3/8" LOCK WASHER, YELLOW ZINC
3/8-16 HEX NUT, YELLOW ZINC
M8-1.25 X 30MM HEX HEAD BOLT, YELLOW ZINC
5/16" FLAT WASHER, YELLOW ZINC
5/16" LOCK WASHER, YELLOW ZINC
M8-1.25 EXTRUDED U-NUT
1/4-20 X 1.00" HEX HEAD BOLT, YELLOW ZINC
1/4-20 X 1.25" HEX HEAD BOLT, YELLOW ZINC
1/4" FLAT WASHER, YELLOW ZINC
1/4" LOCK WASHER, YELLOW ZINC
1/4-20 HEX NUT, YELLOW ZINC
3/8-16 X 1.25" BUTTON HEAD CAP SCREW (NOT
USED)
NOTE:
NOT ALL FASTENERS WILL BE USED.
PHILLIPS SCREWDRIVER
TORQUE WRENCH
On vehicles with tow hooks it may be
75-0815 REVISION 3/28/07
11
12
SEE FIG-
Advertisement
Table of Contents

Related Manuals for Westin SPORTSMAN 40-1125


Summary of Contents for Westin SPORTSMAN 40-1125
- Page 1 I N S TA L L AT I O N I N S T R U C T I O N S APPLICATION: 2003-UP FORD EXPEDITION 2/4 WHEEL DRIVE AUTOMOTIVE PRODUCTS, INC. SPORTSMAN ASSEMBLY 40-1125 PARTS KIT CONTENTS ITEM QTY DESCRIPTION ITEM QTY DESCRIPTION...
- Page 2 the factory M8 flanged bolt and attach top inner brace using this bolt. Push the front of the top inner braces up against the front of the radiator support. Tighten M8 fasteners, the recommended torque STEP 7. value is 16 Ft. Lbs. Loosely bolt top stiffener to radiator support using an extruded U-nut, M8-1.25 x 30MM hex head bolt, 5/16”...
- Page 3 , a s t h e c o m p o u n d s s c r a t c h t h e f i n i s h a n d o p e n i t t o c o r r o s i o n . Thank You for choosing Westin products Westin Automotive Products, Inc.
Need help?
Do you have a question about the SPORTSMAN 40-1125 and is the answer not in the manual?
Questions and answers