Table of Contents
Advertisement
Quick Links
AUTOMOTIVE PRODUCTS, INC.
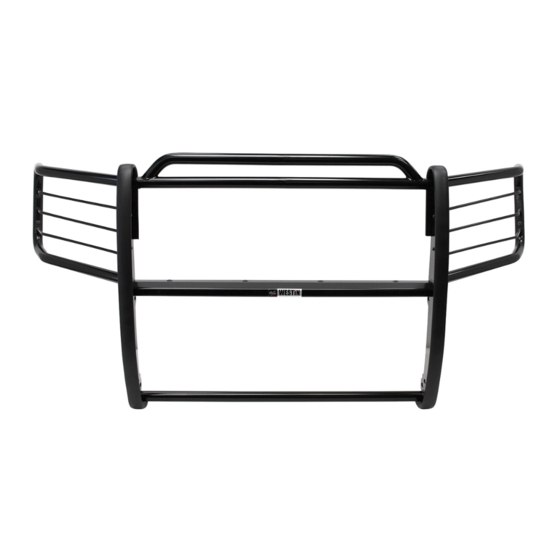
SPORTSMAN
ASSEMBLY
40-0125
ITEM QTY
DESCRIPTION
1
1
SPORTSMAN ASSEMBLY
2,3
2
LIGHT GUARD ASSEMBLY
4,5
2
MOUNT BRACKET, PASSENGER (4) AND DRIVER (5)
6
6
1/2-13 X 1.25" HEX HEAD BOLT, BLACK ZINC
7
12
1/2" FLAT WASHER, BLACK ZINC
8
6
1/2" LOCK WASHER, BLACK ZINC
9
6
1/2-13 HEX NUT, BLACK ZINC
10
2
1/2-13 X 1.25" HEX HEAD BOLT
11
2
1/2" SAE SMALL O.D. FLAT WASHER
3/4" SOCKET
3/4" WRENCH
5/32" HEX WRENCH
19MM SOCKET
TORQUE WRENCH
UTILITY KNIFE
STEP 1.
Remove the contents from box and check for damage. Verify all parts are present. Read instructions completely
before beginning.
STEP 2.
Attach light guard assemblies as shown.
STEP 3.
To install mount brackets, removal of bumper/grille is necessary. Remove seven Phillips screws from grille, (four above
grille, and three on lower front of grille) (Figure 2A). Remove (2) 10mm bolts from bumper, located at front/inside of
fender, using nut driver (Figure 2B). Cut out (6) plastic rivets from inside of front fender, three on each side (replace-
ments provided). From beneath vehicle, remove three pin retainers from bottom/center of bumper with flat screw-
driver and disconnect fog lamp connector, (if equipped)(Figure 2C). Pull bumper/grille straight out from vehicle.
STEP 4.
Install mount brackets to frame using 1/2" and 3/8" hardware as shown in Figure 2. Finger tighten so brackets move
freely. Repeat for opposite side.
STEP 5.
Measure distance from inside to inside of Sportsman uprights near slots. Center mount brackets on vehicle so that this
distance is the outside to outside measurement of the mounting brackets.
STEP 6.
Make sure brackets are properly aligned and tighten fasteners. Recommended torque values are 64 Ft.Lbs. for 1/2"
fasteners and 26 ft. lbs. for 3/8" fasteners.
STEP 7.
Replace bumper/grille in opposite order of removal. (Step 3). Use the replacement, plastic "push-type" retainers
provided.
STEP 8.
Place cardboard under front side of vehicle. Lay Sportsman on cardboard with front side down. Slide Sportsman
back so that the rearmost slots align with the rearmost slots on the brackets. Attach Sportsman to brackets at rearmost
slots using 1/2" stainless steel black zinc fasteners provided.
STEP 9.
Carefully rotate Sportsman up toward vehicle until remaining slots are aligned. Insert remaining 1/2" fasteners. Do not
tighten at this time.
STEP10.
Center and level Sportsman on vehicle and tighten all fasteners. Recommended torque values are 43 Ft. Lbs. for 1/2"
stainless fasteners.
I N S TA L L AT I O N I N S T R U C T I O N S
APPLICATION: 1999-04 JEEP GRAND CHEROKEE/LAREDO 2/4
2
1
PARTS KIT CONTENTS
, PASSENGER (2) AND DRIVER (3)
TOOLS REQUIRED
9/16" SOCKET
10MM NUT DRIVER
FLAT TIP SCREWDRIVER
SEE FIGURE 1.
WHEEL DRIVE
1999-03 JEEP GRAND CHEROKEE LIMITED
3
4
ITEM QTY
DESCRIPTION
12
2
1/2" USS LARGE O.D. FLAT WASHER
13
2
1/2" WILLIAMS WASHER (THICKEST WASHER)
14
2
1/2" LOCK WASHER
15
2
1/2-13 HEX NUT
16
4
3/8-16 X 1.25" HEX HEAD BOLT
17
8
3/8" FLAT WASHER
18
4
3/8" LOCK WASHER
19
4
3/8-16 HEX NUT
20
8
PLASTIC PUSH PIN
9/16" WRENCH
RATCHET
WO:
5
7/16" WRENCH
TAPE MEASURE
PHILLIPS SCREWDRIVER
75-0226 Revision D 3/14/07
Advertisement
Table of Contents

Subscribe to Our Youtube Channel
Summary of Contents for Westin Sportsman 40-0125
- Page 1 I N S TA L L AT I O N I N S T R U C T I O N S APPLICATION: 1999-04 JEEP GRAND CHEROKEE/LAREDO 2/4 WHEEL DRIVE 1999-03 JEEP GRAND CHEROKEE LIMITED AUTOMOTIVE PRODUCTS, INC. SPORTSMAN ASSEMBLY 40-0125 PARTS KIT CONTENTS ITEM QTY...
- Page 2 , a s t h e c o m p o u n d s s c r a t c h t h e f i n i s h a n d o p e n i t t o c o r r o s i o n . Thank You for choosing Westin products Westin Automotive Products, Inc.


Need help?
Do you have a question about the Sportsman 40-0125 and is the answer not in the manual?
Questions and answers