Table of Contents
Advertisement
Quick Links
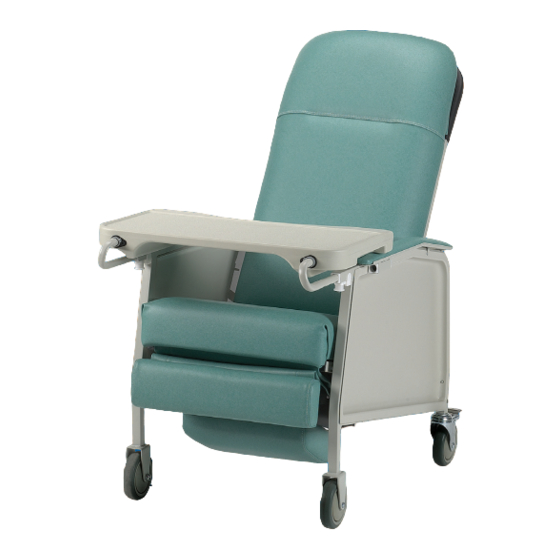
Three-Position Recliner
Owner's Operation and Maintenance Manual
For use with Item #PB6074
DEALER: This manual MUST be given to the user
of the product.
USER:
• BEFORE using this product, read this manual
in its entirety and save for future reference.
• Initial and ongoing maintenance MUST be
performed only by qualified personnel.
For more information regarding ProBasics
products, parts, and services, please visit
www.compasshealthbrands.com
Advertisement
Table of Contents

Related Manuals for Probasics PB6074


Summary of Contents for Probasics PB6074
- Page 1 Three-Position Recliner Owner’s Operation and Maintenance Manual For use with Item #PB6074 DEALER: This manual MUST be given to the user of the product. USER: • BEFORE using this product, read this manual in its entirety and save for future reference.
- Page 2 US Department of Transportation (DOT) has not approved any tie- MANUALS, SERVICE MANUALS OR INSTRUCTION SHEETS down systems for transportation of a user while in a ProBasics Mobile SUPPLIED WITH THIS PRODUCT OR OPTIONAL EQUIPMENT. Recliner, in a moving vehicle of any type.
-
Page 3: Table Of Contents
TABLE OF CONTENTS LABEL LOCATION ........4 Replacing Caster Wheels . -
Page 4: Label Location
LABEL LOCATION SPECIAL NOTES NEVER allow children to operate the recliner. The legrest lowers down Signal words are used in this manual and apply to hazards or unsafe upon closing so that a child could possibly be severely injured. practices which could result in personal injury or property damage. Refer to the following table for definitions of the signal words. -
Page 5: Product Parameters
TYPICAL PRODUCT PARAMETERS MODEL NO. PB6074 MODEL NO. PB6074WD OVERALL HEIGHT: 47 inches OVERALL HEIGHT: 47 inches OVERALL WIDTH: 28 inches OVERALL WIDTH: 32 inches OVERALL DEPTH UPRIGHT: 41 inches OVERALL DEPTH UPRIGHT: 43 inches OVERALL DEPTH RECLINE: 68 inches... -
Page 6: Section 1-Warnings And General Guidelines
SECTION 1—WARNINGS AND GENERAL GUIDELINES NEVER push or pull footrest to position the recliner. SECTION 1 - WARNINGS AND GENERAL GUIDELINES contains important information for the safe operation and use of this product. NEVER stand on the footplates. When getting in or out of the Check all parts for shipping damage. -
Page 7: Weight Limitation
The weight limitation for ProBasics Mobile Recliners is 250 lbs (113.6 kg). The weight limitation for model PB6074WD Wide Recliner is 400 lbs (181.44 kg). The tray for model PB6074 has a weight limitation of 40 lbs (18.2 kg). RECLINE OPTION OPERATED BY AN ATTENDANT Test the recline feature of the recliner first without an occupant to ensure the gas cylinder is operational. -
Page 8: Section 2-Safety Inspection
SECTION 2—SAFETY INSPECTION NOTE: Every six months or as necessary take your recliner to a qualified INSPECT/ADJUST WEEKLY dealer for a thorough inspection and servicing. Regular cleaning ❑ Ensure that the seat upholstery is fastened to the seat frame. service and inspection will reveal loose or worn parts and enhance the ❑... -
Page 9: Section 3-Assembly
SECTION 3—ASSEMBLY Back Frame with WARNING Back Cushion Hex Screw After ANY adjustments, repair or service and before use, make sure that all attaching hardware is tightened securely - otherwise injury or Hex Screw damage may result. Mounting Hole ASSEMBLING THE RECLINER Mounting Hole Guide Tube Guide Tube... -
Page 10: Section 4-Operation
- otherwise injury or damage may result. CAUTION Ensure that there is adequate room to operate the ProBasics Mobile Recliner. There must be at least three feet clearance between the top of FIGURE 4.1 RECLINING THE CHAIR - USER RECLINE the recliner back and the surrounding objects, otherwise damage to the recliner and or surrounding property may occur. -
Page 11: Locking/Unlocking The Rear Wheels
SECTION 4—OPERATION (CONT) LOCKING/UNLOCKING THE REAR WHEELS INSTALLING/STORING THE TRAY NOTE: For this procedure, refer to FIGURE 4.3. NOTE: For this procedure, refer to FIGURE 4.4. NOTE: Reverse this procedure to remove the tray. 1. Push down on the wheel lock mechanism to engage the wheel locks. -
Page 12: Section 5-Maintenance
SECTION 5— MAINTENANCE WARNING After ANY adjustments, repair or service and BEFORE use, make sure Headrest Bracket Cushion that all attaching hardware is tightened securely - otherwise injury or Short Hex Screws damage may result. REPLACING THE BACK CUSHION NOTE: For this procedure, refer to FIGURE 5.1. REMOVING 1. -
Page 13: Replacing The Recline Mechanism Guard
SECTION 5— MAINTENANCE (CONT) Footrest Cushion 6. Position new recline mechanism guard against the side frame with the folded edge down. 7. Align holes of new recline mechanism guard with holes on side frame. Footrest Assembly 8. Secure new recline mechanism guard to side frame with bolts A, B, C, and D. -
Page 14: Replacing Position Lock Lever
SECTION 5— MAINTENANCE (CONT) REPLACING POSITION LOCK LEVER REPLACING CASTERS REPLACING CASTER ASSEMBLY NOTE: For this procedure, refer to FIGURE 5.4. NOTE: For this procedure, refer to DETAIL “A” of FIGURE 5.5. REMOVING POSITION LOCK LEVER 1. Place the recliner on its side to gain access to the existing caster assemblies. -
Page 15: Replacing Plunger Release Knob
SECTION 5— MAINTENANCE (CONT) NOTE: The rear casters are locking/swivel casters and the front casters are free-wheeling and non-pivotal. Plunger Pin Frame DETAIL “A” - CASTER ASSEMBLY DETAIL “B” - CASTER WHEELS Plastic Keeper Spring Recliner Frame Fork Hex Head Glide Locknut Screw... -
Page 16: Installing Side Panel
SECTION 5— MAINTENANCE (CONT) INSTALLING SIDE PANEL INSTALLING ARMREST CUSHION 1. Slip the top of the right-side panel into the mounting tab. 1. Align the armrest cushion with the recliner frame. 2. Push the side panel upward until the side panel fit into the side 2. -
Page 17: Cleaning The Upholstery
For warranty service, please contact the dealer from whom you • Ground-in dirt stains: Use soft bristle brush and powdered cleanser purchased your ProBasics product. In the event you do not receive satisfactory warranty service, please write directly to Compass Health or similar detergent. - Page 18 LIMITED WARRANTY (CONT) LIMITATIONS AND EXCLUSIONS: THE FOREGOING WARRANTY SOME STATES DO NOT ALLOW EXCLUSION OR LIMITATION OF SHALL NOT APPLY TO SERIAL NUMBERED PRODUCTS IF INCIDENTAL OR CONSEQUENTIAL DAMAGE, OR LIMITATION THE SERIAL NUMBER HAS BEEN REMOVED OR DEFACED, ON HOW LONG AN IMPLIED WARRANTY LASTS, SO THE ABOVE PRODUCTS SUBJECTED TO NEGLIGENCE, ACCIDENT, IMPROPER EXCLUSIONS AND LIMITATIONS MAY NOT APPLY TO YOU.
- Page 19 Manufactured for: Compass Health Brands Corp. Middleburg Heights, OH 44130 www.compasshealthbrands.com 800.376.7263 • Made in China 42-PB6074_01 © 2018...
Need help?
Do you have a question about the PB6074 and is the answer not in the manual?
Questions and answers