
Subscribe to Our Youtube Channel
Related Manuals for Kleenmaid ICT6020


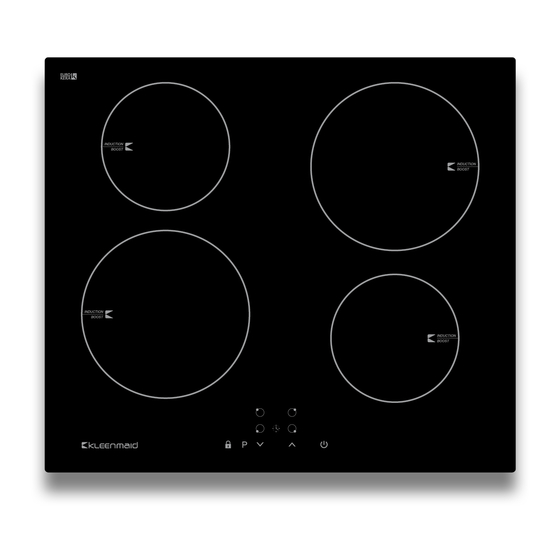
Summary of Contents for Kleenmaid ICT6020
- Page 1 Instructions for use and warranty details To register your warranty or make a warranty claim, scan this QR code: Induction Cooktop Model No.: ICT6020...
- Page 2 Once installation is complete, please read this instruction manual carefully and get to know the controls and the features of your new Kleenmaid appliance. These simple instructions will enable you to achieve excellent results from the very first time you use it.
- Page 3 Your safety is important to us. Please read this information before using your cooktop. • Disconnect the appliance from the mains electricity supply before carrying out any work or maintenance on it. • Connection to a good earth wiring system is essential and mandatory. •...
- Page 4 Cut Hazard • The razor-sharp blade of a cooktop scraper is exposed when the safety cover is retracted. Use with extreme care and always store safely and out of reach of children. • Failure to use caution could result in cuts or other injury. Important Safety Instructions •...
- Page 5 • WARNING: Unattended cooking on a cooktop with fat or oil can be dangerous and may result in fire. NEVER try to extinguish a fire with water, but switch off the appliance and then cover the flame e.g. with a lid or a fire blanket.
-
Page 6: Product Overview
Please read this User Manual in order to fully understand how to install and operate your cooktop correctly. For installation, please read the installation section. Read all the safety instructions carefully before use, and keep this User Manual for future reference. The latest version of this manual is available on our website. -
Page 7: Induction Cooktop
Induction Cooktop Choosing the right Cookware cooktop Do not use cookware with jagged edges or a curved base. cooktop... -
Page 8: Before Using Your New Cooktop
Before using your New Cooktop When unpacking the cooktop please ensure that all contents of the carton are removed prior to disposing of the packaging. These articles should be retained for the installer. Contents include: - 1 x Induction Cooktop - 1 x User Manual - 4 x Brackets - 4 x Screws... -
Page 9: Using Your Cooktop
Using your Cooktop To start cooking a single beep sounds on the display light up for then go out, indicating that the induction cooktop has entered the state of standby mode. key A will show selected Make sure the bottom of the cook on the display next to cooktop... -
Page 10: When You Have Finished Cooking
alternately with the heat setting If the display flashes it means that either When you have finished cooking selection key of the cooking zone you intend to switch off. keys (Residual Heat Indicator) (Residual Heat Indicator) will appear in the display to indicate which cooking zone is hot to touch. -
Page 11: Using The Boost Function
Using the Boost Function water to cook rice or pasta. Using Boost to power on the display function key and cook in boost mode. function operating time cook zone selection key, and an indicator next to the key will cook... -
Page 12: Safety Features
Safety Features Locking the Controls To lock the controls display To unlock the controls cooktop child lock key cooktop cooktop cooktop cooktop Over-Temperature Protection cooktop cooktop Spill Protection The cooktop will beep and shut down after a certain quantity of liquid overflows onto the controls. -
Page 13: Using The Timer
Power level Default working timer (hour) Using the Timer Note: The timer can be set Using the Timer as a Minute Minder If you are not selecting any cooking zone function key keys The timer display the time by 1 the time... - Page 14 the timer, touch the timer function key and "00" will show in the display expires a sound display Setting the timer to turn off one cooking zone cook key of the zone for which you want to set the timer...
- Page 15 function key and timer display show “ ” or “ ” timer regulating keys. timer regulating key once to decrease or increase the time by 1 minute. timer regulating key to decrease or increase the time by 10 minutes. To cancel the timer, touch the cooking zone selection key and then touch the timer function key.
- Page 16 display When the cooking time expires, the corresponding cooking zone will automatically switch off and “H” will show in the display until the zone has cooled to a safe temperature. Setting the timer to turn off more than one cooking zone cook display short...
-
Page 17: Cooking Guidelines
Cooking Guidelines cooktop Cooking Tips Simmering, cooking rice Searing steak the doneness you prefer and become tender before serving. -
Page 18: Heat Settings
For stir-frying induction Heat Settings Heat setting Suitability... -
Page 19: Care And Cleaning
Care and Cleaning What? How? Important! -
Page 20: Hints And Tips
Hints and Tips Problem Possible causes What to do Locking the controls on page Introduction to Induction Cooking" on page 7 page 19 cooktop cooktop cooktop off at the wall operat cooktop cooktop Cooktops on page 7 cooktop cannot... -
Page 21: Failure Display And Inspection
(see back cover of this manual for details). When booking a service please provide your Model No: ICT6020 and the individual Serial Number of your appliance. This is found on the rating label on the underside of the cooktop or on your appliance... -
Page 22: Technical Specification
NOTE: Before making preparations for or commencing installation, the installer should refer to the current online version of the User Manual, which is available on the Kleenmaid website (see back cover for details). Selection of installation equipment Note: The seal, as shown in this illustration, is a factory-fitted foam strip. - Page 23 if there is no rangehood, otherwise: The safety gap between the hob and the rangehood placed above must comply with the recommendations of the rangehood manufacturer. In case of no instructions, a minimum distance of 650mm (or other minimum distance as may be specified by AS/NZS 5601 and interpreted by a certified installer) should apply.
- Page 24 Cautions Connecting the cooktop to the mains power supply...
- Page 26 KLEENMAID WARRANTY TERMS AND CONDITIONS Compass Capital Services Pty Ltd ABN 96 138 214 525 trading as Kleenmaid will provide parts and labour to you the customer as set out herein. Kleenmaid’s Products come with guarantees that cannot be excluded under the Australian Consumer Law. You are entitled to a replacement or refund for a major failure and for compensation for any other reasonably foreseeable loss or damage.
- Page 27 13. Kleenmaid accepts no liability for items that are lost, damaged, or stolen as a result of freight, transport or storage. If you are required to transport the Product to an authorised service centre, you must ensure that it is securely packed and insured.
- Page 28 Other products available in the Kleenmaid range of appliances Washing machines Clothes dryers Dishwashers Ovens Cooktops Steam ovens Microwave ovens Built in espresso coffee machines Rangehoods Freestanding ovens Refrigerators & Freezers Beverage Serving Cabinets Water Dispensers Vacuum Cleaners Compass Capital Services Pty Limited...
Need help?
Do you have a question about the ICT6020 and is the answer not in the manual?
Questions and answers