Table of Contents
Advertisement
Quick Links
Advertisement
Table of Contents

Subscribe to Our Youtube Channel
Related Manuals for Kleenmaid cooking ICTFX9020EX


Summary of Contents for Kleenmaid cooking ICTFX9020EX
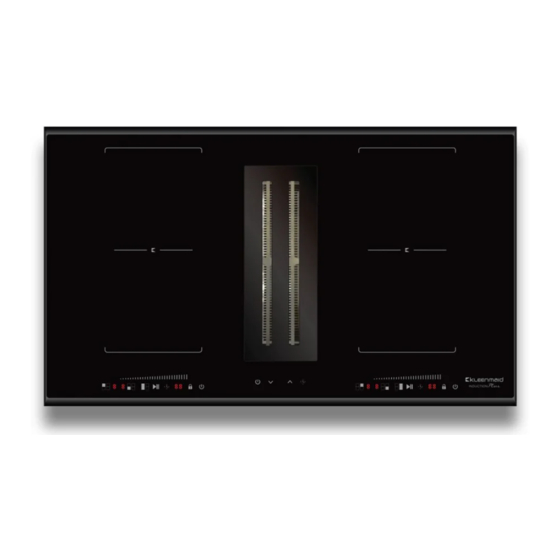
- Page 1 cooking collection Instructions for use and warranty details To register your warranty or make a warranty claim, scan this QR code: Induction Cooktop & Integrated Air Extraction System Model No.: ICTFX9020EX (Extractor) and ICTFX9020HB (Cooktop) �kLEEnma1d...
-
Page 3: Table Of Contents
Safety Warnings ................ 4 Overview of Induction Cooktop and Integrated Air Extraction System ..........8 Induction Cooking ..............8 Using the Extraction System............11 Using the Cooktop ..............12 Cooking Guidelines ..............17 Care and Cleaning ..............19 Filter Maintenance and Replacement ........20 Installation ................21 Component Descriptions .............. -
Page 4: Safety Warnings
Your safety is important to us. Please read this information before using your cooktop and make this User Manual available to your installer. A current version of the manual is available on the Kleenmaid website. (See back cover for details.) Important Safety Instructions for Installation •... - Page 5 Health Hazard • This appliance complies with electromagnetic safety standards. However, persons with cardiac pacemakers or other electrical implants (such as insulin pumps) must consult with their doctor or implant manufacturer before using this appliance to make sure that their implants will not be affected by the Hot Surface Hazard •...
- Page 6 • Do not repair or replace any part of the appliance unless specifically recommended in the manual. All other servicing should be done by a qualified technician. • Do not use a steam cleaner to clean your cooktop. • Do not place or drop heavy objects on your cooktop. •...
- Page 7 • The air extraction system is for home use only, and not suitable for barbecue, roast shop and other commercial purposes. • The air extraction system and its filter should be cleaned regularly to maintain it in good working condition. •...
-
Page 8: Overview Of Induction Cooktop And Integrated Air Extraction System
Overview of Induction Cooktop and Integrated Air Extraction System Top View ontrol panels Cooktop Control Panel controls slider control Timer selector Digital display Timer control Induction Cooking... - Page 9 iron pot magnetic circuit ceramic glass plate induction coil induced currents Before Using Your New Cooktop • Read this guide, taking special note of the ‘Safety Warnings’ section. • Remove any protective film that may still be on your Induction cooktop.
- Page 10 Do not use cookware with jagged edges or a curved base. Make sure that the base of your pan is smooth, sits flat against the glass, and is the same size as the cooking zone. Use pans whose diameter is as large as the graphic of the zone selected.
-
Page 11: Using The Extraction System
Using the Extraction System It is recommended that for general use the Air Extraction System is turned on before the cooktop. Touch control panel for ease of operation On/off. Touch to increase the speed. Touch to decrease the speed. Timer control. The digital display indicates: 1 for low speed. -
Page 12: Using The Cooktop
Using the Cooktop Cooking Zones: These instructions are for the left side of the control panel. The right side operates in a similar manner, using the relevant buttons and display. To start cooking control. 1. Touch the ON/OFF After power on, the buzzer beeps once, all displays show "... - Page 13 To Use the Flex Zone This area can be used as a single zone or as two different zones, according to cooking needs. Select a heat setting by touching the control to use the left Flex zone. (There is no need need to select the Left front zone or Left rear zone separately.) Touch the control again if you want to cancel the Flex Zone during operation.
- Page 14 Locking the Controls • The controls can be locked to prevent unintended use (for example children accidentally turning the cooking zones on). • When the controls are locked, all the controls except the ON/OFF and Pause/ Resume controls are disabled. To Lock the Controls Touch the keylock control .
- Page 15 Pause/Resume Function , and the will If you want to pause the working cooktop, touch button display again. show” 11 11”. To resume cooking, touch the button Using the Timer Set the timer to turn one or more cooking zones off after the set time is up. The timer can be set from 00 up to 99 minutes.
- Page 16 flashing will increase the time by 10 minutes. Sliding the control from right to left will decrease the time. Sliding the timer control from left to right once when the single digit place is flashing will increase the time by 1 minute. Sliding the control from right to left will decrease the time.
-
Page 17: Cooking Guidelines
timer indicator is showing the time of that cooking zone. If you want to check the set time of another cooking zone, touch the cooking zone selection control. The timer will indicate its set time. 2. When cooking timer expires, the corresponding cooking zone will be automatically switched off and show “H”. - Page 18 2. Heat up a heavy-based frying pan. 3. Brush both sides of the steak with oil. Drizzle a small amount of oil into the hot pan and then lower the meat onto the hot pan. 4. Turn the steak only once during cooking. The exact cooking time will depend on the thickness of the steak and how cooked you want it.
-
Page 19: Care And Cleaning
Care and Cleaning What? How? Important! When the power to the cooktop is 1. Switch the power to the Everyday soiling on switched off, there will be no hot cooktop off. glass (fingerprints, surface' indication but the cooking 2. Apply a cooktop cleaner marks, stains left by zone may still be hot! Take extreme while the glass is still warm... -
Page 20: Filter Maintenance And Replacement
-Replace inlet grill. 2. The internal Kleenmaid KleenAir Activated Charcoal (or “Carbon”) Filter. This filter is located in the air outlet box mounted in the kick plate and removes cooking odours from the air if the extractor is installed in recirculating rather than venting mode. -
Page 21: Installation
Note: Before making preparations for or commencing installation, the installer should refer to the current online version of the User Manual, which is available on the Kleenmaid website (see back cover for details). Warning: The interconnection cable, wherever it may become accessible, must be enclosed within a protective electrical conduit compliant with the local electrical wiring regulations. - Page 22 NOTE: Minimum vertical clearance, from the bottom of the cooling fan grilles under the cooktop assembly, to any other object is 8mm. This applies to the fan on the left and the right of the cooktop.
- Page 23 FRONT FRONT FRONT **The height of the underside of the cabinet carcase needs to be at least 101mm (+2mm tolerance) off the floor.
-
Page 25: Component Descriptions
Power supply terminal box power cable blower motor cable Inlet grill (matt black steel) - Page 26 4a grease filter 4b grease filter cassette blower motor duct adapter with non-return valve optional 13a carbon filter 13b carbon filter box trim cover N.B. Items marked *optional are site-specific and are purchased separately. All other components are supplied.
- Page 27 TYPICAL INSTALLATION – 900 x 600 CABINET ASSEMBLY PROCEDURE 1. Screw Cooktop Assembly#1 and Grease Filter Cassette Casing#5 together using 4x supplied screws (M3x8mm). 2. Cut and insert length of Straight Duct#11 to outlet of Grease Filter Cassette Casing#5 (see #11a page 24 - calculate length by measurement). 3.
-
Page 28: Connecting The Cooktop To The Mains Power Supply
Connecting the Cooktop to the Mains Power Supply This cooktop must be connected to the mains power supply only by a suitably qualified person. Before connecting the cooktop to the mains power supply, check that: the domestic wiring system is suitable for the power drawn by the cooktop. the voltage corresponds to the value given in the rating plate the power supply cable sections can withstand the load specified on the rating plate. -
Page 29: Electrical Diagram
Electrical Diagram n� 220-240V~ 400V 3- Legend 1. Black 2. Brown 3. Grey 4. Blue 5. Green/yellow Instructions for connecting extractor cables to the cooktop 1. Insert extractor cable plug 1 into socket at side of the electrical box at the rear of the cooktop (see diagram below). 2. -
Page 30: Technical Specifications
Technical Specifications ICTFX9020EX(Extractor)&ICTFX9020HB(Cooktop) Cooking Zones 4 Zones Supply Voltage 220-240V~, 50-60Hz Cooktop maximum absorbed power 7000 W Air extractor maximum absorbed power 150W Wiring/breaker rating Weight and Dimensions are approximate. Because we continually strive to improve our products we may change specifications and designs without prior notice. This appliance is labeled in compliance with European directive 2002/96/EC for Waste Electrical and Electronic Equipment (WEEE). -
Page 31: Hints And Tips
Hints and Tips Problem Possible causes What to do The induction cooktop Make sure the induction cooktop is No power. connected to the power supply cannot be turned on. and that it is switched on. Check whether there is a power outage in your home or area. -
Page 32: Error Codes And Troubleshooting
The induction cooktop Please note down the error Technical fault. or a cooking zone has code displayed (see list of possible codes in table turned itself off unexpectedly, a tone below), switch the power to sounds and an error the induction cooktop off at code is displayed the wall, and contact a (typically alternating... - Page 33 The benefits given to you under this Kleenmaid Warranty are in addition to other rights and remedies to which you may be entitled under the Australian Consumer Law in relation to the Product to which this Kleenmaid Warranty relates. Subject to the conditions below, the Product is warranted by Kleenmaid and/or its agents to be free from defects in materials and workmanship for the Warranty Period for normal Domestic Use.
-
Page 34: Warranty
13. Kleenmaid accepts no liability for items that are lost, damaged, or stolen as a result of freight, transport or storage. If you are required to transport the Product to an authorised service centre, you must ensure that it is securely packed and insured. - Page 35 This page intentionally left blank.
- Page 36 Other products available in the Kleenmaid range of appliances Washing machines Clothes dryers Dishwashers Ovens Cooktops Steam ovens Microwave ovens Built in espresso coffee machines Rangehoods Freestanding ovens Refrigerators & Freezers Beverage Serving Cabinets Water Dispensers Vacuum Cleaners Compass Capital Services Pty Limited...
Need help?
Do you have a question about the cooking ICTFX9020EX and is the answer not in the manual?
Questions and answers