Table of Contents
Advertisement
Quick Links
Advertisement
Table of Contents

Related Manuals for Spectra Logic BlackPearl NAS


Summary of Contents for Spectra Logic BlackPearl NAS
- Page 1 Spectra BlackPearl NAS Solution Gen1 Installation Guide SpectraLogic.com...
- Page 2 OR FITNESS FOR A PARTICULAR PURPOSE, BOTH OF WHICH ARE EXPRESSLY DISCLAIMED. In no event shall Spectra Logic be liable for any loss of profits, loss of business, loss of use or data, interruption of business, or for indirect, special, incidental or consequential damages of any kind, even if Spectra Logic has been advised of the possibility of such damages arising from any defect or error.
- Page 3 CONDITIONS. 2. OWNERSHIP It is understood and agreed that Spectra Logic Corporation, a Delaware corporation with offices at 6285 Lookout Road, Boulder, CO 80301 ("Licensor") is the owner of all right, title and interest to the Software Product, regardless of the media or form of the original download, whether by the World Wide Web, disk or otherwise.
- Page 4 Upon termination of this EULA, you shall cease all use of the Software Product and destroy all copies, full or partial, together with all backup copies, modifications, printed or written materials, and merged portions in any form and remove all component parts of the Software Product. January 2022 Installation Guide-Spectra BlackPearl NAS Solution - 4 -...
- Page 5 WARRANTY. SOME JURISDICTIONS DO NOT ALLOW THE EXCLUSION OF IMPLIED WARRANTIES OR LIMITATION ON APPLICABLE STATUTORY RIGHTS OF A CONSUMER, SO THE ABOVE EXCLUSION AND LIMITATIONS MAY NOT APPLY TO YOU. January 2022 Installation Guide-Spectra BlackPearl NAS Solution - 5 -...
- Page 6 If for any reason a court of competent jurisdiction finds any provision, or portion thereof, to be unenforceable, the remainder of this EULA shall continue in full force and effect. January 2022 Installation Guide-Spectra BlackPearl NAS Solution - 6 -...
- Page 7 Warnings Do not attempt to install a Spectra BlackPearl NAS 96-bay or 107-bay expansion node on your own. The BlackPearl 96-bay expansion node can weigh up to 270 lb (122.5 kg) and must be installed by Spectra Logic Professional Services. The 107-bay expansion node can weigh up to 270 lb (122.5 kg) and must be...
- Page 8 Lifting hazard. The Spectra BlackPearl NAS 4U master node and 44-bay expansion chassis weigh between 57 lb (25.8 kg) and 138.2 lb (62.7 kg), depending on the number of drives installed. Use lifting aids and proper lifting techniques with assistance when handling heavy equipment.
- Page 9 Phone: 1.303.449.0160 Spectra Logic Sales Website: shop.spectralogic.com United States and Canada Europe Phone: 1.800.833.1132 or 1.303.449.6400 Phone: 44 (0) 870.112.2150 Email: sales@spectralogic.com Email: eurosales@spectralogic.com To Obtain Documentation Spectra Logic Website: support.spectralogic.com/documentations/documentation January 2022 Installation Guide-Spectra BlackPearl NAS Solution - 9 -...
-
Page 10: Table Of Contents
Configuration Information Chapter 3 - Preparing for Installation Acclimating the Spectra BlackPearl NAS Solution Preparing the Rack Spectra BlackPearl NAS Solution Master Node and 44-Bay Expansion Node Unpacking the Spectra BlackPearl NAS Solution Prepare the Unpacking Location Unpack the Components... - Page 11 Install the Inner Rails Slide the Chassis into the Rack Installing Additional Drives Connecting the Interface Cables Automatically Import Activation Keys Connecting the Power Cords Installing the Front Bezel Next Steps January 2022 Installation Guide-Spectra BlackPearl NAS Solution - 11 -...
-
Page 12: Chapter 1 - About This Guide
When instructions in this guide apply to both the BlackPearl NAS solution master node and expansion nodes, the system is used to refer to both. -
Page 13: Overview
• Disk-to-disk data file storage, either alone or as part of a tiered storage solution. Additional Publications The following documents related to the Spectra BlackPearl NAS solution are available on the Support Portal website at support.spectralogic.com, and from the Documentation screen on the BlackPearl NAS user interface. -
Page 14: Typographical Conventions
Read text marked by the “Important” icon for information that helps you complete IMPORTANT a procedure or avoid extra steps. Note: Read text marked with “Note” for additional information or suggestions about the current topic. January 2022 Installation Guide-Spectra BlackPearl NAS Solution - 14 -... -
Page 15: Chapter 2 - Installation Checklists
Chapter 2 - Installation Checklists Use these checklists to ensure the BlackPearl NAS solution is prepared for installation and to record important information during installation. Preparing for Installation Status Description The system components have acclimated to the site’s temperature for at least 24 hours in... -
Page 16: System Information
Chapter 2 - Installation Checklists System Information System Information System Location: Installation Date: Master Node Serial Number: Expansion Node Serial Number(s): BlackPearl NAS Software Version: Number of Drives: Drive Type: Additional Information: January 2022 Installation Guide-Spectra BlackPearl NAS Solution - 16 -... -
Page 17: Configuration Information
You can configure the management port to _____ . _____ . _____ . _____ use DHCP or a different static (fixed) IP address. See “Initial Configuration” in the Network gateway Spectra BlackPearl NAS Solution User Guide _____ . _____ . _____ . _____ for more information. Mail Identify people who should automatically... -
Page 18: Chapter 3 - Preparing For Installation
Inventorying the Components Acclimating the Spectra BlackPearl NAS Solution You must allow time for the BlackPearl NAS solution to acclimate to the working environment when you move it from the loading dock. When the chassis is moved from a cold storage environment to a warm operating... -
Page 19: Spectra Blackpearl Nas Solution Master Node And 44-Bay Expansion Node
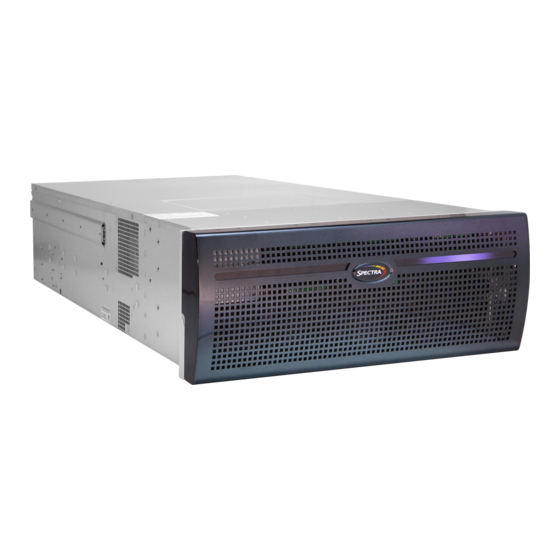
The BlackPearl NAS 4U chassis is 7 inches (18 cm) tall and occupies 4U of rack space. The BlackPearl NAS 2U chassis is 3.5 inches (8.9 cm) tall and occupies 2U of rack space. Both chassis fit in a standard 19-inch, 4-post rack. -
Page 20: Unpacking The Spectra Blackpearl Nas Solution
Solution Site Preparation Guide for more information. Unpacking the Spectra BlackPearl NAS Solution Do not unpack a BlackPearl NAS solution if the shipping box shows signs of damage. Contact both the shipping company and Spectra Logic (see Contacting Spectra Logic IMPORTANT page 9) to report the problem. -
Page 21: Prepare The Unpacking Location
Unpacking the Spectra BlackPearl NAS Solution Prepare the Unpacking Location Move the pallet with the boxes to the location where you plan to install the BlackPearl NAS master node. Make sure you have adequate clearance around and above the shipping boxes so that you can safely unpack them. - Page 22 Chapter 3 - Preparing for Installation Unpacking the Spectra BlackPearl NAS Solution 2. Use scissors to cut the straps securing the shipping box to the pallet. Take care when cutting the straps securing the shipping box. The straps around the packaging are secured very tightly;...
- Page 23 Chapter 3 - Preparing for Installation Unpacking the Spectra BlackPearl NAS Solution 4. Remove the two foam pieces that protect the front bezel during shipping, and then remove the bezel. Figure 3 Remove the two protective foam pieces and the front bezel.
- Page 24 6. Remove the Open Me First accessory box and the rack mount kit. Figure 5 Remove the accessory box and rack mount kit. 7. Remove the inner foam inserts covering the BlackPearl NAS master node. January 2022 Installation Guide-Spectra BlackPearl NAS Solution...
- Page 25 Use lifting aids and proper lifting techniques with assistance when handling heavy equipment. Lifting hazard. The Spectra BlackPearl NAS 2U master node weighs between 39 lb (17.7 kg) and 60.6 lb (27.5 kg), depending on the number of drives installed. Use lifting aids and proper lifting techniques with assistance when handling heavy equipment.
-
Page 26: Inventorying The Components
Chapter 3 - Preparing for Installation Inventorying the Components Inventorying the Components Unpack and identify the components that shipped with the BlackPearl NAS solution master node using the following table and the packing list for reference. Component Description Rack- Included in the main and accessory boxes. The rack-mounting kit includes all the... -
Page 27: Chapter 4 - Installation
Next Steps Installation Use the information in this section to install a BlackPearl NAS solution chassis in a rack , or if you need to move and reinstall the chassis. If you do not have to install an HBA, continue to Installing the Spectra BlackPearl NAS Solution in a Rack on page 35. -
Page 28: Installing An Hba In The Master Node
Installing an HBA in the Master Node The BlackPearl NAS solution master node ships with the 10 GigE HBA installed, if one was purchased with your order. If there are one or more SAS or 40 GigE HBAs included with the shipment, use the instructions in this section to install them. -
Page 29: Ensure Esd Protection
Install an HBA 1. Remove the cover. BlackPearl NAS solution 4U Master Node a. Using a #2 Phillips screwdriver, remove the four screws that secure the cover to the chassis. Three screws are located on the sides of the chassis, while one is located on the top. - Page 30 3. Locate the slot where you want to install an HBA in the chassis. BlackPearl NAS solution 4U Master Node Note: The BlackPearl NAS solution 4U master nodes ship with a 10 GigE HBA installed in slot 1. Figure 11 HBA locations in the BlackPearl NAS solution 4U master node.
- Page 31 • Depending on your order configuration, a 10 GigE HBA may occupy slot 3. • If you have a BlackPearl NAS solution 1.0 chassis, which can be identified by the presence of four RJ45 ports on the rear panel, see the...
- Page 32 5. Remove the HBA from its packaging. 6. Orient the HBA so that the card bracket faces the rear of the chassis and the edge connector is oriented down. Figure 14 The SAS HBA. January 2022 Installation Guide-Spectra BlackPearl NAS Solution - 32 -...
- Page 33 This image shows the 10 GigE HBA. The SAS HBA is installed in a similar manner. Figure 15 Install the HBA. 9. Using a #2 Phillips screwdriver, install the bracket screw to secure the HBA to the chassis (see Figure 13 on page 32). January 2022 Installation Guide-Spectra BlackPearl NAS Solution - 33 -...
- Page 34 HBA(s) that need to be installed. 11. Install the cover. BlackPearl NAS solution 4U Master Node a. Orient the cover over the chassis with the tabs facing toward the front of the chassis. Figure 16 Orient the cover with the tabs facing the front of the chassis.
-
Page 35: Installing The Spectra Blackpearl Nas Solution In A Rack
Install the BlackPearl NAS solution in a standard 4-post, 19-inch (48.3-cm) rack. The BlackPearl NAS master nodes occupy either 2 units (2U) or 4 units (4U) of rack space, depending on which model was ordered. The BlackPearl NAS 44-bay expansion node occupies 4 units (4U) of rack space. - Page 36 Chapter 4 - Installation Installing the Spectra BlackPearl NAS Solution in a Rack • Unpack the rack-mount kit and identify the components listed in the following table. Rack Rail Mounting Item # # Required Components The rack rails ship attached to each other. See Separate the Rails on page 37...
-
Page 37: Separate The Rails
Chapter 4 - Installation Installing the Spectra BlackPearl NAS Solution in a Rack Separate the Rails If necessary, for each rail, remove the inner rack rail section from the outer rack rail. You will attach the inner rails to the chassis and the outer rails to the rack. - Page 38 Chapter 4 - Installation Installing the Spectra BlackPearl NAS Solution in a Rack 4. Press the self-locking latch toward the closest edge of the inner rail and then fully extract the inner rail from the outer rail. Figure 21 Press the latch toward the closest Figure 20 Self-locking latch.
-
Page 39: Install The Outer Rail
Chapter 4 - Installation Installing the Spectra BlackPearl NAS Solution in a Rack Install the Outer Rail If you are installing the rack kit in a circular cut-out rack, skip to Install the Outer Rail Using Adapters on page 40. Instructions give the item numbers in parenthesis for parts listed in the table on page 35. -
Page 40: Install The Outer Rail Using Adapters
Chapter 4 - Installation Installing the Spectra BlackPearl NAS Solution in a Rack 3. Insert the mounting hooks on the open end of the outer rack rail (2) into the cut-outs in the front of the rack and press the outer rail down to lock the mounting hooks to the rack. - Page 41 Chapter 4 - Installation Installing the Spectra BlackPearl NAS Solution in a Rack 2. The adapters (7) used on the front of the outer rail are different from the ones used on the back of the rail. Use adapters labeled “A” for the front of the outer rails, and adapters labeled “B”...
- Page 42 Chapter 4 - Installation Installing the Spectra BlackPearl NAS Solution in a Rack 4. Press the adapter in toward the outer rail, which depresses the black plastic tabs on the outer rail, and then slide the adapter to the left to lock it in place.
- Page 43 Chapter 4 - Installation Installing the Spectra BlackPearl NAS Solution in a Rack 6. Determine the vertical position of the rack mount kit in the rack. Figure 30 Figure 31 show the relationship of the rack kit position in the rack and the resulting position of the chassis.
-
Page 44: Install The Inner Rails
Chapter 4 - Installation Installing the Spectra BlackPearl NAS Solution in a Rack 7. Position the outer rack rail at the desired height in the rack with the open end facing the front of the rack. Make sure the inner side of the outer rack rail is facing toward the inside of the rack. - Page 45 3. Position the inner rack rail over the hooks extending out from the side of the chassis. The rail is keyed to only fit one way. Figure 33 Install the inner rail over all hooks (BlackPearl NAS solution 4U chassis shown from left rear view).
- Page 46 5. Using a #2 Phillips screwdriver, secure the rail to the chassis using one screw (3) for the 4U chassis, and two screws for the 2U chassis. Figure 35 Install the inner rail screw on the BlackPearl NAS 4U chassis. Figure 36 Install the inner rail screws on the BlackPearl NAS 2U chassis.
-
Page 47: Slide The Chassis Into The Rack
Use lifting aids and proper lifting techniques with assistance when handling heavy equipment. Lifting hazard. The Spectra BlackPearl NAS 2U master node weighs between 39 lb (17.7 kg) and 60.6 lb (27.5 kg), depending on the number of drives installed. Use lifting aids and proper lifting techniques with assistance when handling heavy equipment. - Page 48 Installing the Spectra BlackPearl NAS Solution in a Rack 2. If necessary, remove the front bezel of the BlackPearl NAS solution. The bezel is held in place with magnets. Grasp the sides of the bezel and pull it straight off the chassis.
- Page 49 Chapter 4 - Installation Installing the Spectra BlackPearl NAS Solution in a Rack 5. While supporting the front of the chassis with one hand or a lift, press the self-locking latches on both the left and right inner rails downward. Push the chassis the rest of the way into the rack until the mounting brackets on the front of the chassis are flush with the front posts of the rack.
-
Page 50: Installing Additional Drives
The BlackPearl NAS 2U master node ships with all drives installed. The BlackPearl NAS 4U master node ships with 10 drives installed in the front of the chassis. The BlackPearl NAS expansion node ships without drives installed. If you purchased additional drives with your order, they ship in a separate box. - Page 51 2. Locate the empty drive bays where you want to install the drives. Notes: • For the BlackPearl NAS 4U master node, do not install a drive in slot 1, which is the top left drive in the front of the chassis. This slot is reserved for the Visual Status Beacon control sled.
- Page 52 Install the Drives 1. Drives are shipped installed in a drive sled. Slide the locking tab on the front of the drive sled to the right to release the handle. January 2022 Installation Guide-Spectra BlackPearl NAS Solution - 52 -...
- Page 53 3. When the drive sled is in position, push the handle inward and to the right until the locking tab secures it in place. An audible click indicates that the drive sled is locked into position. January 2022 Installation Guide-Spectra BlackPearl NAS Solution - 53 -...
-
Page 54: Connecting The Interface Cables
Connect the interface cables to the system. Figure 43 shows the location of the connectors. The locations of the connectors are similar on the BlackPearl NAS solution 4U master node and the BlackPearl NAS solution 2U master node. IMPORTANT Do not connect power cords at this time Figure 43 The BlackPearl NAS solution master node rear panel components. -
Page 55: Automatically Import Activation Keys
3. If your configuration includes a BlackPearl NAS solution 44-bay expansion node, connect an included SAS cable from any port on the four port SAS card in the BlackPearl NAS solution master note, to the Front Primary In connector on the expansion node. Connect a second cable from the master node to the Rear Primary In connector on the expansion node. -
Page 56: Connecting The Power Cords
Connecting the Power Cords Connecting the Power Cords Use the following steps to connect the power cords to the BlackPearl NAS solution master node and any 44-bay expansion nodes. The figure below shows the BlackPearl NAS solution 4U master node. Power connectors on the BlackPearl NAS solution 2U master node, and the BlackPearl NAS solution 44-Bay expansion node are in similar locations. -
Page 57: Installing The Front Bezel
2. Install the front bezel over the front of the chassis. The magnets hold it in place. Next Steps Your BlackPearl NAS solution is now installed. For information about configuring and using the system, read the following chapters in the...
Need help?
Do you have a question about the BlackPearl NAS and is the answer not in the manual?
Questions and answers