Table of Contents
Advertisement
Quick Links
Advertisement
Table of Contents
Troubleshooting

Related Manuals for BWT THERO 90PRO


Summary of Contents for BWT THERO 90PRO
- Page 1 THERO 90PRO nstallation and opErating instructions...
-
Page 2: Table Of Contents
3.2 Setting the water quality using the blending valve ..............9 3.3 Removing/installing a new RO cartridge ................9 3.4 Installation and operation of the BWT RO app............... 10 3.4.1 Installation of the app ....................... 10 3.4.2 Operating the app......................10 Troubleshooting .......................... -
Page 3: Introduction And Safety
3. The higher the number of the locking po- and flow. sition, the higher the mixing ratio of the feed water . The BWT THERO 90PRO ena- (Chapter 3.2) TDS: bles continuous adjustment of the bypass inde- Abbreviation for “Total Dissolved Solids” the pendent of locking position 0, 1, 2, 3). -
Page 4: Scope Of Delivery
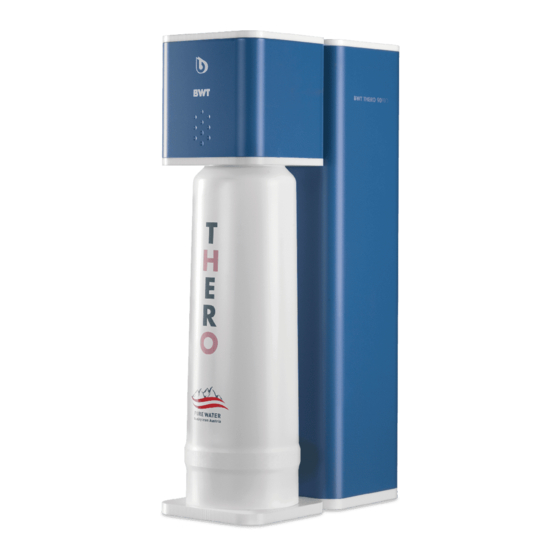
BWT water + more GmbH Walter-Simmer-Straße 4 5310 Mondsee, Austria Telephone: +43/6232/5011-0 Fax: +43/6232/4058 Fig. 1: BWT THERO 90PRO - front side of the E-mail: warewashing@bwt-group.com device 1.4 General information This installation and operating manual (IOM) contains important instructions for safe and efficient use of the reverse osmosis device BWT THERO 90PRO. -
Page 5: Warranty And Disclaimer
1.4.2 Warranty and disclaimer Danger: Electric current or voltage! Always consult a qualified electrician Observe: The information and instruc- when working on places denoted by tions contained in this Installation and this symbol. Operating Manual were compiled based on current standards and regu- Attention: Dangerous spot! lations, the state of the technology, Details or orders and prohibitions to... -
Page 6: Impermissible Operating Methods
• The device must be disconnected prior to 1.5.4 Procedure following an extended performing any maintenance work on the stoppage of operation drinking water supply. Rinse the water pipe The following measures are to be taken to pro- sufficiently before reconnecting the device. tect the RO device from microbial contamina- •... -
Page 7: Requirements Of The Feedwater
• Observe the installation dimensions and bend radii when installing accessories (such as hoses, connection sets, etc.). • The BWT THERO 90PRO device is to be set up and operated with installed magnet plates. • The device may not be rigidly connected to... -
Page 8: Operating The Reverse Osmosis Unit
(see the installation diagram Fig. 4) and the electrical socket. • Use the device switch (situated on the rear of the device) to switch on the device BWT THERO 90PRO. A green LED (Fig. 5) indicates that the RO unit is switched on (POWER ON). -
Page 9: Setting The Water Quality Using The Blending Valve
3.3 Removing/installing a new Reverse osmosis was activated. RO cartridge • Switch off the BWT THERO 90PRO (On/Off switch on back of device). Ensure that the status LED is no longer lit. • Take the new filter cartridge out of the pack- aging and remove the hygiene cap. -
Page 10: Installation And Operation Of The Bwt Ro App
The app is a purely offline application. 3.4.1 Installation of the app No data is transmitted to BWT. If the BWT RO app is not yet installed on your mobile phone, please scan the QR code below. 3.4.2 Operating the app... -
Page 11: Trouble Shooting
4.2 Trouble shooting App screen Error Cause Remedy Water leak inside the Leak or condensation Disconnect device device inside the device from electricity and Inlet valve closes auto- water supply matically. Check pump and pipes, dry leak sensor leakage Pump motor no longer Motor overheating pro- The device will restart working... -
Page 12: Repairs And Maintenance
4 years. order to guarantee that the unit is volt- age-free. The BWT THERO 90PRO reverse osmosis unit is subject to the Pres- Whenever maintenance is performed, sure Equipment Directive 2014/68/ the connection lines and the device EU from 27 June 2014. -
Page 13: Cleaning
5.4 Disposal • The device is to be secured against access by children. Procedure: The BWT THERO 90PRO • To avoid hazards, in the event of any damage device consists of various materials to the power cable, it must be replaced by... -
Page 14: Technical Data
6 Technical data Technische Daten BWT THERO 90PRO Permeate production *1) (amount produced) l/min (l/h) 1,5 l/min (96 l/h) Salt rejection > 98 Water conversion factor WCF (factory setting) *2), *3) ca. 50% @ 15 °C Min. Inlet flow l/min (l/h) min. - Page 15 Appendix: App connection - Step 1 DE: Gerät laut Liste an- EN: Select device accor- wählen. Bei mehreren ding to list. Where the- Geräten bitte auf die re are multiple devices, Ident nummer achten, please note the ID num- und diese zu dem ber and record it for the passenden Gerät ver- correct device.
- Page 16 ES: Después de selec- PT: Depois de selecio- THERO 90PRO hebt ge- THERO 90PRO vises føl- cionar el BWT THERO nar o BWT THERO 90PRO selecteerd, verschijnt het gende skærmbillede. 90PRO, aparece la sigui- aparece o seguinte ecrã. volgende scherm. Wan- Hvis produktet er for- ente pantalla.
- Page 17 Appendix: App connection - Step 3 DE: Sobald eine Verbin- EN: As soon as there is dung zum Gerät besteht, a connection to the de- erscheint dieser Bild- vice, this screen will ap- schirm. Das Gerät ist pear. The device is rea- bereit für die Permeat dy for permeate produc- Produktion, App zeigt...
- Page 18 Appendix: App usage - Step 1 DE: Während des Bezugs EN: While drawing water, zeigt die APP den Status the app shows the status „working“ mit einem “working” with a blue BLAUEN sich drehenden rotating circle. Reverse Kreis an. Die Umkehros- osmosis is in production.
- Page 19 Appendix: App usage - Step 2 DE: Wenn Sie wäh- EN: If you press the rend des Betriebs den “working” button during „working“-Knopf drü- operation, the following cken, erscheinen folgen- operating data will ap- de Betriebsdaten: pear: Leitfähigkeit [TDS] / [µS] Conductivity [TDS] / [µS] Wassertemperatur [°C] Water temperature [°C]...
- Page 20 Appendix: App usage - Step 3 DE: Nach jeder Produkti- EN: After each produc- on wird die Membran für tion, the membrane is 10 s mit Eingangswasser flushed with inlet water gespült. Wenn keine Pro- for 10 s. If no production duktions statt findet, wird is taking place, the sys- die Anlage alle 3 Stun-...
- Page 21 Appendix: App usage - Step 4 DE: Ist ein Service/Filter- EN: If service/filter repla- kerzentausch durchzufüh- cement is due, this di- ren, erscheint diese An- splay will appear in the zeige im Hauptmenü. Die main menu. The status Status LED leuchtet rot. LED is lit in red.
- Page 22 Appendix: Servie Menu settings - Step 1 DE: Um in das Service- EN: To access the service menü zu gelangen, geben menu, enter the following Sie folgendes Passwort password: 05310 ein: 05310 If you change a value, you must Wurde ein Wert geändert, press the “save”...
- Page 23 Appendix: Servie Menu settings - Step 2 DE: Menü zur Einstellung EN: Menu for setting the der Service tage und der service days and pre-fil- Vorfilterkapazität ter capacity Gewünschten Wert einstellen Set the desired value „save“ drücken, auf akusti- Press “save” and wait for sches Signal warten acoustic signal „next“...
- Page 24 Appendix: Servie Menu settings - Step 3 DE: Menü zum Zurück- EN: Menu for resetting setzen der Zählereinstel- the meter settings lungen Reset the relevant meter Betroffenen Zähler zurück- Press “save” and wait for setzen acoustic signal „save“ drücken, auf akusti- Press “next”...
- Page 25 Appendix: Servie Menu settings - Step 4 DE: Anzeige der EN: Display of the rest Reset-Historie history Eingangswasserzähler Inlet water meter Ausgangswasser- Outlet water meter zähler TECHNICAL SERVICE MENU Service days Servicetage HISTORY LOGS Pump operation 12-09-18 14-09-18 Pumpenbetriebs- hours 15-09-18 20-09-18 stunden...
- Page 26 Appendix: Servie Menu settings - Step 5 DE: Software Release: EN: Software release: Aktuelle Firmware, des Current firmware of the ver bauten Boards im board installed in the Gerät. device. APP Release: Aktuelle App release: Current ver- Version der APP am sion of the app on the Handy mobile phone...
- Page 27 B W T UK Li m i t e d B W T Ho u s e , Th e Ga t e w a y Ce n t r e C o r o n a t i o n Ro a d , Hi g h Wy c o m b e Bu c k i n g h a m s h i r e .
Need help?
Do you have a question about the THERO 90PRO and is the answer not in the manual?
Questions and answers