Table of Contents
Advertisement
Quick Links
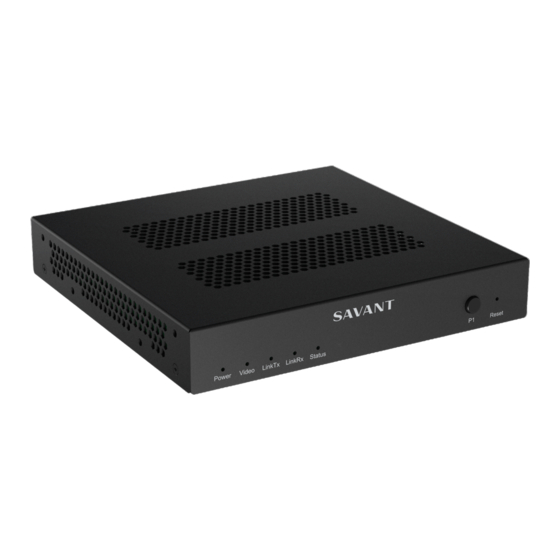
Savant® IP Video Single Output Receiver 4K UHD with Control (PAV-VOM1CP2)
Quick Reference Guide
Box Contents
(1)
Single Video IP Receiver (PAV-VOM1CP2-xx)
(1)
Installation kit (075-0210-xx)
(1)
Power Adapter with International Clips (025-0195-xx)
(1) Internation Clips (CN, US, UK, EU & AUS)
(2) Mounting Brackets (071-1093-xx)
(4) M2.5 x 4mm screws (for mounting brackets) (039-0590-xx)
(1)
IR Emitter (4ft long) (064-0442-xx)
(1)
3-pin RS232 Control Connector (028-0805-xx)
(1)
Product Information and Regulatory Statement (009-1950-xx)
Specifications
Environmental
Temperature
30° to 105° F (0° to 40° C)
Humidity
10% to 90% Relative Humidity (non-condensing)
Dimensions and Weights
Height
6.97 in
Device
(17.7 cm)
16.0 in
Shipping
(40.64 cm)
Power
Power over
IEEE 802.3at
Ethernet (PoE+)
Input Power
12V 2A DC
Nominal Power
16 W
Maximum Power
24 W
Video
HDR
Supported
Supported
640x480
6
Formats
720x480
4
720x576
800x600
1024x768
1280x720
1280x720
1 = at 24 Hz
3 = at 30 Hz
2 = at 25 Hz
4 = at 50 Hz
Audio
Supported
Pass-though of all HDMI 2.0 audio formats are
Formats
supported.
Compliance
FCC Part 15
Safety and
Emissions
RoHS
Compliant
Supported Releases
Software
da Vinci 9.4 and higher
Release
PAV-VOM1CP2 Quick Reference Guide | 009-2034-00
Copyright 2021 Savant Systems, Inc | 210430
Width
Depth
5.91 in
1.00 in
(15.0 cm)
(2.54 cm)
9.00 in
4.00 in
(22.86 cm)
(10.16 cm)
5
5
1280x1024
3840x2160
1
1920x1080
3840x2160
3
1920x1080
3840x2160
5
4
1920x1080
3840x2160
5
5
1920x1080
4096x2160
4
5
1920x1200
4096x2160
5
1
3840x2160
5 = at 60 Hz
CE
C-Tick
Required Components
–
Savant Audio/Video over IP Device
–
Savant System Host
–
Savant qualified 10G Managed Network Switch
–
Savant User Interface (Pro App)
–
Savant Development Environment (SDE)
Front Panel
B
C
A
Power
Video
LinkTx
A
Power LED
Weight
B
1.35 lb
Video LED
(0.61 kg)
3.00 lb
C
LinkTX LED
(1.35 kg)
D
LinkRX LED
E
Status
F
P1
2
3
G
Reset
4
5
3
5
Network Configuration
To ensure that the IP Address will not change due to a power outage,
Savant recommends using DHCP reservation within the router. By
using this method IP Addresses for all devices can be managed from a
single UI, avoiding the need to access devices individually.
NOTE: Setting DHCP reservation varies from router to router. Refer to
the documentation for the router to configure DHCP reservation.
Network Requirements
For more information, see the Savant Device Networking Guidelines
on the Savant Customer Community.
1
of
2
D
E
LinkRx
Status
Off - Device is off. No power applied
Red - Main board is powered
Off - No video signal detected
Blue - Video signal detected
Off - No valid connection
Blue - Valid link
Blinking - Sending Ethernet Data
Off - No valid connection
Blue - Valid link, not receiving Ethernet Data
Blinking - Receiving Ethernet
Blue - Reset button is pressed when the
device is powered on
Blinking - Reset button has been released or
the device was powered on without holding
the reset button
Reserved for future use.
Hold down this button with a pointed
stylus for 20 seconds while powering up
the device to restore the device to factory
default settings
45 Perseverance Way, Hyannis, MA 02601
Savant.com
F
G
P1
Reset
| 508.683.2500
Advertisement
Table of Contents

Summary of Contents for Savant PAV-VOM1CP2
- Page 1 Savant® IP Video Single Output Receiver 4K UHD with Control (PAV-VOM1CP2) Quick Reference Guide Box Contents Required Components – Savant Audio/Video over IP Device Single Video IP Receiver (PAV-VOM1CP2-xx) – Savant System Host Installation kit (075-0210-xx) – Savant qualified 10G Managed Network Switch Power Adapter with International Clips (025-0195-xx) –...
- Page 2 10G connection to the IP Video 10G switch. Installation 10GbE Supports Power over Ethernet (PoE+ IEEE To install the PAV-VOM1CP2 use the mounting screws to attach the 802.3at standard). included mounting brackets. Please follow the steps below. Solid Green - Link is established with Align the bracket using the top holes.


Need help?
Do you have a question about the PAV-VOM1CP2 and is the answer not in the manual?
Questions and answers