Table of Contents
Advertisement
Quick Links
Advertisement
Table of Contents

Related Manuals for Ronix 2110


Summary of Contents for Ronix 2110
- Page 1 ELECTRIC DRILL 10MM 2110...
-
Page 2: Technical Specifications
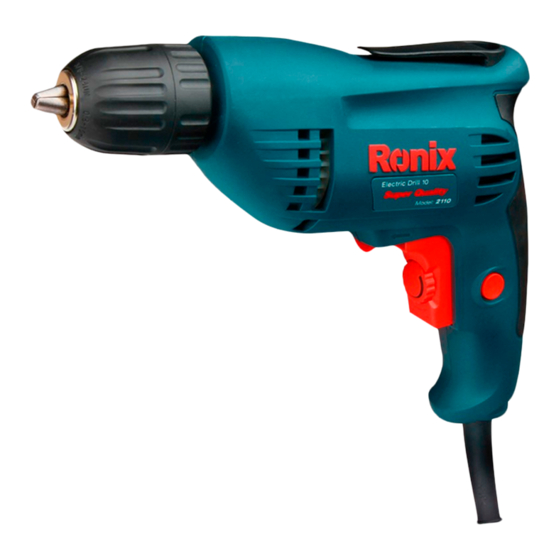
TECHNICAL SPECIFICATIONS Model 2110 Power 400W voltage 220V frequency 50Hz No load speed 0~2900rpm Net. Weight 1.5Kg PART LIST Drill chuck Direction switch Operating switch Locking button GENERAL SAFETY RULES WARNING! Read all instructions. Failure to follow all instructions listed below may result in electric shock, fire and/or serious injury. -
Page 3: Electrical Safety
SAVE THESE INSTRCUTIONS WORK AREA SAFETY Keep work area clean and well lit. Cluttered or dark areas invite accidents. Do not operate power tools in explosive atmospheres, such as in the presence of flammable liquids, gases or dust. Power tools create sparks which may ignite the dust or fumes. -
Page 4: Personal Safety
gloves and footwear will further enhance your personal safety. PERSONAL SAFETY Stay alert, watch what you are doing and use common sense when operating a power tool. Do not use a power tool while you are tired or under the influence of drugs, alcohol or medication. A moment of inattention while operating power tools may result in serious personal injury. - Page 5 Do not use the power tool if the switch does not turn in on and off. Any power tool that cannot be controlled with the switch is dangerous and must be repaired. Disconnect the plug from the power source and/or the battery pack from the power tool before making any adjustments, changing accessories, or storing power tools.
- Page 6 Develop a periodic maintenance schedule for your tool. When cleaning a tool be careful not to disassemble any portion of the tool since internal wires may be misplaced or pinched or safety guard return springs may be improperly mounted. Certain cleaning agents such as gasoline, carbon tetrachloride, ammonia, etc may damage plastic parts.
- Page 7 protective gloves when grasping the bit or accessory. Accessories may be hot after prolonged use. Check to see that keys and adjusting wrenches are removed from the drill before switching the tool “ON”. Keys or wrenches can fly away at high velocity striking you or a bystander.
- Page 8 ATTENTION: 3/8 inch drills are not recommended for running lag bolts NOTE: For tool specifications refer to the nameplate on your tool. OPERATING INSTRUCTIONS TRIGGER CONTROLLED VARIABLE SPEED Your tool is equipped with a variable speed trigger switch. The tool speed can be controlled from minimum to maximum nameplate rated RPM by the pressure you apply to the trigger.
- Page 9 CAUTION: Do not change direction of a complete stop. Shifting during rotation of the chuck can cause damage to the tool. HIP CLIP Your tool is equipped with a hip clip that allows you to conveniently attach your drill to your belt, this feature will allow you to have both hands free when climpbing a ladder or positioning material to be fastened.
- Page 10 Fig 1 Fig 2 OPERATING TIPS You will extend the life of your bits and do neater work if you always put the bit in contact with the work before pulling the trigger. During the operation, hold the tool firmly and exert light, steady pressure. Too much pressure at low speed will stall the tool.
-
Page 11: Drill Bits
Second, unclamp the pieces and drill the second hole the same diameter as the screw shank in the first or top piece of wood. Third, if flat head screw is used, countersink the hole to make the screw flush with the surface. Then, simply apply even pressure when driving the screw. -
Page 12: Drilling Metal
unless pulled out frequently to clear chips from flutes. Use a “back-up” block of wood for work that is likely to splinter, such as thin materials. You will drill a cleaner hole if you ease up on the pressure just before the bit breaks through Operating tips-cont. - Page 13 When using polishing bonnets, always be sure the excess string that secures the bonnet is tucked well within the bonnet during operation. WIRE BRUSHED Work with brushes requires high speeds. Use of the “Lock-ON” button feature will provide a much easier operation. BRUSHING PRESSURE 1.
Need help?
Do you have a question about the 2110 and is the answer not in the manual?
Questions and answers