
Related Manuals for Landice M1


Summary of Contents for Landice M1
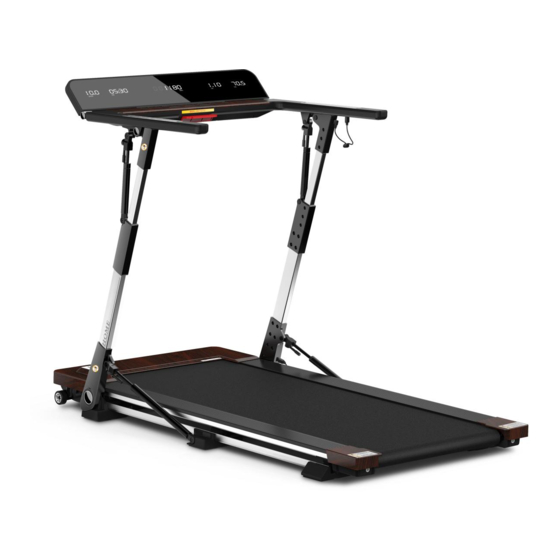
- Page 1 M1 Folding Treadmill Service Manual 1 800 - LANDICE | SERVICE@LANDICE.COM | WWW.LANDICE.COM...
-
Page 2: Table Of Contents
Folding Strut Replacement................20 Adjustable Lever Replacement ..............21 Upper Console Replacement Instructions ..........23 Flowchart: No Power ................... 24 Flowchart : ERR-02, ERR-03, OIL Error ..........25 Exploded Parts View ................... 26 1 800 - LANDICE | SERVICE@LANDICE.COM | WWW.LANDICE.COM... -
Page 3: Landice Warranty Policy
Service Provider if not returned within 30 days. Landice will adjust the invoice off the account once receipt of any defective part(s) that have been returned. Landice will provide return freight tags (ARS tags) for all parts required back. It is our policy to ship all parts UPS ground. -
Page 4: Operation And Safety Instructions
Do not operate treadmill where aerosol (spray) products are used, or where oxygen being administered. To disconnect, press STOP & TURN THE POWER SWITCH OFF, then remove plug from outlet. 1 800 - LANDICE | SERVICE@LANDICE.COM | WWW.LANDICE.COM... -
Page 5: Electrical Requirements
Electrical Requirements Please Note: All M1 Treadmills only comes as a 110v unit Landice requires that a dedicated circuit needs to be wire for each piece of Landice equipment. For optimal performance, DO NOT plug equipment into an AFCI circuit breaker/outlet. -
Page 6: Maintenance Checklist
Clean treadbelt walking surface: Vacuum treadbelt to remove loose dirt. If vacuuming does not remove dirt, Landice recommends the use of a medium stiff nylon bristle brush to remove dirt trapped in treadbelt surface. A damp (not wet!) sponge can be used to finish the cleaning process. -
Page 7: Static Electricity: What To Look For
Treadmill placed on carpet - When you use your treadmill directly on a carpet, it is far more prone to static build up. Instead, install a rubber treadmill mat (LANDICE #73062) underneath the machine. This will help reduce static buildup. -
Page 8: Measuring Ac & Dc Amperage
USE THE CHART BELOW TO DETERMINE THE TREADBELT CONDITION AC Amperage DC Amperage Treadbelt Condition 2.0-4.0 AC Amps 4.5-6.0 DC Amps Good 5.0-7.0 AC Amps 7.0-9.0 DC Amps Normal 7.0-10.0 AC Amps 9.0-12.0 DC Amps Replace 1 800 - LANDICE | SERVICE@LANDICE.COM | WWW.LANDICE.COM... -
Page 9: Using Your Multimeter
Make sure the batteries in your Multimeter are fresh before you begin! Vac – Alternating Current reverses polarity from plus (+) to minus (-). For the M1 Treadmill, you can test coming from the outlet into the unit. Vdc – Direct Current... - Page 10 Electrical Schematic: 1 800 - LANDICE | SERVICE@LANDICE.COM | WWW.LANDICE.COM...
-
Page 11: Motor Cover Removal
Using a 4mm Allen Wrench, remove the 4 bolts keeping the wheel and drive belt pulley in place. (Fig A) Remove the wheel plate from the unit. (Fig B) Then, carefully work the drive belt off the drive motor. (Fig C) 1 800 - LANDICE | SERVICE@LANDICE.COM | WWW.LANDICE.COM... -
Page 12: Motor Pan Removal
From here, you can simply remove the drive belt and/or front roller and replace if necessary. Please proceed to “Treadbelt and Deck Replacement Instructions” if you are replacing those specific parts. 1 800 - LANDICE | SERVICE@LANDICE.COM | WWW.LANDICE.COM... -
Page 13: Treadbelt And Deck Replacement
Slide the side frame covers up and off the unit. Next, lay the treadmill face down. Using a 5mm Allen Wrench, remove all 10 bolts, as circled above. Remove the deck brackets from the unit. 1 800 - LANDICE | SERVICE@LANDICE.COM | WWW.LANDICE.COM... - Page 14 Next, flip the treadmill back over to its normal position, face up. You can now remove the deck and treadbelt from the frame of the unit, and slide the treadbelt off the deck. To re-install, follow these instructions in reverse. 1 800 - LANDICE | SERVICE@LANDICE.COM | WWW.LANDICE.COM...
-
Page 15: Rear Roller Replacement
(Illustration A - circled above) Remove this from the roller shaft and reuse to install the new roller. Finally, slide the roller out from the belt. To re-install, reverse the instructions. 1 800 - LANDICE | SERVICE@LANDICE.COM | WWW.LANDICE.COM... -
Page 16: Drive Motor Replacement
Using a 4mm Allen Wrench, remove the 4 remaining bolts from the drive motor.(Fig A) Remove the black and red wires from the lower circuit board. (Fig B) Now you can remove the drive motor. Reverse the directions to install. 1 800 - LANDICE | SERVICE@LANDICE.COM | WWW.LANDICE.COM... - Page 17 Next, use your hands (or Needle Nose Pliers) to remove the brown wire connections to the circuit breaker (Picture A), and to the Filter. (Picture B) You will then be able to remove the choke from the unit. To install, reverse the instructions. 1 800 - LANDICE | SERVICE@LANDICE.COM | WWW.LANDICE.COM...
- Page 18 Remove the blue wire leading from the Filter to the Power Inlet (Picture C). You should now be able to remove the Filter from the unit (Picture D). To install, please reverse the instructions. 1 800 - LANDICE | SERVICE@LANDICE.COM | WWW.LANDICE.COM...
-
Page 19: Lower Board Replacement
Next, locate the black/red drive motor wires and disconnect from the lower board. (Figure A) Finally, locate brown/blue wires and disconnect from the lower board. (Figure B) Remove the lower board. Reverse the instructions to install. 1 800 - LANDICE | SERVICE@LANDICE.COM | WWW.LANDICE.COM... -
Page 20: Folding Strut Replacement
The new strut is shipped slightly compressed to aid with installation. Be careful to keep the washers in place as you replace the strut. Correct Order = Plastic/Wavy/Plastic Washer. 1 800 - LANDICE | SERVICE@LANDICE.COM | WWW.LANDICE.COM... -
Page 21: Adjustable Lever Replacement
Using a Razor blade or Exacto knife, firmly cut into the hard sticker attached to the adjustable lever. It is a sturdy sticker, so use firm pressure until you break through. Once done, remove the sticker. Adjustable Lever Replacement 1 800 - LANDICE | SERVICE@LANDICE.COM | WWW.LANDICE.COM... - Page 22 Do not over tighten. Check to verify that lever functions properly between LOCK and UNLOCK positions. Make sure the position of new lever orientation label is matching lever function (LOCK/UNLOCK). Press label firmly in place. PLEASE CALL LANDICE TECHNICAL SERVICE 1-800-526-3423, OPTION 3 FOR FURTHER ASSISTANCE 1 800 - LANDICE | SERVICE@LANDICE.COM | WWW.LANDICE.COM...
-
Page 23: Upper Console Replacement Instructions
You will then be able to remove the ribbon from the membrane. Next, remove the entire upper display assembly from the treadmill. To replace, follow the instructions in reverse. 1 800 - LANDICE | SERVICE@LANDICE.COM | WWW.LANDICE.COM... -
Page 24: Flowchart: No Power
Flowchart: No Power 1 800 - LANDICE | SERVICE@LANDICE.COM | WWW.LANDICE.COM... -
Page 25: Flowchart : Err-02, Err-03, Oil Error
Flowchart : ERR-02, ERR-03, OIL Error 1 800 - LANDICE | SERVICE@LANDICE.COM | WWW.LANDICE.COM... -
Page 26: Exploded Parts View
Exploded Parts View 1 800 - LANDICE | SERVICE@LANDICE.COM | WWW.LANDICE.COM...
Need help?
Do you have a question about the M1 and is the answer not in the manual?
Questions and answers