Table of Contents
Advertisement
111 Canfield Avenue
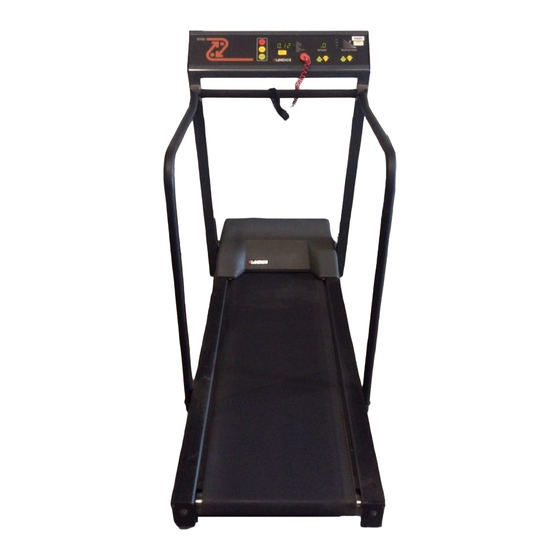
Home and Commercial Treadmill
Diagnostic and Service Manual
This guide covers all 8700 series treadmills manufactured from
HOME TREADMILLS – 8700 SPRINT 1-4 / PRG / SST
NOTE: Early HOME treadmills listed as: 8700R & 8700P are the same as the LTD models.
The only difference was the warranty coverage.
LTD / 110V UNITS – 8700R (
CLUB / 220V UNITS – 8700R (
For Technical Service Call 1-(800)-LANDICE
Randolph, New Jersey 07869
•
8700-Series
1993 – 2000.
REGILAR NO PROGRAMS
REGILAR NO PROGRAMS
Version M/C.1
1-800-LANDICE
•
2001
) / P (
WITH PROGRAMS
) / P (
WITH PROGRAMS
0630
FAX 973-927-
•
) / PT1 / PT2
) / PT1 / PT2
1
Advertisement
Table of Contents

Related Manuals for Landice 8700 Series


Summary of Contents for Landice 8700 Series
- Page 1 Home and Commercial Treadmill Diagnostic and Service Manual 2001 This guide covers all 8700 series treadmills manufactured from 1993 – 2000. HOME TREADMILLS – 8700 SPRINT 1-4 / PRG / SST NOTE: Early HOME treadmills listed as: 8700R & 8700P are the same as the LTD models.
- Page 2 SPRINT – 2; lower wiring schematic Page 27 SPRINT – 1; lower wiring schematic Page 28 SPRINT – 1&2; upper wiring schematic SECTION 4 –Servicing Landice Treadmills Page 29-31 Definitions of components Page 32-34 Testing components Page 35-37 Common symptoms Page 38...
-
Page 3: How To Use This Manual
This manual is designed to help service technicians in the installation, maintenance, or repair of Landice 8700 model treadmills. It covers terminology, installation, tools needed, diagnostics, removal and replacement of parts, estimated time of repairs, warranty forms, wiring schematics, and recommended maintenance. - Page 4 Landice will credit this invoice upon receipt of defective parts. Landice will pay the freight to send out any defective parts. It is the dealer's responsibility to pay the freight to return the defective parts to Landice. If the defective parts are not returned within 30 days, payment of invoice is expected in full.
- Page 5 This warranty is valid only in the United States and Canada. SERVICE LABOR For a period of 1 year, Landice will reimburse the selling dealer according to the terms, rates and conditions in effect at the time of service. A service authorization number must be obtained prior to performing service in order to qualify for service reimbursement.
- Page 6 Recommended tools for servicing Landice treadmills 1. Deep socket set 3/8 drive with ratchet and extension: Must have 3/8, 7/16, 1 /2, 5/16, 9/16 socket. 2. Combination wrench set: Must have 3/8, 7/16, 1 /2, 5/16, 9/16 3. #1, 2, and 3 Philips head screwdriver (or electric screwdriver) 4.
- Page 7 Important Operating Safety Instructions WARNING: Failure to observe the following operating instructions can result in serious injury! If you are suffering from any illness, condition, or disability which affects your ability to run, walk or exercise, do not use this product without consulting your doctor first. If you are suffering from any illness, condition, or disability which affects your ability to run, walk or exercise, do not use this product without supervision present.
-
Page 8: Grounding Instructions
DANGER To reduce the risk of electric shock, always unplug the treadmill from the electrical outlet immediately after using. Always unplug the treadmill before cleaning or removing the motor cover. WARNING To reduce the risk of burns, fire, electric shock, or injury to persons: Treadmill should never be left unattended when plugged in. - Page 9 200 - 250 Volt Treadmills (15 Amp dedicated line) Treadmills marked 200-250 VAC are intended for use on a circuit having a nominal rating more than 120V and are factory-equipped with a specific cord and plug to permit connection to a proper electric circuit. Make sure the product is connected to an outlet having the same configuration as the plug.
- Page 10 8700 Standard Membrane Models That Used This Membrane: 8700, 8700-R, 8700-LTD, 8700-LTD-VFX, 8700-CLUB, 8700-CLUB-VFX Production Time Frame: 1991-1999 Electronics: Standard 110V SCR (220V SCR for CLUB units), commercial motor pan. See Wiring Diagram. Settings Used In: Home and Commercial (LTD’s and CLUB’s) Key Features: Closed Loop Treadmill (w/ speed sensor), Safety Lanyard, 0.5-11MPH Push Button Speed and Elevation Control 8700 Sprint Membrane...
- Page 11 8700 EP/PT Membrane Models That Used This Membrane: 8700EP, 8700-PT Production Time Frame: 1991-1993 Electronics: Standard 110V SCR (220V SCR for CLUB units), commercial motor pan. See Wiring Diagram. Settings Used In: Home and Commercial Key Features: Closed Loop Treadmill (w/ Speed sensor) Safety Lanyard, 0.5-11.0MPH Push Button Speed and Elevation Control, 10 Built In Programs, 4 User Programs, Wireless Heart Rate Control (Optional), LED Graphic Display.
- Page 12 8700 PT2 Membrane Models That Used This Membrane: 8700-PT2, 8700-CLUB-PT2 Production Time Frame: 1994-1998 Electronics: Standard 110V SCR (220V SCR for CLUB units), commercial motor pan. See Wiring Diagram. Settings Used In: Home and Commercial Key Features: Closed Loop Treadmill (w/ Speed sensor) Safety Lanyard, 0.5-11.0MPH Push Button Speed and Elevation Control, 9 Built In Programs, 4 User Programs, Wireless Heart Rate Control, SONAR ranging capability (Optional), LED Graphic Display.
- Page 13 8700 Programmable Membrane Models That Used This Membrane: 8700-PRG, 8700-PRG-VFX, 8700-CLUB-PRG Production Time Frame: 1996-1999 Electronics: 8700-PRG used Sprint-3 electronics, 8700-PRG-VFX used Sprint-4 electronics, 8700-CLUB-PRG used 220V PWM commercial motor pan. See Wiring Diagrams. Settings Used In: Home and Commercial (LTD’s and CLUB’s) Key Features: Closed Loop Treadmill (w/ speed sensor), Safety Lanyard, 0.5-12MPH Push Button Speed and Elevation Control, 4 Built In Programs, 2 User Programs.
- Page 14 Section 3 – Parts Identification M odel 8700 Tr eadm i l l Par t s I t em Par t # M SRP N ot e Tr eadbel t 70046 $326. 00 Tr eadbel t - XL 70157 $381. 00 Sl i der D eck ( N on- VFX) 70033 $208.
- Page 15 M em br ane Panel - SPRI NT3/ 4 70190 $167. 00 M em br ane Panel - 8700PR G 70195 $225. 45 M em br ane Panel - SST 70171 $225. 45 M em br ane Panel - NM A ( C RT, PRT) 70191- NM A $210.
- Page 16 W i r el ess Pul se O pt i on " Pul se Ki t " 71017 $167. 00 Ext ender Ki t M I SC $25. 05 R ecei ver Ki t 70074/ M I SC $125. 25 Pul se Bel t / Tr ansm i t t er 70072/ 70073 $108.
- Page 17 8700 COMERCIAL MOTOR PAN COMPONENTS...
- Page 18 8700 COMMERCIAL LOWER WIRING SCHEMATIC...
- Page 19 LED (light emitting diode) configurations: SCR lower board The SCR lower board is designed with diagnostic LED lights. The LED’s are color coded according to their specific function. Green indicates a properly operating treadmill; the green lights should always be ON when power is supplied to the treadmill. Yellow indicates a treadmill function. Red indicates a treadmill malfunction.
- Page 20 C. LIM (red) – The C.LIM or Current Limit LED should NEVER come on. This diagnostic light is used to determine the condition of the treadbelt and deck. The SCR board has a built-in amp meter. When the treadbelt belt and deck system wears, the amperage will increase. When this amperage reaches its max limit, the lower board will shut down its power (treadbelt will slow down / low torque) to the drive motor and the C.LIM LED will illuminate.
- Page 21 8700 HOME SST VFX, PRG VFX, SPRINT VFX CLOSED LOOP (SPEED SENSOR)
- Page 22 8700 SST, PRG and SPRINT VFX TREADMILL All VFX treadmills utilize CLOSED LOOP speed control. All treadmills listed as VFX in the warranty database use a speed sensor.
- Page 23 LED LIGHTS ON PWM The PWM lower board is designed with two diagnostic LED lights. The LED’s are color coded according to their specific function. LED 1 (red) – This indicates a high current draw similar to the C.LIM LED on our SCR lower control board.
- Page 24 LED (light emitting diode) configurations: RELAY BOARD The RELAY board is designed with diagnostic LED lights. The LED’s are color coded according to their specific function. Green indicates a properly operating treadmill; the green lights should always be ON when power is supplied to the treadmill. Yellow indicates a treadmill function. Red indicates a treadmill malfunction.
- Page 25 8700 SST, PRG and SPRINT 3, NON VFX TREADMILL All NON VFX treadmills utilize OPEN LOOP speed control and no relay boards. Sprint 3 treadmills have push button controls...
- Page 26 8700 SPRINT 2 Safety lanyard, speed control dial (not push button), KBWT-110 SCR motor control...
- Page 27 8700 SPRINT 1 – LOWER WIRING SCHEMATIC NO safety key, speed control dial (not push button), KBLC-118 Motor Control Board...
- Page 28 8700 SPRINT 1&2 UPPER WIRING SCHEMATIC...
- Page 29 DRIVE MOTOR Provides power to drive belt to turn pulley on drive roller to move treadbelt. This gets its power from the PWM or SCR. Landice drive motors are either 110v for 220v. DRIVE ROLLER W/ SHEAVE This is the roller at the front of the treadmill. The sheave (pulley) is pressed onto the roller and allows transfer of movement from drive belt to treadbelt.
- Page 30 Recommended treadbelt lubricant for Landice commercial treadmills. SPEED SENSOR Landice uses a magnetic speed sensor to receive accurate speed readings. Readings are taken directly from the flywheel on the motor and sent to the Relay Board or SCR. Distance between the sensor and the flywheel is critical but the sensor is unaffected by dirt or dust build-up (unlike optical sensors).
- Page 31 TREADBELT This is the surface the user walks on. It rides over the deck and rollers. UPPER DISPLAY BOARD This controls information from the Membrane panel and Face Plate. It then transmits it to the relay board on Home models and the SCR on Club or LTD models. UPRIGHTS One on either side, they house the wire harness, the upper display, the cross member and the handrails.
- Page 32 (DC) the DC power supply must be replaced. Drive Motor: Generation Test – all Landice drive motors (110 & 220) are direct current or DC. A DC drive motor can produce (generate) a DC voltage when it’s manually rotated. The DC output is linear to the speed the motor is rotated.
- Page 33 ELEVATION MOTOR Using your voltmeter measure the input voltage (AC) to the elevation motor. Secure the black (negative) meter probe to a good chassis ground. Place the red meter probe on the RED wire in the elevation harness. Press the elevation DOWN key and you should get 120 /220VAC. Place the red meter probe on the BLACK wire in the elevation harness.
- Page 34 terminals with your voltmeter. You should measure 120/220VAC across these terminals. The DC voltage comes out of the SCR board (going to the drive motor) across two output terminals marked MTR+ and MTR-. Confirm DC voltage out by measuring across these two terminals with your voltmeter.
- Page 35 Common Symptoms Symptom: Treadbelt feels like it’s slipping or grabbing when walked on. Possible Cause: Loose drive belt or treadbelt. Adjust as per manual. Remember to adjust only till slipping stops. DO NOT OVERTIGHTEN Possible Cause: Worn treadbelt and/or deck. If treadbelt or deck is worn it will cause excessive friction and the user will feel like belt is slipping or grabbing.
- Page 36 Landice has adjustment on the front roller to correct for this type of problem. The front roller will not be damaged by the adjustment providing these steps are followed. If this doesn’t correct problem please call 1-800- Landice.
- Page 37 IR POTENTIOMETER ADJUSTMENTS, PWM ONLY: IR = I (amperage) R (resistance) The IR potentiometer that is located next to the MAX speed potentiometer on the PWM motor control board is used to adjust the time it takes the pwm to react to a load or amperage spike. When the user steps onto the treadbelt a load is introduced to the system which creates an amperage spike.
- Page 38 Speed Calibration: SPRINT 4/PRG/SST CLOSED LOOP (speed sensor) 1. Enter the O.L.S. Mode (Open Loop Speed) by pressing “FAST” and “START” simultaneously. 2. Adjust the max speed first. Bring the set speed to 12mph. Let actual speed stabilize. 3. Adjust the MAX potentiometer on the pwm motor control board accordingly. CW = increase speed / CCW = decrease speed.
- Page 39 2. Make a note of serial number, model (L7, L8, Home, LTD, or Club) and type (Sport, Pro, Cardio, CRT, or Executive). Landice tracks all information from this serial number and it must be given when requesting parts or technical assistance.
- Page 40 12 VDC TRANSFORMER REPLACEMENT (HOME TREADMILLS ONLY) Observe the proper polarity when installing a new DC power transformer. Catastrophic damage can occur to the upper display board electronics if the DC polarity is reversed. 1. If your DC transformer has color coded fast-on (push on) connectors: Blue - negative (-) Red - positive (+) 2.
- Page 41 MEMBRANE PANEL 1. Remove control panel end caps from upright assembly. 2. Remove membrane panel and display board assembly by releasing Velcro. 3. Disconnect upper wire harness from display board. 4. Remove screws securing display to membrane panel. 5. Install new membrane panel. FACE PLATE (Replaces membrane panel on SPRINT 3 ONLY) 1.
- Page 42 ELEVATION MOTOR 1. Remove Elevation Motor. A. Remove all weight from the elevation assembly by placing a suitably strong object under the under motor pan (toolbox) so that the wheels are in the air. B. Disconnect elevation motor harness from lower board or lower harness. C.
- Page 43 ELEVATION POTENTIOMETER ELEVATION MOTOR P/N #71013 P/N #70088 110volt P/N #70126 220volt ADJUSTMENT SHAFT ELEVATION NUT NOTE: ELONGATED BRACKET HOLES ARE FOR POTENTIOMETER FINE ADJUSTMENT. To Enter Diagnostic Mode: Turn off the treadmill. SPRINT-1 & 2 (Press DISPLAY & turn Knob to the ON position simultaneously) SPRINT-3 &...
- Page 44 ELEVATION LEG ASSEMBLY 1. Remove plastic motor cover. 2. Remove set screws (2) holding elevation motor to elevation leg assembly. 3. Remove elevation pins from elevation gear nut. 4. Carefully turn treadmill onto its side to gain access to elevation leg mounting brackets. 5.
- Page 45 Drive Roller/Front Roller 1. Release all treadbelt tension. 9/16" bolts on rear roller. 2. Remove drive belt from drive motor. Release tension on drive motor tensioning hook (7/16" nut located underside of motor pan). Pivot motor towards treadbelt and slide drive-belt off. 3.
- Page 46 NOISES Many times a treadmill will tell you what’s wrong with it by the noises it makes. We strongly recommend the use of an automotive stethoscope. Service Tip: Treadmill making noise but can’t tell from where. Solution: Must isolate all moving parts. 1) Unplug treadmill.
- Page 47 6. Is there excess Slip Cote? If you see Slip Cote oozing from sides of belt or off end of deck remove belt and wipe down deck, belt, and rollers. 7. Is it a commercial treadmill? Landice uses a stiffer belt on Club models to increase treadbelt life. These stiffer belts make more noise and are considered normal.
- Page 48 Visual Clues The following is a breakdown of things to look for when troubleshooting these components. Decks- Check for wood showing through black phenolic. Check for ridges or cupping of deck especially in front middle of deck. Both of these indicate that deck should be replaced or reversed if other side is unused.
- Page 49 Voltage Tests Variance in voltage affects treadmill performance. Here is how to trace the voltage into and out of the 8700 series treadmill. Confirm incoming voltage: 120/220 VAC where the line cord attaches to treadmill. It could be; relay board, lower SCR board, terminal block or lower harness.
- Page 50 This means you’ll get an LS or L5 error if your PWM is blown, not an OS or 05 error. This is a safety feature on all Landice Home treadmills with PWM Motor Control Boards. The SCR Motor Control Boards also have internal protection to prevent an over speed condition from occurring due to an internal component failure.
- Page 51 8700 Series Treadmill Diagnostic Troubleshooting Guide 8700 8700 CLUB...
- Page 52 Configuration Mode STEP 1) Turn machine off, press "UP" and "START" at the same time, and let go. STEP 2) To select between English (mph) and Metric (kph) units, press the "DISPLAY" button. To enable/disable the pulse option, press "PAUSE". The pulse LED will light when enabled.(*Must purchase Wireless Pulse Option #71017) The left hand digit in the speed window should display "I"...
- Page 53 Lethal voltages and moving parts capable of causing serious injury are exposed when the drive housing cover is removed. Under no circumstances should drive housing cover be removed except by a Landice factory authorized technician or under supervision of a Landice technical representative.
- Page 54 Upper display fails to light when START is pressed. Plug Treadmill into wall outlet. 1. No power from outlet. 2. Loose wire from line cord to motor control board. Is green +12V lamp on the motor 3. Blown SLOW-BLOW fuse on motor control board lit? control board.
- Page 55 Display lights up; TREADBELT DOES NOT MOVE “L5 / LS ERROR” Plug Treadmill into wall outlet and press START. 1. Check wiring harness connection between Is red SERIAL lamp on the motor control upper and lower board. Part # 70083 board lit? 2.
- Page 56 Display lights up, treadmill moves; speed will not increase; "L5" error. Press START button. 1. Disconnect the speed sensor Is yellow SPD lamp on the motor control from the motor control board. board lit? 2. Is the yellow SPD lamp on the motor control board still lit? Replace speed sensor.
- Page 57 Display lights up; fails to respond to other buttons. Place the treadmill in Diagnostic Mode: 1. Remove the saftey lanyard. 2. Turnoff the treadmill. 3. Hold the DISPLAY and START key simultaneously and then release them as soon as the display lights up. Do all the lights flash on, then off, and then show "PASS"...
- Page 58 Elevation system failure; "PO" error. Place the treadmill in Diagnostic Mode: Grade pot out of 1. Remove the saftey lanyard. calibration or failed. 2. Turnoff the treadmill. Recalibrate pot. 3. Hold the DISPLAY and START key simultaneously and then Go to page 9. release them as soon as the display lights up.
- Page 59 ELEVATION POTENTIOMETER CALIBRATION ELE VA T IO N PO T E N T IO ME TE R E LEVA TIO N MO TO R P/N #7 1013 P/N # 70088 11 0vo lt P/N # 70126 22 0vo lt AD JU S T M E N T SH AF T E L EVAT I O N N U T N O T E: ELO N G A TED BR AC KET HO LES AR E FO R...
- Page 60 8700 Series HOME Treadmill Diagnostic Troubleshooting Guide 8700 SPRINT 4 –VFX (S/N 7-36898 AND UP) 8700 SST – VFX (S/N 7-43807 AND UP) 8700 PRG – VFX (S/N 7-43825 AND UP)
- Page 61 SYMPTOM Upper display board fails to light when START is pressed. 1.Plug a lamp into the wall outlet to confirm it is live. Is the AC PWR light on 2.Check line cord condition and connections. the relay board lit? 3.Unplug treadmill and use a multimeter to check the fuse.
- Page 62 SYMPTOM Display lights up, treadbelt moves,speed will not increase,L5 error. Adjust speed sensor: Check speed sensor alignment. 1.Use 1/2" wrench and loosen It should be within 1/16" of the flywheel the two lock nuts securing and parallel to the flywheel. sensor to it's bracket.
- Page 63 SYMPTOM Display lights up,treadbelt does not move,L5 error. 1.Press FAST & START simultaneously. Attach the safety lanyard. 2.Press FAST until 2.0mph is displayed. Does the four digit display window read SAFE? Is the green LED2 light on the Is the green BELTSW light on the relay board lit? pwm motor control board lit? 1.
- Page 64 SYMPTOM Elevation system not functioning or PO (Pot Out) error code displayed in the two digit speed window. Enter the DIAGNOSTIC MODE. (See pages 12, 13, or 14) Does the elevation system work properly? Proceed with recalibrating elevation potentiometer, page 8. Unplug 6 pin elevation motor connector from relay board.
- Page 65 ELEVATION POTENTIOMETER CALIBRATION ELEVATION POTENTIOMETER ELEVATION MOTOR P/N #71013 P/N #70088 110volt P/N #70126 220volt ADJUSTMENT SHAFT ELEVATION NUT NOTE: ELONGATED BRACKET HOLES ARE FOR POTENTIOMETER FINE ADJUSTMENT. Enter Diagnostic Mode: 2. Power up treadmill in Diagnostic Mode: Sprint – Press DISPLAY & START simultaneously. SST &...
- Page 66 8700 Series HOME Treadmill Diagnostic Troubleshooting Guide 8700 SPRINT 3 8700 PRG 8700 SST...
- Page 67 "8700 Sprint 3" Treadmill Display Board - New Design The 8700 Sprint 3 will consist of a new display board mounted in the upright. It will communicate to the high power relays and KBWT motor control board located at the bottom of the treadmill via 12-conductor, 22-gage cable.
- Page 68 Reed Switch A read switch mounted on the display board shall be used to detect the presence of a magnet attached to a safety lanyard. In the event the magnet is removed. The four-digit display shall read "SAFE" and power to be removed from all relays. Mechanical Buttons.
- Page 69 8700 Series HOME Treadmill Diagnostic Troubleshooting Guide 8700 SPRINT 1 8700 SPRINT 2...
- Page 70 SYMPTOM Upper Display does not light up. Check position of Safety Key.* Check for 120 VAC AC 1. Check fuse on between points motor control 13 and 14 on board, terminal replace if block. necessary A. Check 20 amp in-line fuse (Mounted to motor pan) * 2.
- Page 71 * Applies to Sprint 2 Only. SYMPTOM Display erratic; speed and elevation controls work. Does the display function normally, except for Re - calibrate elevation potentiometer incorrect (or according to the unchanging) instructions in appendix elevation If the potentiometer cannot be re readout? - calibrated, replace the pot.
- Page 72 SYMPTOM Display lights 1. Check On / Off switch up,treadbelt does not speed control panel. turn. Does the relay 2. Check wiring between On "click" when / Off switch and relay(wiring the treadmill is switched harness) 3. Replace relay. Check for 120 VAC between and L2 terminals on the 1.
- Page 73 1. Check wiring between motor control board,filter choke and drive motor. 2. Check for broken choke or shorted capacitor. 3. Check voltage going to motor directly at points 3 and 4 on terminal block. Check voltage output on the KB-TSM at points A+ and A-.
- Page 74 2. 120 VAC between (yellow) and (white) wires when the "DOWN"switch is engaged,and 0 VAC when the switch is disengaged. incorr readin Replace elevation motor. 1. check elevation switch for continuity. 2. check wiring. APPENDIX 1: SPRINT 1 Speed Calibration *SEE SPRINT 2 WIRING SCHEMATIC FOR SPEED POT SETTINGS STEP 1: Verify KBLC - 118 pot settings are...
- Page 75 STEP 2: Turn machine on, increase speed until 1.2 mph shows on display, then slowly decrease speed just until the display shows exactly 1.0 mph. STEP 3: Adjust "MIN" pot on KBLC-118 until belt speed is between 0.95 - 1.00 mph using a tachometer OR 8.8 - 9.3 rpm counting belt revolutions.
- Page 76 Display” button to switch the treadmill on. Use the "SELECT DISPLAY" button to switch into elevation mode (both the "TIME" and "DISTANCE" LED’s will be lit). STEP Lower the treadmill until it is level (o% elevation). STEP Turn the elevation potentiometer until "168" (* 153 Sprint 2) shows in the display.If the number in the display does not change...
- Page 77 maintenance of their treadmills. The following illustrates how to tension the Treadbelt and Drive Belt. Check Drive Belt tension Drive Belts are pretensioned before the treadmill leaves the factory. Adjustments are ONLY necessary when Drive Belt is slipping during use. To test for tightness: 1.
-
Page 78: Recommended Maintenance
speeds (2-3 mph) until you are comfortable making adjustments. Faster speeds will cause the adjustments to take effect quicker (5-6 mph). Example: Treadbelt tracks to the right: a. Turn treadmill on, and bring speed up to 4.0 mph. b. Using a 9/16" wrench, tighten the right-hand adjustment bolt 1/4" turn. c. - Page 79 Landice institutional treadmills should be lubricated on a monthly basis. How to lubricate: Only use SlipCote by Landice. Most standard greases, waxes, and silicon sprays will build up on the deck and rollers and have an adverse effect on the longevity of the treadmill.
- Page 80 brush to remove dirt trapped in treadbelt surface. A damp (not wet!) sponge can be used to finish the cleaning process. Institutional drive motor maintenance Yearly Institutional Maintenance: Replace the Drive Motor Brushes. Failure to do so will result in premature Drive Motor failure. 1.
- Page 81 5V LED Definition Picture Troubleshooting 12 VDC Power Supply Definition Picture 21-22 Removal/Replacement Troubleshooting Testing 32, 49, 70 Capacitor Definition Picture 17-18 Removal/Replacement Troubleshooting Wiring CE Error Code Choke (Inductor) Definition Picture 17-18 Removal/Replacement Troubleshooting Wiring Components Definitions 29-31 Parts list 14-16 Testing 32-34...
- Page 82 Picture(Motor Pan) 17, 21 Removal/Replacement Testing Troubleshooting 47-48 Drive Motor Brushes Maintenance Removal/Replacement Troubleshooting 35, 36, 47, 55, 63 Drive Roller w/Sheave Definition Removal/Replacement Troubleshooting 35, 46, 77 Elevation Leg Assembly Definition Picture Removal/Replacement Elevation Motor Calibration 43, 59, 64, 65 Definition Picture 17, 21, 42, 43,...
- Page 83 Fuses 54, 61, 70 IR Potentiometer Definition 30, 37 Adjustments 37, 74 Troubleshooting L5 (LS) Error Code Troubleshooting 55, 56, 62, 63 LED LIGHTS 19-20 RELAY Maintenance 53, 78, 79 Membrane Panel Definition Picture 10, 11, 12, 13 Removal/Replacement Testing Troubleshooting Noises 46-48...
-
Page 84: Speed Calibration
Testing Troubleshooting 24, 61, 63 Wiring Safety Lanyard Definition Troubleshooting 52, 57, 68, 70 SCR Motor Control Board Definition LED Lights 19-20 Picture Removal/Replacement Testing 33-34 Troubleshooting 54, 55, 56, 58 Wiring SlipCote Lubricant Definition 78-79 Troubleshooting Speed Calibration Speed Sensor Definition Picture 17, 21... - Page 85 Testing Uprights (Frame) Definition Upper Wire Harness Definition Troubleshooting 49, 54, 61, 70 Voltage Specifications Testing...
Need help?
Do you have a question about the 8700 Series and is the answer not in the manual?
Questions and answers