
Related Manuals for Digi DI-80


Summary of Contents for Digi DI-80
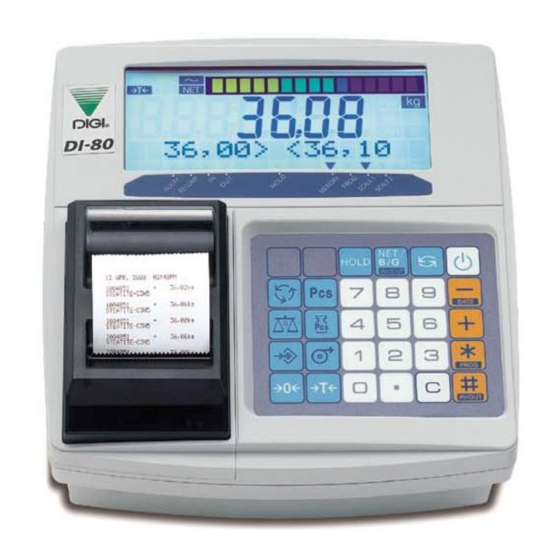
- Page 1 DI - 80 / 80SS User Manual Issue Date Software Version April 2002 V1.27 TERAOKA WEIGH-SYSTEM PTE LTD 3A, Tuas Avenue 8 Singapore 639218 TEL: (65) 6861 3911 FAX: (65) 6861 2242 URL: www.teraoka.com.sg - 1 - DI-80 USER MANUAL...
-
Page 2: Table Of Contents
1. REGISTRATION MODE 1.1 DISPLAY UNIT INDICATORS ......................4 1.2 KEY SHEET LAYOUT AND KEYS FUNCTION ................5 1.2.1 DI-80 and DI-80SS Key Sheet Layout ..................5 1.2.2 Keys Functions..........................6 1. 3 REGISTRATION MODE DESCRIPTION ..................8 1.3.1 Weight Mode..........................8 1.3.2 Counting Mode Type 1........................ - Page 3 1.15 HOLDING FUNCTION........................41 1.15.1 Weighing Mode.......................... 41 1.15.2 Counting Mode .......................... 42 1.16 INVENTORY OPERATION......................43 1.16.1 Manual Transaction ........................43 1.16.2 Total Transaction ........................44 1.17 WEIGHT UNIT SWITCHING ...................... 46 - 3 - DI-80 USER MANUAL...
-
Page 4: Registration Mode
Light when Scale - 1 is selected. L11: Scale - 1 lamp Light when Scale - 2 is selected. L12: Scale - 2 lamp L13: Quantity lamp Light when SUB-2 DISPLAY is showing Quantity. - 4 - DI-80 USER MANUAL... -
Page 5: Key Sheet Layout And Keys Function
1.2 KEY SHEET LAYOUT AND KEYS FUNCTION 1.2.1 DI-80 and DI-80SS Key Sheet Layout DI-80 Key Sheet Layout DI - 80SS Key Sheet Layout - 5 - DI-80 USER MANUAL... -
Page 6: Keys Functions
To void the Total Weight or Quantity. To issue receipt (Build-in Printer) or sending data to PC or Barcode printer. PRINT KEY To issue receipt (Build-in Printer) or sending data to PC or Barcode printer. - 6 - DI-80 USER MANUAL... - Page 7 To change or view individual PLU Set point data. FEED KEY Feed receipt paper (For Build-in Printer) HOLD KEY To enable or disable Holding function. UNIT SWITCHING KEY To switching Weight Unit between kg & lb or oz, g & dwt. - 7 - DI-80 USER MANUAL...
-
Page 8: Registration Mode Description
1.3.1 Weight Mode When DI-80 is powered up, it will go to Weight Mode, where the Main Display show the Weight and the Sub- Display will showing Set point 1 & Set point 2 or PLU Name is depending on SPEC 00 bit 0 setting. -
Page 9: Segment Check & Stand-By-Status
0. 0 0 0 Note 1: If there is anything on the Platforms and it exceeds scale start range, following error message will appear: E r r S T A R T E R R - 9 - DI-80 USER MANUAL... -
Page 10: Tare Operation
Note 1: After One Touch Tare and called up a PLU, if tare value is set in PLU File in advance, the PLU Tare value will override the One Touch Tare value, if not, the One Touch Tare value will remain for the PLU. - 10 - DI-80 USER MANUAL... - Page 11 Digital tare value, if not, the Digital Tare value will remain for the PLU. Note 2: If you want Digital Tare when Weight loaded on platter, SPEC 38 bit 2 must set to "0" in advance. If not, set to "1". - 11 - DI-80 USER MANUAL...
-
Page 12: Tare Value Exchange
(Ex. 50g) 0. 0 5 0 4. Press [T] key to subtract the tare weight again (Tare Accumulation). 0. 0 0 0 5. Remove 20g from the platform. 0. 0 2 0 - 12 - DI-80 USER MANUAL... - Page 13 (Ex. 20g). 0 2 0 2. Press [T] key to subtract the tare weight. 0. 0 2 0 3. Enter the tare weight by numeric key (Ex. 50g). 0 5 0 - 13 - DI-80 USER MANUAL...
- Page 14 6. Press [T] key to subtract the tare weight (Tare Subtraction). 0. 0 3 0 Total tare value will change from 50g to 30g. 7. Press [T] key to clear the Tare value. 0. 0 0 0 - 14 - DI-80 USER MANUAL...
-
Page 15: Tare Override
Print Tare value on receipt 2 0. 0 0 0 (Build-in Printer) can be select at SPEC 14 bit 2. S T E A T I T E - C 3 H 5 - 15 - DI-80 USER MANUAL... -
Page 16: Net/Gross Operation
Press [ ] key if you want to 1. 0 0 0 issue a receipt or press [+] / [-] key for Accumulation / Subtraction operation. 5. Back to NET Mode, press [NET/ B/G] key again. 0. 5 0 0 - 16 - DI-80 USER MANUAL... -
Page 17: Plu Call Up
SET POINT TYPE (bit 1 & 0) must set to % 0. 0 0 0 WEIGHT or WEIGHT, after display the Commodity Name for a second, the Set Point data will appear on Sub-Displays. 0 0 0 > < 2 . 0 0 0 - 17 - DI-80 USER MANUAL... -
Page 18: Call Up Plu By Teraoka Code / Ascii Code
0 0 0 0 4. Press [C] key to clear the PLU and display return to Counting Mode. 0. 0 0 0 Note 1: Press [+] key to next position and [-] key back to previous position. - 18 - DI-80 USER MANUAL... -
Page 19: Set New Item Code In Registration Mode
2, press [C] key to cancel. Note 2: If you want set new Tare value and update to PLU, after set the tare value and then press [UNIT WEIGHT] key to store. - 19 - DI-80 USER MANUAL... -
Page 20: Manual Print
After complete issuing 5. 5 0 0 receipt, remove the product from the platter and press [C] key to clear the PLU. S T E A T I T E - C 3 H 5 - 20 - DI-80 USER MANUAL... -
Page 21: Counting Mode
5. Press [ ] key to issue a receipt. After complete issuing 5. 0 0 0 receipt, remove the product from the platter and press [C] key to clear the PLU. 0 0 0 0 2 5 0 0 - 21 - DI-80 USER MANUAL... -
Page 22: Accumulation And Subtraction
S T E A T I T E - C 3 H 5 Note 1: Label issue from Barcode Printer or Data send to PC only when [PRINT] key is depressed can be set at SPEC 19 bit 0. - 22 - DI-80 USER MANUAL... - Page 23 0. 0 0 0 PLU Auto Clear after remove all weight from platter, can be set at SPEC 28 bit 0 and the condition is depending on SPEC 28 bit 2 & bit 1 setting. - 23 - DI-80 USER MANUAL...
- Page 24 0 0 0 0 2 5 0 0 Note 1: Label issue for Barcode Printer or Data send to PC only when [PRINT] key is depressed can be set at SPEC 19 bit 0. - 24 - DI-80 USER MANUAL...
- Page 25 PLU auto clear after remove all weight from platter, can be set at SPEC 28 bit 0 and the 2 5 0 0 condition is depending on SPEC 28 bit 2 & bit 1 setting - 25 - DI-80 USER MANUAL...
-
Page 26: Multiple Items Transaction
( S U S ) M 9 x 1 Note 1: Label issue from Barcode Printer or Data send to PC only when [PRINT] key is depressed can be set at SPEC 19 bit 0. - 26 - DI-80 USER MANUAL... - Page 27 ( S U S ) M 9 x 1 11. Place 5kg of the product on the platter. 5. 0 0 0 S E M ( S U S ) M 9 x 1 - 27 - DI-80 USER MANUAL...
- Page 28 0. 0 0 0 PLU auto clear after remove all weight from platter, can be set at SPEC 28 bit 0 and the condition is depending on SPEC 28 bit 2 & bit 1 setting. - 28 - DI-80 USER MANUAL...
- Page 29 0 0 0 0 5 0 0 0 0 Note 1: Label issue for Barcode Printer or Data send to PC only when [PRINT] key is depressed can be set at SPEC 19 bit 0. - 29 - DI-80 USER MANUAL...
- Page 30 Mode can be set at SPEC 32 bit 1. 1 0 0 0 11. Place 1kg of the product on the platter. 1. 0 0 0 1 0 0 0 1 0 0 0 0 - 30 - DI-80 USER MANUAL...
- Page 31 0. 0 0 0 PLU auto clear after remove all weight from platter, can be set at SPEC 28 bit 0 and the condition is depending on SPEC 28 bit 2 & bit 1 setting. - 31 - DI-80 USER MANUAL...
-
Page 32: Switching Platform
2 0. 0 0 0 0 0 0 1 0 0 0 0 5. Press [+] key. t o t A L Q U A N T I T Y 1 0 0 0 0 - 32 - DI-80 USER MANUAL... - Page 33 0. 5 0 0 return to Counting Mode. 0 0 0 0 2 5 0 11. Remove the product from Scale 1 and press [C] key to clear the PLU. 0. 0 0 0 - 33 - DI-80 USER MANUAL...
-
Page 34: Unit Weight Operation
10pcs of product on the platter but the Insufficient lamp is "ON", so add few pieces product (Ex. 3pcs) on the platter until Insufficient lamp is "OFF". Enter [1] [3] and then press [Pcs] key to compute the unit weight of the samples]. - 34 - DI-80 USER MANUAL... - Page 35 To print next receipt, press 2. 0 0 0 [ ] key again, if not, remove the product from platter and then press [C] key to clear the 2 0 0 Unit Weight. - 35 - DI-80 USER MANUAL...
-
Page 36: Clearing Unit Weight
2 0 0 . 2. Remove the product from platter and press [C] key to clear the Unit Weight data. 0. 0 0 0 If PLU is called up, PLU data will clear when press [C] key. - 36 - DI-80 USER MANUAL... -
Page 37: Re-Computing Unit Weight In Memory
The display will show ----- for a second. 0 1 6 0 5. Recall up the PLU No. 123. The Unit Weight will change from 2.0000 to 2.0160. 0. 0 2 0 0 1 6 0 - 37 - DI-80 USER MANUAL... -
Page 38: General Set Point Setting
4, enter the data and press [SET POINT] key to save. 5 0 0 > < 1 . 0 0 0 Set Point not show on Sub - Displays can be set at SPEC 00 bit 0. - 38 - DI-80 USER MANUAL... -
Page 39: Checker Output
Note 1: Buzzer On when weight is within SP-1 and SP-2 or outside SP-1 and SP-2 can be set at SPEC 17 bit 2. Buzzer On Delay Function when weight < SP-1 when SPEC 17 bit set to "1" can be set at SPEC 02 bit 3, bit 2 & bit 1. - 39 - DI-80 USER MANUAL... -
Page 40: Counting Mode
Note 1: Buzzer On when weight is within SP-1 and SP-2 or outside SP-1 and SP-2 can be set at SPEC 17 bit 2. Buzzer On Delay Function when weight < SP-1 when SPEC 17 bit set to "1" can be set at SPEC 02 bit 3, bit 2 & bit 1. - 40 - DI-80 USER MANUAL... -
Page 41: Holding Function
Press [ ] key to printout the peak value if you want ([+] or [-] key is not available when no weight on the platter). 4. After about 10 seconds, display will return to normal. 0. 0 0 0 - 41 - DI-80 USER MANUAL... -
Page 42: Counting Mode
5. After about 10 seconds, display will return to normal. PLU Auto Clear after return 0. 0 0 0 to normal if SPEC 28 bit 0 set to "1" in advance. 0 0 0 0 - 42 - DI-80 USER MANUAL... -
Page 43: Inventory Operation
[ ] key to store the data to Inventory IN. 5. Remove the product from platter and press [C] key to clear the PLU. 0. 0 0 0 IN lamp will automatically clear. - 43 - DI-80 USER MANUAL... -
Page 44: Total Transaction
5. Press [C] key to exit from Total Mode. Auto exit from Add. Mode 5. 0 0 0 can be set at SPEC 32 bit 1. 0 0 0 0 5 0 0 0 - 44 - DI-80 USER MANUAL... - Page 45 0 0 0 0 1 0 0 0 0 11. Remove the product from platter and press [C] key to clear the PLU. 0. 0 0 0 OUT lamp will automatically clear. - 45 - DI-80 USER MANUAL...
-
Page 46: Weight Unit Switching
3. Press [UNIT SWITCH] key again to switch back the previous weight unit. 2. 0 0 0 Note: Increment conversion 1) dwt Scale 4) kg Scale 2) g Scale 5) lb Scale 3) oz Scale - 46 - DI-80 USER MANUAL... - Page 47 PROGRAM MODE Item Memory DI-80 series has 1000 item memory (can be expanded to 2000 item memory as factory option). Item code consists of the following data. Parameter Character Data Length Item Code Numeric or 12 or 16 letters Note: *1) Alphanumeric Parts No.
- Page 48 5.1a Alphanumeric Data Entry Alphanumeric data can be programmed to Item no., parts no, parts name. You may select the data entry by ASCII code or TERAOKA entry (two digit numeric data) by internal spec selection. ASCII CODE ENTRY by ASCII code P 16 SCREW:CROMATE23_ ASCII DISPLAY: Shows that entry is by ASCII.
- Page 49 TERAOKA CODE ENTRY Data can be entered by TERAOKA character code. P 16 SCREW:CROMATE23_ TERAOKA DISPLAY: Shows that entry is by PARAMETER TERAOKA CODE. NAME: POSITION OF CURSOR: These two digits shows P: Parts Name the position of cursor. [ + ] and [ - ], to move cursor n: Parts No position.
- Page 50 5.1b Item Programming 1. Go to program mode. [MODE] + [RE- ZERO] ProG P L U C O U Insuff Recom In Out Hold Mem Prog S 1 S2 Note) Press [MODE] key while pressing [RE-ZERO] key. Note) The 2 display shows the number of items that exist in memory.
- Page 51 ∼ 5. Enter inventory quantity and [ 1 ], [ 5 ], press [GROSS] key. [ 0 ], [ 0 ], [GROSS] 0,056 i.e.1500pcs Insuff Recom In Out Hold Mem Prog S 1 S2 6. Press [ - ] key to enter [ - ] parts no.
- Page 52 10. Press [ + ] key to enter [ + ] setpoint data. Insuff Recom In Out Hold Mem Prog S 1 S2 11. Enter Setpoint 1 and press [ 3 ], [ 5 ], [ + ] key. [ 0 ], [ + ], i.e.
- Page 53 5.2 Memory Edition and Deletion 5.2a Delete and edit a certain Item Code 1. Go to program mode. [MODE] + [RE- ZERO] ProG P L U C O U Insuff Recom In Out Hold Mem Prog S 1 S2 Note) Press [MODE] key while pressing [RE-ZERO] key. Note) The 2 display shows the number of items that exist in memory.
- Page 54 5.2b Erase all Item data in memory 1. Go to program mode. [MODE] + [RE- ZERO] ProG P L U C O U Insuff Recom In Out Hold Mem Prog S 1 S2 Note) Press [MODE] key while pressing [RE-ZERO] key. Note) The 2 display shows the number of items that exist in memory.
- Page 55 5.3 Review Item Code already in Memory 1. Go to program mode. [MODE] + [RE- ZERO] ProG P L U C O U Insuff Recom In Out Hold Mem Prog S 1 S2 Note) Press [MODE] key while pressing [RE-ZERO] key. Note) The 2 display shows the number of items that exist in memory.
- Page 56 5.4 Date and Time 1. Go to program mode. [MODE] + [RE- ZERO] ProG P L U C O U Insuff Recom In Out Hold Mem Prog S 1 S2 Note) Press [MODE] key while pressing [RE-ZERO] key. Note) The 2 display shows the number of items that exist in memory.
- Page 57 6. Enter the day of the week. [ 4 ] EntEr D A Y i.e. Friday Insuff Recom In Out Hold Mem Prog S 1 S2 Note) one digit numeric data represents the day of the week as following table. Number Day of Week Number...
- Page 58 Reset Sequence Number to 0 1. Go to program mode. [MODE] + [RE- ZERO] ProG P L U C O U N T Insuff Recom In Out Hold Mem Prog S 1 S2 Note) Press [MODE] key while pressing [RE-ZERO] key. Note) The 2 display shows the number of items that exist in memory.
- Page 59 APENDIX I (LIST OF ASCII CODE) Code Chara. Code Chara. Code Chara. Code Chara. Code Chara Code Char Space 30 “ & ’ < ∼ >...
- Page 60 APENDIX II (LIST OF TERAOKA CODE) Code Chara. Code Chara. Code Chara. Code Chara. Code Chara. Space “ & ‘ Æ Ä Ø Ö Ã Ê Á...
Need help?
Do you have a question about the DI-80 and is the answer not in the manual?
Questions and answers