
Related Manuals for Digi SM-720


Summary of Contents for Digi SM-720
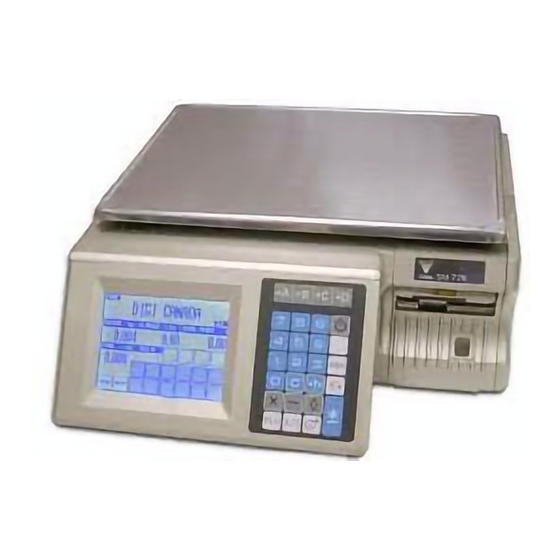
- Page 1 SERVICE MANUAL DIGITAL COMPUTING PRINTING SCALE SM-720 Edition 5 COPYRIGHT © 2006 TERAOKA WEIGH-SYSTEM PTE LTD...
-
Page 2: Table Of Contents
Operating Specification ..........................7 Type of Interface ............................7 Main Components ............................7 OVERVIEW ..............................9 2.1 Dimension (in mm) ............................9 2.1.1 SM-720 DP ............................9 2.1.2 SM-720 EB ............................9 2.1.3 SM-720 EV ............................10 2.1.4 SM-720 TDP............................10 2.1.5 SM-720 TEB ............................11 2.1.6 SM-720 TEV ............................11 2.1.7 SM-720 H ............................12... - Page 3 8.9 Hanging Type Front & Rear Display Disassembly..................71 9. FIRMWARE UPGRADE ..........................72 9.1 Bootloader Downloading ...........................72 9.2 Firmware Downloading..........................75 10. WIRELESS LAN KIT INSTALLATION AND WLAN CONFIGURATION ............79 10.1 SM-720 Standard Machine ........................79 10.1.1 Internal Wireless Kit Installation ....................79 10.1.2 External Wireless Kit Installation ....................81...
- Page 4 10.2 SM-720 Touch Screen Machine......................83 10.2.1 Wireless LAN Kit Installation ......................83 10.2.2 RF Bridge Configuration Setup .....................84 10.3 SM-720 Hanging Scale ...........................86 10.3.1 SM-720 Hanging WLAN Installation Sheet ...................86 10.3.2 Hanging Scale WLAN Bridge Configuration..................89 11. MISCELLANEOUS............................90 11.1 Error Messages ............................90 11.2 Corresponding Key Of PS2 Keyboard ....................93...
-
Page 5: I) Notice
Notice DIGI ® The material contained in this document is proprietary and for information only and is subject to change without notice. Teraoka Weigh-System assumes no responsibility for any errors or damages arising from misinterpretation of any procedure. Screen displays, operating procedures and supporting features might vary with different software version releases. -
Page 6: Ii) Safety Information
ii) Safety Information The operator of the equipment shall comply with the safety and warning indications and procedures outlined in this document. Teraoka Weigh-System Pte Ltd assumes no responsibility or liability for failure to comply with these requirements. • To avoid electric shock, use only the supplied power cords and ensure product is connected to a properly grounded supply. -
Page 7: Iii) Safety Regulations
iii) Safety Regulations Federal Communication Commission Interference Statement This equipment has been tested and found to comply with the limits for a Class B digital device, pursuant to Part 15 of the FCC Rules. These limits are designed to provide reasonable protection against harmful interference in a residential installation. -
Page 8: General
SM720 Service Manual Edition 5 1. GENERAL Model Specification Model SM-720 Description: Type: Dimension: Variation Dual Pole SM-720 DP 497(L) x 404(W) x 589(H) Economic SM-720 EB 430(L) x 404(W) x 177(H) Bench Elevated SM-720 EV 404(L) x 397(W) x 658(H) Touch... -
Page 9: Operating Specification
SM720 Service Manual Edition 5 D) Speed For Label Up to 150 mm / sec For Receipt Up to 150 mm / sec Note: For Best Speed and Printing Resolution, use Ricoh paper, 150LAB Memory Capacity 2MB (Standard), 10MB (Max.) Memory Extension 8MB (Optional) Board... - Page 10 SM720 Service Manual Edition 5 control two DC motor. 3 RS232 Drv AX3232. It’s a device consists of two line driver, two receiver, and a dual change-pump circuit (M/B-U18) with +-15kv ESD protection pin to pin. 4 Controller H8/3024F. It’s a high-performance single-chip microcomputer that integrates peripheral functions necessary y for system configuration with an H8/300H CPU feature a 32- (CPU BD-U1) bits internal architecture as its core.
-
Page 11: Overview
SM720 Service Manual Edition 5 2. OVERVIEW 2.1 Dimension (in mm) 2.1.1 SM-720 DP 2.1.2 SM-720 EB... -
Page 12: Tdp
SM720 Service Manual Edition 5 2.1.3 SM-720 EV 2.1.4 SM-720 TDP... -
Page 13: Teb
SM720 Service Manual Edition 5 2.1.5 SM-720 TEB 2.1.6 SM-720 TEV... - Page 14 SM720 Service Manual Edition 5 2.1.7 SM-720 H Note: This dimension is using 72mm Printer. 2.1.7 SM-720 BS...
-
Page 15: Key Sheet Layout
SM720 Service Manual Edition 5 2.2 Key sheet Layout 32 Preset Keys 56 Preset Keys 100 Preset Keys... - Page 16 SM720 Service Manual Edition 5 Symbol Key Panel Standard Key Panel ON / OFF KEY * Turn display ON or OFF. NUMERIC KEYS * Enter numeric data. TARE KEY * Set or Clear Tare Value. * Select " NO " in S and Z Mode. * Item Test print in S Mode.
- Page 17 SM720 Service Manual Edition 5 CHANGE KEY * Calculate the Changed Amount. * Escape the Programming screen without saving data in S mode. MULTIPLE KEY * Register the number of Non-Weight products. * Select programming item such as PLU data, Shop Name in S mode.
-
Page 18: Panel Layout
SM720 Service Manual Edition 5 PRESET KEYS * Call up Preset data such as PLU Data or Function Data in Reg. Mode. * Enter Alphabetic data in Program Mode. Note: The following Preset Keys are used in entering Alphabetic (Pole Type). Move the Move the Code type... - Page 19 SM720 Service Manual Edition 5 Lights when the amount of change is being displayed. Lights when label or receipt paper ends. Lights when REGISTRATION Mode is selected. Lights when CHECK Mode is selected. Light when PROGRAM Mode is selected. Lights when TOTAL Mode is selected. Lights when Sales Data is in Memory for CLERK 9995.
-
Page 20: Span Switch
SM720 Service Manual Edition 5 3. SPAN SWITCH 3.1 Span Switch Jumper Setting Changing Procedure Interface Bottom Board Cover Cable 1. Bottom View of Machine. 2. Loosen the 4pcs SEMS B 3. Loosen the 2pcs Truss Head screw M4X6, then open the screw M4X6, and disconnect Bottom Cover. -
Page 21: Initial Setup
SM720 Service Manual Edition 5 4. INITIAL SETUP 4.1 Pole, Bench and Elevated Type 4.1.1 Scale Assembly 4.1.1.1 Display Pole Kit Mounting 1. Place the display Pole inside the pole bottom (base AB) 2. Align the four holes of the display pole and tighten screw Flat Head M4x16 (4pcs). - Page 22 SM720 Service Manual Edition 5 KEY TO PRESS OPERATION -- Select scale type. Scale Type: 0: Pole 6 Kg 1: Pole 15 Kg -- Select scale type. 2: Pole 30 Kg & 3: Pole 30 Lb 4. Bench 6 Kg Then 5: Bench 15 Kg -- To set the scale type.
- Page 23 SM720 Service Manual Edition 5 Key to press Operation -- Process of initialize. If Yes -- Then go to segment check. PLEASE WAIT Key to press Operation -- Go to segment check. If No SM720 VER 29.XXX Default Country Specification Method 2: Key to press Operation -- Show current country SPEC then default...
- Page 24 SM720 Service Manual Edition 5 KEY TO PRESS OPERATION -- Select label length. Label Length: 0: Short Label length up to -- Select label length. maximum 120mm. & 1: Long Then Label length up to -- To set the label length. maximum 240mm SELECT LABEL LENGTH 0 SHORT...
-
Page 25: Calibration
SM720 Service Manual Edition 5 4.1.3 Calibration Key to press Operation -- Go to Z mode In the Weighing Mode, press then turn On the Span Switch. TO CLEAR DAILY TRANSACTION PRESS PRINT KEY MODE KEY TO PRESS OPERATION -- Access code to calibration mode. [8] [7] [1] [5] REMOVE ALL WT. -
Page 26: User Spec Setup Procedure
SM720 Service Manual Edition 5 4.1.4 User Spec Setup Procedure To Change the setting of the User SPEC, if there is some SPEC need to alter. KEY TO PRESS OPERATION -- Go to Z mode. In the Weighing Mode, press then turn On the Span Switch. - Page 27 SM720 Service Manual Edition 5 KEY TO PRESS OPERATION -- Increase the SPEC number without saving data of the previous SPEC number. SP2 : RIGHT SIDE PRICE DATA OF ITEM BARCODE 0: BEFORE TAX 1: AFTER TAX KEY TO PRESS OPERATION -- Decrease the SPEC number without saving data of the previous SPEC number.
-
Page 28: Weigh & Measurement Spec Setup Procedure
SM720 Service Manual Edition 5 4.1.5 Weigh & Measurement Spec Setup Procedure To Change the setting of the Weight & Measurement SPEC, if there is some SPEC need to alter. KEY TO PRESS OPERATION -- Go to Z mode In the Weighing Mode, press then turn On the Span Switch. - Page 29 SM720 Service Manual Edition 5 KEY TO PRESS OPERATION -- Increase the SPEC number without saving data of the previous SPEC number. SP602: DISPLAY TYPE 0: SINGLE DISPLAY ROW 1: THREE DISPLAY KEY TO PRESS OPERATION -- Decrease the SPEC number without saving data of the previous SPEC number.
-
Page 30: Touch Pole, Touch Bench And Touch Elevated Type
SM720 Service Manual Edition 5 4.2 Touch Pole, Touch Bench and Touch Elevated Type 4.2.1 Default Country Spec Setting Procedure Picture 1) Touch and hold the “Corner Side” of touch screen panel, then switch power “ON” the scale. Note: Ensure Span Switch is set in “On” position 2) Select Countries of scale and touch [Save]. -
Page 31: Calibration
SM720 Service Manual Edition 5 4.2.2 Calibration Procedure Picture 1) In Operation Mode, touch [8] [7] [1] [5] key button and go to [Weight Calibration] screen. Note: Ensure Span Switch is set to [Enable]. 2) In [Weight Calibration] mode, remove all weight from platter and then touch [Start]. -
Page 32: User Spec Setup Procedure
SM720 Service Manual Edition 5 4.2.3 User Spec Setup Procedure To Change the setting of the User SPEC, if there is some SPEC need to alter. Procedure Picture 1) In [Operation Menu] mode, touch [User Setup] icon. 2) Touch [Yes]. 3) The Spec Setup screen will display and touch the “Square”... - Page 33 SM720 Service Manual Edition 5 3) Touch [Communication]. 4) In “Communication Specs” mode, touch [Client/Server Setting]. 5) In “Client/Server Setting” mode, touch the [IP Address]. 6) Set the [IP Address] and then touch [Exit] to go to “Spec Setting Menu”. Example: 192.168.0.15 7) In Spec Setting menu, touch [SAVE] to save change setting.
-
Page 34: Hardware Testing & Maintenance
SM720 Service Manual Edition 5 5. HARDWARE TESTING & MAINTENANCE 5.1 For Pole, Bench and Elevated Type 5.1.1 Hardware Testing KEY TO PRESS OPERATION -- Go to Z mode In the Weighing Mode, press TO CLEAR DAILY TRANSACTION PRESS PRINT KEY MODE MODE 5.1.1.1 RAM Read and Write Test... -
Page 35: Sio Loop Back Test
SM720 Service Manual Edition 5 5.1.1.2 SIO Loop Back Test KEY TO PRESS OPERATION -- Testing the RS232 port. -- Please plug in the connector on the RS232C port before proceed. (The test result is show at below). HARDWARE TESTING SIO LOOP BACK TEST CONGRATULATION! THE TEST IS SUCCESSFUL HARDWARE TESTING... -
Page 36: Internal Count
SM720 Service Manual Edition 5 Then KEY TO PRESS OPERATION -- Go to Hardware Testing Mode again HARDWARE TESTING RAM READ / WRITE Testing In Progress… After that KEY TO PRESS OPERATION -- Exit to Z mode. TO CLEAR DAILY TRANSACTION PRESS PRINT KEY MODE Remarks:... -
Page 37: Span Switch Status
SM720 Service Manual Edition 5 5.1.1.6 Span Switch Status KEY TO PRESS OPERATION -- Go to Z mode. -- Then turn on the Span Switch. In the Weighing Mode, press TO CLEAR DAILY TRANSACTION PRESS PRINT KEY MODE KEY TO PRESS OPERATION -- Indicates SPAN Switch status. -
Page 38: Peel Sensor
SM720 Service Manual Edition 5 5.1.2.3 Peel Sensor To set the peel sensor voltage if the peel sensor is not working normally in some situations like temperature and humidity changed. The peel sensor voltage can be set automatically by press the # key. KEY TO PRESS OPERATION -- At R mode. -
Page 39: Printing Position
SM720 Service Manual Edition 5 5.1.2.4 Printing Position To adjust the printing position when printing is out of alignment. The process only allows adjusting vertical position only. KEY TO PRESS OPERATION -- At R mode. 0,000 0,000 0,00 0,00 KEY TO PRESS OPERATION -- Go to Thermal Head calibration. -
Page 40: For Touch Pole, Touch Bench And Touch Elevated Type
SM720 Service Manual Edition 5 5.2 For Touch Pole, Touch Bench and Touch Elevated Type 5.2.1 Hardware Testing 5.2.1.1 Memory (RAM) Test Procedure Picture 1) In [Operation Menu] mode, press and hold [Re-zero] and press [0][8][9][3] to go to [Maintenance Screen]. 2) Touch [Self Diagnostic] to go to self diagnostic mode. -
Page 41: Sio Loop Back Test
SM720 Service Manual Edition 5 5.2.1.2 SIO Loop Back Test Connect RS232 Loop Back jig to scale. TEST JIG CONNECTOR for SIO Port Connect pin 4 and pin 5 Procedure Picture 1) In [Operation Menu] mode, press and hold [Rezero] and press [0] [8] [9] [3] to go to [Maintenance Screen]. -
Page 42: Rs485 Loop Back Test
SM720 Service Manual Edition 5 5.2.1.3 RS485 Loop Back Test Connect RS-485 Loop Back jig to scale. TEST JIG CONNECTOR for 4 LINE RS485 Port Connect pin 1 and pin 3 Connect pin 2 and pin 4 Procedure Picture 1) In [Operation Menu] mode, press and hold [Re-zero] and press [0] [8] [9] [3] to go to [Maintenance Screen]. -
Page 43: Internal Count
SM720 Service Manual Edition 5 5.2.1.4 Internal Count Procedure Picture 1) In [Operation Menu] mode, press and hold [Re-zero] and press [0][0][9] to go to Internal Count Mode. Note: Ensure Span Switch is [Enable]. 2) Internal Count mode. -
Page 44: Adjustment
SM720 Service Manual Edition 5 5.2.2 Adjustment 5.2.2.1 Peel Sensor setting Procedure Picture 1) In [Operation Menu] mode, press and hold [Re-zero] and press [0][8][9][3] to go to [Maintenance Screen]. 2) Touch [Self Diagnostic] to go to self diagnostic mode. 3) In Self Diagnostic mode, press arrow key to scroll down menu, then press [Printer Sensor]. -
Page 45: Gap Sensor Setting
SM720 Service Manual Edition 5 5.2.2.2 Gap Sensor setting Procedure Picture 1) In [Operation Menu] mode, press and hold [Re-zero] and press [0] [8] [9] [3] to go to [Maintenance Screen]. 2) Touch [Self Diagnostic] to go to self diagnostic mode. 3) In Self-Diagnostic mode, press arrow key to scroll down menu, and then press [Gap Sensor]. -
Page 46: Label Printing Layout Setting
SM720 Service Manual Edition 5 6) Press and hold [Re-zero] and press [5][1][6] to adjust “Gap Sensor Voltage” Note: Ensure the “Gap Sensor Voltage” without Cassette & Label is [0.2 Volt] by adjusting VR1 at gap sensor board in Printer Kit. 7) Re-insert Cassette to printer and then press [Feed] key to Auto Detect Setting and press [PLU] key. -
Page 47: Date And Time Setting
SM720 Service Manual Edition 5 5.2.2.4 Date And Time Setting Procedure Picture 1) In [Operation Menu] mode, touch [Program] to go to Programming Mode. 2) In [Programming Mode], touch [Date & Time]. 3) Press “Number” key button and then touch the inside box line of Date/Time to insert number. -
Page 48: Maintenance
SM720 Service Manual Edition 5 6. MAINTENANCE 6.1 Thermal Head Cleaning To maintain good quality printouts and long life span for the thermal print head, regular cleaning of the thermal print head is required. Please use the cleaning kit supplied with the product. Instruction 1. -
Page 49: Basic Maintenance
SM720 Service Manual Edition 5 4. Use the tip of the Cleaning Tool to clean the Thermal Head portion as shown: Thermal Head Cleaning Tool CAUTION Use only the cleaning pen from the provided cleaning kit Do not clean or try to remove dirt or anything sticking on thermal head with sharp objects – this will DAMAGE the thermal print head. -
Page 50: Thermal Head Cleaning And Replacement
SM720 Service Manual Edition 5 6.3 Thermal Head cleaning and replacement SM720 Printer Front Printer Head Handle Printer Side Door Door 1. Open the Printer Side Door. 2. Press on the top of Printer 3. Push the Printer Head Handle to Front Door and pull out the cover up for Printer Head in upper toward in front. -
Page 51: Mainboard Jumper Setting For Different Display Type
6.4 Mainboard Jumper Setting for Different Display Type There are 4 types of LCD using in SM-720 scale, below are the jumper setting for 4 different type of LCD using in the scale. If the jumper setting wrongly set, the displays will not function or not working properly. -
Page 52: Procedure Of Linerless Machine Conversion
SM720 Service Manual Edition 5 6.6 Procedure of Linerless Machine Conversion... - Page 53 SM720 Service Manual Edition 5...
-
Page 54: Method Of Assembly Sealing Screw & Sticker
SM720 Service Manual Edition 5 6.7 Method of Assembly Sealing Screw & Sticker 6.7.1 For All Machine except Console Type SM-720 SEALING METHOD (ALL VARIANT MODELS) -
Page 55: For Hanging Type
SM720 Service Manual Edition 5 6.7.2 For Hanging Type SM-720 HANGING SEALING METHOD... -
Page 56: For Console Type
SM720 Service Manual Edition 5 6.7.3 For Console Type SM-720 WITH EXTERNAL LOADCELL SEALING METHOD (ALL VARIANT MODELS) -
Page 57: Exploded View
SM720 Service Manual Edition 5 7. EXPLODED VIEW 7.1 Pole Type ASSY AA (PLATER SUPPORT) PLATTER SUPPORT ASSY TOP COVER KEYBOARD ASSY POLE DISPLAY ASSY FRONT DOOR ASSY SUPPORT AA (LC DIECAST TOP) SWITCHING PS TZD200/JA ELEC BLK (SM300 A/D-1) LOADCELL (NMB C2G1-30K-S23) ELEC BLK (SM500V2 AC PWR) PRINTER KIT... -
Page 58: Bench Type
SM720 Service Manual Edition 5 7.2 Bench Type ASSY AA (PLATER SUPPORT) PLATTER SUPPORT ASSY TOP COVER KEYBOARD ASSY FRONT DOOR ASSY SUPPORT AA DISPLAY ASSY (LC DIECAST TOP) SWITCHING PS TZD200/JA ELEC BLK (SM300 A/D-1) LOADCELL (NMB C2G1-30K-S23) ELEC BLK (SM500V2 AC PWR) BRACKET AB PRINTER KIT (FRONT COVER) -
Page 59: Hanging Type
SM720 Service Manual Edition 5 7.3 Hanging Type BRACKET AJ (LEVEL) CASSETE ASSY LEVEL ASSY A-1 INTERFACE ASSY PRINTER DOOR ASSY BRACKET AK (CASSETTE) COVER AA (H-DOME) PRINTER ASSY HOOK ASSY BRACKET BG (LCD COVER) BRACKET AS (SPAN SWITCH) REAR COVER ASSY BRACKET AG (FRAME PRT WALL) ELEC BLK (SM300 A/D-1) -
Page 60: Disassembly
SM720 Service Manual Edition 5 8. DISASSEMBLY 8.1 Pole Type Disassembly Screw Type: 101- Flat Head M4X16 (4pcs) 102- Sems B M4X10 (4pcs) 103- Flat Head M3X5 (3pcs) 104- Truss Head M4X6 (2pcs) - Page 61 SM720 Service Manual Edition 5 112 112 Screw Type: 105- Sems B M4X8 (2pcs) 106- Sems B M3X8 (2pcs) 107- Flat Head M4X16 (1pcs) 108- Truss Head M4X16 (4pcs) 109- Sems B M4X6 (2pcs) 110- Sems B M3X6 (4pcs) 111- Binding Head M3X8 (2pcs) 112- Allen Cap M6X20 (4pcs)
- Page 62 SM720 Service Manual Edition 5 Ground Wire Screw Type: 113- Sems B M4X8 (2pcs) 114- Sems B M4X6 (4pcs) 115- Sems B M4X12 (3pcs)
-
Page 63: Pole And Bench Ad Board Disassembly
SM720 Service Manual Edition 5 8.2 Pole and Bench AD Board Disassembly Loadcell wire color indication Green Blue White Black Screw Type: 101- Sems B M3X6 (2pcs) To remove the AD Board, solder out the Loadcell wire and then unscrew the 2pcs Sems B M3X6 screw. -
Page 64: Pole And Bench Load-Cell Disassembly
SM720 Service Manual Edition 5 8.3 Pole and Bench Load-cell Disassembly Support AA Loadcell Screw Type: 101- Allen Cap M4X20 (4pcs) To remove the Support AA from Loadcell, unscrew the 2pcs Allen Cap screw M4X20 from Top. To remove the Loadcell from Base Diecast, unscrew the 2pcs Allen Cap screw M4X20 from Bottom. -
Page 65: Pole Display Disassembly
SM720 Service Manual Edition 5 8.4 Pole Display Disassembly LCD W/CCFL 5399FB 12AXLCD05399FB Case BH (800LCD, Y033) 44011602303400 Cover BP Screw Type: (Pole Bottom) 101 – Truss Head M4x10 102 – Flat Head M3x10 103 – Washer (A)-4 104 – Binding Head M3x6 105 –... -
Page 66: Extra Bracket Disassembly For 30Kg
SM720 Service Manual Edition 5 8.6 Extra Bracket Disassembly for 30Kg Bracket EE (30Kg, Base Top) Bracket EF (30Kg, Base Bottom) Screw Type: 101- M4 X 12 Sems B 1. To assembly the Bracket EE (30KG, Base Top) tighten 1pcs Sems B screw M4x12 from Top. 2. -
Page 67: Hanging Type Disassembly
SM720 Service Manual Edition 5 8.7 Hanging Type Disassembly Sub ASSY Bracket BX Cover AJ (H-DOME) & Bracket BY 44013502801000 PAN AC (DI 350MM) 44010406500300 Screw Type: 101 – Axis AE 102 – Flat Head M3x8 Bracket BN (Triangle) 44013501804000... - Page 68 SM720 Service Manual Edition 5 Catch to Binding Head Cover AD (H-PRTCOVER) 44013502800403 Cover AB (H-SIDE) 44013502800200 – (Gray) 44013502801100 – (Blue) Front View Rear View BKT AD (SM500H Rear) 44013501800404 102 102 Screw Type: 101 – SEMS B M3x6 102 –...
- Page 69 SM720 Service Manual Edition 5 SM500 1MB ETHT M/B KIT 0EX00401160002 TWB-01750-0 (SM500V2 ETH/RS485) 22TWB100017500 Bracket AP (Printer Base) Bracket AM (Wire/Supp) 44013501801600 44013301801300 Bracket AM (Wire/Supp) 44013301801300 101 101 Insulator AD (I/F Bottom) 44011604800400 ELEC BLK (SM300 A/D-1) 44012490910400 Screw Type: 101 –...
- Page 70 SM720 Service Manual Edition 5 101 101 Joint AA (671) 44013004900101 Spring AA Bracket AN (Base plate) 44010408300100 440135018014XX Joint AA 41012404900103 Axis AA (DS671H) 41012401300103 ELEC BLK (SM500H CLCD PWR, EC) 44011690904900 WELASSY AA (Hook Top) 44013050200102 Bracket BP (Hook Support) 44013501804200 BKT BD (SM500H Power) 44013501803000...
- Page 71 SM720 Service Manual Edition 5 Bracket AE (Frame Top) 44013501800502 Bracket AF (Load Center) Bracket AM (Col Main) 44013501800601 44013501801301 Bracket AK (Load Support) 44013501801101 LOADCELL Blk AB (15 KG) 44012460200200 Bracket AG (Frame PRT Wall) 44013501800701 Bracket BG (LCD Cover) 44013501803300 Bracket AM (Top Support) 44013001801302...
- Page 72 SM720 Service Manual Edition 5 Bracket AM (Col Main) 44013501800502 BKT BA (SM500H M/B) 44013501802700 Bracket AJ (Fan) Bracket AZ (Tunnel) 44013501801000 44013501802601 Screw Type: 101 – SEMS B M3x8 102 – SEMS B M3x6...
-
Page 73: Hanging Type Keyboard Disassembly
SM720 Service Manual Edition 5 8.8 Hanging Type Keyboard Disassembly PCB TW1231-0 (56 Preset Key) 22TWB000012310 Screw Type: 101 – SEMS B M3x6 102 – PAKKIN (A)-1 8.9 Hanging Type Front & Rear Display Disassembly LCD 5375 FNPWTNH WELASSY AF (FRONT) BKT AD (SM500H REAR) 12AWCD05375FKP 44013550200601... -
Page 74: Firmware Upgrade
SM720 Service Manual Edition 5 9. FIRMWARE UPGRADE 9.1 Bootloader Downloading The software use for Boot loader downloading to scale is Flash Development Toolkit 3.1. 1. PC to scale via RS232C interface. RS232 Cable Procedure Picture 1) Double click open the [Flash Development Toolkit 3.1] software. 2) When Option icon appears, click the [Cancel]. - Page 75 SM720 Service Manual Edition 5 4) Click the [bootloader23MH.mot] file from the location where you put and then click the [Open]. 5) From the Option Menu select the [Device] [Configure Flash Project]. 6) Click the to select the device [H8/3024F]. 7) Click the to select the port [COM1], then click the 8) In the CPU crystal frequency for selected device, change the default...
- Page 76 SM720 Service Manual Edition 5 9) Click the 10) From the Option Menu select [Device] [Download Active File]. 11) After boot loader downloading finish, on the screen will shown [Main kernel download complete… Connection Complete]. Note: Ensure that after downloading completed, must change back the Mainboard [SW 1] jumper setting.
-
Page 77: Firmware Downloading
SM720 Service Manual Edition 5 9.2 Firmware Downloading The software use for firmware downloading to scale is Hyper Terminal. 1. PC to scale via RS232C interface. 2. Plug in the Power Cord connect to Scale. (Don’t on the power first) RS232 Cable Procedure Picture... - Page 78 SM720 Service Manual Edition 5 4) In the Hyper Terminal software to select [File] [Properties] to open the properties setting. 5) Go to Settings Option use the button to change the setting follow by below highlight as shown. Emulator: ANSIW Telnet terminal ID: VT100 Click the [OK] button to exit and go to downloading page.
- Page 79 SM720 Service Manual Edition 5 a) After next step on the screen shown “Enter erase end address as a 32-bit hex value e.g. AABBCC”. b) Type in number & character [00beffff], it will shown the information of Confirm erase block (Y/N). c) Press the [Y] keyboard button, it will automatically to start erase the blocks data.
- Page 80 SM720 Service Manual Edition 5 12) Select the Software/File where the software/file allocate, and then click the [Open] button. 13) When the screen appear Send File page, click the [Send] button. Note: Ensure the [Protocol] option, using to select [1K Xmodem] 14) The downloading and upgrade the software needs to take time waiting around 15 minutes for process.
-
Page 81: Wireless Lan Kit Installation And Wlan Configuration
1. SM-720 scale 2. Wireless LAN Kit. 3. Screw M3x6 4. Hi Sticker 5. Place the SM-720 scale upside 6. Disconnect the cable, loosen 2 down and loosen 4 screw for screws for remove the I/F Board remove the bottom cover and remove all the screw that tighten main board. - Page 82 SM720 Service Manual Edition 5 10. Connect the wire and retighten 11. Fix and Retighten the bottom 12. Loosen all the screw inside red the I/F Board cover bracket using screw, then circle and take the platter support paste MC ID sticker. 13.
-
Page 83: External Wireless Kit Installation
22. Retighten the all screw (inside 23. Retighten the all screw (inside red circle). red circle). 10.1.2 External Wireless Kit Installation 1. SM-720 scale 2. Wireless LAN Kit. 3. Screw M4x6 4. Hi Sticker 5. Loosen all the screw inside red 6. -
Page 84: Wlan Bridge Configuration Setup
SM720 Service Manual Edition 5 10.1.3 WLAN Bridge Configuration Setup Spec Setting Set Scale Spec by press key while pressing key in Z Mode or R Mode. 1. Press key, press key to select ETHERNET-TWISTED for Spec 49 and press key. -
Page 85: Touch Screen Machine
SM-500V2 Service Manual Edition 5 10.2 SM-720 Touch Screen Machine 10.2.1 Wireless LAN Kit Installation 1. SM-720 scale. 2. Wireless WLAN kit. 3. Clamp A 4. Hi Sticker 5. Remove screw in circle then 6. Then connect the wire from remove Bottom Cover Bracket. -
Page 86: Rf Bridge Configuration Setup
SM-500V2 Service Manual Edition 5 7. Then assemble WLAN kit 8. Connect Antenna wire to WLAN 9. And then paste Antenna on the together with Bottom Cover kit. Then tidy up wire using screw Body of machine as shown to Bracket. - Page 87 SM-500V2 Service Manual Edition 5 12. Touch [EXIT] [EXIT] [SAVE] to save and return to “OPERATION MENU” mode. 13. Touch [YES] to send the configuration to RF Card. 14. After successful, turn OFF scale by main power again. (Note: If unsuccessful, Error message “ETHERNET COMM ERROR” will appear). Wireless Communication Testing 1.
-
Page 88: Hanging Scale
SM-500V2 Service Manual Edition 5 10.3 SM-720 Hanging Scale 10.3.1 SM-720 Hanging WLAN Installation Sheet 1. Pull out the Cover Dome. 2. Remove Bracket BN (Triangle) 3. Rotate Counter clock wise by loosen screw (Red Circle). locking bracket 90 degree as shown. - Page 89 SM-500V2 Service Manual Edition 5 7. Loosen the screw (Red Circle) 8. Take off front cover from main 9. Remove display connector (Red as shown. assy. Circle). 10. Remove all wire from 11. Remove M/B from main assy 12. Assemble WLAN Kit with MainBoard.
- Page 90 SM-500V2 Service Manual Edition 5 WLAN. 16. Re-fix the Mainboard by 17. Connect all wire to the 18. Paste MAC ID Sticker with tightens the screws (Red Mainboard. dimension as shown. Circle). 19. Connect display wire to the 20. Re-fix front cover to the main 21.
-
Page 91: Hanging Scale Wlan Bridge Configuration
SM-500V2 Service Manual Edition 5 22. Tighten the screw. 23. Pull out the pin lock then assy 24. Assemble printer cover. side cover from front direction. 25. Rotate clock-wise locking 26. Assy bracket BN (triangle) by 27. Assemble back dome cover. bracket 90 degrees as shown. -
Page 92: Miscellaneous
SM-500V2 Service Manual Edition 5 11. MISCELLANEOUS 11.1 Error Messages Error No. Error Message Causes PRINTER CASSETTE OPEN Cassette not inserts properly. Re-insert cassette again. PAPER END Label sensor sense no label. No more labels. Replace label roll. PLEASE PRESS FEED KEY Label miss feed, press FEED key to align label. - Page 93 SM-500V2 Service Manual Edition 5 PLEASE PEEL LABEL Peel sensor activated, remove label away from sensor. CHANGE LABEL SWITCH Remove cassette and set cassette switch to Label. CHANGE RECEIPT SWITCH Remove cassette and set cassette switch to Receipt. NON PRINT No manual printing.
- Page 94 SM-500V2 Service Manual Edition 5 LABEL INVALID No such label data. PLU NOT AVAILABLE No such PLU data when scanner is use to scan PLU no. DATA INVALID U1 only. Quantity setting incorrect when using FOR. QUANTITY OVERFLOW Quantity data over the limit. NO LINK No acknowledge from FL-1 when sending or receiving data.
-
Page 95: Corresponding Key Of Ps2 Keyboard
11.2 Corresponding Key Of PS2 Keyboard The PS2 keyboard can directly connect to the SM-720 in the PS2 keyboard port at the bottom of the scale. It can only function when in the S mode (Programming mode). And the PS2 keyboard wire connector must using PS2 connector. -
Page 96: Ascii Characters
The table shown below is the common use of characters of ASCII code in HEX value. Please enter the hex value when entering commodity name, advertisement, shop name, clerk name, special name, ingredient, and text etc. when using the SM-720 BENCH TYPE. -
Page 97: Teraoka Code
The table shown below is the common use of characters of TERAOKA code in numerical value. Please enter the numerical value when entering commodity name, advertisement, shop name, clerk name, special message, ingredient, text etc. when using the SM-720 BENCH TYPE. -
Page 98: Straight & Crossover Ethernet Cable
SM-500V2 Service Manual Edition 5 11.5.1 Straight & Crossover Ethernet Cable Straight cable is for Client / Server connection. Crossover cable is for Hub-to-Hub connection. (Some models of the Hub do not need crossover cable for Hub- to-Hub connection. Please refer to the Hub operation manual if in doubt) Preferable type: CviLux Preferable type: CviLux CJP3 / CviLux CJP4 (with insert bar) CABLE TYPE... -
Page 99: Cash Drawer Option (Rj11)
SCALE / HUB SIGNAL SIGNAL SIGNAL SIGNAL 5,7,8 N.A. N.A. 5,7,8 5,7,8 N.A. N.A. 5,7,8 11.5.2 Cash Drawer Option (RJ11) SM-720 SCLAE SIDE (Interface Board) 4 5 6 1 2 3 Note: This connector is used for Interface Board TWB-01750-1. -
Page 100: Ps2 Keyboard Option
SM-500V2 Service Manual Edition 5 Signal Function Frame Ground DRAWER 1 Drawer 1 drive signal DRSW Drawer Switch Input Drawer Drive Power Supply DRAWER 2 Drawer 2 Drive Signal Common Ground On Circuit 11.5.3 PS2 Keyboard Option PS2 Keyboard Connector (Main Board Side) Signal DATA... -
Page 101: Rs232C And Multi-Drop (4 Line, Rs485) Wire
SM-500V2 Service Manual Edition 5 11.5.4 RS232C and Multi-Drop (4 Line, RS485) Wire Connector Type 9 Pin D-Sub Connector 25 Pin D-Sub Connector Female (Back View) Female (Back View) 9 Pin D-Sub Connector 25 Pin D-Sub Connector Male (Back View) Male (Back View) 8 Pin DIN Plug Male (Front View) - Page 102 SM-500V2 Service Manual Edition 5 Signal Signal PC (25 PIN) TO LCU 401 (For PC to LCU 401 communication) 25 Pin D-Sub (Female) 25 Pin D-Sub (Male) Signal Signal...
- Page 103 SM-500V2 Service Manual Edition 5 SCALE TO SCALE (For LCU 401 to scale and scale-to-scale communication) SM300 / SM80SX / SM90 / SM500 / SM500V2 / SM720 SM300 / SM80SX / SM90 / SM500 / SM500V2 / SM720 9 Pin D-Sub (Male) 9 Pin D-Sub (Male) Signal Signal...
- Page 104 SM-500V2 Service Manual Edition 5 PC (25 PIN) TO SCALE RS232C PORT (For PC and PC FL-1 communication) SM300 / SM80SX / SM90 / SM500 / SM500V2 / SM720 RS232 Port 25 Pin D-Sub (Female) 8 Pin DIN plug (Male) Signal Signal PC (9 PIN) TO SCALE RS232C PORT...
- Page 105 SM-500V2 Service Manual Edition 5 9 Pin D-Sub (Female) 8 Pin DIN plug (Male) Signal Signal...
-
Page 106: Treatment And Recovery Of Weee
Only licensed operators meeting WEEE regulations will be able to handle and recover WEEE. Please contact your DIGI office or DIGI distributor when the product has reached the end of its life. They will advise you regarding the product take-back. - Page 107 SM-500V2 Service Manual Edition 5 Items Identification Removal Comments procedure o Polychlorinated biphenyls (PCB) containing capacitors. Mercury containing components, such as switches or backlighting lamps. Printed circuit boards of mobile phones. Toner cartridges, liquid and pasty, as well as color toner. Plastic containing brominated flame-retardants.
- Page 108 SM-500V2 Service Manual Edition 5 Items Identification Removal Comments procedure 12.2 Location of Battery in Information Main board. Warning Disposal Other printed circuit boards greater than 10 square centimeters. 1) Mainboard For Pole & Bench: 7. Exploded View Item 5. 8.
- Page 109 SM-500V2 Service Manual Edition 5 Items Identification Removal Comments procedure For Hanging: 8.7 Hanging Type Disassembly (Step 1 to 7 and 14) 5) AD Board 7. Exploded View Item 3. For Pole & Bench: 8. Pole Disassembly (Step 2 to 8) For Hanging: 8.7 Hanging Type Disassembly...
-
Page 110: Location Of Battery In Main-Board
SM-500V2 Service Manual Edition 5 Items Identification Removal Comments procedure Rear Display Assembly 12.2 Location of Battery in Main-board MAIN BD BLK AG (SM-720) 44011690100700 Lithium Battery (BT1) -
Page 111: Block Diagram
SM-500V2 Service Manual Edition 5 13. BLOCK DIAGRAM 13.1 SM-720EB (SM500 LCD Option) -
Page 112: Sm-720Dp (Sm800 Lcd Option)
SM-500V2 Service Manual Edition 5 13.2 SM-720DP (SM800 LCD Option) -
Page 113: Sm-720Dp (Sm500 Lcd Option)
SM-500V2 Service Manual Edition 5 13.3 SM-720DP (SM500 LCD Option) -
Page 114: Sm-720Ev (Sm800 Lcd Option)
SM-500V2 Service Manual Edition 5 13.4 SM-720EV (SM800 LCD Option) -
Page 115: Sm-720Ev (Sm500 Lcd Option)
SM-500V2 Service Manual Edition 5 13.5 SM-720EV (SM500 LCD Option) -
Page 116: Sm-720Teb (Sm500 Lcd Option)
SM-500V2 Service Manual Edition 5 13.6 SM-720TEB (SM500 LCD Option) -
Page 117: Sm-720Teb (Sm800 Lcd Option)
SM-500V2 Service Manual Edition 5 13.7 SM-720TEB (SM800 LCD Option) -
Page 118: Sm-720Tev (Sm800 Lcd Option)
SM-500V2 Service Manual Edition 5 13.8 SM-720TEV (SM800 LCD Option) -
Page 119: Sm-720Tev (Sm500 Lcd Option)
SM-500V2 Service Manual Edition 5 13.9 SM-720TEV (SM500 LCD Option) -
Page 120: Sm-720Tp (Sm500 Lcd Option)
SM-500V2 Service Manual Edition 5 13.10 SM-720TP (SM500 LCD Option) -
Page 121: Sm-720Tp (Sm800 Lcd Option)
SM-500V2 Service Manual Edition 5 13.11 SM-720TP (SM800 LCD Option) -
Page 122: Sm-720Bs (Sm800 Lcd Option)
SM-500V2 Service Manual Edition 5 13.12 SM-720BS (SM800 LCD Option) -
Page 123: Specification List
SM-500V2 Service Manual Edition 5 14. SPECIFICATION LIST 14.1 User Specification [REZERO] + [1][4][1] SPEC 0: SELECTION OF ITEM BARCODE 0: F1F2 CCCCC XCD XXXX (13 DIGIT NON-PLU) 1: F2 CCCCCC XCD XXXX (13 DIGIT NON-PLU) 2: F1F2 CCCCC O XXXX (13 DIGIT NON-PLU) 3: F1F2 CCCCCC XXXX CD (13 DIGIT NON-PLU) 4: F1F2 CCCCC XXXXX CD (13 DIGIT NON-PLU) - Page 124 SM-500V2 Service Manual Edition 5 SPEC 7: SELECTION OF TOTAL BARCODE 0: F1F2 CCCCC XCD XXXX (13 DIGIT NON-PLU) 1: F2 CCCCCC XCD XXXX (13 DIGIT NON-PLU) 2: F1F2 CCCCC O XXXX (13 DIGIT NON-PLU) 3: F1F2 CCCCCC XXXX CD (13 DIGIT NON-PLU) 4: F1F2 CCCCC XXXXX CD (13 DIGIT NON-PLU) 5: F2 CCCCCC XXXXX CD (13 DIGIT NON-PLU) 6: F2 CCCCC XXXXXX CD (13 DIGIT NON-PLU)
- Page 125 SM-500V2 Service Manual Edition 5 SPEC 15: SELECTION OF TURN OVER PRINTING FOR ADV MESSAGE 0: NO 1: YES SPEC 16: EXIT FROM ' CHANGE ' MODE WITHIN SPECIFIED INTERVAL 0: NO 1: 3 SECOND 2: 6 SECOND 3: 10 SECOND 4: 15 SECOND SPEC 17: SELECTION OF ORDERING MONTH, DATE AND YEAR FOR PRINT 0: M / D / Y...
- Page 126 SM-500V2 Service Manual Edition 5 SPEC 26: SELECTION OF SHOP NAME PRINTING ON LABEL 0: NO PRINT 1: PRINT SPEC 27: FORCED TARE FUNCTION 0: DISABLE 1: ENABLE SPEC 28: SELECTION OF PEEL SENSOR FUNCTION IN PREPACK MODE 0: DISABLE 1: ENABLE SPEC 29: SELECTION OF CONTINUOUS PRINT FOR LABEL IN PREPACK 0: INHIBIT...
- Page 127 SM-500V2 Service Manual Edition 5 3: HIGH SPEC 39: SELECTION OF PLU CALLING 0: MANUAL 1: AUTO 2: TIME-OUT SPEC 40: SELECTION OF PLU DIGITS FOR AUTO PLU TIME OUT CALLING 3 DIGITS/0.5 SEC 4 DIGITS/1.0 SEC 5 DIGITS/1.5 SEC 6 DIGITS/2.0 SEC SPEC 41: U.
- Page 128 SM-500V2 Service Manual Edition 5 SPEC 52: SELECTION OF DATA LENGTH ( SIO ) 0: 7 BIT 1: 8 BIT SPEC 53: SELECTION OF PARITY ( SIO ) 0: NONE 1: ODD 2: EVEN SPEC 54: SELECTION OF STOP BIT ( SIO ) 0: 1 BIT 1: 2 BIT SPEC 55: SELECTION OF BAUD RATES FOR MULTI-DROP SIO...
- Page 129 SM-500V2 Service Manual Edition 5 1: ALLOW MULTI PASSWORD SPEC 65: REPORT PRINTING IN DAILY AND TERM TRANSACTION CLEAR 0: INHIBIT 1: ALLOW SPEC 66: PACK QUANTITY FUNCTION KEY ENABLE 0: ALLOW 1: INHIBIT SPEC 67: ADVERTISEMENT FUNCTION KEY ENABLE 0: ALLOW 1: INHIBIT SPEC 68: FIXED TOTAL PRICE DISCOUNT FUNCTION KEY ENABLE...
- Page 130 SM-500V2 Service Manual Edition 5 0: ALLOW 1: INHIBIT SPEC 81: PRINT SELECT FUNCTION KEY ENABLE 0: ALLOW 1: INHIBIT SPEC 82: PRINT OF PLACE OF PRODUCTION ON LABEL 0: INHIBIT 1: ALLOW SPEC 83: SELECTION OF MARKDOWN 0: NO MARKDOWN 1: UNIT PRICE MARKDOWN 2: TOTAL PRICE MARKDOWN 3: UNIT AND TOTAL PRICE MARKDOWN...
- Page 131 SM-500V2 Service Manual Edition 5 SPEC 95: SELECTION OF RECEIPT PRINTING WITH DUAL COPY 0: INHIBIT 1: ALLOW SPEC 96: SELECTION OF ADVERTISEMENT MESSAGE ON ALL LABEL 0: INHIBIT 1: ALLOW SPEC 97: SELECTION OF MANUAL PRINT IN PREPACK MODE FOR WEIGH ITEM 0: INHIBIT 1: ALLOW SPEC 98: SELECTION OF QUANTITY AND UNIT PRINTOUT FOR NON WEIGH ITEM IN MANUAL...
- Page 132 SM-500V2 Service Manual Edition 5 SPEC 110: SELECTION OF YEAR TYPE ( FOR AA AND TAIWAN ) 0: STANDARD 1: JAPANESE / TAIWAN SPEC 111: SELECTION OF PRICE SYMBOL ON RECEIPT ( FOR AA ONLY ) 0: NO PRINT 1: KANJI YEN 2: YEN SPEC 112: DEFAULT DATA OF PRINTING SPECIAL MESSAGE NUMBER FOR RECEIPT (0 - 16)
- Page 133 SM-500V2 Service Manual Edition 5 1: DISABLE SPEC 124: SELECTION OF PLU UNIT PRICE AFTER DISCOUNT 0: UNIT PRICE AFTER DISCOUNT 1: UNIT PRICE DISCOUNT AMOUNT SPEC 125: POSITION OF SPECIAL MESSAGE ON RECEIPT 0: BOTTOM OF RECEIPT 1: TOP OF RECEIPT SPEC 126: SELECTION OF FUNCTION KEYS PROTECTION FOR DENMARK SELF -SERVICE 0: NO PROTECTION 1: PROTECTION...
- Page 134 SM-500V2 Service Manual Edition 5 SPEC 140: AA MESSAGE SIZE 0: 24 × 24 1: 16 × 16 SPEC 141: SELECTION OF YEAR FORMAT 0: YY 1: YYYY SPEC 142: SELECTION OF DAY DISPLAY FOR SELL-BY-DATE 0: DISABLE 1: ENABLE SPEC 143: PEEL SENSOR TRIGGER VOLTAGE 0: HIGH 1: LOW...
- Page 135 SM-500V2 Service Manual Edition 5 1: PRINT SPEC 156: IMAGE COPY FROM FREE FORMAT 0: DISABLE 1: ENABLE SPEC 157: TRAINING MODE 0: DISABLE 1: ENABLE SPEC 158: FSD PRICE AND IMAGES 0: DISABLE 1: ENABLE SPEC 159: ½ AND ¼ KEY ENABLE 0: DISABLE 1: ENABLE SPEC 160: TWISTED PAIR CABLE FOR ETHERNET...
- Page 136 SM-500V2 Service Manual Edition 5 0: NO EURO 1: EURO SPEC 172: DUAL DECLARATIONS 0: NO 1: YES SPEC 173: MASK 7 SEGMENT DISPLAY IN X, S, Z MODE 0: NO 1: YES SPEC 174: FIXED CLERK ASSIGN TO PRESET KEYS 8/ 16/ 24/ 32 (BENCH TYPE ONLY) 0: CLERK KEYS 1: FUNCTION KEYS SPEC 175: 30LB →...
- Page 137 SM-500V2 Service Manual Edition 5 1: SERVER SPEC 188: SELECTION OF TARE DECIMAL POINT LEFT SHIFT FOR SM25 FIS3D 0: NO 1: YES SPEC 189: PLU AUTO DELETE 0: NO DELETE 1: 15 DAYS 2: 30 DAYS 3: 90 DAYS SPEC 190: SWAP WEIGHT AND UNIT PRICE ON RECEIPT 0: NO...
- Page 138 SM-500V2 Service Manual Edition 5 0: PRINT 1: NO PRINT SPEC 203: PRESET KEYS PAGES 0: 1 PAGE 1: 3 PAGES BY TOGGLE KEY 2: 3 PAGES BY SHIFT KEY SPEC 204: REFERENCE PLU FUNCTION KEY ENABLE 0: DISABLE 1: ENABLE SPEC 205: PRINT FUNCTION KEY ENABLE 0: DISABLE 1: ENABLE...
- Page 139 SM-500V2 Service Manual Edition 5 1: F2 2: F3 3: F4 4: F5 5: F6 6: F7 7: F8 SPEC 218: ZERO UNIT PRICE FOR UNIT PRICE CHANGE FUNCTION KEY 0: DISABLE 1: ENABLE SPEC 219: NUMERIC KEY ENTRY RESET (AA) 0: 3 SECONDS 1: 5 SECONDS 2: DISABLE...
- Page 140 SM-500V2 Service Manual Edition 5 SPEC 232: FEED FOR CONTINUOUS LABEL 0: NO 1: YES SPEC 233: TIME FORMAT 0: 24 HOUR 1: 12 HOUR (AM / PM) SPEC 234: SUB-TOTAL AND GRAND TOTAL BARCODE 0: BASED ON ITEM BARCODE 1: BASED ON TOTAL BARCODE SPEC 235: MASK BARCODE LAST HUMAN READABLE CHECK DIGIT 0: NO...
- Page 141 SM-500V2 Service Manual Edition 5 1: MANUAL MODE 2: PREPACK MODE 3: NO PRINT SPEC 248: PRINT SELL BY DATE 0: MANUAL AND PREPACK MODE 1: MANUAL MODE 2: PREPACK MODE 3: NO PRINT SPEC 249: PRINT USED BY DATE 0: MANUAL AND PREPACK MODE 1: MANUAL MODE 2: PREPACK MODE...
- Page 142 SM-500V2 Service Manual Edition 5 3: NAME (CONCATENATE) SPEC 261: RESERVED 0: DISABLE 1: ENABLE SPEC 262: CASH DRAWER DETECTION ( IRELAND _ SM 500 ) 0: NO 1: YES SPEC 263: FSD NET VALUE MINIMUM 0: OFF 1: ON SPEC 264: PRINT INGREDIENT DATA ON THE NEXT LABEL 0: DISABLE 1: ENABLE...
- Page 143 SM-500V2 Service Manual Edition 5 SPEC 275: TAIWAN RECEIPT PRINTER 0: DISABLE 1: ENABLE SPEC 276: FLOATING SERVER 0: DISABLE 1: ENABLE SPEC 277: REAL TIME BUFFER 0: NO REAL TIME BUFFER 1: 2 DAYS BUFFER 2: 3 DAYS BUFFER 3: 4 DAYS BUFFER 4: 5 DAYS BUFFER 5: 6 DAYS BUFFER...
- Page 144 SM-500V2 Service Manual Edition 5 SPEC 289: REPEAT PLU CALL 0: NO 1: YES SPEC 290: PAYMENT KEY (EURO COUNTRIES ONLY) 0: DISABLE 1: ENABLE SPEC 291: GAP VALUE IN FEED OPERATION 0: READJUST 1: NO CHANGE SPEC 292: SM200 POWER SAVE 0: BACK LIGHT OFF 1: POWER OFF SPEC 293: SM200 POWER SAVE TIMEOUT...
- Page 145 SM-500V2 Service Manual Edition 5 SPEC 306: UNIT PRINT ON RECEIPT 0: PCS 1: ITEMS SPEC 307: CODE PAGE (IR ONLY) 0: DOS 1: ANSI SPEC 308: SM500 2 RECEIPT PRINTER 0: DISABLE 1: ENABLE SPEC 309: PRAXIS FUNCTION (IKB ONLY) 0: DISABLE 1: ENABLE SPEC 310: RSS14 BARCODE (AI 01 ONLY)
- Page 146 SM-500V2 Service Manual Edition 5 SPEC 321: JULIAN DATE FOR PACKED & SELL DATE 0: NO 1: YES SPEC 322: PRICE PRINTING SIZE (LARGE FONT) (VER 14.63 ONWARDS) 0: NO 1: YES SPEC 323: AUTO PLU BROADCASTING (VER 14.85 ONWARDS) 0: DISABLE 1: ENABLE SPEC 324: DECIMAL POINT FOR UNIT PRICE AND TOTAL PRICE FIELDS...
- Page 147 SM-500V2 Service Manual Edition 5 SPEC 337: TRACEABILITY DEFAULT LABEL FORMAT 1: F1 2: F2 3: F3 4: F4 5: F5 6: F6 7: F7 8: F8 SPEC 337: TRACEABILITY NO AUTO UPDATE 0: NO 1: YES SPEC 338: TRACEABILITY BARCODE 0: EAN13 1: EAN128 SPEC 339: TRACEABILITY NO C/D CHECK...
-
Page 148: Weigh & Measure Specification [Rezero] + [1][4][2]
SM-500V2 Service Manual Edition 5 1: ENABLE SPEC 350: ADDITIONAL ROUNDING IN RECEIPT 0: PRINT 1: NO PRINT SPEC 351: GRATUITOUS ARP 0: DISABLE 1: ENABLE SPEC 352: MAGALI TRACEABILITY 0: DISABLE 1: ENABLE SPEC 353: UP & WT CHECK BEFORE LBL PRT 0: DISABLE 1: ENABLE SPEC 354: ROMANIAN CURRENCY (RM ONLY) - Page 149 SM-500V2 Service Manual Edition 5 SPEC 601: SELECTION OF AUTO - ZERO FUNCTION 0: NO AUTO - ZERO 1: AUTO - ZERO SPEC 602: SELECTION OF DISPLAY TYPE 0: SINGLE DISPLAY ROW 1: THREE DISPLAY SPEC 603: SELECTION OF TAX 0: NO TAX 1: TAX SPEC 604: SELECTION OF MINUS WEIGHT MASKING...
- Page 150 SM-500V2 Service Manual Edition 5 3: 10 SECS SPEC 614: SELECTION OF ZERO SETTING RANGES WHEN WEIGHT RESET SWITCH IS ON OR ZERO TRACKING 0: ±10% OF CAPACITY ( POWER ON START POINT ± 6000IR ) 1: ±5% OF CAPACITY ( POWER ON START POINT ± 3000IR) 2: ±2% OF CAPACITY ( POWER ON START POINT ±...
- Page 151 SM-500V2 Service Manual Edition 5 1: COMMA SPEC 628: SELECTION OF PRICE ROUNDING METHODS FOR THE DECIMAL DIGITS FOR WEIGHED ITEMS 0: ROUNDING 1: TRUNCATING 2: CUT UP SPEC 629: SELECTION OF ADDITIONAL PRICE ROUNDING METHOD FOR ITEM 0: NO ADDITIONAL ROUNDING 1: 1 / 4 ROUNDING 2: SPECIAL ROUNDING 3: ROUNDING FOR 1 ST DIGIT...
- Page 152 SM-500V2 Service Manual Edition 5 1: ALLOW SPEC 642: SELECTION OF TARE DISPLAY FOR ONE-TOUCH-TARE 0: ALLOW 1: INHIBIT SPEC 643: SELECTION OF WEIGHT RANGE OF NON - WEIGH ITEMS 0: ONLY NET 0d 1: UNDER NET 0d 2: UNDER NET 4d 3: GROSS <...
- Page 153 SM-500V2 Service Manual Edition 5 SPEC 655: SELECTION OF PREPACK MODE 0: ALLOW 1: INHIBIT SPEC 656: SELECTION OF SCALE TYPE 0: POLE TYPE 1: BENCH TYPE SPEC 657: MAINTENANCE MODE 0: ENABLE 1: DISABLE SPEC 658: SELECTION OF EXTRA LABEL FOR PREPACK PRINTING 0: INHIBIT 1: ALLOW SPEC 659: SELECTION OF ITEM PRICE PRINTING...
- Page 154 SM-500V2 Service Manual Edition 5 SPEC 668: 16x16 COM NAME 0: 1.0 SEC DISPLAY 1: 1.5 SEC DISPLAY 2: 2.0 SEC DISPLAY 3: 0.5 SEC DISPLAY SPEC 669: MASK WEIGHT DISPLAY 0: NO 1: YES SPEC 670: SCROLL MESSAGE DISPLAY 0: FULL LENGTH 1: HALF LENGTH SPEC 671: DISPLAY CPU SELECTION...
- Page 155 SM-500V2 Service Manual Edition 5 SPEC 682: ADDITIONAL EURO SECOND PRICE ROUNDING METHOD 0: NO ADDITIONAL ROUNDING 1: 1 / 4 ROUNDING 2: SPECIAL ROUNDING 3: ROUNDING FOR 1 ST DIGIT 4: CUT OFF 5: CUT UP 6: Υ5 CUT OFF AND Υ10 CUT OFF SPEC 683: FOREIGN CHARACTER FOR STANDARD COUNTRIES 0: NO 1: GB CODE...
-
Page 156: Weigh & Measure Specification [Rezero]+[1][4][1] (For Sm90Ts, Sm500Ts & Sm-720Ts)
SM-500V2 Service Manual Edition 5 SPEC 696: QUANTITY SYMBOL RECALCULATION 0: NO 1: YES SPEC 697: RESERVE 0: NO 1: YES SPEC 698: DEC PLU TARE 0: NO 1: YES 14.3 Weigh & Measure Specification [REZERO]+[1][4][1] (For SM90TS, SM500TS & SM-720TS) SPEC 195: NUMBER OF CHARACTER PAGES 0: 3 PAGES 1: 4 PAGES... -
Page 157: Revision Records
SM720 Service Manual Edition 5 15. REVISION RECORDS REVISION RECORDS Serial Rev. Software Date Description of Changes Remarks Status Version Mar ‘06 Tentative Edition July ‘06 V29.246 Edition 1 1) Add Firmware Upgrade, Maintenance, Hardware Setting, Miscellaneous, Block Diagram, and Specifications and add 30Kg disassembly. - Page 158 SM720 Service Manual Edition 5 9) Remove the main component listing. Editing EB, DP, EV, TEB, TEV & TP type block diagram. Adding the Procedure of Linerless machine conversion. Editing the information Component listing of hazardous material. Adding the Hanging Scale of Sealing Screw / Sticker method.
Need help?
Do you have a question about the SM-720 and is the answer not in the manual?
Questions and answers