
Related Manuals for Casio XJ-350


Summary of Contents for Casio XJ-350
- Page 1 DATA PROJECTOR XJ-350 User’s Guide Keep this manual in a safe place for future reference.
- Page 2 • Digital Light Processing are trademarks of Texas Instruments Incorporated of the United States. • Microsoft, Windows, Windows NT, Windows XP, and the Windows logo are registered trademarks or trademarks of Microsoft Corporation of the United States in the United States and other countries. •...
-
Page 3: Safety Precautions
Safety Precautions Thank you for selecting this CASIO product. Be sure to read these “Safety Safety Precautions Precautions” before trying to use it. After reading this User’s Guide, keep it in a safe place for future reference. About safety symbols Various symbols are used in this User’s Guide and on the product itself to ensure... -
Page 4: Precautions During Use
Continued use creates the risk of fire and electric shock. Immediately perform the following steps. Unplug the projector. Contact your original dealer or authorized CASIO service center. GMalfunction Immediately stop using the projector if the screen appears abnormal, if sound is not... - Page 5 Be sure to leave all internal inspection, adjustment, and repair up to your original dealer or authorized CASIO service center. GDropping and impact Continued use of the projector after it has been damaged by...
- Page 6 GLens cover Be sure to open the lens cover before turning on the projector. Never close the lens cover while the projector is in use. GLocation Never locate the projector in any of the following types of locations. Doing so creates the risk of fire and electric shock.
- Page 7 GLens effect Never have an aquarium or any other object that produces a lens effect in front of the projector while the lamp is on. Such an object creates the risk of fire. GLens Never touch the lens with your hand.
-
Page 8: Battery Precautions
Safety Precautions Battery Precautions Warning Misuse of batteries can cause them to leak and stain the area around them, or to explode, creating the risk of fire and personal injury. Make sure that you always observe the following precautions. • Never try to take batteries apart and do not allow them to become shorted. -
Page 9: Lamp Precautions
Should the lamp break, be sure to contact your original dealer or authorized CASIO service center to request replacement. Attempting to replace a broken lamp on your own creates the risk of personal injury due to broken glass or dispersed mercury. -
Page 10: Operating Precautions
If the lamp continues to be used after its lamp life is reached, after 100 hours the projector will enter a cool down state and then go into standby. The projector will not turn on again until you replace the lamp. -
Page 11: Other Precautions
Operating Precautions Other Precautions This projector is made of precision components. Failure to observe the following precautions can result in inability to correctly save data and malfunction. GNever use or store the projector in the following locations. Doing so creates the risk of malfunction of and damage to the projector. - Page 12 Any other use is forbidden without the permission of CASIO COMPUTER CO., LTD. • CASIO COMPUTER CO., LTD. shall not be held liable for any lost profits or claims from third parties arising out of the use of this product or this manual.
-
Page 13: Table Of Contents
Adjusting the Projector Elevation Angle ... 32 Rear Projection (From the Back of the Screen) ... 34 Connecting a Computer to the Projector (Video and Audio) ... 34 Connecting a Computer to the Projector’s USB Port ... 35 Connecting to a Standard Video Device ... 36 Connecting to a Component Video Output Device ... - Page 14 Input Settings ... 85 Option Settings... 89 Operational Info... 99 Restore All Defaults ... 100 User Maintenance ...101 Cleaning the Projector... 101 Reattaching the Lens Cover... 101 Replacing the Lamp ... 102 Troubleshooting...110 Indicators and Alert Tones ... 110 Projector Troubleshooting ... 112 Appendix...114...
-
Page 15: Features And Functions
2X zoom makes it possible to produce a projected image of the size you want from a range of possible distances. To project onto a 60-inch screen, for example, you can set up the projector anywhere from 1.6 meters (5.25 feet) to 3.2 meters (10.5 feet) from the screen. -
Page 16: General Guide
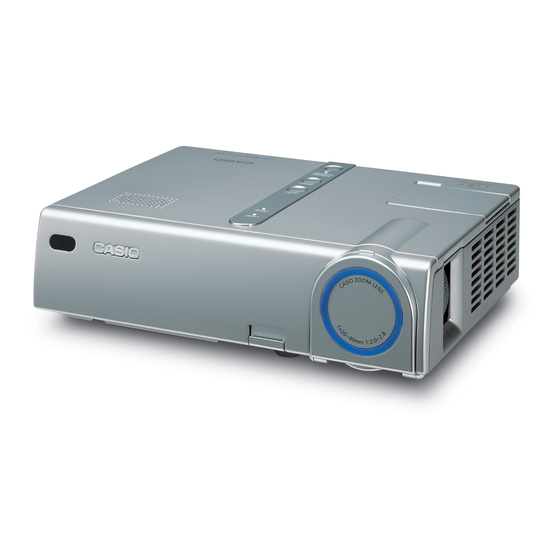
General Guide This section defines the names and explains the main functions of each part of the projector. [Front/Right Side] Remote control signal receiver : Receives the remote control signal. Remote Controller Signal Range (page 27) Lens Caution! Never look into the lens while the projector is turned on. - Page 17 General Guide [Top, Left Side, Back] * For details about the terminals on the back of the projector, see “Back, Terminals” on page 22. Projection key panel cover Key and Indicator Panel Key and Indicator Panel, Projection Key Panel (page 19)
- Page 18 Intake vents Setup Precautions (page 30) Caution! Never allow the intake vents on the back or the bottom of the projector to become blocked. Blocked vents can cause heat to build up, creating the risk of fire and malfunction. Lamp cover To replace the lamp (page 105) : Rotate to change the angle of the projector.
- Page 19 : Indicates the current projector status. : Turns projector power on and off. : Press this key to automatically correct the projected image and remove vertical and horizontal keystoning. : Press this key to display the projector setup menu on the projected image.
- Page 20 General Guide Cursor keys To move the highlighting (selection cursor) on the menu screen ( page 65) [ENTER] key To execute the command currently highlighted on the menu screen ( page 65) [ESC] key When a menu screen is displayed, to back-step to the previous screen ( page 65) You can disable certain key operations, if you want.
- Page 21 General Guide Using the Projection Key Panel You can use the keys on the projection key panel to control the projector when the remote controller is not available for some reason. Opening and Closing the Projection Key Panel Cover Hook your finger...
- Page 22 General Guide [Back, Terminals] RGB input terminal Connecting a Computer to the Projector (Video and Audio) (page 34) Connecting to a Component Video Output Device (page 37) USB port Connecting a Computer to the Projector’s USB Port (page 35) AUDIO input terminal...
-
Page 23: Remote Controller
General Guide The asterisks (*) in the following explanations indicate keys that have the same names and functions as keys on the projector itself. Note that the operations of remote controller keys , and can be performed using the projector’s [INPUT] key. - Page 24 *Cursor keys To move the highlighting (selection cursor) on the menu screen ( page 65) To perform mouse operations on the computer connected to the projector’s USB port ( page 60) In this manual, cursor key operations are indicated as [ ], [ ], [ ], [ ].
-
Page 25: Loading Remote Controller Batteries
Replace remote controller batteries with a set of new ones whenever the remote controller does not work or if you need to move the remote controller very close to the projector before it will work. Caution! Misuse of batteries can cause them to leak and stain of the area around them, or to explode, creating the risk of fire and personal injury. - Page 26 Remote Controller Load two new batteries into the case, making sure that their positive (+) and negative (–) ends are facing correctly. Replace the battery cover on the back of the remote controller.
-
Page 27: Remote Controller Signal Range
Remote Controller Signal Range When performing an operation on the remote controller, point it at the remote control signal port on the back or front of the projector. The following illustration shows the range of the remote controller signal. ± 40 degrees max. -
Page 28: Getting Ready
Getting Ready This section explains how to set up the projector to get it ready for use, and how to connect it to an input source (computer or video device). It also includes information about how to turn on the projector, how to select the display language the first time you turn it on, and precautions you need to keep in mind concerning the power supply. - Page 29 Getting Ready The allowable projection range is from 0.8 meter (2.62 feet) to 16 meters (52.49 feet), which is the distance from the surface of the lens to the screen. Screen Size 300 8.0 m to 16.0 m (26.25 feet to 52.49 feet) 16 m 14 m 12 m...
-
Page 30: Setup Precautions
Do not place any objects within the area indicated by the dashed line in the illustration below. Be especially careful that you never block intake and exhaust vents. Do not locate any objects near the projector while it is in use. Keep all items at least 30 cm (11.8 inches) away from the exhaust vents. -
Page 31: Projector Angle To The Screen
Getting Ready Projector Angle to the Screen The following shows the allowable angle that the projector can be positioned relative to the screen. Vertical Screen Up to about 30 degrees Up to about 30 degrees The angles shown in the above illustration are subject to the following conditions. -
Page 32: Adjusting The Projector Elevation Angle
Getting Ready Adjusting the Projector Elevation Angle You can change the elevation angle of the projector in a range of 0 to 8 degrees. You can also make fine adjustments to the left and right side elevation angle when necessary. - Page 33 Rotate to adjust horizontal alignment. To retract the elevation adjustment foot, hold down the release button and slide the elevation adjustment foot back into the projector. Never try to forcibly change the elevation adjustment foot position without pressing the release button.
-
Page 34: Rear Projection (From The Back Of The Screen)
Connecting a Computer to the Projector (Video and Audio) You can use the projector to project an image of video output from a computer. You can also output audio from the computer through the projector’s speaker. Always turn off the projector and the computer before connecting them. -
Page 35: Connecting A Computer To The Projector's Usb Port
Connecting a Computer to the Projector’s USB Port After you connect a computer to the projector’s USB port, you can use the remote controller to perform computer mouse operations, and previous page and next page operations. The illustration shows how to connect to the USB port. -
Page 36: Connecting To A Standard Video Device
Getting Ready Connecting to a Standard Video Device You can use the projector to project an image from a video deck, TV, video camera, or other video device. You can also output audio from the video device through the projector’s speaker. -
Page 37: Connecting To A Component Video Output Device
(Green: Y; Blue: Cb/Pb; Red: Cr/Pr). You can use the optional YK-3 component video cable to connect to pin jack (RCA) type component video output terminals. The projector does not support connection to any other type of terminal. -
Page 38: Turning On The Projector
Make sure that you use a power source with the same voltage as that specified for the projector. Do not share the outlet supplying power to the projector with other devices. If you are using an extension cord, make sure that the ampere rating of the extension cord is compatible with the power consumption value of this projector. - Page 39 Press the [ ] (power) key. This causes the POWER/STANDBY indicator to flash green, which indicates that the projector is warming up. After a short while, the start up screen will be projected (warm up is still in progress). After warm up is complete, POWER/STANDBY indicator stops flashing and remains lit green, and the projector starts projecting an image from the device connected to it.
- Page 40 Getting Ready Specifying the Display Message Language A “Language” window will be projected the first time you turn on the projector. Use the menu on this screen to specify the display language you want to use. Use the cursor [ ] and [ ] keys to highlight the language you want to use.
-
Page 41: Turning Off The Projector
Turning Off the Projector When you turn off the projector, the lamp goes out and the projector goes into a cool down state. Note that you will not be able to turn the projector back on again while it is cooling down. -
Page 42: Auto Power Off
10 minutes. When Auto Power Off is triggered, the projector first enters a cool down state, the same as it does when you press the [ The POWER/STANDBY indicator flashes amber to indicate that the projector is cooling down. -
Page 43: Projection Operations
Start projection (presentation, video, etc.) • Perform the required operation on the input source computer or video equipment. • Use the projector’s various functions to adjust the projected image as required. ] (power) key to turn on the projector. 34 to 37). - Page 44 Projection Operations Auto Input Source Selection When you turn on the projector, it checks the status of each input source (whether or not the input source is sending a signal) in the sequence shown below. It automatically selects the first input source it finds that is sending an input signal, and projects the applicable image.
- Page 45 [Projector] [Remote Controller] [S-VIDEO] key [VIDEO] key [RGB/COMPONENT] key [INPUT] key To select the input source using projector keys On the projector, press the [INPUT] key to cycle through input sources in the sequence shown below. (RGB/Component) (S-VIDEO) (VIDEO)
- Page 46 Whether the displayed input source name shows [RGB] or [Component] depends on the current “Input Settings projector’s setup menu. If the input source name shows this: Component For information about configuring setup menu settings, see “Using the Setup Menu” on page 61.
-
Page 47: Zoom And Focus
Projection Operations Zoom and Focus Use the zoom ring to adjust the image size, and the focus ring to focus the image. To adjust the image size To focus the image It is best to have a still image on the screen when you focus the image. Performing zoom after focusing can cause the image to go out of focus. - Page 48 Projection Operations Auto Adjustment of an RGB Image When the input source is RGB (computer), the projector automatically adjusts vertical and horizontal positioning, frequency, and phase whenever it detects an RGB signal (following input source selection, power up, etc.) You can also execute an automatic adjustment operation by pressing the [AUTO] key.
- Page 49 The projector outputs images using XGA (1024 pixels × 768 pixels) video resolution. When the input signal from the computer connected to the projector is not an XGA signal, “Resize Image To Fit” automatically enlarges or reduces the image so it matches the projector’s video resolution and fills the entire screen.
-
Page 50: Keystone Correction (Keystone)
Projection Operations Keystone Correction (KEYSTONE) When the projector is at an angle to the screen it is projecting on, the projected image may have different length left and right edges, or top and bottom edges. This phenomenon is called, “keystoning”. This projector comes with functions for automatic as well as manual keystone correction, which provides a regularly shaped projected image. - Page 51 If this happens, rearrange the projector and screen so the lens is pointing straighter at the screen, and then perform manual keystone correction or auto keystone correction...
-
Page 52: Manual Keystone Correction
Projection Operations Manual Keystone Correction Manual keystone correction can be used to correct for both vertical and horizontal keystoning. To use manual keystone correction Press the [KEYSTONE] key. This causes the keystone correction screen to appear on the projected image. Use the [ ] and [ ] keys to select either “Vertical Keystone Correction”... -
Page 53: Adjusting The Volume Level (Vol +/-)
If this happens, rearrange the projector and screen so the lens is pointing straighter at the screen, and then perform manual keystone correction or auto keystone correction again. -
Page 54: Enlarging The Projected Image (D-Zoom +/-)
Projection Operations Enlarging the Projected Image (D-ZOOM +/–) You can use the remote controller’s zoom keys to enlarge a specific part of the projected image up to four times its original size. To enlarge part of the projected image On the remote controller, press the [D-ZOOM +] or [D-ZOOM –] key. This causes a cross cursor to appear on the projected image. - Page 55 Projection Operations On the remote controller, press the [D-ZOOM +] key to enlarge the image. You can press the [D-ZOOM +] key again to further enlarge the image, up to 4 times. You can back step through the image enlargements by pressing the [D-ZOOM –] key. You can shift the zoomed image up, down, left, or right by pressing the applicable remote controller cursor key.
-
Page 56: Using Picture-In-Picture (P-In-P)
Projection Operations Using Picture-in-Picture (P-IN-P) While RGB is selected as the input source, you can display a sub-window that simultaneously displays the image being input through the VIDEO or S-VIDEO terminal. This function is called “picture-in-picture” or “P-IN-P”. RGB input image The initial default setting for the sub-window input source is VIDEO. - Page 57 On the remote controller, press the [RGB/COMPONENT] key to select RGB as the input source. You can also select the input source using the projector’s [INPUT] key. On the remote controller, press the [P-IN-P] key to display the sub- window.
-
Page 58: Muting The Image And Audio (Mute)
Projection Operations To change the size of the sub-window While a sub-window is displayed, use the [D-ZOOM +] and [D-ZOOM –] keys to select one of the three available sub-window sizes (small, medium, large). When RGB is selected as the input source, certain signal types (1600 × 1200 UXGA signal, for example) do not support selection of the large sub-window size. -
Page 59: Freezing The Projected Image (Freeze)
Projection Operations Freezing the Projected Image (FREEZE) The freeze function stores the current projected image in projector memory, and projects it as a still image. To freeze the projected image On the remote controller, press the [FREEZE] key. This freezes the image that was being projected when you pressed the [FREEZE] key. - Page 60 Projection Operations Use the remote controller to perform mouse operations as described below. To do this: Move the pointer on the computer screen up, down, left, or right Scroll up one page Scroll down one page Perform a left-click operation Perform a right-click operation Note that wireless mouse operations are not possible while a manual keystone correction (page 52), volume adjustment (page 53), image enlargement (page 54), or P-IN-P (page 56)
-
Page 61: Using The Setup Menu
Pressing the [MENU] key while an image is being projected displays the setup menu on the projected image. The setup menu can be used to configure a variety of different projector settings. See the “Setup Menu Setting List” on page 62 for details about the settings that are available. - Page 62 Using the Setup Menu Setup Menu Setting List Main menu Sub-menu Brightness Contrast Sharpness Saturation Tint Gamma Mode Image Color Balance Adjustment Vertical Position Horizontal Position Frequency Phase Noise Filter Restore Menu Defaults Volume Volume Restore Menu Adjustment Defaults Vertical Keystone Correction Horizontal Keystone Correction...
- Page 63 Using the Setup Menu Setup Menu Setting List Main menu Sub-menu Auto Input Detect Auto Keystone Correction Auto Adjust Low-noise Mode Auto Power Off Option Key Lock Settings Custom Logo Settings Language Alert Tones Restore Menu Defaults Lamp Time Reset Lamp Time Input Signal Signal Name Operational...
-
Page 64: Before Configuring Menu Settings
Using the Setup Menu Before Configuring Menu Settings Always remember that the settings you configure on the setup menu are applied for the input source (RGB, Component, S-VIDEO, VIDEO) that was selected when you displayed the setup menu. Note the following important points. The items that appear on the setup menu depend on the currently selected input source and other factors. -
Page 65: Setup Menu Screen Operations
Using the Setup Menu Setup Menu Screen Operations This section explains projector operations you need to perform while configuring setup menu settings. It also provides details about each sub-menu item type. Basic Setup Menu Operations The following is the general flow of the steps you need to perform when configuring setup menu operations. - Page 66 Using the Setup Menu Press the [ENTER] key. This selects the top item in the sub-menu. Use the [ ] and [ ] keys to select the sub-menu item whose setting you want to change. Change the setting or select an option to configure the currently selected sub-menu item.
- Page 67 Using the Setup Menu Sub-menu Operations This section explains steps you need to perform in order to configure settings for each sub- menu item type (value, selection, setting screen, execution, information). Value Setting Type Sub-menu Item This type of sub-menu item consists of a value and a bar graph. Examples: Image Adjustment Correction Operation: Press the [ ] key to make the value smaller, or the [ ] key to make it larger.
- Page 68 Using the Setup Menu Setting Screen Type Sub-menu Item This type of sub-menu item displays a separate screen that you use to configure its settings. Examples: Image Adjustment Operation: The following example shows how to configure settings for Input Settings Video Signal, S-Video Signal On the remote controller, press the [VIDEO] key to select the VIDEO input terminal as the input source.
- Page 69 Using the Setup Menu Note that the available settings and configuration procedures depend on the setting screen. See “Setup Menu Reference” on page 73 for details about each sub-menu item. Execution Type Sub-menu Item This type of sub-menu item returns a setting to its initial default value. Examples: Image Adjustment Time Initializing Settings (page 70)
- Page 70 Using the Setup Menu Initializing Settings The setup menu lets you initialize the settings of a particular main menu item, or for all setup menu items. To initialize the settings of a particular main menu item Example: To initialize the settings of the “Image Adjustment” main menu item. Performing the following procedure returns all of the sub-menu items under the currently selected main menu item to their initial default settings.
- Page 71 Using the Setup Menu Press the [ENTER] key. This displays a confirmation message asking if you want to initialize settings. Use the [ ] and [ ] keys to select [Yes]. Press the [ENTER] key to initialize the menu’s settings, or the [ESC] key to exit the initialize operation without doing anything.
- Page 72 Using the Setup Menu To initialize all menu settings Performing the following procedure initializes all sub-menu items for all menus, except for the language (Option Settings Time). Note that initialization does not delete the custom logo. Perform steps 1 through 4 under “Basic Setup Menu Operations” on page 65.
-
Page 73: Setup Menu Reference
Using the Setup Menu Setup Menu Reference This section provides detailed explanations about the contents for all of the setup menu items. The titles in this section use the format: Main Menu Item Image Adjustment IImage Adjustment This sub-menu adjusts the brightness of the projected image. A larger value produces a brighter image. - Page 74 Using the Setup Menu IImage Adjustment This sub-menu lets you select the gamma mode for the projected image. Input Source Specific Menu Items Input Source Available Items (Parentheses indicate defaults.) Standard, (Presentation), Theater, Graphics Component Standard, Presentation, (Theater), Graphics S-VIDEO VIDEO No Signal None...
- Page 75 Using the Setup Menu Use the [ ] and [ ] keys to select “Color Temperature”, and then press the [ENTER] key. This causes a marker to appear at the beginning of the “Color Temperature” line, which indicates that color temperature value selection is enabled. Use the [ ] and [ ] keys to select the color temperature setting you want.
- Page 76 Using the Setup Menu After all the settings are the way you want, press the [MENU] key. IImage Adjustment This sub-menu lets you adjust the vertical position of the input source image within the projection area. This setting is not possible when there is no input signal. “Image Adjustment”...
- Page 77 This sub-menu lets you manually control the phase of the image. Normally, the projector is able to adjust the phase automatically. If there are color errors or flickering in the projected image, however, it means that automatic adjustment is not possible for some reason.
-
Page 78: Volume Adjustment
Volume Adjustment IVolume Adjustment This sub-menu can be used to adjust the volume level of the projector’s speaker. This setting is also linked to volume settings made with the remote controller’s [VOL +] and [VOL –] keys. Changing this setting when there is no input signal changes the volume setting of the currently selected signal source. -
Page 79: Screen Settings
If this happens, rearrange the projector and screen so the lens is pointing straighter at the screen, and then perform manual keystone correction or auto keystone correction again. - Page 80 16:9. In this case, this setting cannot be changed. Using this projector to reduce, enlarge, or otherwise alter an image for business purposes or public display may infringe upon the rights of the individual who holds the copyright of...
- Page 81 When RGB is selected as the input source and the video resolution of the connected computer is anything other than XGA (1024 × 768 pixels), “Resize Image To Fit” automatically enlarges or reduces the input image so it matches the video resolution of the projector and fills the entire screen.
- Page 82 A single setting is stored, which is applied to all input sources. IScreen Settings Startup Screen Use this sub-menu to specify whether or not a startup screen should be projected whenever the projector is turned on. Input Source Specific Menu Items Input Source Available Items (Parentheses indicate defaults.)
- Page 83 Using the Setup Menu IScreen Settings No Signal Screen This sub-menu lets you specify what should be projected when there is no input signal to the projector. Input Source Specific Menu Items Input Source Available Items (Parentheses indicate defaults.) (Blue), Black, Logo...
- Page 84 Using the Setup Menu Setting Storage A single setting is stored, which is applied to all input sources. IScreen Settings Restore Menu Defaults This sub-menu returns all of the sub-menu items on the Screen settings main menu to their initial default settings. You can perform initialization even when there is no input signal.
-
Page 85: Input Settings
Component. Setting Explanations RGB: Select this setting when a computer is connected to the projector’s RGB input terminal. For details about connection, see “Connecting a Computer to the Projector (Video and Audio)” on page 34. Component: Select this setting when the projector’s RGB input terminal is connected the component video output terminal of a video device using an optionally available YK-3 component video cable. - Page 86 Using the Setup Menu IInput Settings Video Signal, S-Video Signal This sub-menu specifies the input signal for the projector’s VIDEO and S-VIDEO input terminals. Input Source Specific Menu Items Input Source Available Items (Parentheses indicate defaults.) None Component S-VIDEO (Auto), NTSC, NTSC4.43, PAL, PAL-M, PAL-N, PAL60, SECAM...
- Page 87 Using the Setup Menu IInput Settings P-in-P Input This sub-menu lets you select the input source for the image that appears in the P-in-P sub- window (page 56). Input Source Specific Menu Items Input Source Available Items (Parentheses indicate defaults.) (VIDEO), S-VIDEO Component None...
- Page 88 RGB signal being sent from the computer and projects the image. Some signals, however, cannot be detected properly by the projector. When auto detection is not possible for some reason, try using this setting for a computer signal with a resolution of SXGA (1280 ×...
-
Page 89: Option Settings
VIDEO No Signal Setting Explanations On: Turns on auto detection of the input source whenever the projector is turned on. Off: Turns off auto detection of the input source whenever the projector is turned on. Setting Storage A single setting is stored, which is applied to all input sources. - Page 90 This setting is saved for the RGB input terminal only. IOption Settings Low-noise Mode The low-noise mode reduces the luminosity of the projection lamp and the speed of the cooling fan, allowing quieter projector operation. Input Source Specific Menu Items Input Source Available Items (Parentheses indicate defaults.)
- Page 91 On, (Off) Component S-VIDEO VIDEO No Signal Setting Explanations On: Turns on key lock and disables projector keys. Off: Turns off key lock and enables projector keys. Setting Storage A single setting is stored, which is applied to all input sources.
- Page 92 While the projector is on: Hold down the projector’s [ESC] key for about five seconds. While the projector is off: Simultaneously hold down the projector’s [ESC] and [ You can use the above projector operations to turn off key lock if the remote controller batteries unexpectedly go dead, etc.
- Page 93 Using the Setup Menu To capture a custom logo Project the still image that you want to use as the custom logo. Perform steps 1 through 4 under “Basic Setup Menu Operations” on page 65. Select the “Option Settings” main menu, and then select the “Custom Logo Settings”...
- Page 94 Using the Setup Menu Use the cursor keys to move the cross cursor and draw the selection boundary. When the area you want to capture is enclosed by the selection boundary, press the [ENTER] key. This causes the message “Start image capture and registration as custom logo?” to appear.
- Page 95 Using the Setup Menu Configuring Custom Logo Capture Settings Before capturing a custom logo, configure the following settings to control its position, zoom, and other parameters when it is projected. Setting Logo Vertical Logo Horizontal Custom Logo Zoom Background Color Resolution The “Logo Vertical”, “Logo Horizontal”, and “Background Color”...
- Page 96 Using the Setup Menu To configure custom logo settings Perform steps 2 and 3 under “To capture a custom logo” on page 93 to display the custom logo setting screen. Use the [ ] and [ ] keys to select the custom logo item whose setting you want to change.
- Page 97 Press the [MENU] key to exit the setup menu. Initializing the custom logo settings and deleting the custom logo causes the projector’s preset logo to appear when “Logo” is selected for the startup screen (page 82), no signal screen (page 83), and mute screen (page 83).
- Page 98 Setting Storage A single setting is stored, which is applied to all input sources. This setting is required the first time you turn on the projector. For more information, see “Specifying the Display Message Language” on page 40. IOption Settings Alert Tones This sub-menu lets you turn alert tones on and off.
-
Page 99: Operational Info
IOperational Info Signal Name This sub-menu item shows the signal name of the signal input to the projector. The “Signal Name” column of the table under “Supported Signals” on page 116 shows the signal names that are displayed by this sub-manu item. -
Page 100: Restore All Defaults
Using the Setup Menu IOperational Info Scan System This sub-menu item appears only when RGB or Component is the input signal, and shows the scanning frequency of the input signal. The input signal is interlace or non-interlace for RGB signal input, and interlace or progressive for Component signal input. Restore All Defaults IRestore All Defaults Restore All Defaults... -
Page 101: User Maintenance
Always turn off the projector before cleaning it. Cleaning the Projector Exterior Wipe the exterior of the projector with a soft cloth that has been moistened in a weak solution of water and a mild neutral detergent. Be sure to wring all excess moisture from the cloth before wiping. -
Page 102: Replacing The Lamp
User Maintenance Without changing the angle of the lens cover relative to the lens, use the end (not the tip) of a pen or some similar instrument to gently press the right hinge of the cover into the slot on the right When reattaching the lens cover, make sure it is at an angle that is more than 90 degrees relative to the lens as shown in the illustration on the left. -
Page 103: To Check The Current Lamp Use Time
10 seconds, and then the projector will turn off automatically. The lamp has exceeded its service life! The projector will not turn on until you replace the lamp. When this message appears, replace the lamp immediately using the procedure under... - Page 104 (indicated when the POWER/STANDBY indicator is flashing amber) to finish. Next, disconnect the AC power cord from the projector, and wait for at least 60 minutes to allow it to cool down even further.
-
Page 105: To Replace The Lamp
Wait for about 60 minutes to allow the projector’s current lamp to cool down completely. Turn over the projector and place it on top of a desk or on some other stable surface. Loosen the lamp cover screw, and then remove the lamp cover. - Page 106 Screws Use the lamp cartridge handle to pull the lamp cartridge from the projector. Bracing your thumb on the projector as shown in the illustration, slowly lift the cartridge handle and pull the cartridge out of the projector. Lamp cartridge...
- Page 107 User Maintenance Insert the new lamp cartridge as far as it will go, as shown in the illustration. After inserting the lamp cartridge, lay its handle down in the position shown in the illustration under step 5 on page 106. Secure the lamp cartridge with the three screws.
-
Page 108: Resetting The Lamp Time
If you replace the lamp when the above message appears, use the procedure under “To reset the lamp time” on page 108. The lamp has exceeded its service life! The projector will not turn on until you replace the lamp. -
Page 109: To Reset The Lamp Time After Exceeding The Lamp Life
Perform the following procedure to initialize the lamp time in this case, which will make it possible to turn on the projector. Use the bundled AC power cord to plug the projector into a power outlet. -
Page 110: Troubleshooting
Indicators and Alert Tones The status of the indicators let you know the current operational status of the projector. This section provides details about indicators, and about the error alert tones. Normal Operation Indicators “POWER”... - Page 111 “POWER” in the following table stands for the “POWER/STANDBY” indicator. “ ” in the “Alert” column indicates that the projector will emit four long beeps when an error occurs. “ ” in the “Alert” column indicates that the projector will emit two short beeps when an error occurs.
-
Page 112: Projector Troubleshooting
(1-second interval) POWER : Amber flashing Red steady LAMP : Red steady Projector Troubleshooting Check the following items whenever you experience any problem with the projector. Problem The projector does not turn on when I press the [ (power) key. Alert Power has turned off automatically because the lamp cover is open. - Page 113 The correct output source is not selected on the projector. On the projector, select the input source that corresponds to the device whose image you are trying to project. Images may not project correctly when you have...
-
Page 114: Appendix
Power Requirements Dimensions Weight * Specifications are subject to change without notice. Appendix XJ-350 DLP (DMD, single panel) 0.7inch XGA (1024 × 768) Manual, optical zoom ( × 2); manual focus F = 2.0 to 2.8 f = 20 to 40mm 200W high-pressure mercury lamp RGB mini D-Sub 15-pin ×... -
Page 115: Computer System Requirements For Usb Connection
Appendix Computer System Requirements for USB Connection The following are the minimum Windows and Macintosh computer system requirements for USB connection with the projector. IWindows IBM PC/AT or compatible computer with USB port and Windows 98, 98SE, Me, 2000 Professional, or XP preinstalled IMacintosh Macintosh computer with USB port and OS 8.6 to 9, 10.1, or 10.2 preinstalled... -
Page 116: Supported Signals
Appendix Supported Signals RGB Signal Signal Name 640 × 350/85 VESA 640 × 400/85 720 × 400/85 640 × 480/60 640 × 480/72 640 × 480/75 640 × 480/85 800 × 600/56 800 × 600/60 800 × 600/72 800 × 600/75 800 ×... - Page 117 Appendix Component Signal HDTV SDTV Video/S-Video Signal Signal Name NTSC NTSC4.43 PAL-M PAL-N PAL60 SECAM * Listing of a device in the above table does not guarantee that you will be able to display its images correctly. * When “640 × 350/85” is the input signal, the “Operational Info” sub-menu items show 640 × 400/85 information.
-
Page 118: Fcc Warning
Proper connectors must be used for connection to host computer and/or peripherals in order to meet FCC emission limits. Connector cable ... XJ-350 unit to PC Model Number:XJ-350 Trade Name:CASIO COMPUTER CO., LTD. - Page 119 Batterij niet weggooien, maar inlevern als KCA CASIO ELECTRONICS CO., LTD. Unit 6, 1000 North Circular Road London NW2 7JD, U.K.
- Page 120 MA0405-C...
Need help?
Do you have a question about the XJ-350 and is the answer not in the manual?
Questions and answers